Let's talk breakfast. I'm a huge advocate for starting the day right, and for me, nothing beats a perfectly cooked over-easy egg. It's a simple pleasure, a delicious bite of comfort, and frankly, it's the perfect way to kickstart your morning.
But let me be honest: mastering the art of the over-easy egg wasn't a walk in the park. There were many mornings filled with frustration, resulting in rubbery, overcooked yolks and a heap of burnt toast. But after countless trials (and a few singed pans), I finally cracked the code. Now, I'm ready to share my secrets with you, helping you turn breakfast into a symphony of egg-cellent delights.
This isn't just another egg recipe. This is a culmination of years of experience, experimentation, and a healthy dose of kitchen wisdom. So grab your frying pan, gather your ingredients, and let's embark on this culinary adventure together.
Part 1: The Foundation of Flawless Eggs

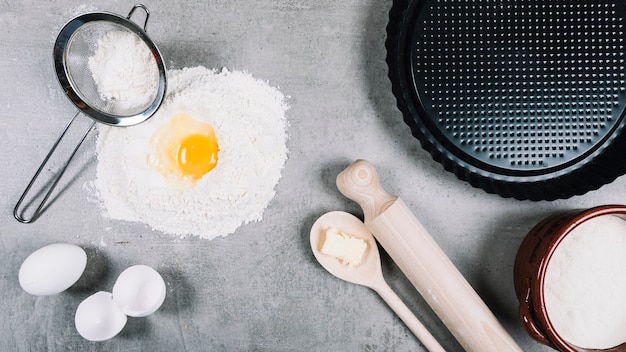
Before we dive into the cooking process, let's lay the groundwork for success. Here's what you'll need to whip up a perfect over-easy egg:
1. The Unsung Hero: The Right Pan
A good quality non-stick frying pan is your culinary companion. It doesn't have to be fancy, but it should be sturdy and heat up evenly. A cast iron pan is a classic, but any decent non-stick pan will do the trick. Personally, I swear by my trusty stainless steel pan. It's seen me through countless breakfasts and has never let me down.
2. Egg-ceptional Eggs: Quality Matters
Let's talk about the stars of the show: the eggs. fresh eggs are the ideal choice, but don't despair if you're using store-bought. What matters most is the appearance of the yolk. Look for firm, orangey yolks. Avoid eggs with pale, watery yolks – they're usually a sign of a less-than-fresh egg.
3. The Golden Touch: Butter or Olive Oil
Butter is the key ingredient that adds that irresistible golden hue and rich flavour. Unsalted butter is the way to go, but salted butter will work in a pinch. If you're feeling fancy (or avoiding dairy), a drizzle of olive oil is a good substitute.
4. The Flip Master: A Reliable Spatula
You'll need a trusty spatula for flipping your egg. A thin, flexible spatula is ideal, but any sturdy spatula will do the job.
5. The Secret Ingredient: Patience
Yes, patience! It's the most crucial ingredient of all. You can't rush an over-easy egg. It takes time for the yolk to set perfectly. If you try to flip it too soon, you'll end up with a broken yolk and a soggy mess.
Part 2: The Art of the Cook
Now that we have our essential ingredients, let's get cooking! This is where the magic happens.
1. Warming Up: Preparing Your Pan
Start by setting your pan over medium heat. You want the pan to be hot but not smoking. Add a generous knob of butter or a drizzle of olive oil to the pan. Let it melt evenly across the bottom.
2. The Egg Whisperer: Cracking and Sliding
Carefully crack your egg into a small bowl. This allows you to check for any pesky shell fragments before adding it to the pan. Once you're sure it's shell-free, gently slide the egg into the hot pan.
3. The Waiting Game: Patience is Key
Now comes the most crucial part: the wait. Allow the egg whites to set while the yolk remains runny. This will take about 3-4 minutes. Resist the urge to flip it prematurely!
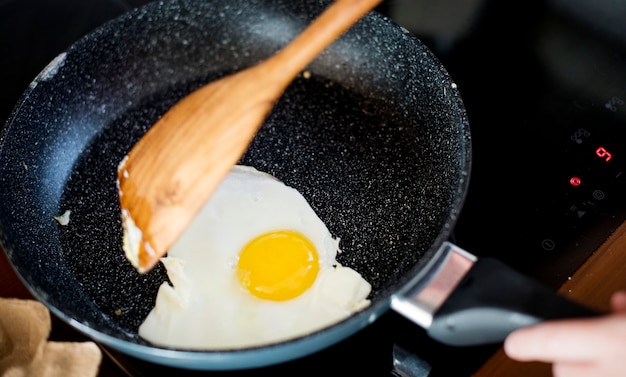
4. The Flip: A Gentle Touch
Now for the moment of truth: flipping the egg. Here's where a gentle touch is crucial. Don't just flip it over. Instead, use a smooth, circular motion with your spatula to lift the egg slightly, allowing the oil or butter to slide underneath. Then, gently flip the egg over.
5. The Final Touch: Setting the Yolk
Let the egg cook for another 30-60 seconds, until the yolk is set to your liking. If you prefer a runny yolk, cook it for a shorter time. If you prefer a more set yolk, cook it a bit longer.
6. Presentation: Unveiling Perfection
Slide your perfectly cooked over-easy egg onto a plate and admire your handiwork. You’ve just cooked the most delicious over-easy egg of your life!
Part 3: Breakfast Harmony: Serving it Up
Now that you've mastered the over-easy egg, it's time to think about pairing it with other breakfast delights. Here are a few of my favorite combinations that always hit the spot:
1. The Classic: Toast and Bacon
This pairing is a timeless classic for a reason. I prefer my toast lightly buttered and my bacon crispy. But feel free to experiment with different types of bread and bacon for a unique twist.
2. The Healthy Choice: Avocado Toast
For a lighter and healthier option, spread some mashed avocado on your toast. Season it with salt and pepper, and top it with your over-easy egg.
3. The Savory Delight: Mushroom and Spinach
For a more substantial breakfast, sauté some mushrooms and spinach in garlic and olive oil. Serve this delicious combination on top of toast and top it off with your over-easy egg.
4. The Adventure: Breakfast Burrito
Feeling adventurous? Wrap your over-easy egg in a warm tortilla with some cheese, beans, and salsa. It's a delicious and satisfying breakfast that's perfect for on-the-go mornings.
Part 4: Beyond the Basics: Elevating Your Egg Game
You've mastered the basics of the over-easy egg. Now, let's spice things up a bit with a few tips to take your breakfast to the next level.
1. Flavor Boost: Adding a Pinch of Magic
While the egg is cooking, add a pinch of salt and pepper for a boost of flavor. If you're feeling adventurous, try adding a sprinkle of fresh herbs like chives or parsley.
2. A Splash of Color: Vibrant Breakfast Delights
Add a touch of vibrancy to your plate by serving your over-easy egg with a side of fresh fruit or a colorful salad.
3. Toppings Galore: Experimenting with Flavors
There's a whole world of toppings just waiting to be explored. Try adding a dollop of sour cream or Greek yogurt, a sprinkle of grated cheese, or a drizzle of hot sauce.
Part 5: The Common Egg-streme Mistakes to Avoid
Let's face it: even seasoned cooks can make mistakes. But don't fret! Here are a few common errors to avoid for an egg-cellent experience:
1. Crowded Pan Syndrome: One Egg at a Time
Don't overcrowd the pan. This will make it difficult for the eggs to cook evenly. If you need to cook more than one egg, do it in batches.
2. The Early Flip: Patience is a Virtue
Be patient and allow the egg whites to set before flipping. If you flip it too soon, you'll end up with a broken yolk and a scrambled mess.
3. Too Hot to Handle: The Right Heat is Key
Don't use too high heat. The egg will cook too quickly, resulting in rubbery whites. Medium heat is the perfect temperature for an over-easy egg.
4. Butter Deficiency: The Importance of Lubrication
Make sure to use enough butter or oil to coat the bottom of the pan. This will prevent the egg from sticking and ensure a smooth cooking process.
Part 6: Troubleshooting: Addressing Those Egg-cellent Dilemmas
We've all been there. Sometimes, things don't go according to plan. But don't despair! Here are some tips to fix those less-than-perfect situations:
1. Sticky Situation: The Egg is Sticking
If the egg is sticking to the pan, it's a sign that the pan wasn't hot enough or that you didn't use enough butter or oil. Reduce the heat and add a little more fat to the pan.
2. Broken Yolk: A Minor Setback
Don't panic if the yolk breaks when you flip the egg. Continue cooking it until the whites are set, then serve it as is. It might not be picture-perfect, but it's still delicious!
3. Overcooked Egg: A Case of Too Much Heat or Time
If the egg is overcooked, you've probably used too high heat or cooked it for too long. It's best to start over. If you're in a hurry, try to salvage it by adding a little water to the pan and letting it steam for a few minutes.
Part 7: Experimentation is the Key to Deliciousness
Cooking is a journey, not a destination. Don't be afraid to experiment with different techniques, different pans, and different toppings. The more you cook, the more you'll learn, and the more your over-easy eggs will evolve into works of culinary art.
Part 8: Enjoy the Journey, Savor the Results
Remember, cooking should be fun! Relax, enjoy the process, and savor the delicious results of your efforts. So, put on your favorite playlist, pour yourself a cup of tea, and enjoy your perfect over-easy egg breakfast!
Part 9: FAQ: Answers to Your Burning Egg Questions
Now, let's address some of the most common questions about cooking over-easy eggs.
1. Oil Alternatives: Beyond Butter
You can use other oils if you prefer. But butter is the best choice for flavor and that beautiful golden color.
2. Testing for Set Whites: Knowing When It's Ready
The whites should be opaque and firm to the touch when they're ready.
3. Non-Stick Pan Deficiency: Adapting to Different Pans
If you don't have a non-stick pan, you can use a regular frying pan, but you'll need to use more butter or oil to prevent the egg from sticking. You can also try cooking the egg in a greased cast iron pan.
4. Over Easy vs. Sunny-Side Up: Understanding the Differences
An over-easy egg is flipped and cooked on both sides. A sunny-side-up egg is cooked only on one side, leaving the yolk exposed.
5. Oven-Baked Eggs: A Different Approach
Yes, you can cook over-easy eggs in the oven. Preheat your oven to 350 degrees F (175 degrees C). Place a baking sheet in the oven for a few minutes to heat it up. Then, remove the baking sheet and place the egg on top of it. Cook for 3-4 minutes, or until the whites are set.
There you have it! The secrets to the perfect over-easy egg revealed. Now, go forth and conquer your breakfast routine. You've got this!
Everyone is watching

Corn on the Cob: The Ultimate Guide to Perfectly Cooked Ears
Healthy MealsAh, corn on the cob. Just the name evokes images of sunny days, barbecues, and that sweet, juicy flavour that ...

Perfect Pork Roast Oven Cooking Time: A Guide to Delicious Results
Healthy MealsThere's something truly satisfying about a perfectly roasted pork. The aroma alone is enough to make your mout...

Ham Cooking Time: How Long to Bake, Smoke, or Boil a Delicious Ham
Healthy MealsAh, ham. It's a classic, isn't it? A real crowd-pleaser, especially around holidays. And when done right, it'...

Scallops: The Ultimate Guide to Perfect Cooking
Healthy MealsAh, scallops. Those delicate, sweet, and utterly delicious morsels of the sea. They hold a special place in my...

Spaghetti Squash: The Ultimate Guide to Cooking and Serving
Healthy MealsRemember that time you saw spaghetti squash at the supermarket, looking all bumpy and strange, and thought, "W...