Ah, liver and onions. A dish that conjures up memories of childhood dinners and perhaps a little bit of trepidation. But don't let its simple name fool you! When prepared right, liver and onions can be a truly delectable and comforting meal. And trust me, after following this guide, you'll be singing its praises.
I've been cooking this dish for years, perfecting my techniques along the way. The trick? It's all about getting the liver just right – tender, melt-in-your-mouth perfection – and those caramelized onions, oh those onions! They must be sweet, savory, and a tad tangy, a symphony of flavors that elevate the dish to another level.
This guide is your ticket to liver and onions nirvana. We'll cover everything from choosing the right liver to prepping it for a velvety texture, and of course, the star of the show: the onions. I'll even throw in some tried-and-true tips and tricks I've picked up over the years, so get ready to elevate your culinary game. Now, grab your apron, gather your ingredients, and let's get cooking!
(Part 1) Choosing the Liver
The first step towards a truly memorable liver and onions dish is selecting the right liver. You're looking for something fresh and firm, with a vibrant color. Personally, I'm a big fan of calf liver, as it tends to be milder and more tender than beef liver. But ultimately, the choice comes down to personal preference. Just remember to steer clear of any liver that has a strong, unpleasant odor or looks discolored. That's a sure sign that it's not the best choice for your culinary masterpiece.
Where to Find Your Perfect Liver
My go-to spot for a fantastic liver is my local butcher shop. They usually have a great selection and are always happy to help you pick the perfect cut for your dish. If a butcher isn't nearby, try a good quality supermarket, but remember to check the date and make sure it's fresh. Freshness is key for the best flavor and texture.
The Tell-Tale Signs of Freshness
Now, how do you know if that liver is the freshest of the fresh? Here's a quick guide:
- Color: A vibrant, deep red color is the sign of a fresh liver. Avoid anything that looks pale or has discolored patches. It's a good indication of age.
- Texture: A fresh liver should be firm to the touch. It should spring back slightly when you press it. If it feels mushy or limp, it's a sign that it's not at its best.
- Smell: A fresh liver should have a mild, slightly sweet smell. If you detect a strong ammonia-like odor, it's best to pass on that particular piece.
(Part 2) Prepping the Liver: A Journey to Tenderness
Now that you have your chosen liver, it's time to prep it for the ultimate tenderness. This is a critical step, and where many cooks stumble, resulting in a tough, chewy liver. Fear not, I've got you covered with my foolproof method!
Soaking the Liver: A Milk Bath for Tenderness
This is where the magic happens! Soaking the liver in milk helps to tenderize it and reduce any strong, liver-y flavor. Simply place the liver in a bowl filled with cold milk, cover it with cling film (plastic wrap), and let it sit in the fridge for at least 30 minutes. Ideally, give it an hour or two. This allows the milk to penetrate the liver, breaking down those tough proteins and creating a more tender, melt-in-your-mouth texture.
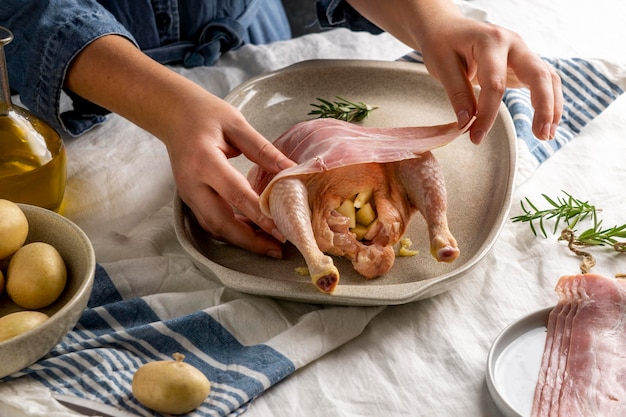
Trimming the Liver: The Quest for Perfection
After the milk bath, it's time to trim. Remove any tough membranes or fat that might be on the surface. You can even cut the liver into smaller pieces if you prefer. It's always better to trim a little more than you think you need. Those tough bits can make the liver chewy and unpleasant, so err on the side of caution. I often slice the liver into thin strips – it cooks faster and it's much easier to eat.
Dredging the Liver: A Crispy, Flavorful Coating
The final prep step is dredging the liver, which means coating it in flour or breadcrumbs. I'm partial to a mixture of flour and paprika, which gives the liver a delightful crispy coating and prevents it from sticking to the pan. Just make sure to shake off any excess flour before you start cooking, you don't want any burnt bits!
(Part 3) The Onions: A Symphony of Flavor
Now, let's talk about the onions, the unsung heroes of this dish. They contribute a sweet, savory depth that elevates liver and onions from ordinary to extraordinary. We want those onions beautifully caramelized – soft, golden brown, and incredibly delicious. Follow my tried-and-true method for onion perfection:
Choosing the Right Onions
I find yellow or white onions to be the best choice for caramelizing. They have a lovely sweetness that complements the liver beautifully. Red onions, on the other hand, can be a bit too strong, so I usually avoid them. For those who want to get a little fancy, shallots or sweet onions can also be fantastic choices.
Slicing for Success
Thinly sliced onions are key to achieving perfectly caramelized onions. This allows them to cook evenly and quickly, releasing all their delicious flavor. You can slice them by hand, but I find using a mandoline a real game-changer. It makes the process so much easier and ensures perfectly even slices, which is crucial for consistent caramelization.
The Art of Caramelizing Onions
Patience is key to achieving perfectly caramelized onions. Here's my step-by-step guide:
- Heat a large frying pan over medium heat. Add a generous amount of butter – you want enough to coat the bottom of the pan and prevent the onions from sticking.
- Add the sliced onions and cook, stirring occasionally, for about 30 minutes. The onions will start to soften and release their juices. Keep cooking, stirring frequently, until they are golden brown and sweet, a testament to your dedication.
- Lower the heat and continue to cook for another 10-15 minutes. This helps to develop those deep, caramelized flavors. Be careful not to burn the onions, as that will give them a bitter taste.
(Part 4) Cooking the Liver: Timing is Everything
Finally, it's time to cook the liver. Remember, this is a quick process, so keep a close eye on it. Overcook the liver and you'll be left with a dry, tough mess. Here's my method for achieving perfectly cooked liver:
Heating the Pan
Heat a large frying pan over medium-high heat. Add a little oil to the pan and heat it until it's shimmering. You don't want the pan too hot, as that can make the liver tough.
Cooking the Liver: A Quick and Precise Process
Add the dredged liver to the hot pan and cook for 1-2 minutes per side. You want the liver to be nicely browned on the outside and still a touch pink in the center. Overcooking is the enemy here, so don't let it sit in the pan for too long. It's best to cook the liver in batches if necessary to ensure even cooking.
Resting the Liver: A Final Touch of Perfection
Once the liver is cooked to your liking, remove it from the pan and place it on a plate. Cover it loosely with foil and let it rest for a few minutes. This allows the liver to relax and retain its moisture, ensuring a juicy, flavorful bite.
(Part 5) Bringing It All Together: A Symphony of Flavors
Now comes the moment of truth – combining the liver and onions. It's a simple step, but it's crucial to get it right. You want to keep the liver moist while preserving the glorious caramelization of the onions. Here's how I do it:
Combining Liver and Onions: The Final Touch
Return the caramelized onions to the pan and add a splash of red wine vinegar. This adds a wonderful tangy flavor that balances out the sweetness of the onions. Simmer the onions for a few minutes, allowing the vinegar to reduce slightly.
Add the rested liver back to the pan and gently toss it in the onions. Don't overcook the liver at this stage – just heat it through and allow the flavors to mingle, creating a beautiful symphony of tastes.
Serving Suggestions: Elevating the Experience
Serve the liver and onions immediately, accompanied by some creamy mashed potatoes or a simple green salad. I like to add a generous dollop of butter to my mashed potatoes – it adds a touch of richness that beautifully complements the liver and onions.
(Part 6) Tips and Tricks: The Secrets to Success
Over the years, I've learned a few tips and tricks that help ensure a truly delicious liver and onions dish. Here are a few of my favorites:
- Don't overcook the liver! It should be pink in the center. Overcooked liver will be dry and tough, so keep a close eye on the cooking time.
- Use good quality butter for caramelizing the onions. It makes a world of difference. That rich, buttery flavor adds another dimension to the onions.
- Don't be afraid to add a touch of sugar to the onions as they caramelize. This helps to bring out their natural sweetness and create a more complex flavor.
- Avoid overcrowding the pan when cooking the liver. Cook in batches if necessary. This ensures even cooking and prevents steaming, which can make the liver tough.
(Part 7) Variations: Exploring New Flavor Horizons
Liver and onions is a wonderfully adaptable dish, so don't be afraid to experiment with different variations. Here are a few ideas to get your creative juices flowing:
- Add some bacon. Dice some bacon and cook it in the pan with the onions. The smoky flavor of the bacon adds another layer of depth to the dish.
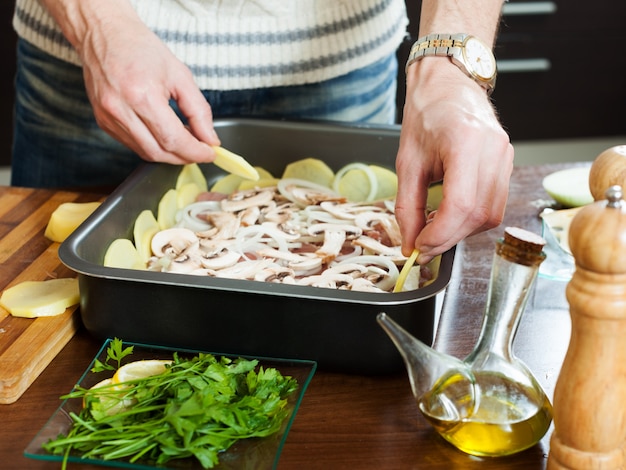
- Add some mushrooms. Slice some mushrooms and add them to the onions while they are caramelizing. The earthy flavor of the mushrooms complements the onions beautifully.
- Experiment with different vinegars. Instead of red wine vinegar, try balsamic vinegar or apple cider vinegar. Each will add its own unique flavor profile to the dish, so feel free to experiment and discover your favorites.
- Serve it on a bed of rice. For a heartier meal, serve the liver and onions on a bed of rice or couscous. The addition of rice or couscous provides a filling base for this classic dish.
(Part 8) FAQs: Unraveling the Mysteries
Here are some frequently asked questions about liver and onions, ready to dispel any lingering doubts or queries:
What if the liver is tough?
If the liver is tough, it's likely that it was overcooked. Try to avoid overcooking it in the future. You can also try soaking the liver in milk for a longer period of time to help tenderize it.
Can I use frozen liver?
You can use frozen liver, but it's best to thaw it in the fridge overnight. This helps to prevent the liver from becoming dry and tough.
How long can I store leftover liver and onions?
Leftover liver and onions can be stored in the fridge for up to 3 days. Make sure to reheat it thoroughly before serving.
What are some good side dishes to serve with liver and onions?
Here are some classic side dishes that complement liver and onions perfectly:
- Mashed potatoes: A creamy, comforting side that balances the rich flavors of the main dish.
- green beans: A simple and fresh side dish that provides a welcome contrast to the richness of the liver and onions.
- Carrots: A sweet and colorful addition that adds a touch of brightness to the plate.
- Peas: A classic pairing for liver and onions, adding a touch of sweetness and vibrant green color.
- Salad: A refreshing and healthy option to balance the richness of the meal.
Why is liver considered a healthy choice?
Liver is a nutritional powerhouse! It's a good source of protein, iron, and vitamin A, essential nutrients for maintaining good health. It also contains other important minerals like zinc, copper, and folate.
(Part 9) Conclusion: A Culinary Triumph
There you have it – the ultimate guide to tender and delicious liver and onions! I hope you've enjoyed this guide and picked up a few new tips and tricks along the way. Remember, the key to a winning dish is choosing the right liver, prepping it with care, and caramelizing those onions to golden perfection. And don't be afraid to experiment with different variations! You might just discover your new favorite way to enjoy this classic and versatile dish.
Everyone is watching

Corn on the Cob: The Ultimate Guide to Perfectly Cooked Ears
Healthy MealsAh, corn on the cob. Just the name evokes images of sunny days, barbecues, and that sweet, juicy flavour that ...

Perfect Pork Roast Oven Cooking Time: A Guide to Delicious Results
Healthy MealsThere's something truly satisfying about a perfectly roasted pork. The aroma alone is enough to make your mout...

Ham Cooking Time: How Long to Bake, Smoke, or Boil a Delicious Ham
Healthy MealsAh, ham. It's a classic, isn't it? A real crowd-pleaser, especially around holidays. And when done right, it'...

Scallops: The Ultimate Guide to Perfect Cooking
Healthy MealsAh, scallops. Those delicate, sweet, and utterly delicious morsels of the sea. They hold a special place in my...

Spaghetti Squash: The Ultimate Guide to Cooking and Serving
Healthy MealsRemember that time you saw spaghetti squash at the supermarket, looking all bumpy and strange, and thought, "W...