Ah, chestnuts. The smell of them roasting is enough to transport me back to childhood Christmases, huddled around the fire with a mug of hot chocolate, watching the flickering flames dance across the room. There’s something so comforting about the warm, nutty flavour of roasted chestnuts, and the way they crack open, revealing their soft, creamy insides. It’s a taste of pure autumnal joy, and I’m here to share my secrets to achieving that perfect roast.
Now, I’ve tried all sorts of methods over the years, from frying them in a pan to using a special chestnut roaster. But for me, the oven is the way to go. It’s simple, reliable, and lets you roast a decent batch without fuss. So, grab your chestnuts, get comfy, and let’s get roasting!
(Part 1) Choosing the Perfect Chestnuts
Chestnuts 101: Picking Your Perfect Partners in Crime
The first step to a successful roast is selecting the right chestnuts. I’ve learned the hard way that not all chestnuts are created equal. You want to pick chestnuts that are firm, plump, and have a glossy, unblemished shell. Avoid any that are soft, shriveled, or have any signs of mold. It’s also important to make sure your chestnuts are fresh. If they’re dried out, they won’t roast properly.
Think of chestnuts like a good friend. You want them to be strong and full of life, not limp and tired. The same goes for their appearance – a healthy, vibrant shell is a sign of a good chestnut.
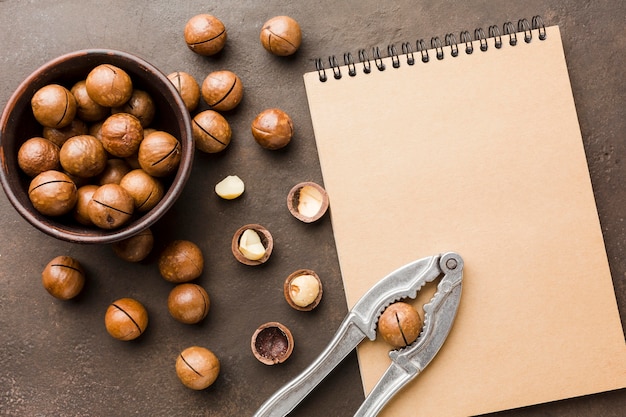
The "X" Marks the Spot: Identifying the Right Chestnuts
Now, here’s a little trick I’ve picked up over the years: look for the "X." You see, the best chestnuts for roasting have a small, whitish "X" marking on the flat side of the chestnut. This "X" is actually a scar left from the chestnut flower, and it’s a sure sign that the chestnut is mature and ready for roasting. Think of it like a badge of honour, a sign that this chestnut has reached its full potential.
Remember, when choosing chestnuts, don't be afraid to give them a little squeeze. They should feel firm and springy, not soft and mushy. You want a chestnut that’s ready to give its all in the oven.
Storage: Keeping Your Chestnuts Happy
Once you’ve got your perfect chestnuts, you need to store them properly. I keep mine in a cool, dry place, preferably in a paper bag or a container with some ventilation. Don’t store them in the fridge, as this can make them dry out. The ideal environment for chestnuts is a cool, airy spot, like a pantry or a cupboard. Aim to use your chestnuts within a week or two for the best flavour.
Think of your chestnuts like delicate flowers. They need a gentle environment to maintain their freshness and flavour. Just as a delicate flower wouldn't thrive in a cold, damp place, your chestnuts won't fare well in the fridge. They're happiest at room temperature, away from harsh conditions.
(Part 2) Preparing Your Chestnuts for Roasting

The Art of Scoring: Opening the Door to Flavor
Now, before you pop those chestnuts in the oven, you need to give them a little helping hand to release their sweet, nutty flavors. This is where scoring comes in. Using a sharp knife, make a small, shallow cut on the flat side of each chestnut, perpendicular to the "X." Don’t go too deep, as you don’t want to cut all the way through the chestnut.
Imagine the chestnut as a little treasure chest, and the score as a key that unlocks its delicious secrets. You want to make a small, gentle incision, just enough to allow the steam to escape during roasting, without compromising the chestnut’s integrity. Think of it as a little invitation to the flavours inside to burst forth.
Soaking: A Little Sip for a Smoother Roast
Some people swear by soaking their chestnuts for a few minutes before roasting. It’s supposed to help them cook more evenly and prevent them from drying out. I’ve tried both ways, and honestly, I haven’t noticed a huge difference, but if you want to be extra cautious, you can certainly give it a go! Just soak them in cold water for 15-20 minutes, then drain them before roasting.
Think of soaking as a gentle bath for your chestnuts. It helps to hydrate them, making them more receptive to the heat of the oven. It's a little extra love that can ensure a perfectly roasted chestnut, but it's not strictly necessary. It's up to you whether you choose to pamper your chestnuts with a pre-roasting soak.
(Part 3) Roasting Your Chestnuts to Perfection
Oven Preheating: The First Step to Success
Now, preheating your oven is absolutely essential for getting your chestnuts perfectly roasted. A hot oven helps to cook them evenly and quickly, while also preventing them from drying out. Preheat your oven to 400 degrees Fahrenheit (200 degrees Celsius) and get ready to unleash the aromas of autumn!
The oven is your trusty sidekick in this roasting adventure, and preheating it is like giving it a warm-up before the big show. A hot oven creates the ideal environment for the chestnuts to cook through evenly and quickly. Think of it as giving your chestnuts a "jump start" on the path to perfection.
The Roast: Laying Down the Foundation for Flavor
Once your oven is preheated, grab a baking sheet and line it with parchment paper or aluminum foil. This will prevent the chestnuts from sticking to the pan and make cleanup a breeze. Now, spread your scored chestnuts in a single layer on the baking sheet, making sure they’re not crowded. You want them to roast evenly without getting stuck together.
Think of your baking sheet as a stage for your chestnuts to perform their roasting routine. The parchment paper or aluminum foil is like a cozy blanket, protecting them from sticking and ensuring they shine in their own right. Don't crowd the stage, give them space to move around and roast to perfection.
Timing is Key: The Art of Patience
Now for the waiting game. The roasting time will vary depending on the size of your chestnuts, but generally, you can expect them to take around 20-30 minutes. Keep a close eye on them and check them every 10 minutes or so. You’ll know they’re ready when the skins have cracked open and the chestnuts are slightly browned.
Patience, my friend, is your virtue in this stage. The oven is your cauldron, and time is your magic ingredient. Think of it like a slow, gentle dance between the chestnuts and the heat. Allow the magic to unfold as the chestnuts transform into their delicious, roasted selves.
A Little Extra Help: The Magic of Steam
If you want to take your roasting game to the next level, try this trick. After about 15 minutes, add a small amount of water to the bottom of the baking sheet. This creates steam, which helps to keep the chestnuts moist and prevent them from drying out. Be careful not to add too much water, though, as you don’t want them to boil!
Think of the steam as a secret ingredient, a little boost of hydration that helps to keep the chestnuts plump and juicy. It's a bit of alchemy, where water transforms into steam, and the steam, in turn, transforms the chestnuts into something truly special.
(Part 4) Checking for Doneness: When the Magic Happens
The Tell-Tale Signs: How to Know Your Chestnuts Are Ready
You’re on the home stretch! Now it’s time to check if your chestnuts are ready to be devoured. Look for these tell-tale signs:
- Cracked Shells: The skins should have cracked open, revealing the soft, creamy insides. This indicates that the chestnuts have cooked through and are ready to be enjoyed. Think of it as the chestnuts revealing their beautiful, soft interiors.
- Slightly Browned: The chestnuts should have a slightly browned appearance, indicating that they’ve been exposed to the heat of the oven. They've absorbed the warmth and embraced the golden hue of perfection.
- Yielding Texture: Gently press on a chestnut. If it yields easily to the touch, you know it’s cooked through. If it’s still hard, give it a few more minutes in the oven. Think of it as testing the softness of a ripened fruit.
(Part 5) Removing from the Oven: Handling with Care
Don't Rush: Letting the Heat Escape
Once your chestnuts have achieved that perfect roast, don’t be tempted to grab them immediately. Let them cool slightly on the baking sheet before you handle them. The heat can be intense, so it’s best to give them a few minutes to cool down before you start peeling them.
Think of the chestnuts as little fiery creatures, still radiating the warmth of the oven. Just like a hot iron, it's best to let them cool down gradually, preventing any accidental burns. Give them a little time to settle and regain their composure.
The Peeling Process: Unveiling the Sweetness
Peeling roasted chestnuts can be a bit tricky, but with practice, you’ll become a pro. Start by holding the chestnut in your hand, with the flat side facing up. Gently press on the cracked skin with your thumbs, and it should start to peel away. If it’s a bit stubborn, use a knife to help you pry it open. Once you’ve peeled off the outer skin, you can also remove the thin, brown inner skin if you wish.
Think of peeling roasted chestnuts like unboxing a gift. You need to be patient and gentle to unveil the beautiful treasure inside. It's a process that requires a delicate touch and a bit of finesse. But with a little patience, the soft, creamy interior will reveal itself, ready to be enjoyed.
(Part 6) Serving Up Your Roasted Chestnuts
Simple Pleasures: Enjoy Them as They Are
Roasted chestnuts are delicious on their own, but if you’re feeling fancy, you can add a touch of sweetness. Drizzle them with a little honey or maple syrup, or sprinkle them with a pinch of cinnamon or nutmeg. They are delicious enjoyed warm, right out of the oven.
Think of roasted chestnuts as a blank canvas, ready to be adorned with your favourite flavours. They're a blank canvas ready for your creative touch. A touch of sweetness, a hint of spice, or a sprinkle of magic, it's all up to you.
Get Creative: Adding Your Personal Touch
Roasted chestnuts are incredibly versatile. They can be added to salads, soups, stuffings, and even desserts. They work particularly well with chocolate and other rich flavors. Try adding them to your favorite chocolate chip cookies or brownie recipe for a unique twist.
Imagine roasted chestnuts as the secret ingredient that transforms your culinary creations. A sprinkle of their nutty flavour adds depth and complexity to a variety of dishes, from savoury to sweet. They're like a dash of magic, ready to elevate your culinary creations.
(Part 7) Storing Your Roasted Chestnuts
Keeping the Flavor Fresh: Preserving Your Roasting Triumph
If you have leftover roasted chestnuts, they can be stored in an airtight container in the fridge for up to 3 days. They can also be frozen for up to 3 months. Just be sure to defrost them completely before using. When reheating them, I prefer to pop them back into a preheated oven for a few minutes, to revive their wonderful roasted aroma.
Think of storing your roasted chestnuts as a way to preserve their magic, keeping their flavour and texture fresh. The fridge is their temporary haven, offering a cool and dry sanctuary. And the freezer is their long-term slumber, allowing them to be enjoyed again, whenever you need a taste of autumnal bliss.
(Part 8) A Few Tips for Success
Chestnut Sizes Matter: A Little Flexibility Goes a Long Way
Remember, chestnuts come in different sizes, so don’t be afraid to adjust the roasting time accordingly. Smaller chestnuts will cook faster than larger ones, so keep a close eye on them and adjust the time as needed. Always remember to check the doneness using the techniques mentioned above.
Think of the chestnuts as a diverse cast of characters, each with their own personality and pace. Just as some people are naturally faster than others, some chestnuts will cook faster than others. Don't be afraid to adjust the timing to accommodate their individual needs.
Don't Overcrowd the Pan: Space is Key to Even Roasting
It’s important to give your chestnuts plenty of space to roast. Don’t overcrowd the baking sheet, as this can prevent them from cooking evenly and cause them to steam rather than roast. If you have a large batch of chestnuts, roast them in batches to ensure that they all roast to perfection.
Think of the baking sheet as a dance floor for the chestnuts. They need space to move around, to breathe, to express their inner flavours. Don't make them jostle for attention, give them the room to shine individually.
Experiment with Flavors: Discover Your Perfect Chestnut Roast
Don’t be afraid to get creative with your roasted chestnuts! Try adding different spices or herbs to your roasting pan. For example, a pinch of rosemary or thyme can add a delicious savory note to your chestnuts. Or, a sprinkle of orange zest can add a bright, citrusy flavor.
Think of roasting chestnuts as an opportunity to create a flavour symphony. Each spice and herb is a unique instrument, adding its own distinct melody to the chorus of flavour. Experiment, explore, and discover the perfect flavour combination for your palate.
FAQs: Unlocking Your Chestnut Knowledge
1. Can I roast chestnuts in a microwave?
While it’s possible to roast chestnuts in a microwave, I wouldn’t recommend it. Microwaves tend to cook chestnuts unevenly, and they can easily dry out. Stick to the oven for the best results.
Think of the microwave as a quick and convenient tool, but not the ideal instrument for roasting chestnuts. The oven, on the other hand, is like a seasoned musician, capable of producing a harmonious roast with delicate precision.
2. What if my chestnuts are too hard to peel?
Sometimes, even after roasting, chestnuts can be stubborn to peel. If this happens, try soaking them in hot water for a few minutes. This will soften the skins and make them easier to peel. You can also try using a knife to help you pry open the skins.
Think of the hot water as a magic potion that softens the stubborn skins. It's a simple trick that can make a big difference, unlocking the delicious treasure inside.
3. Can I use frozen chestnuts to roast?
You can certainly roast frozen chestnuts, but they might not roast as evenly as fresh ones. If you’re using frozen chestnuts, I recommend thawing them completely before roasting them. This will help to ensure that they cook through evenly.
Think of frozen chestnuts as sleepers, needing a little time to wake up and reach their full potential. Thawing them completely before roasting allows them to regain their moisture and texture, ensuring an even and delicious roast.
4. Why do some chestnuts have a bitter taste?
Chestnuts can sometimes have a bitter taste if they aren’t roasted properly. If you notice a bitter taste, it’s likely because the chestnuts were roasted at too low a temperature or for too long. You can try roasting them again at a higher temperature for a shorter amount of time. If they’re still bitter, they may have been stored improperly or were not fresh to begin with.
Think of bitterness as a sign that something went awry. Like a dish that’s overcooked or under-seasoned, bitterness in chestnuts is a sign that the roasting process hasn’t been executed perfectly.
5. Are there any health benefits to eating chestnuts?
Chestnuts are a good source of fiber, vitamin C, and potassium. They are also low in fat and calories, making them a healthy snack option. They are particularly popular during the colder months as they are naturally warming and satisfying.
Think of chestnuts as a delicious and nutritious treat, offering a range of health benefits. They are a natural source of energy and warmth, perfect for the colder months.
So there you have it! My secrets to achieving that perfect roasted chestnut. I hope you enjoy them as much as I do, and I encourage you to experiment with different flavors and recipes. Chestnuts are truly a delicious and versatile ingredient that can be enjoyed in countless ways. Happy roasting!
Everyone is watching

Corn on the Cob: The Ultimate Guide to Perfectly Cooked Ears
Healthy MealsAh, corn on the cob. Just the name evokes images of sunny days, barbecues, and that sweet, juicy flavour that ...

Perfect Pork Roast Oven Cooking Time: A Guide to Delicious Results
Healthy MealsThere's something truly satisfying about a perfectly roasted pork. The aroma alone is enough to make your mout...

Ham Cooking Time: How Long to Bake, Smoke, or Boil a Delicious Ham
Healthy MealsAh, ham. It's a classic, isn't it? A real crowd-pleaser, especially around holidays. And when done right, it'...

Scallops: The Ultimate Guide to Perfect Cooking
Healthy MealsAh, scallops. Those delicate, sweet, and utterly delicious morsels of the sea. They hold a special place in my...

Spaghetti Squash: The Ultimate Guide to Cooking and Serving
Healthy MealsRemember that time you saw spaghetti squash at the supermarket, looking all bumpy and strange, and thought, "W...