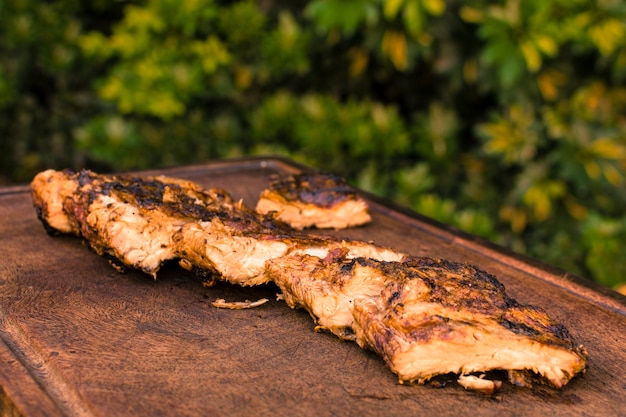
There's nothing quite like the satisfying sizzle of a steak on the grill, is there? It's a taste of summer, a symbol of good times with friends and family, and a meal that always leaves you feeling satisfied. But let's be honest, grilling a steak to perfection isn't always a walk in the park. It takes a bit of know-how, a touch of intuition, and a healthy dose of patience. I'm here to share my tried-and-tested methods for grilling the perfect ny strip steak, the kind that'll have everyone around the table begging for seconds.
I've been a grill master for years now, and I've learned a thing or two about this whole steak-grilling business. From the right cut to the perfect sear, I'm going to break down everything you need to know, from beginner to seasoned grill enthusiast. So, grab your tongs, fire up the barbie, and let's get grilling!
Part 1: choosing the right cut - The Foundation of a Great Steak

You can't make a masterpiece without the right ingredients, and that's especially true when it comes to grilling steak. A good NY strip is the key to a juicy, flavorful, and perfectly cooked steak. But how do you choose the right one? Well, it's all about looking for the right marbling and thickness.
Finding the Right Marbling - The Secret to Juiciness
First things first, you want to look for a steak that has good marbling. This means you’re looking for little streaks of white fat running through the meat. Think of it like the cream in your coffee—the more marbling, the richer and more flavorful your steak will be. That fat melts during the cooking process, basting the meat from the inside out, making it incredibly juicy and tender. Look for a steak that has a decent amount of marbling throughout, not just in patches. You want that delicious flavor infusion throughout your entire steak!
Choosing the Right Thickness - Achieving Perfect Doneness
Next up, the thickness. A good NY strip for grilling should be at least 1-1.5 inches thick. This allows for a nice sear on the outside while keeping the inside tender and juicy. Avoid thin steaks, as they can dry out quickly on the grill. And if you’re feeling fancy, go for a thick-cut steak that’s closer to 2 inches thick. You’ll need to adjust the cooking time slightly, but it’ll be worth it for the added tenderness. Just remember, thicker cuts require a longer cooking time to reach your desired doneness.
Part 2: The Prep Work - Setting the Stage for Success
Now, let’s get to the prep work. This step might seem simple, but it’s crucial for a successful grilling experience. I’ve learned the hard way that skipping prep can lead to a tough and dry steak, something we definitely want to avoid.
Seasoning Your Steak - Bringing Out the Flavor
First, it’s all about the seasoning. I’m a firm believer in keeping things simple. Salt and pepper are my go-to, and they really bring out the natural flavors of the steak. Apply it generously, but avoid over-salting. You want to enhance the steak's natural flavor, not drown it out with too much salt. If you’re feeling adventurous, you can add some other spices, like garlic powder, onion powder, or paprika. But remember, a little goes a long way. A sprinkle of your favorite herb blend can also add another dimension to your steak's flavor profile.
Resting Your Steak - Ensuring Even Cooking
Once your steak is seasoned, it’s time to let it rest at room temperature for about 30 minutes. This allows the meat to come to room temperature, which helps it cook more evenly. You don’t want to be chucking a cold steak straight onto a hot grill—that’s a recipe for disaster! The outer edges will cook much faster than the center, leading to uneven cooking and a tough, dry steak.
The Importance of Patting Dry - Achieving that Crispy Sear
Before you throw your steak on the grill, make sure it’s patted dry with paper towels. This will help ensure a nice sear and prevent any steam build-up, which can lead to a soggy steak. It’s a small detail, but trust me, it makes a big difference. Think of it as ensuring the grill's heat has direct contact with the steak's surface, leading to that perfect, crispy crust.
Part 3: Firing Up the Grill - Choosing Your Weapon
Time to fire up the barbie! Now, you might be thinking, “What kind of grill should I use?” Well, that’s a matter of personal preference. I tend to use a charcoal grill, as I find it gives the steak a smoky flavor that I simply can’t resist. But if you’re a gas grill enthusiast, that works too. Just make sure you have your grill nice and hot.
Grilling with Charcoal - The Flavor of Tradition
If you’re using charcoal, I recommend using a good quality lump charcoal. It burns hotter and cleaner than briquettes, and it gives off a great smoky flavor. Let the coals burn until they’re covered in a thin layer of gray ash, which indicates they are ready for grilling. The ash helps create that smoky flavor we all love! You can also experiment with different types of wood chips to add even more flavor to your steak.
Grilling with Gas - The Convenience of Modernity
For gas grills, turn all burners to high heat for about 10 minutes to preheat the grill. You want the grill to be smoking hot. You can use a grill thermometer to check the temperature, aiming for around 500°F (260°C). A really hot grill is essential for achieving that beautiful sear and creating those mouthwatering grill marks.
Part 4: The Art of the Sear - Creating that Crispy Crust
Now comes the fun part—the sear! This is the key to getting that beautiful, crispy crust on the outside of your steak.
Creating the Perfect Sear - Locking in the Flavor
Place your steak directly over the hottest part of the grill and let it cook for about 2-3 minutes per side. This will create a nice, even sear and lock in the juices. Don’t be tempted to flip the steak too early. Let it cook undisturbed for those first few minutes. Give that steak a chance to get a nice, even sear before you move it!
The Importance of Crosshatching - Adding Those Eye-Catching Grill Marks
To get a really impressive sear, try crosshatching your steak. This is where you grill the steak for a few minutes, then rotate it by 90 degrees and grill it again. This creates those beautiful grill marks and helps to cook the steak more evenly. It's a simple trick that elevates the visual appeal of your steak, making it even more enticing to eat!
Part 5: Cooking the Steak to Perfection - Mastering the Doneness
Now that you’ve got a nice sear on both sides, it’s time to cook the steak to your desired level of doneness. Remember, this is where intuition comes into play. There are different methods for checking the temperature, but I prefer to go by feel and experience.
The Different Levels of Doneness - Finding Your Perfect Bite
Here’s a quick guide to different levels of doneness:
| Doneness | internal temperature | How to Check |
|---|---|---|
| Rare | 125-130°F (52-54°C) | The center of the steak will be red and cool to the touch. |
| Medium-Rare | 130-135°F (54-57°C) | The center of the steak will be slightly red and warm to the touch. |
| Medium | 135-140°F (57-60°C) | The center of the steak will be pink and warm to the touch. |
| Medium-Well | 140-145°F (60-63°C) | The center of the steak will be lightly pink and warm to the touch. |
| Well-Done | 145-150°F (63-66°C) | The center of the steak will be brown and hot to the touch. |
Cooking the Steak to Your Preferred Doneness - Patience is Key
If you like your steak rare, you’ll want to cook it for a shorter amount of time. For medium-rare, cook it a little longer, and so on. Remember, the longer you cook the steak, the more cooked it will be. Once you’ve reached your desired level of doneness, remove the steak from the grill and let it rest for 5-10 minutes. This allows the juices to redistribute throughout the steak, resulting in a more tender and flavorful meal.
Part 6: Resting the Steak - The Secret to Juiciness
Resting your steak is just as important as the grilling process itself. It allows the juices to redistribute throughout the steak, resulting in a more tender and flavorful meal. I’ve found that a good 5-10 minutes of rest is the perfect amount of time.
The Science Behind Resting - The Magic of Relaxation
When you grill a steak, the muscle fibers contract, squeezing out the juices. Resting the steak gives those fibers a chance to relax, allowing the juices to reabsorb into the meat. This results in a steak that is incredibly juicy, tender, and flavorful.
How to Rest a Steak - A Simple Yet Essential Step
To rest your steak, simply place it on a cutting board and loosely cover it with aluminum foil. Don’t wrap it too tightly, as you want to allow the steam to escape. This will help keep the steak warm and prevent it from drying out. Patience is key during this resting phase – it's the final step to achieving the perfect grilled steak!
Part 7: Slicing and Serving - The Moment of Truth
After your steak has rested, it’s time to slice and serve. This is the moment you’ve been waiting for!
Slicing the Steak - Mastering the Art of Presentation
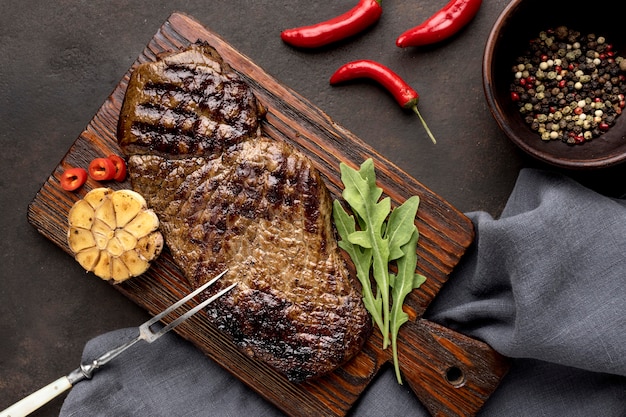
Using a sharp knife, slice the steak against the grain. This means slicing perpendicular to the muscle fibers. This will make the steak easier to chew and more tender. A sharp knife is essential here. Not only will it make slicing easier, but it will also prevent tearing or shredding the steak.
Serving Your Steak - Elevate the Experience
I like to serve my NY strip steak with simple sides, like roasted vegetables or a fresh salad. But you can really go wild with your sides—the world is your oyster! And don’t forget the sauce. I’m partial to a classic béarnaise sauce, but a simple garlic butter sauce is also delicious. Think about your favorite flavors and create a combination that complements your perfectly grilled steak!
Part 8: FAQs - Unlocking the Secrets of Grilling
Now, let’s answer some of the most frequently asked questions about grilling NY strip steak.
1. What Temperature Should I Grill My Steak?
Aim for a high heat of around 500°F (260°C) for a nice sear.
2. How Do I Know When My Steak is Done?
You can use a meat thermometer, but I find that the touch method works best for me. Rare steak will be cool to the touch, medium-rare will be slightly warm, medium will be warm, medium-well will be lightly pink and warm, and well-done will be brown and hot.
3. How Long Should I Rest My Steak?
Rest your steak for 5-10 minutes before slicing and serving.
4. What Happens if I Overcook My Steak?
If you overcook your steak, it will be tough and dry. It’s better to err on the side of undercooking, as you can always cook it a bit longer if needed.
5. Can I grill steak on a Gas Grill?
Absolutely! Gas grills can be just as effective as charcoal grills for grilling steak. Just make sure your grill is preheated to a high temperature.
That’s it, folks! Now you’re ready to grill the perfect NY strip steak. Don’t be afraid to experiment and find what works best for you. And most importantly, have fun! Because at the end of the day, grilling is all about enjoying good food and good company.
Everyone is watching

Corn on the Cob: The Ultimate Guide to Perfectly Cooked Ears
Healthy MealsAh, corn on the cob. Just the name evokes images of sunny days, barbecues, and that sweet, juicy flavour that ...

Scallops: The Ultimate Guide to Perfect Cooking
Healthy MealsAh, scallops. Those delicate, sweet, and utterly delicious morsels of the sea. They hold a special place in my...

Spaghetti Squash: The Ultimate Guide to Cooking and Serving
Healthy MealsRemember that time you saw spaghetti squash at the supermarket, looking all bumpy and strange, and thought, "W...

Salmon Cooking Times: Perfect Guide for Every Recipe
Healthy MealsLet me tell you, cooking salmon is an art form. It's all about getting that perfect balance: juicy and tender,...

Ham Cooking Time: How Long to Bake, Smoke, or Boil a Delicious Ham
Healthy MealsAh, ham. It's a classic, isn't it? A real crowd-pleaser, especially around holidays. And when done right, it'...