So you've got yourself a lovely piece of london broil, and you're thinking, "I'm going to grill this bad boy to perfection!" It's a classic choice for a weekend barbecue, but it can be a bit tricky to get just right. You want that perfectly seared outside, juicy inside, and oh-so-flavorful experience. Fear not, my friend, because I'm here to guide you through the process, sharing my own tips and tricks I've learned over the years. I’ll walk you through every step, from prepping the meat to mastering the grilling technique, so you can impress your friends and family with a juicy, flavorful London broil that’ll leave them wanting more.
(Part 1) Getting Started: Choosing and Prepping Your London Broil
First things first, let's talk about choosing the right cut of meat. Now, London broil isn't a specific cut, but rather a term used for tougher cuts, usually from the top sirloin, flank steak, or even the round. It's a budget-friendly choice that's perfect for grilling. I personally prefer flank steak – it's usually a bit more flavorful and tender, and it's a great option for slicing thinly after grilling. If you're a fan of a good marbling, go for the top sirloin, as it will be a bit more forgiving when it comes to cooking time.
Choosing the Right Meat
When you're picking out your London broil, take a good look. You're aiming for a piece that looks nice and red, with some good marbling throughout. That marbling is key to a juicy, flavorful cut. Avoid any cuts that have a lot of white streaks, as that usually means it's dry. You also want to feel the meat; it should be firm and springy. That's a sign of freshness.
Prepping for Perfection: A Marinating Masterclass
Now, the key to a truly amazing London broil is the marinade. It's what really brings out the flavor and helps to tenderize the meat. Think of it as a magic potion for your London broil! My go-to marinade is a simple blend of olive oil, soy sauce, garlic, and a touch of honey. It's a classic combination for a reason – it's simple, flavorful, and works beautifully with the beef. You can always add your own personal touch by adding things like red wine vinegar, Worcestershire sauce, or some fresh herbs like rosemary or thyme.
Marinade Essentials
- The Magic of Olive Oil: It not only adds flavor but also helps to keep the meat moist while grilling. You'll get that beautiful, slightly browned crust, but the meat will stay juicy inside.
- Soy Sauce for Umami: It adds a savory punch and helps to enhance the meat's natural flavor. It's that delicious savory taste that makes your mouth water.
- Garlic for Depth: Garlic adds that beautiful, aromatic flavor and a slight tang. It just elevates the entire marinade and gives it a warm, inviting aroma.
- A Touch of Honey: Just a tiny bit of honey adds a subtle sweetness that balances out the savory notes of the marinade. It’s a nice counterpoint to the soy sauce and brings a hint of sweetness that complements the beef beautifully.
Once your marinade is ready, simply pour it over the London broil, making sure to coat all sides. Cover it and pop it in the fridge to let it marinate for at least 2 hours. If you've got time, I’d recommend marinating it overnight. The longer, the better! It allows the flavors to really penetrate the meat and tenderize it from within.
(Part 2) Fire Up the Grill: Setting the Stage for Grilling
Now that your London broil is prepped and ready to go, it’s time to get your grill nice and hot. Now, I know there are different types of grills out there, but for a truly good London broil, I prefer using a charcoal grill. It gives you that smoky flavour that just can't be beat. It's the classic barbecue experience, and it adds a depth of flavor that you just can't get with gas grills. But if you're a gas grill devotee, don't worry – you can still achieve great results! Just make sure your grill is nice and hot.
Preparing Your Grill
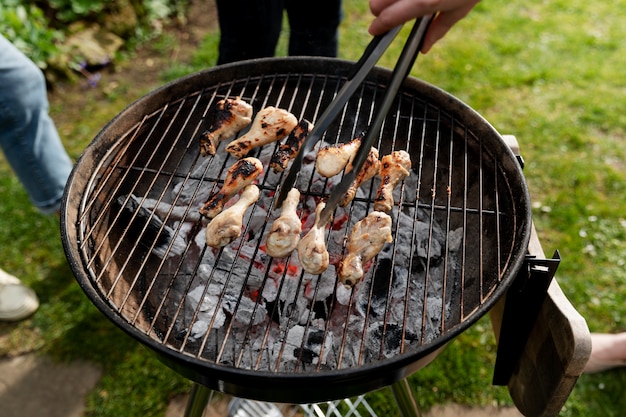
First things first, you'll need to make sure your grill is clean. I know, it’s not the most glamorous part, but it’s important. A dirty grill can give your meat a funky flavor, and nobody wants that. Use a grill brush to scrub away any leftover food particles. You'll want to ensure that your grill grates are nice and clean so that the London broil has a good surface to cook on. Now, it's time to light up your charcoal briquettes. You want a nice hot bed of coals that's evenly spread out across the bottom of the grill. I usually use about 12-16 briquettes, but adjust it according to your grill size. You want to make sure the coals are nice and white-hot, which indicates they're ready for grilling.
Building a Two-Zone Fire
One of my favorite grilling tricks is to create a two-zone fire. It’s a technique that allows you to both sear and cook your meat gently. This means having one section of your grill really hot, and another section with lower heat. It’s like having a super-hot spot for searing and a cooler spot for finishing. To achieve this, you can simply pile the charcoal briquettes on one side of the grill, leaving the other side with a few briquettes for lower heat. You’ll have a nice gradient of heat across the grill, giving you control over the cooking process.
Remember, the hottest part of the grill will be directly above the coals, so adjust your grill rack accordingly. You want the flames to be about 4-5 inches away from the meat. This helps prevent burning and ensures even cooking.
(Part 3) The Grilling Ritual: Bringing Your London Broil to Life
Alright, you’ve got your hot grill, your marinating London broil, and you’re ready to go. Now, it’s time to focus on the grilling itself. You've got to work with that fire, keep an eye on the meat, and listen to your instincts. It's a bit of a dance, but once you get the hang of it, it's incredibly rewarding.
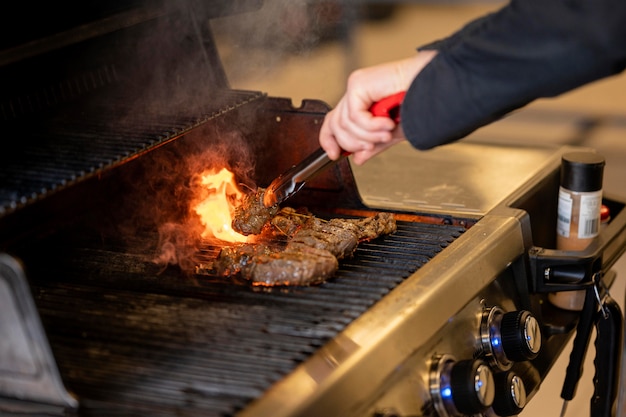
Sealing in the Flavor: The High-Heat Sizzle
Start by placing your London broil over the hottest part of the grill. You'll hear a satisfying sizzle as the meat hits the hot surface. That's the sound of flavor! You're searing in the flavor, creating a beautiful crust that'll make your mouth water. Let it cook for about 3-4 minutes on each side. This searing process locks in the juices and creates a beautiful, caramelized exterior.
Adjusting the Heat for Perfect Doneness
After you've seared all sides, it's time to move the London broil to the cooler side of the grill. The goal here is to cook it through without burning the outside. Now, keep in mind, London broil is a tougher cut of meat, so it’ll take a bit longer than your typical steak. I usually grill it for about 10-15 minutes, depending on the thickness of the meat. But remember, you can always check the doneness with your finger test (more on that later!).
Checking for Doneness: The Finger Test
You're probably wondering how to tell when your London broil is done. Well, there are a few ways. You can use a meat thermometer, but I prefer the old-school finger test. Simply poke the thickest part of the meat with your finger. If it feels firm and springy, it’s medium-rare. If it feels a bit more firm, it’s medium, and if it feels really firm, it’s well-done. It's a bit of a subjective test, but it gives you a good idea of the meat's texture. If you're unsure, it's always better to err on the side of undercooked rather than overcooked, as you can always cook it a bit more.
(Part 4) Finishing Touches: Rest and Slice
You've done it! Your London broil is perfectly grilled. But before you dive in, it’s super important to let it rest. This gives the juices a chance to redistribute throughout the meat, resulting in a more tender and flavorful piece. Think of it as giving the meat a chance to relax and recover after its grilling ordeal. I usually let it rest for about 10 minutes before slicing it. You can cover it loosely with foil to keep it warm while it rests.
Slicing Perfection: Thin and Against the Grain
Now for the final touch - slicing. You want to cut the London broil thinly and against the grain. This will make it easier to chew and will ensure it's more tender. Think of the grain as the direction of the muscle fibers in the meat. Cutting against the grain breaks those fibers up and makes the meat more tender. I usually slice it about 1/4 inch thick.
(Part 5) Serving Up Your Masterpiece: Let the Feast Begin!
Congratulations! You've successfully grilled a London broil to perfection. Now it's time to enjoy your delicious creation. It's a moment of culinary triumph – you've conquered the grill!
Simple and Savoury: A Classic Presentation
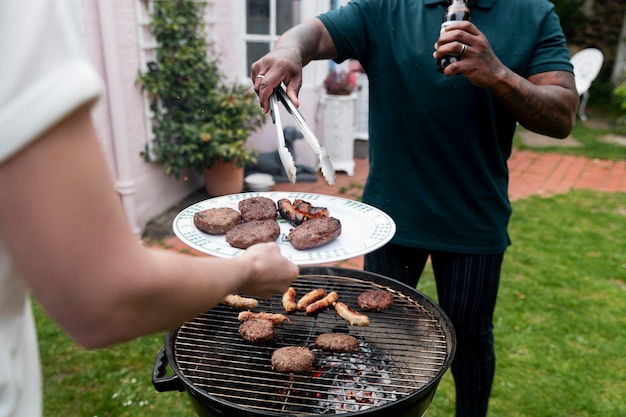
I like to keep things simple when it comes to serving London broil. A classic combination of grilled vegetables like onions, peppers, and zucchini is always a winner. They're easy to grill and provide a lovely contrast of textures and flavors. I also love serving it with a side of creamy mashed potatoes or a simple salad. The mashed potatoes add a creamy, comforting element, while a salad adds a refreshing touch. But feel free to get creative and experiment with different sides that tickle your fancy. Maybe you're in the mood for a spicy chimichurri sauce or a tangy salsa. Go for it!
A Feast for the Senses: Enjoy Your Effortless Creation
Remember, the most important thing is to enjoy your meal. Take your time, savour each bite, and relish the fact that you've created a culinary masterpiece right in your own backyard. It's a moment to be proud of – you've created something delicious and satisfying!
(Part 6) cooking tips for Success: A Culinary Toolkit
Okay, so you’re ready to tackle London broil, and I’m all for it! But before you head out to the grill, here are some extra tips to help you along the way. These are the little secrets that will take your grilling to the next level.
Tip 1: The Power of Salt and Pepper
Don’t be afraid to use salt and pepper liberally. It might seem obvious, but it really does make a difference. Salt helps to draw out moisture from the meat, which enhances flavour and creates a crispier crust. Pepper adds a bit of spice and complexity. Add salt and pepper to your marinade or season it generously before grilling. It's like a finishing touch that elevates the flavor profile.
Tip 2: The Importance of Rest
I’ve mentioned this before, but it’s worth repeating. Always let your London broil rest for at least 10 minutes after grilling. This allows the juices to redistribute throughout the meat, resulting in a more tender and flavourful steak. You can cover it loosely with foil to keep it warm while it rests. It's a simple step that makes a big difference in the final outcome.
Tip 3: The Thermometer Truth
If you’re not comfortable with the finger test, or you want a more precise measure, a meat thermometer is your best friend. Insert the thermometer into the thickest part of the meat, making sure it’s not touching any bone. For medium-rare London broil, you’re aiming for an internal temperature of 130-135 degrees Fahrenheit. It's a good idea to have a meat thermometer on hand, especially if you're a beginner. It removes any guesswork and ensures you cook your meat to the perfect doneness.
(Part 7) Mastering the Art of Grilling: A Guide to Success
You’ve got your London broil, you’re ready to grill, but maybe you’re a bit intimidated. Relax! It's all about confidence and understanding the basics. Here are some additional tips to help you navigate the world of grilling like a pro. It's a journey, but with these tips, you'll be a grilling master in no time.
Understanding the Grill: Your Culinary Canvas
Think of your grill like a canvas. You can create a variety of cooking styles and flavors, depending on how you manage the heat and the airflow. Experiment with different methods, and you'll discover your own personal grilling style. Maybe you like a super-hot sear or a more gentle, indirect heat. It's all about exploring what works best for you.
The Power of Indirect Heat: Gentle Cooking
If you’re looking for a more gentle cooking method, try using indirect heat. This means grilling over the cooler side of your grill, away from the direct flames. Indirect heat is ideal for cooking larger cuts of meat, as it helps to cook them evenly without burning the outside. It's perfect for those times when you want to avoid that intense char. You can achieve this by using a two-zone fire, which we discussed earlier.
Embrace the Smoke: Adding Depth and Flavor
Using wood chips or wood chunks on your grill can add a fantastic smoky flavour to your London broil. Just soak the chips in water for about 30 minutes before adding them to the coals. This will help them smolder and produce delicious smoke. You can use different types of wood to create different flavor profiles. Hickory, mesquite, and applewood are all popular choices.
Safety First: The Essential Precautions
Always be cautious when grilling. Keep a fire extinguisher nearby, and never leave your grill unattended. And most importantly, keep your grill away from flammable materials. These are just some basic safety precautions that are essential when using a grill. It's always better to be safe than sorry!
(Part 8) FAQs: Answering Your Grilling Queries
Let’s address those burning questions you might have about grilling london broil.
Can I grill London broil on a gas grill?
Absolutely! You can grill London broil on a gas grill as well. Simply set the grill to medium-high heat and follow the same searing and cooking steps as you would on a charcoal grill. You won’t get that smoky flavor, but it’ll still be delicious. Gas grills are great for convenience and ease of use, so don't feel limited by the type of grill you have.
How can I make London broil more tender?
Besides marinating, there are a few ways to make London broil more tender. You can pound the meat before grilling, which helps to break down the muscle fibers. It's a simple technique that can make a big difference. You can also cook it until it’s medium-rare. Overcooking will make it tough. And remember, letting it rest after grilling is crucial for tenderness. It allows the juices to redistribute and makes the meat more forgiving.
What are some good side dishes for London broil?
You’ve got tons of options! Grilled vegetables, mashed potatoes, rice pilaf, roasted potatoes, and salads all pair well with London broil. I often serve it with a side of asparagus or broccoli. Get creative and experiment with different combinations! Maybe you're in the mood for a creamy polenta or a tangy coleslaw. The possibilities are endless.
What are some other cuts of meat that are good for grilling?
Besides London broil, you’ve got a whole world of grilling possibilities! Some other great cuts for grilling include ribeye steak, new york strip steak, filet mignon, and even chicken breasts or pork chops. Experiment and discover your favourite grilling meats. It's all about exploration and finding what you love.
Can I freeze London broil?
Yes, you can freeze London broil. Just wrap it tightly in plastic wrap and then in aluminum foil. It will stay good in the freezer for about 3-4 months. Just make sure to thaw it completely in the fridge before grilling. It's a great way to stock up on meat for future grilling adventures.
I hope this guide has helped you to grill London broil to perfection. Remember, grilling is all about having fun and experimenting with different flavours and techniques. So fire up your grill, get those grilling tools ready, and enjoy the deliciousness! Happy grilling!
Everyone is watching

Corn on the Cob: The Ultimate Guide to Perfectly Cooked Ears
Healthy MealsAh, corn on the cob. Just the name evokes images of sunny days, barbecues, and that sweet, juicy flavour that ...

Perfect Pork Roast Oven Cooking Time: A Guide to Delicious Results
Healthy MealsThere's something truly satisfying about a perfectly roasted pork. The aroma alone is enough to make your mout...

Scallops: The Ultimate Guide to Perfect Cooking
Healthy MealsAh, scallops. Those delicate, sweet, and utterly delicious morsels of the sea. They hold a special place in my...

Ham Cooking Time: How Long to Bake, Smoke, or Boil a Delicious Ham
Healthy MealsAh, ham. It's a classic, isn't it? A real crowd-pleaser, especially around holidays. And when done right, it'...

Spaghetti Squash: The Ultimate Guide to Cooking and Serving
Healthy MealsRemember that time you saw spaghetti squash at the supermarket, looking all bumpy and strange, and thought, "W...