There's nothing quite like the aroma of a perfectly seared bone-in ribeye steak sizzling on the grill. It's a culinary masterpiece, promising juicy tenderness and a flavour that bursts with rich, savory notes. As a seasoned grill enthusiast, I've spent years perfecting my technique for this iconic cut of meat, and I'm thrilled to share my secrets with you. Let's embark on this delicious adventure together, from selecting the right cut to achieving that irresistible sear and achieving the perfect pink centre.
So, grab your apron, gather your ingredients, and let's get started!
Part 1: Selecting Your Steak

choosing the right steak is the first crucial step in this journey. You want a cut that's not only visually appealing but also promises a flavorful and tender eating experience.
1.1 Choosing the Cut: The King of Cuts
When it comes to bone-in ribeyes, I always aim for a cut that's at least 1.5 inches thick. This thickness ensures a good amount of marbling – those beautiful white streaks of fat running through the meat. Marbling is the key to a juicy, tender steak with incredible flavour. Think of it as nature's built-in basting system – as the fat renders during cooking, it adds incredible richness and flavour.
1.2 Inspecting the Colour and Texture: The Signs of a Great Steak
At the butcher's counter, take a moment to truly appreciate the quality of the steak. Look for a deep red colour, a sign of freshness and good quality. Avoid cuts that appear brown or grey, as this can indicate that the meat hasn't been stored properly.
Next, gently press your finger against the steak. A good ribeye should feel firm and springy, not soft or mushy. This indicates a healthy, well-aged piece of meat. If you feel any soft spots or if the meat feels limp, it's best to choose a different cut.
Part 2: Preparing Your Steak: Getting Ready for the Grill

Now that you've got the perfect ribeye in hand, it's time to prep it for its starring role on the grill. A little bit of attention to detail goes a long way.
2.1 Removing the Silver Skin: A Smooth Surface for perfect searing
The silver skin, a thin, tough membrane that often covers the surface of the steak, can hinder the searing process and make it tough to chew. To remove it, I use a sharp paring knife, carefully sliding it under the silver skin and gently peeling it away. This will reveal a beautifully smooth surface that's ready to be kissed by the hot grill.
2.2 Seasoning with Salt and Pepper: Enhancing the Natural Flavors
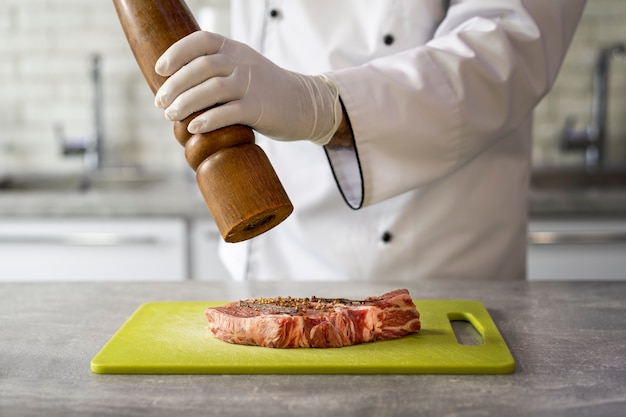
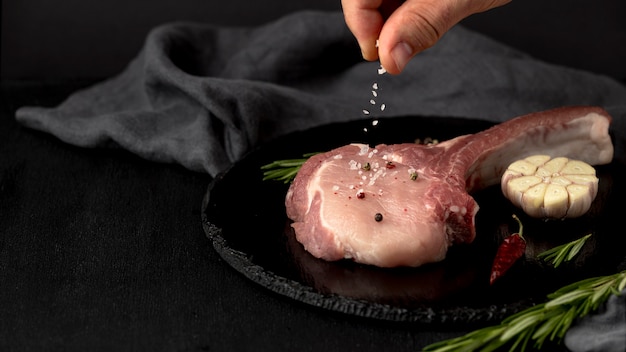
For me, the magic of a great steak comes from its natural flavours, and I prefer to let those shine through. I use a simple yet effective seasoning combination: kosher salt and freshly ground black pepper. Kosher salt, with its larger crystals, distributes more evenly and provides a clean, pure taste. Freshly ground pepper adds a delightful kick of spice.
I like to season my steaks liberally, but be sure to avoid overdoing it. The goal is to enhance the natural flavours of the steak, not to mask them. A light touch is key.
Part 3: Bringing Your Steak to Room Temperature: Achieving an Even Cook

This step is often overlooked, but it's essential for ensuring an even cook. Leaving your steak out on the counter for at least 30 minutes before cooking allows the meat to come to room temperature. This helps the internal temperature rise evenly, preventing the centre from becoming cold while the exterior is overcooked.
Part 4: Prepping Your Grill: Setting the Stage for Sizzling Perfection
With your steak prepped and ready, it's time to turn up the heat and prepare your grill for a sizzling performance. While I prefer the smoky flavour of a charcoal grill, a gas grill can work just as well.
4.1 Cleaning the Grill Grates: A Clean Surface for a Beautiful Sear
Before placing your steak on the grill, take a moment to clean the grates. I use a grill brush or a wire brush to remove any leftover debris from previous cooks. A clean grill ensures that your steak won't stick and will have those beautiful grill marks that are the hallmark of a perfectly grilled steak.
4.2 Oiling the Grates: Preventing Sticking and Enhancing Sear Marks
Now, using a paper towel dipped in oil, lightly coat the grill grates. This prevents sticking and helps create those iconic grill marks. Olive oil or vegetable oil work well for this purpose.
Part 5: Cooking the Steak: The Art of Searing and Precision
The moment of truth has arrived! It's time to sear your steak to perfection. This is where patience and a keen eye for detail are essential.
5.1 Searing the Steak: Creating the Irresistible Crust
Place your steak on the preheated grill, making sure to avoid any flare-ups. The grill should be hot enough that you can hold your hand 2-3 inches above it for only 2-3 seconds before needing to move it away. This indicates a temperature of around 450-500°F.
Let the steak cook undisturbed for 4-5 minutes per side. This is where the magic happens: a beautiful, crusty exterior forms, sealing in the juices and locking in the flavour.
5.2 Checking for Doneness: Knowing When Your Steak is Perfect
Now, let's take a peek at the steak. There are two methods you can use to determine its doneness: the touch method and using a meat thermometer.
5.2.1 The Touch Method: A Hands-On Approach
This method relies on the feel of the steak. Here's a quick guide:
Rare: The steak will feel very soft and squishy.
Medium-rare: The steak will feel slightly firmer but still soft.
Medium: The steak will feel firm and bounce back slightly when pressed.
Medium-well: The steak will feel very firm and almost hard.
Well-done: The steak will feel very hard.
5.2.2 Using a Meat Thermometer: A Precise Measurement
For those who prefer a more scientific approach, using a meat thermometer is the most accurate way to determine doneness. Insert the thermometer into the thickest part of the steak, making sure it doesn't touch the bone. Here are the recommended internal temperatures for different levels of doneness:
| Doneness | Internal Temperature (°F) |
|---|---|
| Rare | 125-130 |
| Medium-rare | 130-135 |
| Medium | 140-145 |
| Medium-well | 150-155 |
| Well-done | 160+ |
5.3 Cooking to Desired Doneness: A Gentle Finish
Once your steak is nearing its desired level of doneness, move it to a cooler part of the grill or reduce the heat to medium-low. This will ensure that the steak cooks evenly without becoming overcooked.
For a medium-rare steak, you'll likely need to cook it for another 5-6 minutes per side. Adjust the cooking time based on the thickness of your steak and your desired level of doneness. If you prefer a more well-done steak, you'll need to cook it for a longer time, but be careful not to overcook it.
Part 6: Resting the Steak: Unlocking Tenderness and Flavour
This is a crucial step that often gets overlooked. After the steak is cooked, it's essential to let it rest for at least 10 minutes, preferably on a cutting board. Don't be tempted to slice and serve it immediately!
Resting allows the juices to redistribute throughout the steak, resulting in a more tender, juicy, and flavorful cut. The internal temperature will also continue to rise slightly during resting, which helps ensure that the steak is cooked to your desired level of doneness.
Part 7: Serving Your Steak: The Grand Finale
After the steak has rested, it's finally time to enjoy the fruits of your labor! Serve it with your favourite sides, and don't forget to add a knob of butter or a drizzle of olive oil for extra richness.
7.1 Slicing the Steak: Unlocking the Tenderness
Use a sharp knife to slice the steak against the grain. This means cutting the slices perpendicular to the muscle fibres, resulting in a more tender bite. If you're slicing a bone-in ribeye, be sure to remove the bone before slicing the steak into individual portions.
Part 8: Enhancing Your Steak: Adding Finishing Touches
A perfectly cooked steak is delicious on its own, but there are ways to take it to the next level.
8.1 Adding a Sauce: A Touch of Richness and Complexity
A good sauce can elevate a delicious steak to another level. I recommend making a simple pan sauce using butter, garlic, and herbs. For a more adventurous flavour, try a chimichurri sauce or a classic béarnaise sauce.
8.2 Garnishing Your Steak: A Touch of Elegance
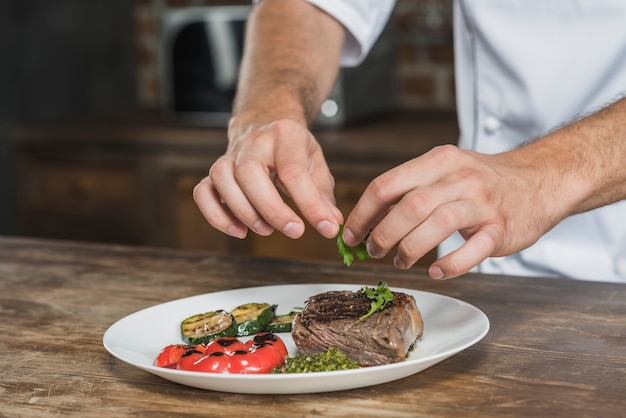
To add a touch of elegance, garnish your steak with fresh herbs, a sprinkle of sea salt, or a drizzle of olive oil. A sprig of rosemary or thyme adds a fragrant touch, while a sprinkle of Maldon sea salt adds a beautiful crunch and a subtle salty flavour. A drizzle of high-quality olive oil adds richness and helps to bring out the natural flavours of the steak.
Part 9: FAQs: Answering Your Questions
Here are some frequently asked questions about cooking bone-in ribeye steak:
9.1 What's the best way to cook a bone-in ribeye steak?
The best way to cook a bone-in ribeye steak is on a grill over medium-high heat. This method produces a beautiful sear and cooks the steak evenly. You can also use an oven or a skillet, but grilling is my preferred method for this cut.
9.2 How long do I cook a bone-in ribeye steak?
The cooking time for a bone-in ribeye steak depends on the thickness of the steak and your desired level of doneness. A 1.5-inch thick steak will take about 10-12 minutes for medium-rare, but adjust the cooking time based on your preferences and the thickness of the steak. Use a meat thermometer to check for doneness.
9.3 What temperature do I cook a bone-in ribeye steak?
For a grill, aim for medium-high heat, around 450-500°F. For an oven, cook the steak at 400°F for 10-12 minutes.
9.4 How do I tell if a bone-in ribeye steak is cooked?
You can use a meat thermometer to check for doneness. Alternatively, you can use the touch method, as described earlier, to estimate the doneness of your steak.
9.5 What are some good side dishes for bone-in ribeye steak?
There are many delicious side dishes that complement a bone-in ribeye steak. Here are a few ideas:
- grilled asparagus
- Roasted potatoes
- Creamy mashed potatoes
- roasted brussels sprouts
- Caesar salad
- grilled corn on the cob
- Sauteed mushrooms
- Roasted garlic bread
Part 10: Mastering the Art of Cooking: A Journey of Discovery
Cooking the perfect bone-in ribeye steak is a skill that takes practice and patience. But with the right technique, anyone can achieve delicious results. Remember to use high-quality meat, season it generously, and cook it over medium-high heat. Most importantly, don't be afraid to experiment and find what works best for you.
So, go forth and conquer the world of steak!
Part 11: Additional Tips: Fine-Tuning Your Technique
Here are some additional tips to help you cook a perfect bone-in ribeye steak:
- Use a meat thermometer: A meat thermometer is the most accurate way to check for doneness. Insert the thermometer into the thickest part of the steak, making sure it doesn't touch the bone.
- Don't overcrowd the grill: If you're cooking multiple steaks, make sure you leave enough space between them. This will allow the steaks to cook evenly.
- Avoid flipping the steak too often: Flipping the steak too often can dry it out.
- Rest the steak on a cutting board: This will help prevent the steak from losing its juices.
- Use a sharp knife: A sharp knife will make slicing the steak much easier.
- Don't overcook the steak: Overcooking a steak will make it tough and dry.
- Enjoy the process: Cooking a bone-in ribeye steak is a delicious and rewarding experience.
I hope this guide has helped you learn how to cook a perfect bone-in ribeye steak. Happy grilling!
Everyone is watching

Corn on the Cob: The Ultimate Guide to Perfectly Cooked Ears
Healthy MealsAh, corn on the cob. Just the name evokes images of sunny days, barbecues, and that sweet, juicy flavour that ...

Perfect Pork Roast Oven Cooking Time: A Guide to Delicious Results
Healthy MealsThere's something truly satisfying about a perfectly roasted pork. The aroma alone is enough to make your mout...

Ham Cooking Time: How Long to Bake, Smoke, or Boil a Delicious Ham
Healthy MealsAh, ham. It's a classic, isn't it? A real crowd-pleaser, especially around holidays. And when done right, it'...

Scallops: The Ultimate Guide to Perfect Cooking
Healthy MealsAh, scallops. Those delicate, sweet, and utterly delicious morsels of the sea. They hold a special place in my...

Spaghetti Squash: The Ultimate Guide to Cooking and Serving
Healthy MealsRemember that time you saw spaghetti squash at the supermarket, looking all bumpy and strange, and thought, "W...
