Ah, ham. The quintessential centerpiece of a holiday feast, a picnic staple, and a delicious addition to any meal. But let's be honest, cooking a ham can be a bit daunting. You want it to be perfectly cooked, moist, and bursting with flavour – not dry, rubbery, and a little underwhelming. Well, fear not, my culinary comrades! I've been whipping up hams for years, and I'm here to share my secrets for a truly scrumptious roast.
(Part 1) Choosing the Right Ham: The Foundation of Your Feast
You wouldn't start building a house without a solid foundation, right? The same goes for your ham. Choosing the right one is essential to a delicious outcome. Let’s delve into the world of hams and uncover the perfect match for your culinary vision.
types of ham: A World of Options
You'll find a whole smorgasbord of ham types at your local butcher or supermarket. Each has its own unique characteristics and appeal.
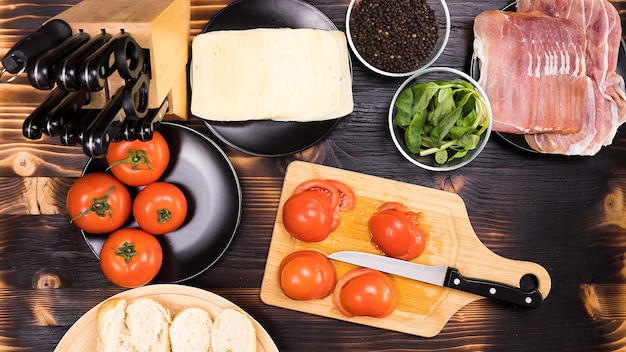
- Bone-in: This is the classic, traditional ham. It’s a real statement piece, often boasting a beautiful, smoky flavour from the curing process. The bone helps to keep the ham moist and adds a depth of flavour. Just be prepared for a bit more carving.
- Boneless: This is the go-to choice for convenience. boneless hams are often pre-sliced, making them a breeze to carve. You'll find them in various sizes, perfect for smaller gatherings or a quick family meal. However, watch out for dry hams! Some boneless varieties can be a bit on the parched side.
- Spiral-cut: These are already sliced, making carving a true cinch. They're ideal for a hassle-free serving experience. The spiral cuts allow for faster cooking because heat penetrates the ham more evenly.
Size: A Matter of Portions
Before you grab that ham, consider how many mouths you’ll be feeding. You don’t want to be left with an abundance of leftovers (though, a good ham sandwich never goes amiss!), but you also don’t want to run out. A general rule of thumb is to calculate about 1/2 pound of ham per person. However, if you're planning on having a lot of side dishes, you might be able to get away with a bit less ham per person.
Curing and Glazing: Beyond the Basics
The curing process plays a significant role in the final taste and texture of your ham. Each method results in a distinct flavour profile.
- Smoked: This classic ham boasts a distinctive, smoky taste that is utterly irresistible. It's a true crowd-pleaser, perfect for any gathering.
- Dry-cured: These hams are aged for a longer period, resulting in a more intense, salty flavour. They're known for their complex aromas and bold taste.
- Wet-cured: This method involves curing the ham in a brine, resulting in a more delicate, moist flavour. They're often a good choice for those who prefer a milder taste.
Finally, don’t forget the glaze! Glazes add a layer of sweetness and shine to your ham, elevating it from ordinary to extraordinary. There are endless options to choose from, from honey-mustard to brown sugar and maple syrup. Find a glaze that compliments the flavours of your chosen ham and complements your personal preference.
(Part 2) Preparing Your Ham: Getting Ready for the Oven
Now, we’re entering the fun part – getting your ham ready for its star turn in the oven! It’s all about a little TLC to ensure a flawless, flavourful result.
A Little TLC for Your Ham:
First, take a good look at your ham. It’s likely to be wrapped in plastic, so give it a quick unwrapping. Most hams come pre-cooked, meaning they're ready to be reheated and enjoyed. However, if you happen to have an uncooked ham, make sure you cook it thoroughly until it reaches the safe internal temperature.
Here's a tip I've learned through years of ham-making: score the fat! This helps the glaze penetrate the ham better and creates those lovely, crispy edges that everyone adores. Use a sharp knife to score the fat in a criss-cross pattern. Don't go too deep, just enough to create those perfect grooves.
Preheating the Oven: Setting the Stage
While your ham is getting ready for its moment in the spotlight, preheat your oven to 325°F (160°C). This temperature is perfect for creating a moist and tender ham.
(Part 3) Cooking the Ham: The Moment of Truth

Alright, folks, it’s showtime! We’re about to cook that beautiful piece of ham to perfection.
Roasting the Ham: The Art of Patience
Place the ham in a roasting pan, making sure it's nice and snug. Add a bit of water to the bottom of the pan, just enough to create a bit of steam. This helps to keep the ham moist and prevents it from drying out. Pop it in the oven and let it roast for about 15 minutes per pound.
Patience is key! It's a good idea to check the internal temperature of the ham after about 1 hour of roasting, using a meat thermometer. We're aiming for an internal temperature of 145°F (63°C) to ensure the ham is cooked through.
The Glaze: Adding a Touch of Magic
Now, for the grand finale – the glaze! A good glaze will add a burst of flavour and make your ham look absolutely stunning. You can use a store-bought glaze or get creative and make your own. The key is to apply it during the last 30 minutes of cooking.
I'm a big fan of a honey-mustard glaze. It's sweet, tangy, and pairs perfectly with ham. But feel free to experiment with different flavours! A brown sugar-maple syrup glaze is another favourite, or try a fruity pineapple glaze for a tropical twist.
(Part 4) Resting and Carving: Let it Breathe
Once your ham has reached the desired temperature, give it a moment to relax. Take it out of the oven and let it rest for at least 15 minutes before carving. This allows the juices to redistribute throughout the ham, resulting in a more tender and juicy final product.
When it’s time to carve, use a sharp knife and slice the ham in thin slices. Remember, presentation counts! Arrange those slices beautifully on a platter, and you’ve got yourself a real showstopper.
(Part 5) Serving and Enjoying: The Grand Finale
And there you have it – a perfectly roasted ham. It's time to celebrate! Serve it up with your favourite sides, like mashed potatoes, green beans, or a delicious salad. And don’t forget the gravy! It's the perfect accompaniment to that juicy ham.
I love to serve my ham with a dollop of mustard and a side of pineapple chunks. The sweetness of the pineapple complements the salty ham beautifully. But really, it's all about personal preference. Let your creativity shine!
(Part 6) Tips and Tricks for a perfect ham: Elevate Your Game
Now, let’s talk about some of my little tricks for making a truly perfect roast ham. These tips are like the secret ingredients that can take your ham from good to phenomenal.
1. The Power of Brining: Unlocking Moisture and Flavour
If you want to take your ham to the next level, try brining it. It's a simple yet powerful technique that can transform your ham. Brining involves soaking the ham in a salt water solution for several hours. This helps to keep the ham moist and tender, and it also adds a bit of flavour.
Here's a simple brine recipe that's become a staple in my kitchen:
| Ingredient | Amount |
|---|---|
| Water | 1 gallon |
| Kosher Salt | 1 cup |
| Brown Sugar | 1/2 cup |
| Black Peppercorns | 1 tablespoon |
| Bay Leaves | 4 |
Combine all ingredients in a large pot and bring to a boil. Let it cool completely before adding your ham. The ham should be completely submerged in the brine. Let it soak for at least 4 hours, or up to 12 hours, for the best results.
2. The Magic of Glaze: Adding Shine and Sweetness
Don’t underestimate the power of a glaze! It adds a beautiful colour, a glossy sheen, and a burst of flavour to your ham. It's the final touch that transforms your ham from good to great.
Here are a few of my favourite glaze ideas to get you started. Remember, you can always tweak them to suit your taste buds.
- honey mustard glaze: Combine honey, Dijon mustard, and a pinch of brown sugar. The sweetness of the honey blends beautifully with the tanginess of the mustard, creating a truly delicious glaze.
- Brown Sugar maple glaze: Mix brown sugar, maple syrup, and a dash of cinnamon. The sweetness of the brown sugar and maple syrup is balanced by the warmth of the cinnamon, creating a rich and comforting glaze.
- Pineapple Glaze: Combine pineapple juice, brown sugar, and a splash of lemon juice. This glaze brings a tropical twist to your ham, offering a burst of sweetness and a hint of tartness.
Feel free to experiment with different flavour combinations to find your favourite. Remember, glaze goes on during the last 30 minutes of cooking. It gives your ham time to absorb the flavours and develop a beautiful, glossy finish.
3. Temperature is Key: Don't Overdo It
A meat thermometer is your best friend when cooking ham. It allows you to ensure that your ham is cooked through without becoming dry and tough. The ideal internal temperature for ham is 145°F (63°C). Overcooked ham can be dry, so don't let it go too long in the oven!
4. Don’t Forget the Leftovers: Waste Not, Want Not
leftover ham is a real treat! It's so versatile! It's perfect for sandwiches, salads, or even a delicious ham and bean soup. You can also dice it up and add it to pasta dishes, quiches, or frittatas. Get creative and let your leftover ham shine!
(Part 7) FAQs: Clearing Up Common Questions
Now, I’m sure you’re bursting with questions. So, let’s tackle some of the most common ones.
1. Can I cook a ham from frozen?
It’s not recommended to cook a ham from frozen. It's best to defrost it in the refrigerator for a few days before cooking. This ensures that the ham defrosts evenly and avoids any potential problems with uneven cooking. If you’re short on time, you can defrost it in cold water, but make sure to change the water every 30 minutes to ensure the water remains cold and prevents bacterial growth.
2. How long can I keep a cooked ham in the refrigerator?
A cooked ham can be stored in the refrigerator for up to 3-4 days. Wrap it tightly in plastic wrap or aluminum foil to keep it fresh.
3. Can I freeze cooked ham?
Yes, you can freeze cooked ham. Wrap it tightly in plastic wrap or freezer paper and store it in the freezer for up to 2 months. Thaw it in the refrigerator before reheating.
4. How do I reheat a cooked ham?
You can reheat a cooked ham in the oven or in a slow cooker. If you’re reheating it in the oven, preheat it to 325°F (160°C) and cook the ham until it’s heated through. If you’re using a slow cooker, cook it on low heat for 2-3 hours. Make sure to check the internal temperature to ensure it reaches at least 145°F (63°C).
5. What are some good side dishes to serve with ham?
There are so many delicious side dishes that go well with ham! Here are a few ideas to get you started.
- Mashed potatoes: A classic comfort food that pairs perfectly with the salty ham.
- Green beans: A simple, healthy side that adds a touch of freshness.
- Asparagus: A sophisticated side dish with a delicate flavour.
- sweet potato casserole: A sweet and creamy side dish that complements the savoury ham.
- Macaroni and cheese: A crowd-pleasing comfort food that’s always a hit.
- Cornbread: A Southern classic that pairs perfectly with ham.
- fruit salad: A refreshing and vibrant side dish that adds a touch of sweetness.
(Part 8) Wrapping it Up: Time to Enjoy
Well, there you have it! My top tips for cooking a delicious roast ham. I hope you’ve found this guide helpful and inspiring. Now go out there and create a ham that’ll have everyone asking for seconds!
And remember, if you’re ever feeling a bit lost in the kitchen, just remember this: a little love and a bit of patience can go a long way! And with a bit of practice, you'll be a ham-cooking pro in no time.
Everyone is watching

Corn on the Cob: The Ultimate Guide to Perfectly Cooked Ears
Healthy MealsAh, corn on the cob. Just the name evokes images of sunny days, barbecues, and that sweet, juicy flavour that ...

Perfect Pork Roast Oven Cooking Time: A Guide to Delicious Results
Healthy MealsThere's something truly satisfying about a perfectly roasted pork. The aroma alone is enough to make your mout...

Ham Cooking Time: How Long to Bake, Smoke, or Boil a Delicious Ham
Healthy MealsAh, ham. It's a classic, isn't it? A real crowd-pleaser, especially around holidays. And when done right, it'...

Scallops: The Ultimate Guide to Perfect Cooking
Healthy MealsAh, scallops. Those delicate, sweet, and utterly delicious morsels of the sea. They hold a special place in my...

Spaghetti Squash: The Ultimate Guide to Cooking and Serving
Healthy MealsRemember that time you saw spaghetti squash at the supermarket, looking all bumpy and strange, and thought, "W...