There's something undeniably comforting about the aroma of a slow-cooked ham filling the air. It’s a dish that screams celebration, comfort, and, of course, pure deliciousness. For years, I've been on a mission to perfect my ham-cooking skills, and I'm finally ready to share my secrets with you! It's not about complicated techniques, but rather about a deep understanding of the ham itself, and a touch of patience. So grab a cuppa, settle in, and let's embark on this culinary adventure together.
(Part 1) Choosing the Right Ham: A Foundation of Flavor
You can't expect a perfect ham to just magically appear, right? It all starts with choosing the right one. Now, there's a whole world of hams out there, each with its own unique characteristics. For me, a bone-in ham is the way to go. There's just something about that bone that adds a depth of flavour that you can't get from a boneless ham.
types of hams: Navigating the Options
Let's break down the different types of hams you'll encounter:
- city ham: These are dry-cured hams, known for their intense flavor and slightly salty, tangy taste. They're usually sold uncooked, and you'll have to do a little extra work to prepare them. But trust me, the reward is well worth it! Imagine that deep, rich flavor that only comes from a ham that's been carefully cured and aged.
- country ham: Similar to city ham, but with a more pronounced, almost rustic flavor. They're cured with salt and typically smoked, giving them a delicious smoky aroma. They're like a taste of the countryside, full of character and authenticity.
- Cooked Ham: These are already cooked and ready to eat, perfect for a quick meal. They're convenient, but they often lack the complexity of flavor you get from a dry-cured ham.
- spiral-sliced ham: This pre-cooked ham is sliced in a spiral pattern, making it easy to serve. It's a good choice for a crowd as it's readily available and often comes with a pre-made glaze.
For this guide, we're focusing on bone-in hams that are uncooked. These are the ones that offer the most flexibility and control over the final outcome. You can truly tailor the flavor and texture to your liking.
(Part 2) Preparing Your Ham: A Ritual of Hydration and Enhancement
Once you've got your bone-in ham, it's time to get it ready for its star turn. This is where a little patience and a good pair of kitchen gloves come in handy.
Soaking the Ham: A Ritual of Hydration
Soaking the ham is a critical step, especially if you're working with a dry-cured ham. It helps to rehydrate the ham, making it more tender and less salty. I usually soak my ham in cold water for about 24 hours, changing the water every 8 hours. This allows the ham to absorb moisture gradually, ensuring that it’s evenly hydrated. You can also add a few bay leaves or a splash of apple cider vinegar to the water for extra flavour. But honestly, I’m a bit of a purist. I like the classic ham flavour, and I find that the soaking process alone brings out enough flavour.
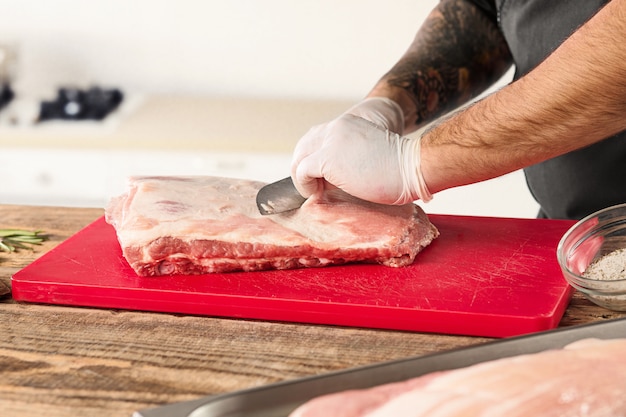
Trimming the Ham: A Little TLC
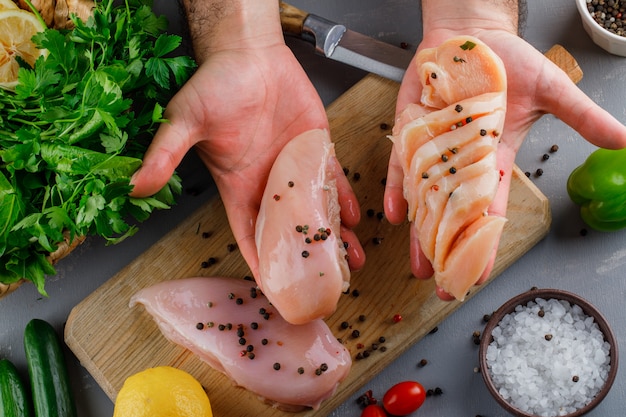
Now, take a good look at your ham. You might need to trim away any excess fat or skin. I use a sharp knife, but you can also use kitchen shears. Remember, this is a personal preference thing. Some folks love a thick layer of fat, while others prefer a leaner cut. It's all about what you enjoy. Trimming the ham also helps to ensure even cooking and creates a more aesthetically pleasing presentation.
Scoring the Ham: A Taste of Elegance
Scoring your ham is like giving it a little makeover. It adds a touch of elegance, helps the ham cook evenly, and allows the glaze to penetrate deeper. To score your ham, use a sharp knife to make diagonal cuts, about 1/2 inch deep, across the fat. You can also make small cuts at right angles to the diagonal cuts to create a diamond pattern. I think it's a bit more visually appealing, but you do you!
(Part 3) Cooking the Ham: The Art of Slow and Steady
This is where the magic happens. We're going to cook that ham to perfection using a slow, steady method that will bring out its inherent goodness.
The Low and Slow Approach: Mastering the oven method
I prefer to cook my ham in the oven. It's easy, reliable, and gives you plenty of time to focus on other things, like preparing sides or catching up with friends. Here's what I do:
- Preheat your oven to 325°F (160°C). You want a gentle heat that allows the ham to cook slowly and evenly.
- Place the ham in a roasting pan. I like to add a little water to the bottom of the pan to create a moist environment, but you can also use a ham holder to keep the ham elevated.
- Cook for approximately 15-20 minutes per pound. This is a general guideline, so check the internal temperature of the ham to ensure it's cooked through.
- Use a meat thermometer to check the temperature. The ham is considered cooked when the internal temperature reaches 145°F (63°C).
As the ham cooks, you'll see a golden-brown crust start to develop on the surface. You can use a basting brush to brush the ham with a glaze during the last hour of cooking. This will add a layer of sweetness and give it that beautiful sheen.
Glazing the Ham: A Touch of Sweetness
Now, let's talk about glazes! There are endless possibilities here, but some classics include brown sugar, honey, maple syrup, and even mustard. I tend to keep it simple. My go-to glaze is a mixture of brown sugar, honey, and a bit of orange juice for a citrusy kick. I like to brush it on the ham during the last hour of cooking, allowing it to caramelize and create that irresistible glaze.
For a more adventurous glaze, consider adding a touch of ginger, cinnamon, or even a dash of chili powder for a hint of spice. The possibilities are endless, and the best glaze is the one that speaks to your taste buds!
(Part 4) Resting the Ham: Patience is a Virtue
Once your ham has reached the desired internal temperature, resist the temptation to carve it right away. Let it rest for at least 15 minutes, covered with foil. This will allow the juices to redistribute, resulting in a more tender and flavorful ham. It's a simple step, but it makes a world of difference in the final product.
(Part 5) Carving the Ham: A Moment of Triumph
Now comes the moment of truth. Carving a ham can seem intimidating, but it’s really quite straightforward. Here's what I do:
Tools of the Trade: The Essentials for Carving
- Sharp knife: A good quality carving knife is essential for clean, even slices. I use a long, thin knife with a slightly curved blade.
- Carving fork: This is helpful for holding the ham in place while you carve.
- Cutting board: You need a sturdy cutting board that's large enough to accommodate the ham.
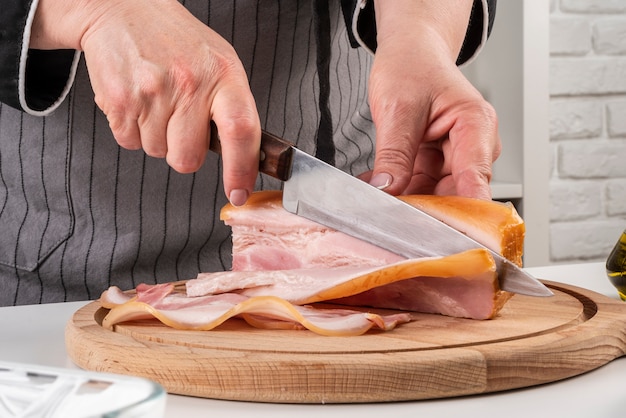
The Art of Slicing: Making the Most of Your Ham
Start by cutting around the bone to remove the ham from the bone. Then, cut slices about 1/4 inch thick, working from the outside in. You can slice the ham across the grain or with the grain, depending on your preference. Some people prefer slices that are more tender, while others prefer slices that are more firm. I typically slice across the grain for a more tender cut.
Once the ham is carved, you can arrange it on a platter and serve it with your favorite sides. I like to pair my ham with mashed potatoes, green beans, and a good dollop of mustard. But hey, you can get creative and experiment with different flavour combinations.
(Part 6) Storing Leftovers: Keeping the Goodness Alive
No one wants to see their hard work go to waste. Here are some tips for storing your leftover ham:
Refrigeration: The Coolest Way to Store
Store your leftover ham in an airtight container in the refrigerator for up to 4 days. You can also wrap it tightly in plastic wrap or aluminum foil. This will help to prevent the ham from drying out and keep it fresh.
Freezing: For When You Need a Ham Fix Later
If you have a lot of leftover ham, you can freeze it for up to 2 months. Wrap the ham tightly in plastic wrap and then aluminum foil. This will create a double layer of protection, preventing freezer burn and preserving the flavor. When you're ready to use it, thaw the ham in the refrigerator for a few days. Remember, thawing it in the refrigerator ensures that it thaws evenly and prevents the formation of bacteria.
(Part 7) Reheating Your Ham: A Second Act of Flavour
Don't worry, your leftover ham doesn't have to be boring! You can easily reheat it and enjoy it in a variety of ways.
Oven Reheating: A Classic Approach
Preheat your oven to 325°F (160°C). Place the ham in a roasting pan and cover it with foil. Cook for about 15 minutes, or until heated through. You can also add a little water to the bottom of the pan to keep the ham moist.
slow cooker: A Gentle and Delicious Method
If you have a slow cooker, you can use it to reheat your ham. Place the ham in the slow cooker and add a little water or broth. Cook on low heat for about 2-3 hours, or until heated through. This method is great for keeping the ham moist and tender.
Microwave: A Quick and Easy Solution
If you're short on time, you can reheat your ham in the microwave. Place the ham in a microwave-safe dish and cover it with plastic wrap. Microwave on high for 1-2 minutes, or until heated through. Be careful when removing the plastic wrap as it might be hot.
To prevent the ham from drying out in the microwave, you can add a tablespoon or two of water to the dish before reheating. This will help to create a moist environment and keep the ham juicy.
(Part 8) Beyond the Plate: Creative ham recipes
Now that you've mastered the art of cooking a ham, let's explore some exciting ways to put those leftovers to good use. Ham is incredibly versatile! It can be used in salads, sandwiches, soups, casseroles, and even pastries.
Ham and potato soup: A Creamy comfort food
This is a classic that never disappoints. You can use leftover ham and potatoes to make a hearty and flavorful soup. Just simmer the ham and potatoes in chicken broth with your favorite herbs and spices. You can add a touch of cream or milk for a richer, creamier texture.
ham and cheese quiche: A Savory and Satisfying Meal
For a more elegant take on ham, try making a ham and cheese quiche. It's a great way to use up leftover ham and make a crowd-pleasing meal. You can use a pre-made pie crust or make your own. Just mix together eggs, milk, cheese, and chopped ham, pour the mixture into the pie crust, and bake until set.
Ham Salad Sandwiches: A Simple and Delicious Snack
This is a go-to for a quick and easy lunch or snack. Simply chop up some leftover ham and combine it with mayonnaise, mustard, and your favorite vegetables. Serve on bread or crackers. Get creative with your fillings! Add some chopped celery, onion, or pickles for a bit of crunch. You can also use a different dressing, like a Dijon mustard vinaigrette, for a more sophisticated flavor.
Ham and Pineapple fried rice: A Fusion Delight
This dish brings together the sweet and savory flavors of ham and pineapple. Combine cooked rice, chopped ham, diced pineapple, and your favorite vegetables in a wok or large skillet. Stir-fry until heated through. Add a splash of soy sauce and a sprinkle of sesame seeds for extra flavor.
(Part 9) FAQs: Answering Your Ham Questions
You've got questions, I've got answers. Here are some common questions about cooking ham, and my solutions:
Table: Ham cooking faqs
| Question | Answer |
|---|---|
| What is the best way to cook a bone-in ham? | The best way to cook a bone-in ham is in the oven at a low temperature, around 325°F (160°C). This allows the ham to cook slowly and evenly, resulting in a tender and flavorful ham. |
| How long should I cook a bone-in ham? | The cooking time for a bone-in ham will vary depending on the size of the ham. As a general rule of thumb, cook the ham for 15-20 minutes per pound. Be sure to check the internal temperature of the ham with a meat thermometer to ensure it's cooked through. |
| How do I know if my ham is cooked? | The ham is cooked when the internal temperature reaches 145°F (63°C). You can use a meat thermometer to check the temperature. If the internal temperature is below 145°F (63°C), continue cooking the ham until it reaches the desired temperature. |
| Can I freeze leftover ham? | Yes, you can freeze leftover ham for up to 2 months. Wrap the ham tightly in plastic wrap and then aluminum foil. When you're ready to use it, thaw the ham in the refrigerator for a few days. |
| What are some creative ways to use leftover ham? | Ham is incredibly versatile! You can use it in salads, sandwiches, soups, casseroles, and even pastries. Try making a ham and potato soup, a ham and cheese quiche, or a ham salad sandwich. |
So there you have it, my comprehensive guide to cooking a bone-in ham to tender perfection! With these tips and tricks, you'll be serving up a winning ham that will impress your family and friends. Happy cooking!
Everyone is watching

Corn on the Cob: The Ultimate Guide to Perfectly Cooked Ears
Healthy MealsAh, corn on the cob. Just the name evokes images of sunny days, barbecues, and that sweet, juicy flavour that ...

Perfect Pork Roast Oven Cooking Time: A Guide to Delicious Results
Healthy MealsThere's something truly satisfying about a perfectly roasted pork. The aroma alone is enough to make your mout...

Ham Cooking Time: How Long to Bake, Smoke, or Boil a Delicious Ham
Healthy MealsAh, ham. It's a classic, isn't it? A real crowd-pleaser, especially around holidays. And when done right, it'...

Scallops: The Ultimate Guide to Perfect Cooking
Healthy MealsAh, scallops. Those delicate, sweet, and utterly delicious morsels of the sea. They hold a special place in my...

Spaghetti Squash: The Ultimate Guide to Cooking and Serving
Healthy MealsRemember that time you saw spaghetti squash at the supermarket, looking all bumpy and strange, and thought, "W...