There's something truly satisfying about a perfectly cooked pork chop. Juicy, tender, with a golden-brown crust, it's a meal that's both simple and delicious. But let's be honest, for years, I was a pork chop disaster. My attempts often resulted in dry, tough pieces of meat that were more of a chore to eat than a culinary delight. Then, I finally cracked the code, and now I'm sharing my secrets for achieving pork chop perfection every time.
Get ready to elevate your cooking game because this isn't just about a recipe – it's about understanding the fundamentals. We'll delve into the importance of choosing the right chops, mastering the art of pre-cooking prep, and conquering the cooking process from searing to resting. Let's get started!
Part 1: Choosing the Right pork chops

Finding the Right Cut for Success
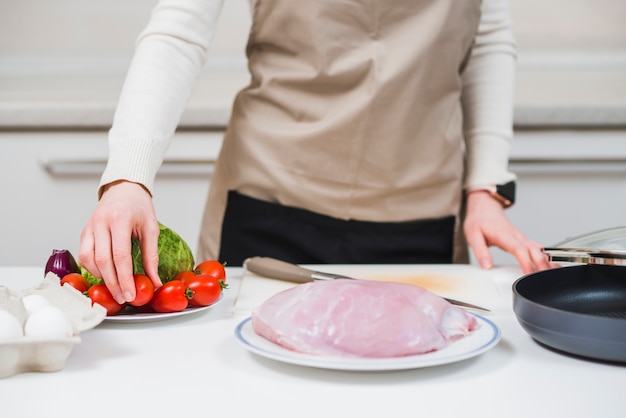
The first step to delicious pork chops is choosing the right cut. It's all about finding that sweet spot of thickness. I recommend aiming for chops that are about 1 inch thick. Anything thinner and they'll likely dry out in the pan, leaving you with a disappointing meal. Remember, we want juicy, succulent pork chops, not dry, tough ones.
Now, you have a choice: bone-in or boneless. I'm a bone-in fan all the way. They seem to hold onto flavour better, and they add a nice rustic touch to the dish. When you're at the butcher's, don't be shy; ask them to trim any excess fat. You want a nice, even layer of fat, but too much can make the chops greasy.
Recognizing the Signs of a Good Pork Chop
Now, let's talk about the pork chops themselves. You want to look for chops with a nice, even pink colour. Pay attention to marbling – those streaks of fat throughout the meat. Marbling is a good sign, as it adds flavour and helps keep the pork chops moist. Avoid any chops that look dry or have a grayish tinge. That’s a sign that they haven’t been properly handled.
If you're unsure, don't hesitate to ask the butcher for advice. They're the experts, and they're usually happy to help you find the perfect chops for your recipe.
Part 2: Prepping for Perfection: The Foundation of Great Pork Chops
Bringing Pork Chops to Room Temperature for Even Cooking
Once you’ve got your prize-winning pork chops, it's time to start prepping. This next step might seem insignificant, but letting your pork chops come to room temperature before cooking is a game-changer. Cold pork chops won't cook evenly, and they can end up tough and chewy.
Take those chops out of the fridge about 30 minutes before you plan to cook them. This gives them enough time to warm up, allowing them to cook more evenly. This leads to a more tender and juicy final product – the kind of result we're all aiming for.
Patting Dry: The Secret to Crispy Perfection
Next, pat the pork chops dry with paper towels. This step is crucial. It helps prevent the meat from steaming in the pan, which can lead to a soggy finish. We want those chops to get crispy on the outside, not soft and mushy.
A little bit of moisture can make a big difference. So, when you're patting those chops, ensure they're completely dry. It’s all about achieving that perfect balance of crispiness and tenderness.
Part 3: Mastering the Art of Seasoning
Salt and Pepper: The Foundation of Flavour
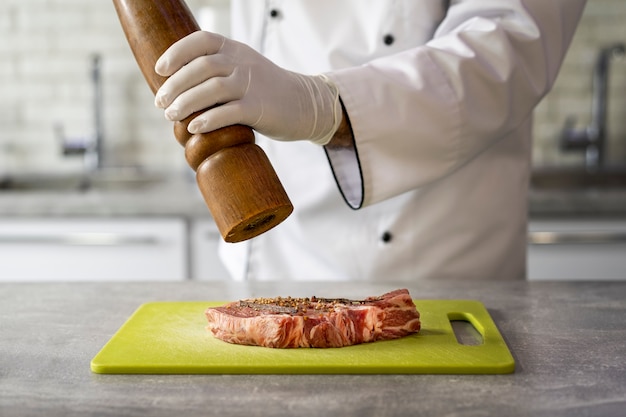
Seasoning is everything. And when it comes to pork chops, a simple salt and pepper blend is all you need. Don’t be afraid to use a generous amount of salt. Salt helps season the meat and draw out moisture, creating a more flavorful and juicy result.
Remember, you can always add more salt later, but it's tough to remove it once it's in there. So, don’t be shy with the salt shaker! Let your taste buds be your guide.
Adding a Touch of Spice for a Personal Touch
But hey, if you're feeling adventurous, you can always add a little something extra to your seasoning game. I love a sprinkle of garlic powder, onion powder, or paprika.
Don’t be afraid to experiment with different herbs and spices. You can also use pre-made seasoning blends. Just make sure they don't contain any salt so you don't overdo it. Ultimately, it’s about creating a flavor profile that you enjoy.
Part 4: The Art of Searing: Achieving a Golden-Brown Crust
The Key to Crispy Perfection: A Smoking Hot Pan
Now comes the moment of truth – the sear. Searing is crucial for achieving that beautiful, golden-brown crust and locking in flavor. It’s all about creating a delicious caramelization on the outside of the pork chops.
To get the best sear, make sure your pan is hot. I’m talking smoking hot. Use a cast iron pan if you have one, as it holds heat exceptionally well.
The perfect sear: Technique and Timing
Heat the pan over medium-high heat until it’s smoking hot. Then, add a tablespoon or two of oil, and let it heat up.
Carefully place the pork chops in the hot pan, making sure they have enough space so they cook evenly. Don’t crowd the pan, or the temperature will drop, and you won’t get that glorious sear.
Cook the chops for 3-4 minutes per side, or until they’re nicely browned and crispy. Don't touch them while they're cooking! Let them sear undisturbed to create a beautiful, crispy crust.
Flipping for Even Cooking
Once the first side is beautifully browned, carefully flip the chops over and sear the other side. Make sure to cook them evenly, so they’re golden brown on all sides.
This is where experience comes in. You'll learn to tell by the sound and the appearance of the chops when they're ready to flip. It's like music to your ears!
Part 5: Cooking to Perfection: Ensuring Safety and Tenderness
Monitoring the Temperature: The Importance of a meat thermometer
Now, it's time to cook the pork chops through. For this step, you want to lower the heat to medium-low. We don’t want to overcook those lovely pork chops, and a lower heat helps keep them juicy.
To ensure they’re cooked to perfection, use a meat thermometer. You want the internal temperature to reach 145°F (63°C). That’s the magic number for safe and delicious pork chops.
Timing is Key: Knowing When to Stop
The cooking time will vary depending on the thickness of your chops. For a 1-inch thick chop, you can expect to cook it for about 5-7 minutes per side, but check the internal temperature to make sure.
I always err on the side of undercooking. You can always pop them back in the pan for a minute or two if they need a little more time. But you can’t undo overcooking!
Part 6: Resting for Juiciness: The Secret to Tender Pork Chops
Letting the Chops Retain Their Moisture
Once the pork chops are cooked through, don't rush to serve them right away. Let them rest for 5-10 minutes before slicing and serving. This is a critical step! It allows the juices to redistribute throughout the meat, making them incredibly tender and juicy.
Cover the chops loosely with foil to keep them warm and let the juices redistribute. Resist the temptation to cut into them immediately! It's a tough test of patience, but trust me, it's worth it. You'll be rewarded with the most succulent, flavorful pork chops you've ever tasted.
Part 7: Serving Up Your Pork Chop Masterpiece: The Finishing Touches
Choosing the Perfect Accompaniments
And there you have it – perfectly tender, juicy pork chops. Now it's time to create the ultimate meal. I love to pair my pork chops with a simple side dish like roasted vegetables, creamy mashed potatoes, or a fresh green salad.
The possibilities are endless! And you can use your imagination to choose the perfect sides that complement your pork chops.
Adding a Finishing Touch: The Power of Sauces
If you want to take your pork chops to the next level, try adding a sauce or glaze. I love a simple pan sauce made with the juices from the pan, a little butter, and some herbs.
You can also use a store-bought glaze or make your own with ingredients like honey, mustard, or maple syrup. The options are endless, and a delicious sauce will elevate your pork chops even further.
Part 8: Tips and Tricks for Pork Chop Perfection
Using a Thermometer: The Most Reliable Tool
Always use a meat thermometer to ensure your pork chops are cooked to the proper internal temperature. This is the most reliable way to guarantee they're safe to eat and perfectly cooked. It’s an investment that will last you a lifetime in the kitchen.
Don’t Overcrowd the Pan: Giving Chops Space to Shine
When searing your pork chops, make sure they have enough space in the pan. Overcrowding the pan will lower the temperature, preventing a nice sear and leading to uneven cooking. It’s all about giving each chop its own space to shine.
Resting is Key: The Patience Pays Off
Remember to let your pork chops rest for at least 5 minutes after cooking. This will allow the juices to redistribute and make them incredibly tender and juicy. Don’t rush the process! Patience is a virtue in the kitchen.
Experiment with Flavours: Discover Your Perfect Combination
Don’t be afraid to experiment with different seasonings and marinades. From herbs to spices to citrus marinades, you can add a burst of flavour to your pork chops. It’s all about exploring and discovering what you like best.
Part 9: pork chop faqs: Answers to Your Burning Questions
Q1: What happens if I overcook my pork chops?
overcooked pork chops will be dry, tough, and less flavorful. You’ll end up with a disappointing meal. That’s why using a meat thermometer and monitoring the internal temperature is so important.
Q2: How can I tell if my pork chops are done?
The best way to tell if your pork chops are done is to use a meat thermometer. The internal temperature should reach 145°F (63°C).
You can also check the chops for doneness by gently pressing on the center of the thickest part. The meat should feel firm but not hard. If it feels squishy, it needs a little more time.
Q3: How do I make a pan sauce?
To make a pan sauce, simply deglaze the pan with a little wine or broth. Then, add some butter, herbs, and a squeeze of lemon juice. Whisk everything together until it's a smooth, glossy sauce.
Q4: Can I freeze pork chops?
Yes, you can freeze pork chops. Place them in a freezer-safe bag and remove as much air as possible. Frozen pork chops can last in the freezer for up to 3-4 months. Thaw them in the refrigerator overnight before cooking.
Q5: What are some other ways to cook pork chops?
Besides pan-frying, you can also bake, grill, or roast pork chops. Each method has its own advantages and disadvantages. Experiment and see what works best for you.
Part 10: The Joy of Pork Chop Perfection: Embracing the Journey
And there you have it. The secret to cooking perfectly tender, juicy pork chops every time. It all comes down to choosing the right cuts, prepping them properly, searing them to perfection, and cooking them to the right temperature.
I’ve come a long way from those dry and tough pork chops of my past. Now, I'm confident I can make a pork chop that’s both delicious and tender. And you can too! It’s a skill you’ll master with time and practice.
So, go ahead, pick up some pork chops, put on your apron, and get cooking. You’ve got this!
Everyone is watching

Corn on the Cob: The Ultimate Guide to Perfectly Cooked Ears
Healthy MealsAh, corn on the cob. Just the name evokes images of sunny days, barbecues, and that sweet, juicy flavour that ...

Perfect Pork Roast Oven Cooking Time: A Guide to Delicious Results
Healthy MealsThere's something truly satisfying about a perfectly roasted pork. The aroma alone is enough to make your mout...

Ham Cooking Time: How Long to Bake, Smoke, or Boil a Delicious Ham
Healthy MealsAh, ham. It's a classic, isn't it? A real crowd-pleaser, especially around holidays. And when done right, it'...

Scallops: The Ultimate Guide to Perfect Cooking
Healthy MealsAh, scallops. Those delicate, sweet, and utterly delicious morsels of the sea. They hold a special place in my...

Spaghetti Squash: The Ultimate Guide to Cooking and Serving
Healthy MealsRemember that time you saw spaghetti squash at the supermarket, looking all bumpy and strange, and thought, "W...