(Part 1) Choosing the perfect brisket

1. Flat vs. Point: Which Side Should You Choose?
Brisket typically comes in two main parts: the flat and the point. The flat is leaner and more rectangular, ideal if you're looking for a less fatty option. It's also a bit more forgiving in terms of cooking, as it's less prone to drying out. The point is thicker and more rounded, boasting a higher fat content. This fat renders down during cooking, giving the point a rich, deep flavour and incredible tenderness.Personally, I adore the point for its luscious flavour and melt-in-your-mouth texture. But ultimately, it's a matter of personal preference. If you're aiming for a leaner cut, the flat is a great choice. If you're after a richer, more decadent flavour, go for the point.
2. Size Matters: Choosing the Right Brisket for Your Needs
When it comes to size, consider how many people you'll be feeding. A 3-4 pound brisket is perfect for a smaller gathering, serving about 4-6 people. A 6-8 pound brisket is ideal for a larger crowd, comfortably feeding 8-12 people.3. Marbling: A Sign of Brisket Goodness
Marbling is a key indicator of a good brisket. Look for a brisket with good marbling, meaning there's a good amount of fat interspersed with the lean meat. This fat will render down during cooking, creating that mouthwatering tenderness and rich flavour that defines a perfect brisket.(Part 2) Trimming the Brisket: A Little TLC Before the Oven

1. Removing Excess Fat: A Balancing Act
Start by removing any excess fat from the brisket. I typically trim off the thickest layer of fat, leaving about a 1/4-inch layer on the brisket. This layer of fat will help keep the brisket moist during cooking and add a wonderful depth of flavour.2. Conquering the Silver Skin: A Crucial Step
Next, you'll need to tackle the silver skin, a thin, tough membrane that can be chewy and unpleasant if left on. You can remove it using a sharp knife or a paring knife. Simply score the silver skin in a few places, then pull it off using your fingers.If you find it difficult to remove the silver skin, you can use a paper towel to grip it and help you pull it off. The key is to be patient and persistent. A little effort now will be rewarded with a much more tender and enjoyable brisket.
(Part 3) Creating the Perfect brisket rub: Flavor from the Start

1. My Favourite brisket rub recipe: A Symphony of Flavours
This rub is all about creating a balanced flavour profile that enhances the natural flavour of the brisket without overpowering it.
- 1 cup brown sugar: Provides sweetness and helps create a beautiful caramelized crust.
- 1/2 cup smoked paprika: Adds a smoky depth and a vibrant red hue.
- 1/4 cup garlic powder: Contributes a savory and aromatic punch.
- 1/4 cup onion powder: Adds another layer of savory flavour and a hint of sweetness.
- 2 tablespoons kosher salt: Enhances the natural flavours of the meat and helps to draw out moisture.
- 1 tablespoon black pepper: Provides a subtle peppery kick.
- 1 tablespoon chili powder: Adds a touch of warmth and complexity.
- 1 teaspoon cayenne pepper (optional): For those who like a bit of heat, cayenne adds a pleasant kick.
(Part 4) Cooking the Brisket in the Oven: Low and Slow for Tenderness
Finally, the moment of truth: It's time to cook the brisket. I always cook my brisket in the oven, using a low and slow method that guarantees a tender and juicy result.1. Setting the Stage: The Power of Low Temperature
Preheat your oven to 275 degrees Fahrenheit (135 degrees Celsius). This low temperature is key for a successful brisket. It allows the fat to render down slowly and the meat to break down, creating that irresistible tenderness we all crave.2. The Time is Right: How Long to Cook Your Brisket
The cooking time will depend on the size of your brisket. A 3-4 pound brisket will take about 6-8 hours. A 6-8 pound brisket will take about 8-10 hours.3. Keeping Things Moist: The Importance of Water
To keep the brisket moist during cooking, I use a dutch oven. It traps moisture and heat, ensuring even cooking. You can also use a roasting pan, but make sure to add a cup of water to the bottom of the pan. This will create steam and help prevent the brisket from drying out.4. Maintaining Moisture: The Importance of Checking and Adding Water
Check the brisket every hour or so and add more water to the pan if needed. You want the water to be simmering, not boiling.(Part 5) Checking for Doneness: Knowing When It's Ready
After several hours of slow cooking, it's time to start checking for doneness. The best way to do this is by using a meat thermometer.1. The Thermometer Test: A Reliable Guide
Insert the thermometer into the thickest part of the brisket, ensuring it doesn't touch any bone. The brisket is done when it reaches an internal temperature of 195-205 degrees Fahrenheit (90-96 degrees Celsius).2. The Jiggle Test: A Hands-on Approach
You can also use the "jiggle test" to check for doneness. Gently press on the brisket with your fingers. It should feel very tender and jiggle slightly. If it feels firm, it needs more time in the oven.(Part 6) Resting the Brisket: Letting the Flavours Bloom
Once the brisket is done, resist the temptation to slice it immediately. Let it rest for at least 30 minutes before slicing. This crucial step allows the juices to redistribute throughout the meat, ensuring a juicy and flavourful brisket.1. Wrapping the Brisket: Trapping the Goodness
Wrap the brisket tightly in aluminum foil and place it in a cooler or insulated container to keep it warm. The foil traps the heat and moisture, preventing the brisket from drying out and ensuring it stays tender.2. The Science Behind Resting: Letting the Muscle Relax
Resting the brisket allows the muscle fibres to relax, making the brisket even more tender. The juices also redistribute, resulting in a more even distribution of flavour. It's a simple step, but it makes a world of difference in the final result.(Part 7) Slicing the Brisket: Unlocking the Tenderness
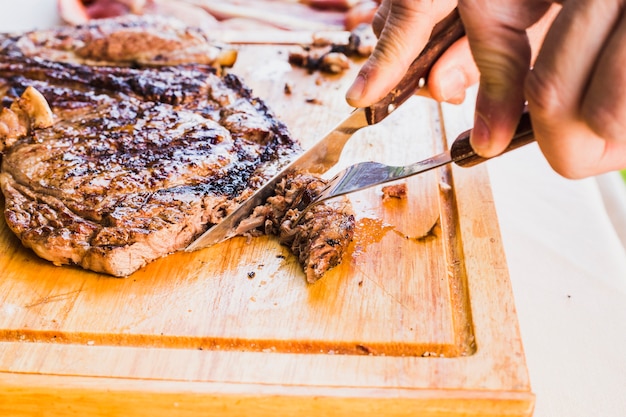
After the brisket has rested, it's time for the grand finale: slicing. I like to use a sharp knife and slice against the grain. This helps to make the brisket even more tender and easier to chew.1. Slicing Against the Grain: A Key to Tenderness
To slice against the grain, look for the direction of the muscle fibres. You want to cut perpendicular to the fibres. This breaks down the muscle fibres, making the meat incredibly tender.2. Serving the Brisket: A Feast for the Senses
Serve the brisket with your favourite sides, such as mashed potatoes, mac and cheese, baked beans, or coleslaw. You can also top it with a delicious barbecue sauce, a tangy vinegar-based sauce, or a spicy chipotle sauce.Let the aroma of the smoked brisket fill the air as you gather your loved ones around the table. This is a meal that's meant to be shared, savoured, and enjoyed.
(Part 8) Storing Leftovers: Keeping the Flavour Alive
If you have any leftover brisket, it's a good problem to have! You can store it in the refrigerator for up to 3 days. Simply wrap it tightly in plastic wrap and aluminum foil. You can also freeze leftover brisket for up to 3 months.1. Reheating Leftovers: Bringing Back the Magic
To reheat leftover brisket, simply place it in a preheated oven at 275 degrees Fahrenheit (135 degrees Celsius) for about 30 minutes. You can also reheat brisket in the microwave, but it might lose some of its tenderness.Reheated brisket is perfect for sandwiches, salads, or even a simple bowl of brisket and rice. It's a delicious way to enjoy the flavours of your slow-cooked brisket for days to come.
FAQs
1. What if my brisket is too fatty?
If your brisket has a thick layer of fat, you can trim off some of it before cooking. Just be sure to leave a thin layer of fat to help keep the brisket moist.2. How do I know when my brisket is done?
The best way to know when your brisket is done is by using a meat thermometer. The brisket is done when it reaches an internal temperature of 195-205 degrees Fahrenheit (90-96 degrees Celsius). You can also use the "jiggle test" to check for doneness.3. What if my brisket is dry?
If your brisket is dry, you can try adding more liquid to the pan during cooking. You can also add a cup of beef broth or apple cider vinegar to the pan. If your brisket is already dry, you can try braising it in a liquid to rehydrate it.4. What kind of sauce should I use on my brisket?
The best sauce for your brisket will depend on your personal preference. Some popular options include barbecue sauce, vinegar-based sauce, and horseradish sauce.5. What are some good side dishes to serve with brisket?
Some classic side dishes to serve with brisket include mashed potatoes, mac and cheese, baked beans, coleslaw, and cornbread. You can also serve it with roasted vegetables, like carrots, potatoes, or onions.Conclusion
Cooking a brisket is a journey of flavour and patience. By following these steps, you'll be able to create a tender, juicy, and flavourful brisket that will impress your friends and family. So, what are you waiting for? Get out there, grab a brisket, and let the slow cooking magic begin!Everyone is watching

Corn on the Cob: The Ultimate Guide to Perfectly Cooked Ears
Healthy MealsAh, corn on the cob. Just the name evokes images of sunny days, barbecues, and that sweet, juicy flavour that ...

Scallops: The Ultimate Guide to Perfect Cooking
Healthy MealsAh, scallops. Those delicate, sweet, and utterly delicious morsels of the sea. They hold a special place in my...

Spaghetti Squash: The Ultimate Guide to Cooking and Serving
Healthy MealsRemember that time you saw spaghetti squash at the supermarket, looking all bumpy and strange, and thought, "W...

Salmon Cooking Times: Perfect Guide for Every Recipe
Healthy MealsLet me tell you, cooking salmon is an art form. It's all about getting that perfect balance: juicy and tender,...

Ham Cooking Time: How Long to Bake, Smoke, or Boil a Delicious Ham
Healthy MealsAh, ham. It's a classic, isn't it? A real crowd-pleaser, especially around holidays. And when done right, it'...
