Ah, the Sunday roast. There's nothing quite like the aroma of a perfectly roasted chicken wafting through the house, promising a delicious meal and a cozy gathering. But let's be honest, sometimes that perfect roast can feel a little daunting. How long do you cook it? What temperature should the oven be? Will it be juicy and flavorful, or dry and disappointing? Fear not, my friends! Over the years, I've roasted countless chickens, learned from my mistakes, and perfected my technique. Now, I'm going to share all my secrets with you, from selecting the right bird to carving it like a pro. Let's get cooking!
(Part 1) The Right Bird for the Job: Choosing Your Weapon
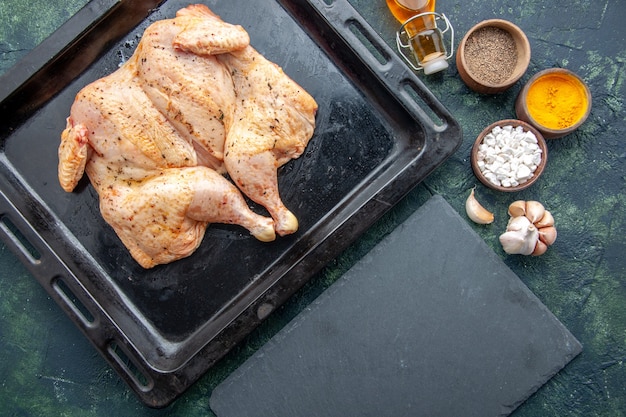
The first step to a delicious roast chicken is choosing the right bird. For a family of four, a 4-pound chicken is a perfect size. Now, I'm a firm believer in free-range, organic chickens whenever possible. They have a richer flavor and a more tender texture, in my opinion. You can usually find these beauties at your local butcher or farmers market. When selecting your chicken, look for one with plump breasts and legs, and avoid any that have a strong odor or a slimy feel. Trust your senses! If you can, ask your butcher to spatchcock the chicken for you – it flattens the bird, allowing it to cook more evenly.
Choosing Your Chicken: A Few Things to Keep in Mind
Before you grab that bird, here are a few key things to remember:
- Freshness is Key: You want a chicken that has been properly stored and has a bright, fresh appearance. You can tell if the chicken is fresh by looking at the color of the skin. It should be a light yellow color and free of any discoloration or bruising.
- Look for a Plump Bird: A plump bird means that the chicken has been well-fed and will have a more flavorful, juicy taste. Look for a chicken with full breasts and legs.
- Avoid Anything Slimy: A slimy feel is a sign that the chicken has gone bad. Pass on that one and find another.
(Part 2) Preparing Your Chicken for Roasting: Setting the Stage
You've got your bird, now it's time to get it ready for the oven. There are a few simple steps you can take to ensure your chicken is juicy, flavorful, and cooked to perfection.
Preparing the Chicken: A Step-by-Step Guide
Follow these steps for a perfectly prepped chicken:
- Pat it Dry: The first step is to pat the chicken dry with paper towels. This will help the skin to crisp up nicely in the oven. Think of it as getting rid of any excess moisture that could prevent that crispy skin we all crave.
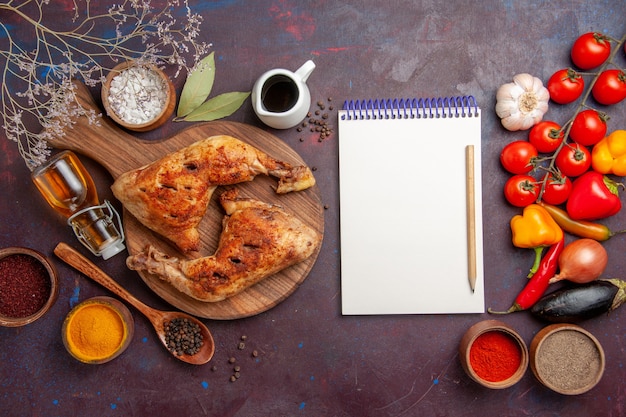
- Season It with Salt and Pepper: Next, season the chicken generously with salt and pepper. You can use your favorite blend of herbs and spices as well, but don't overdo it – let the natural flavor of the chicken shine through. I personally love a simple sprinkle of rosemary and thyme.
- Stuff the Cavity (Optional): If you're feeling fancy, you can stuff the cavity of the chicken with herbs, lemon slices, or vegetables. I love to use a mix of rosemary, thyme, and garlic. Just make sure not to overstuff the cavity, as this can prevent the chicken from cooking evenly.
- Tie the Legs Together: To help the chicken cook evenly, tie the legs together with kitchen twine. This will help to keep the legs from drying out, ensuring they are just as juicy as the rest of the bird.
- Roast it on a Rack: The best way to roast a chicken is on a rack placed over a baking sheet. This will allow the air to circulate around the chicken, which will help it to cook evenly. If you don’t have a roasting rack, you can place the chicken on a bed of vegetables like carrots, celery, and onions. They’ll add flavor and moisture as the chicken cooks.
(Part 3) roasting time: Finding the Sweet Spot
Here comes the moment of truth: figuring out how long to roast your chicken. There are a lot of different opinions on this, but I've found that the best way to get a perfectly cooked chicken is to use a meat thermometer. It's your best friend in the kitchen, guaranteeing you don't overcook or undercook your bird.
Using a Meat Thermometer for Perfect Results
When using a meat thermometer, you should aim for an internal temperature of 165 degrees Fahrenheit (74 degrees Celsius) in the thickest part of the thigh. This ensures the chicken is cooked through and safe to eat.
Estimating the Roasting Time
If you don't have a meat thermometer, you can estimate the roasting time based on the weight of your chicken. A good rule of thumb is to roast a 4-pound chicken for about 1 hour and 15 minutes at 350 degrees fahrenheit (175 degrees Celsius). But remember, this is just a guideline. It's always best to use a meat thermometer to be certain.
(Part 4) The Art of Roasting: Tips and Tricks
Roasting a chicken might seem simple, but there are a few tricks I've learned over the years that can elevate your roast to a whole new level of deliciousness.
Tips for a Juicy and crispy chicken:
- Start it Hot, Finish it Low: I like to start my chicken in a hot oven at 425 degrees Fahrenheit (220 degrees Celsius) for 15 minutes to get the skin nice and crispy. Then I reduce the temperature to 350 degrees Fahrenheit (175 degrees Celsius) and continue roasting until the chicken is cooked through. This technique helps to ensure that the chicken is juicy and the skin is crispy. That golden-brown, crispy skin is the best part, right?
- Basting for Extra Moisture: Basting your chicken with pan juices or melted butter during roasting can help to keep it moist and flavorful. If you are feeling fancy, you can even make a pan sauce with the drippings. This is the secret to a flavorful, rich sauce that elevates your roast to gourmet status.
- Let it Rest: After the chicken is cooked, let it rest for 10-15 minutes before carving. This will allow the juices to redistribute, ensuring that the chicken is nice and tender. It's a simple trick that makes a huge difference.
(Part 5) Signs Your Chicken is Done: A Visual Guide
Besides using a meat thermometer, there are a few other signs that your chicken is cooked through and ready to eat. Keep an eye out for these visual cues:
Visual Cues for chicken doneness:
- The skin is golden brown and crispy: The skin of a cooked chicken should be a beautiful golden brown color and should be crispy to the touch. This is a sign that the chicken has cooked properly and is ready to enjoy.
- The juices run clear: When you cut into the thickest part of the thigh, the juices should run clear, not pink. This is a sure sign that the chicken is cooked through.
- The chicken is no longer pink: The chicken should be cooked all the way through and should not be pink in the center. If there's any pink, it needs a little more time in the oven.
(Part 6) Making the Most of Your Roasted Chicken
You’ve got a delicious roasted chicken – congratulations! Now, it’s time to enjoy it! Here are a few ideas to make the most of your hard work:
Delicious Ways to Enjoy Your Roasted Chicken
- Serve it with roasted vegetables: A classic pairing for roasted chicken is roasted vegetables. Try roasting potatoes, carrots, onions, or asparagus. The flavors of the chicken and vegetables will meld beautifully, creating a symphony of tastes.
- Make a salad: A fresh salad is the perfect accompaniment to a hearty roast chicken dinner. I love a simple salad with mixed greens, tomatoes, and a vinaigrette dressing. It adds a touch of freshness and balances out the richness of the chicken.
- Make chicken sandwiches: leftover roast chicken is great for sandwiches. You can add your favorite toppings, such as lettuce, tomato, and mayonnaise. It's a delicious and convenient way to use up the leftover chicken.
- Make chicken soup: If you have a lot of leftover chicken, you can make a delicious chicken soup. Just shred the chicken and add it to a broth with your favorite vegetables. It's a heartwarming and comforting way to use up any leftover chicken.
(Part 7) Chicken Roasting Essentials: What You Need
To get started, you’ll need a few essential tools. Don’t worry, you probably already have most of them in your kitchen!
Must-Have Kitchen Items for roasting chicken:
- A roasting pan: This is a large, shallow pan with a rack that is designed for roasting chickens. You can find these at most kitchen stores.
- A meat thermometer: A meat thermometer is essential for ensuring that your chicken is cooked through. There are a variety of thermometers available, so choose one that fits your needs and budget.
- Kitchen twine: You can use this to tie the legs of the chicken together so that it cooks more evenly. You can find kitchen twine at most grocery stores.
- A sharp knife: You will need a sharp knife for carving the chicken after it is cooked. A good quality chef's knife is perfect for this task.
(Part 8) The Art of Carving: A Step-by-Step Guide
Once your chicken has rested, it’s time to carve it. This is your moment to shine! Impress your guests with your carving skills.
Carving a Roasted Chicken Like a Pro:
- Remove the wings: Start by removing the wings by cutting through the joint where the wing meets the breast. This will give you a clean cut and ensure you don't tear the meat.
- Separate the legs: Cut through the joint where the leg meets the body to separate the legs. This joint is easy to identify and will make separating the legs a breeze.
- Slice the breasts: Cut the breasts into slices, working across the grain of the meat. This will ensure that the meat is tender and easy to eat.
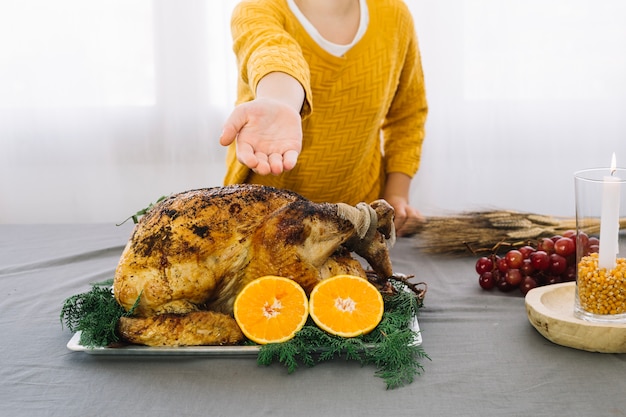
- Serve and enjoy: Arrange the chicken pieces on a platter and serve with your favorite sides. Now, it's time to enjoy the fruits of your labor!
FAQs (Frequently Asked Questions)
You’ve got questions, I’ve got answers! Let’s get to it.
1. What if I don’t have a meat thermometer?
If you don't have a meat thermometer, you can estimate the cooking time based on the weight of your chicken. A good rule of thumb is to roast a 4-pound chicken for about 1 hour and 15 minutes at 350 degrees Fahrenheit (175 degrees Celsius). You can also check the chicken for doneness by inserting a fork into the thickest part of the thigh. If the juices run clear, the chicken is cooked through. But remember, this method is not as reliable as using a meat thermometer.
2. How do I know if my chicken is overcooked?
Overcooked chicken will be dry and tough. The skin will be very crispy and may even be burned. You can also tell if your chicken is overcooked by the juices. If the juices run pink, the chicken is not cooked through. If you're unsure, it's always better to err on the side of caution and cook it a little longer.
3. Can I use a different kind of chicken?
You can use a different size of chicken, just adjust the cooking time accordingly. For example, if you are using a 3-pound chicken, you will need to cook it for about 45 minutes to 1 hour. If you are using a 5-pound chicken, you will need to cook it for about 1 hour and 30 minutes to 1 hour and 45 minutes. The key is to adjust the cooking time based on the weight of the bird.
4. What if I don’t have a roasting rack?
If you don’t have a roasting rack, you can place the chicken on a bed of vegetables like carrots, celery, and onions. This will help to keep the chicken moist and flavorful. The vegetables will also absorb the chicken drippings and create a delicious sauce.
5. What can I do with leftover roast chicken?
Leftover roast chicken is a great way to make a quick and easy meal. You can use it to make sandwiches, salads, soups, or even tacos. Get creative and experiment with different flavors!
(Part 9) My Roast Chicken Journey: A Personal Touch
Roasting a chicken is more than just a recipe; it's a journey. It's about the warmth of a home-cooked meal, the aroma of herbs and spices filling the air, and the satisfaction of creating something delicious from scratch. I’ve learned a lot over the years, from my early missteps to mastering the art of the perfect roast. I remember my first attempt at roasting a chicken, back when I was just starting out in the kitchen. I was so excited to try this new dish, but I didn't have a meat thermometer and I wasn't sure how long to cook it. The result? A dry and rubbery chicken that no one wanted to eat. But I didn’t give up! I researched different techniques, watched cooking videos, and finally found the method that worked best for me. Now, whenever I roast a chicken, I feel a sense of accomplishment. It's a reminder that even with practice and patience, you can achieve delicious results.
(Part 10) Embrace the Journey, Enjoy the Results
Roasting a chicken is a simple yet rewarding task. It's a chance to connect with your kitchen, experiment with flavors, and create a delicious meal that everyone will enjoy. Whether you're a seasoned chef or a novice cook, embrace the journey. Don't be afraid to try new things and learn from your experiences. The key is to have fun and enjoy the process. And remember, even if it doesn't turn out perfect the first time, you can always try again!
So, go ahead, grab that chicken, and let the roasting begin! Happy cooking!
Everyone is watching

Corn on the Cob: The Ultimate Guide to Perfectly Cooked Ears
Healthy MealsAh, corn on the cob. Just the name evokes images of sunny days, barbecues, and that sweet, juicy flavour that ...

Perfect Pork Roast Oven Cooking Time: A Guide to Delicious Results
Healthy MealsThere's something truly satisfying about a perfectly roasted pork. The aroma alone is enough to make your mout...

Ham Cooking Time: How Long to Bake, Smoke, or Boil a Delicious Ham
Healthy MealsAh, ham. It's a classic, isn't it? A real crowd-pleaser, especially around holidays. And when done right, it'...

Scallops: The Ultimate Guide to Perfect Cooking
Healthy MealsAh, scallops. Those delicate, sweet, and utterly delicious morsels of the sea. They hold a special place in my...

Spaghetti Squash: The Ultimate Guide to Cooking and Serving
Healthy MealsRemember that time you saw spaghetti squash at the supermarket, looking all bumpy and strange, and thought, "W...