Ah, roast chicken. It's a dish that brings back memories of family dinners, Sunday lunches, and those comforting aromas that fill the kitchen. But getting it absolutely perfect takes a little more than just throwing a chicken in the oven. It’s about knowing your bird, mastering the art of seasoning, and understanding the delicate dance between heat and time.
I’ve been cooking roast chicken for years, and I’ve learned a thing or two along the way. Today, I’m sharing my secrets, the tips and tricks I’ve picked up, and a few essential guidelines that will help you create the most succulent, crispy-skinned, flavour-packed roast chicken you’ve ever tasted.
(Part 1) The Big Picture: Choosing Your Bird

The foundation of any good roast chicken is, of course, a good bird. This is where your journey to perfection begins. You need a plump, free-range chicken, preferably with a bit of age on it. That age, you see, gives you a beautiful balance of fat and lean meat, resulting in that succulent, melt-in-your-mouth texture we all crave. It's like the chicken has been patiently waiting for this moment, ready to be transformed into a culinary masterpiece.
The Size Matters
Now, the size of your bird is crucial. It determines the roasting time, so you need to get it right. A 1.5kg chicken is perfect for a small family or a romantic dinner for two. But if you’re feeding a larger group, a 2.5kg bird will do the trick. I always recommend weighing your bird before you start so you can plan your cooking time accordingly. It's like a little pre-game strategy for your culinary adventure.
The Visual Check: A First Impression
Before you bring your chosen bird home, take a moment to inspect it. You want a chicken that's firm to the touch, not spongy. The skin should have a good, even colour, free of any discolouration. This visual check ensures you're getting a fresh bird, ready to be roasted to perfection.
Don't Be Afraid to Truss!
Now, let's talk about trussing. It's a step that some people might skip, but trust me, it's a game-changer. Trussing keeps the chicken compact, ensuring even cooking and preventing the legs from drying out. It’s like giving your bird a little hug, ensuring it stays warm and cozy during the roasting process. I prefer using kitchen twine. It's simple and effective. Tie a piece of twine around the legs, then another around the wings. This keeps everything nice and neat, giving your chicken a polished, ready-for-the-oven look.
(Part 2) The Secret Sauce: Prepping Your Chicken

Your chicken is trussed and looking its best. Now it’s time for the prep, the art of bringing out its natural flavours. It's not about rushing things; it's about taking your time and giving your bird the attention it deserves. This is where you truly begin to transform a simple chicken into something extraordinary.
Seasoning With Savour
Salt and pepper are your foundation. I like to season my chicken generously, both inside and out. Don’t be shy with the salt! It actually helps to draw out moisture from the chicken, resulting in a juicier bird. Think of it as a little culinary magic trick.
Now, for the flavour, I often add some herbs like rosemary or thyme. You could even try a little bit of paprika or garlic powder for an extra kick. Don’t forget about the cavity! Stuff it with some lemon wedges, garlic cloves, or herbs for a burst of flavour that will permeate the chicken as it cooks. It's like a secret message hidden inside, ready to be revealed as you carve and serve.
The Beauty of Brining
Now, let’s talk about brining. It's a bit of a game changer when it comes to roasting chicken. It’s all about submerging your chicken in a salt water solution for a few hours. This allows the salt to penetrate the meat, season it deeply, and lock in moisture. The result? A chicken that's incredibly juicy and tender. It's like giving your bird a spa treatment, ensuring it comes out feeling refreshed and plump.
I use a simple brining solution of salt, water, and a touch of sugar. Let the chicken soak in the brine for at least 2 hours, but ideally 4-6 hours. It's definitely worth the effort, especially if you're aiming for that melt-in-your-mouth perfection.
(Part 3) Oven-Ready: Getting Your Bird In the Oven

Your chicken is prepped and seasoned, ready to be transformed by the heat of the oven. It's like sending a masterpiece to the kiln, ready to be fired into something truly remarkable.
Heat Matters
Start by preheating your oven to 190°C (375°F). You want that oven nice and hot to create a crispy skin. It's a subtle dance between heat and time, ensuring the skin gets that golden brown crispness while the inside stays juicy and tender. Now, some people swear by high heat for the first 30 minutes, then lowering the temperature for the rest of the cooking time. I find that works well too. But even with a hot oven, it's important to give the chicken time to cook properly. It's not a quick fix!
The Right Position
Place your chicken in a roasting pan, breast side up. Now, here's a tip: put a rack in the bottom of the pan. This allows the heat to circulate evenly around the chicken and helps to prevent it from steaming in its own juices. Think of it as a little pedestal for your chicken, allowing the heat to caress it evenly.
And for extra moisture, you can add a cup of water or broth to the bottom of the pan. This will create steam, which keeps the chicken from drying out. It's like a miniature steam bath for your bird, ensuring it stays juicy and tender throughout the roasting process.
Keeping an Eye on Things
Now, you want to keep an eye on your chicken while it's roasting. Don't just leave it to its own devices! Use a meat thermometer to check the internal temperature. It should reach at least 74°C (165°F) in the thickest part of the thigh. This is the best way to ensure that your chicken is cooked thoroughly and safe to eat. Avoid overcooking! You want a juicy, tender bird, not a dry, tough chicken.
(Part 4) The Resting Stage: Patience is Key
You've waited patiently, the chicken is cooked through, and now it's time for a moment of quiet reflection. Don't rush to carve it right away! Let the chicken rest for about 10-15 minutes before carving. This allows the juices to redistribute throughout the meat, resulting in a much juicier chicken. It's like giving your bird a little break to recover from its roasting journey, allowing the flavours to mellow and harmonize.
The Carving Ceremony
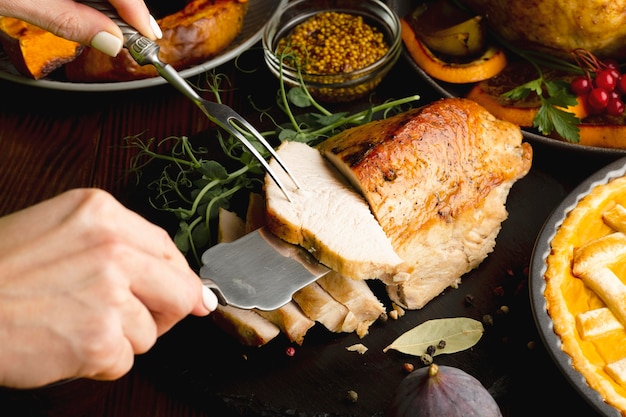
Now, the moment of truth! Carve your chicken. It's best to carve it on a cutting board. Cut down the centre of the breast bone and then slice the meat off the bone. You can also carve the legs and thighs. I like to serve the chicken with roasted vegetables or potatoes. It's a classic combination for a reason. The flavours just blend together beautifully.
(Part 5) The Golden Rules of Roasting Chicken
Let's sum up some of the key points to ensure your roast chicken is truly magnificent. These are the guiding principles I always keep in mind, the foundation of a truly remarkable roast chicken.
- Choose a good bird: Opt for a plump, free-range chicken with a good amount of fat and lean meat. It's the starting point of your culinary masterpiece.
- Season generously: Salt and pepper are your best friends, and don't forget about herbs or spices. They add depth and complexity to your dish.
- Trust the thermometer: Use a meat thermometer to ensure the chicken is cooked through to 74°C (165°F) in the thickest part of the thigh. It's the most reliable way to know you're serving a safe and delicious meal.
- Let it rest: Allow the chicken to rest for 10-15 minutes before carving to redistribute the juices. It's a simple step that makes a big difference in the tenderness and juiciness of your chicken.
- Don't overcook: A juicy chicken is a happy chicken. Aim for a golden brown skin and tender meat. Overcooking can lead to dry and tough chicken, so pay attention to your cooking time and internal temperature.
(Part 6) Tips and Tricks for Roasting Perfection
Now, let's delve into some of my favourite tips and tricks to elevate your roast chicken game. These are the little things that really make a difference, the secret ingredients that transform a good roast chicken into a truly exceptional one.
Butter is Your Friend
Before roasting, slather your chicken with a good quality butter. This adds richness and flavour, and it also helps to keep the chicken moist and tender. It's like giving your bird a luxurious massage before it enters the oven. I often add some herbs like rosemary or thyme to the butter for an extra burst of flavour.
The Power of Roasting Vegetables
Don't just roast your chicken! Roast some vegetables with it. Carrots, potatoes, onions, and garlic are perfect companions for a roast chicken. The vegetables get roasted in the chicken juices, resulting in a symphony of flavours. The vegetables absorb the chicken's flavour, while the chicken gets a boost of earthy, sweet, and savory notes. And the bonus? You've got a complete meal ready to go. It's a win-win situation!
Embrace the Pan Drippings
Those pan drippings are pure magic! They're full of flavour and can be used to make a delicious gravy. Simply pour off any excess fat from the pan, then deglaze the pan with a little bit of wine or broth. Add a tablespoon of flour, whisk it all together, and bring to a simmer. You'll have a rich, flavorful gravy that's the perfect accompaniment to your roast chicken. It's like turning your roasting leftovers into a culinary goldmine.
(Part 7) Roast Chicken Variations: Beyond the Classic
Who says roast chicken has to be boring? Let's get creative with some delicious variations. Here are a few ideas to spark your culinary imagination, taking your roast chicken beyond the ordinary.
Lemon and Herb Roast Chicken
A classic for a reason! Stuff the chicken cavity with lemon wedges and fresh herbs like rosemary, thyme, or oregano. The combination of citrus and herbs creates a vibrant and refreshing flavour. It's like adding a touch of sunshine to your dinner table, making it both flavorful and aromatic.
Garlic and Rosemary Roast Chicken
This is a simple yet flavourful variation. Rub the chicken with a mixture of garlic, rosemary, and olive oil. The garlic and rosemary will infuse the chicken with a rich, aromatic flavour. And for extra zest, try adding a few slices of lemon to the cavity. It's a simple combination that makes a big impact on the flavor profile of your chicken.
Spiced Roast Chicken
For a more adventurous twist, try adding a blend of spices to your chicken. A combination of paprika, cumin, coriander, and chili powder will give your roast chicken a warm and spicy kick. It's like taking a culinary journey to another part of the world, adding a touch of spice and excitement to your meal.
(Part 8) Roast Chicken for Everyone: A Table of Timings
Alright, here's the thing: cooking time for roast chicken varies depending on the size of your bird. To help you out, I've put together a handy table of roasting times for different weights. This will give you a good starting point. Remember, always check the internal temperature to ensure your chicken is cooked through.
| Chicken Weight (kg) | Roasting Time (minutes) |
|---|---|
| 1.0-1.5 | 60-75 |
| 1.5-2.0 | 75-90 |
| 2.0-2.5 | 90-105 |
| 2.5-3.0 | 105-120 |
(Part 9) FAQs: Your Roast Chicken Queries Answered
Let's get those questions answered. Here are some of the most common questions about roasting chicken, and my trusty advice to help you out. Consider it a roast chicken FAQ handbook, ready to tackle any culinary query.
Q1: Can I roast a frozen chicken?
It's not recommended. Frozen chicken will take much longer to cook, and it's harder to get it evenly cooked. It's best to thaw your chicken completely before roasting. It's like giving your chicken a chance to relax and unwind before its grand entrance into the oven.
Q2: How do I know if my chicken is done?
Use a meat thermometer to check the internal temperature. It should reach at least 74°C (165°F) in the thickest part of the thigh. You can also check for clear juices when you cut into the chicken. It's like a detective work, ensuring your chicken is cooked to perfection.
Q3: What if my chicken is overcooked?
If your chicken is overcooked, it will be dry and tough. There's not much you can do to fix it. But to prevent overcooking, make sure you use a meat thermometer and take the chicken out of the oven when it reaches the desired internal temperature. It's like knowing when to stop, preventing the chicken from going overboard.
Q4: How do I make gravy from the pan drippings?
Pour off any excess fat from the pan, then deglaze the pan with a little bit of wine or broth. Add a tablespoon of flour, whisk it all together, and bring to a simmer. Strain the gravy through a fine-mesh sieve before serving. It's like transforming the essence of your roast into a rich and flavorful sauce.
Q5: Can I reuse the same roasting pan for other dishes?
Absolutely! Your roasting pan is a versatile tool. Just make sure you clean it thoroughly after using it for roast chicken. It's great for roasting vegetables, casseroles, and even baking bread. It's like a culinary multi-tasker, ready to handle any cooking challenge.
Everyone is watching

Corn on the Cob: The Ultimate Guide to Perfectly Cooked Ears
Healthy MealsAh, corn on the cob. Just the name evokes images of sunny days, barbecues, and that sweet, juicy flavour that ...

Scallops: The Ultimate Guide to Perfect Cooking
Healthy MealsAh, scallops. Those delicate, sweet, and utterly delicious morsels of the sea. They hold a special place in my...

Spaghetti Squash: The Ultimate Guide to Cooking and Serving
Healthy MealsRemember that time you saw spaghetti squash at the supermarket, looking all bumpy and strange, and thought, "W...

Salmon Cooking Times: Perfect Guide for Every Recipe
Healthy MealsLet me tell you, cooking salmon is an art form. It's all about getting that perfect balance: juicy and tender,...

Ham Cooking Time: How Long to Bake, Smoke, or Boil a Delicious Ham
Healthy MealsAh, ham. It's a classic, isn't it? A real crowd-pleaser, especially around holidays. And when done right, it'...
