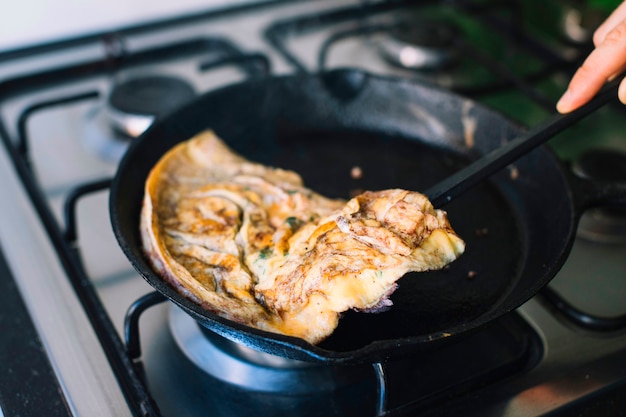
Let’s be honest, there’s nothing quite like sinking your teeth into a crispy, golden-brown chicken breast, juicy and tender on the inside. But achieving that perfect fried chicken breast can feel like a culinary tightrope walk. Too much time in the pan, and you're left with a dry, rubbery mess. Not enough, and you're dealing with a pale, undercooked disappointment.
So, how long do you actually fry a chicken breast for? Well, it’s not a straightforward answer. It’s like a delicious puzzle with lots of pieces: the thickness of your chicken breast, the temperature of your oil, the type of pan you're using, and even the way you season it all play a role. But fret not, my fellow food enthusiast! I'm here to guide you through this culinary adventure, sharing my own personal tricks and tips that have helped me create countless crispy, succulent chicken masterpieces over the years.
We’ll be diving deep, from preparing your chicken like a pro to mastering the art of frying and serving those perfect chicken breasts. Buckle up, it's going to be a juicy ride!
(Part 1) Prepping Your Chicken – The Foundation for Success

Before we even think about hot oil, we need to set a strong foundation. Prepping your chicken isn’t just about getting it ready for the pan – it’s the first step towards achieving a flavourful, evenly cooked result.
1. Thawing and Drying – The Key to a Crispy Exterior
I’ve learned this the hard way: frozen chicken is a recipe for disaster! It takes forever to cook, and the texture often comes out uneven. So, rule number one – always make sure your chicken is completely thawed before you start frying.
And once it's thawed? Grab some kitchen paper and pat those breasts dry! This might seem insignificant, but trust me, it’s crucial. Excess moisture creates steam when the chicken hits the hot oil, resulting in a soggy, unevenly cooked mess. We want that crisp exterior, remember?
2. Seasoning – Adding Flavor and Depth
Okay, now for the fun part – seasoning! This is where you get to express your culinary creativity. For a simple yet delicious base, I always go with salt and pepper. A generous pinch of each does the trick, and you can always adjust to your taste.
Don’t be afraid to experiment! Paprika, garlic powder, onion powder – these are some of my favourites. You can even get adventurous with a touch of lemon zest, a splash of hot sauce, or even a sprinkle of dried herbs like thyme or rosemary.
3. Breading – Achieving Ultimate Crispness
To take your fried chicken to the next level, consider breading it. It adds a wonderful crunch and helps lock in the chicken's natural moisture, resulting in a juicy, flavorful experience. There are a few classic methods to choose from:
- Flour: The simplest option! Dredge your chicken in a thin layer of flour for a subtle texture and a hint of lightness.
- Breadcrumbs: This classic breading creates a gloriously crispy, golden crust. Plain breadcrumbs are great, but you can also try flavoured ones like panko for a lighter, crispier texture or herb-seasoned for extra flavour.
- Cornmeal: Adds a delightful coarse texture with a satisfying crunch. This option is perfect for a rustic, down-home feel.
- A Combination: Get creative! Mix and match your favourite breading options. Flour, breadcrumbs, and spices? Absolutely! Flour, cornmeal, and grated cheese for a cheesy, crispy twist? Why not! The possibilities are endless.
No matter what you choose, ensure the coating is even and adheres firmly to the chicken. This ensures a beautiful, even crust that won’t fall off as you fry.
(Part 2) Choosing the Right Oil – The Secret to a Delicious Fry

The type of oil you use isn’t just about taste, it’s about how the chicken cooks. It’s a crucial decision that can affect everything from crispness to flavour.
1. Understanding smoke point – The Key to Avoiding Burning
This is where things get a little technical. The smoke point is the temperature at which your oil starts to break down and smoke, releasing unpleasant flavours that will taint your chicken. You want an oil with a high smoke point, one that can withstand the heat of frying without burning.
2. Common Oil Options – Choosing the Best for Your Chicken
Here's a look at some popular oils used for frying, along with their smoke points.
| Oil | Smoke Point (°F) |
|---|---|
| canola oil | 400 |
| Peanut Oil | 450 |
| vegetable oil | 450 |
| avocado oil | 520 |
| Grapeseed Oil | 420 |
For frying chicken, you’re looking for an oil with a high smoke point and a neutral flavour that won’t overpower the chicken. Canola oil, peanut oil, and vegetable oil are reliable choices, while avocado oil and grapeseed oil offer slightly higher smoke points.
3. Oil Quantity – Achieving Even Cooking
You need enough oil to partially submerge your chicken breasts. Aim for about 1/2 to 3/4 inch deep in your pan. This ensures the chicken cooks evenly from all sides and doesn’t stick to the bottom, preventing a greasy mess.
(Part 3) Getting the Temperature Right – The Secret to Crispness and Juiciness

Think of your oil temperature as the key to unlocking the perfect fried chicken experience. Too low, and your chicken will soak up the oil, leaving you with a greasy, soggy texture. Too high, and you'll end up with a burnt exterior and an undercooked interior.
1. Using a Thermometer – Achieving Precision
The best way to check your oil temperature is with a deep-fry thermometer. They’re incredibly affordable and easily available at most kitchen stores.
Aim for a temperature between 350°F and 375°F (175°C and 190°C). This sweet spot ensures a wonderfully crispy exterior and a juicy, cooked-through interior.
2. The Breadcrumb Test – A Time-Tested Trick
If you're not using a thermometer, you can always rely on the trusty breadcrumb test. Drop a small piece of breadcrumb into the oil. If it sizzles and browns quickly, your oil is ready. If it just sits there, the oil needs to be heated further.
(Part 4) cooking time – A Matter of Thickness and Temperature
Now we get to the meat of the matter (pun intended!). How long you fry your chicken breast depends on its thickness and the temperature of your oil.
1. Chicken Breast Thickness – A Key Factor
Thinner chicken breasts cook much faster than thick ones. So, keep that in mind when planning your frying time.
2. Frying Time Chart – A General Guide
Here’s a rough guide to frying times for different chicken breast thicknesses, assuming you’re using oil at the ideal temperature of 350°F to 375°F.
| Chicken Breast Thickness | Frying Time |
|---|---|
| Thin (less than 1 inch) | 5-7 minutes per side |
| Medium (1-1.5 inches) | 8-10 minutes per side |
| Thick (over 1.5 inches) | 10-12 minutes per side |
3. Checking for Doneness – Avoiding undercooked chicken
Always check for doneness to ensure your chicken is safe to eat. A meat thermometer is your best friend here. It should register an internal temperature of 165°F (74°C).
If you don’t have a thermometer, you can also gently press on the chicken. If it springs back, it’s cooked through. If it feels mushy, it needs more time in the pan.
(Part 5) Avoiding Overcrowding – The Path to Even Cooking
Remember this rule: "Don't cram the pan!" If you overcrowd it with too many chicken breasts, you’ll lower the temperature of the oil, preventing even cooking. Your chicken might also steam instead of fry, resulting in a soggy texture.
For the best results, fry your chicken breasts in batches, ensuring there’s enough space between each one for the oil to circulate freely.
(Part 6) Resting – Letting the Juices Redistribute
Once your chicken is cooked to perfection, don't rush to dig in! Let it rest for a few minutes before carving. This allows the juices to redistribute throughout the meat, resulting in a moist and tender experience.
(Part 7) Serving Suggestions – Taking Your Chicken to the Next Level
Now, for the most rewarding part: enjoying your perfectly fried chicken breasts! Here are a few ideas to get your tastebuds tingling.
- Classic Chicken Sandwich: This is a classic for a reason! Serve your fried chicken breast on a toasted bun with crisp lettuce, juicy tomato, creamy mayonnaise, and your favourite sauce. It's a satisfying and flavourful combination.
- chicken salad: Chop up your fried chicken and toss it with mayonnaise, celery, grapes, and your favourite herbs. Serve it on bread, crackers, or even as a filling for lettuce wraps.
- Chicken Caesar Salad: A lighter option that still packs a punch. Pair your fried chicken breast with a crisp Caesar salad for a refreshing and flavourful meal.
- Chicken Stir-fry: Slice your fried chicken breast and toss it into your favourite stir-fry. It adds a delicious protein boost and a satisfying crunch.
Remember, these are just a few ideas. Get creative and experiment with your favourite ingredients and flavours!
(Part 8) Troubleshooting – Addressing Common Frying Challenges
Let’s be honest, even seasoned cooks have their fair share of frying mishaps. Here are some common problems and how to avoid them in the future.
1. Dry Chicken – Avoiding Overcooking
If your chicken breast turns out dry, it's likely because you overcooked it. Make sure you keep a close eye on the cooking time and check for doneness using a meat thermometer.
Next time, you can try lowering the cooking temperature or reducing the frying time slightly. You can also consider marinating your chicken before frying for extra moisture and flavor.
2. Soggy Chicken – Avoiding Excess Oil Absorption
A soggy chicken breast usually indicates that it was in the pan too long or that you didn't dry it properly before frying. Make sure you pat the chicken dry with kitchen paper before breading and ensure the oil is hot enough.
You can also try a faster cooking method, like pan-frying, if you tend to have soggy chicken. Just remember to adjust the cooking time accordingly.
3. Burnt Chicken – Preventing a Charcoal Exterior
Burnt chicken is the unfortunate result of frying at too high a temperature or leaving it in the pan for too long. Double-check the oil temperature before frying, and make sure you don't overcrowd the pan.
If you notice your chicken is browning too quickly, lower the heat slightly. Keep a close eye on it and remove it from the pan as soon as it reaches the desired colour and doneness.
(Part 9) FAQs – Answering Your Burning Questions
Let's tackle some of the most common questions about frying chicken breasts.
1. Can I Fry Chicken Breast in a deep fryer?
Absolutely! Deep frying is a great way to achieve extra-crispy chicken. Just make sure you use a deep fryer thermometer to get the oil temperature right (around 350°F to 375°F). Always follow the manufacturer's instructions for your specific model.
2. Can I Fry Frozen Chicken Breast?
It's not recommended to fry frozen chicken breasts. It will take much longer to cook, and you'll likely struggle to get that crispy exterior. Always thaw your chicken breasts completely before frying.
3. What Happens if I Fry Chicken Breast at Too Low a Temperature?
If you fry chicken breast at too low a temperature, it will soak up more oil, resulting in a greasy, soggy texture. The chicken might not cook evenly either.
Make sure the oil is hot enough before adding the chicken. Remember, a hot oil bath is crucial for that crispy exterior and juicy interior.
4. What Happens if I Fry Chicken Breast at Too High a Temperature?
If you fry chicken breast at too high a temperature, it will burn before it has a chance to cook through. You'll end up with a charred exterior and a raw interior.
Always check the oil temperature before frying and make sure the chicken is cooked through.
5. How Do I Know When My Chicken Breast is Cooked Through?
The most reliable way to check for doneness is with a meat thermometer. The internal temperature should reach 165°F (74°C) for safe consumption. If you don’t have a thermometer, gently press on the chicken. If it springs back, it’s cooked through. If it feels mushy, it needs more time.
Conclusion
So there you have it, a comprehensive guide to frying chicken breasts to perfection. It might seem like a lot to remember, but with a little practice, you’ll be whipping up crispy, juicy chicken in no time. Remember to prep your chicken properly, choose the right oil, ensure the perfect temperature, and keep a close eye on the cooking time.
Now, go on and conquer your next frying adventure. Enjoy the deliciousness!
Everyone is watching

Corn on the Cob: The Ultimate Guide to Perfectly Cooked Ears
Healthy MealsAh, corn on the cob. Just the name evokes images of sunny days, barbecues, and that sweet, juicy flavour that ...

Scallops: The Ultimate Guide to Perfect Cooking
Healthy MealsAh, scallops. Those delicate, sweet, and utterly delicious morsels of the sea. They hold a special place in my...

Spaghetti Squash: The Ultimate Guide to Cooking and Serving
Healthy MealsRemember that time you saw spaghetti squash at the supermarket, looking all bumpy and strange, and thought, "W...

Salmon Cooking Times: Perfect Guide for Every Recipe
Healthy MealsLet me tell you, cooking salmon is an art form. It's all about getting that perfect balance: juicy and tender,...

Ham Cooking Time: How Long to Bake, Smoke, or Boil a Delicious Ham
Healthy MealsAh, ham. It's a classic, isn't it? A real crowd-pleaser, especially around holidays. And when done right, it'...
