Ah, the turkey. A symbol of festive gatherings, family traditions, and, let's be honest, a whole lot of deliciousness. But when you're dealing with an 18-pound behemoth, the thought of cooking it can be a bit daunting. Don't worry, I've got you covered. As someone who's cooked their fair share of turkeys, I'm here to guide you through the process, step by step, with tips and tricks to ensure your bird is cooked to juicy, golden perfection.
(Part 1)The Big Bird: An 18-Pound Turkey
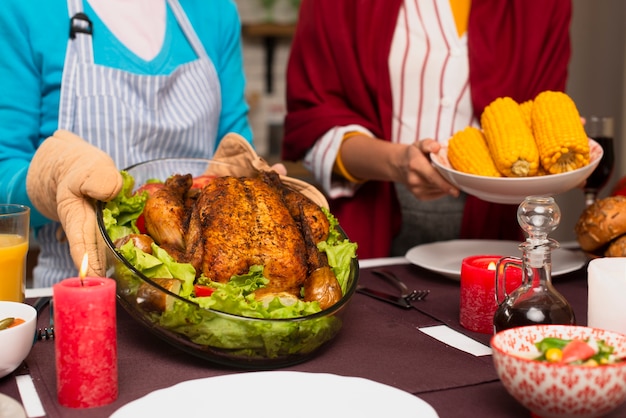
An 18-pound turkey is a real statement piece. It's not just a dinner; it's an event! It's the kind of bird that makes your guests go, "Whoa, that's a big one!" But it also means a bit more work, especially when it comes to cooking time. So, why bother with such a large turkey in the first place?
Why an 18-Pound Turkey?
Well, there are a few reasons why you might choose a hefty 18-pound turkey. Let's be honest, for a big gathering, you want enough meat to go around, and a large turkey usually means more affordable per pound than smaller ones. But the real reason is that it's simply impressive. A magnificent, golden turkey taking center stage on your table just screams "festive" and "abundance." It's about making a statement, showing your guests that you're ready to go all out for the occasion.
Cooking an 18-Pound Turkey: The Basics
Now, let's get into the nitty-gritty. Cooking a large turkey requires a bit of know-how and patience, but it's not rocket science. It's all about understanding the timing, temperature, and a few essential tricks to ensure a flawless result.
Understanding Cooking Time
Firstly, we need to understand that an 18-pound turkey will take considerably longer to cook than a smaller one. It's not just about throwing it in the oven and hoping for the best. You've got to factor in the size and weight. A good rule of thumb is to allow about 15 minutes per pound of turkey for a roasting temperature of 325°F (163°C). So, for an 18-pound bird, you're looking at a total cooking time of roughly 4.5 hours. That's a significant chunk of time, so make sure you plan accordingly.
The Importance of Temperature
Temperature is absolutely crucial to ensure your turkey is cooked through and safe to eat. The USDA recommends a safe internal temperature of 165°F (74°C) for the thickest part of the thigh. This is where a good meat thermometer comes in handy. You don't want to undercook your turkey, but you also don't want to dry it out. The goal is to achieve that perfect balance between juicy and cooked. And trust me, a properly cooked turkey is a thing of beauty – succulent, juicy, and bursting with flavour. It's worth the wait!
Essential Tools for Turkey Success
Now, let's talk equipment. To make your turkey cooking experience a smooth and enjoyable one, you'll need a few essential tools:
- roasting pan: A large, sturdy roasting pan is a must-have for a turkey this size. You'll want one that's big enough to accommodate the turkey with plenty of room to spare. You don't want your turkey crammed in there like a sardine! Look for a pan with a rack to elevate the bird, allowing for even cooking and better airflow.
- Meat Thermometer: A meat thermometer is your trusty sidekick. It's the only way to know for sure if your turkey is cooked to the right temperature. You can find them at most grocery stores and kitchen supply shops. Choose one with a probe that's long enough to reach the thickest part of the thigh.
- Basting Spoon: This is your weapon of choice for keeping the turkey moist and flavourful throughout the cooking process. You'll use it to baste the turkey with pan drippings or a mixture of butter, broth, or wine. It's a simple but vital tool for ensuring a juicy and flavorful bird.
Preparing Your Turkey: A Step-by-Step Guide
Before you pop that magnificent bird into the oven, a little prep work is essential. It's not complicated, just a few simple steps to ensure a delicious outcome:
Step 1: Thawing
If your turkey is frozen, you need to thaw it completely before cooking. The safest and most effective way to do this is in the refrigerator. It takes about 24 hours for every 4 pounds of turkey to thaw, so plan ahead. Don't be tempted to rush the process by thawing at room temperature or using water, as this can lead to uneven thawing and bacteria growth.
Step 2: Patting Dry
Once thawed, pat the turkey dry with paper towels. This helps to ensure a crispy skin and prevents the turkey from steaming during cooking. A crispy skin is a sign of a well-cooked turkey, and it adds a wonderful texture to the meal.
Step 3: Seasoning
Now, this is where you get to unleash your creativity. Seasoning your turkey is all about personal preference. I like to keep it simple, using a good sprinkle of salt, pepper, and a blend of herbs like thyme, rosemary, and sage. You can also add spices like garlic powder, onion powder, paprika, or even a dash of cayenne pepper for a bit of heat. Experiment and find what suits your taste.
Step 4: Stuffing (Optional)
Stuffing is a classic Thanksgiving or Christmas tradition, but it's not essential. It's a matter of personal preference. If you choose to stuff your turkey, make sure to cook the stuffing separately to ensure it reaches a safe internal temperature of 165°F (74°C). Stuffing the turkey can sometimes hinder the cooking process, making it more difficult to achieve a safe internal temperature. It's often easier and safer to cook the stuffing separately in a casserole dish.
Cooking Your Turkey: Time for the Oven
With the turkey prepped and ready, it's time to hit the oven! Here's how to cook your 18-pound turkey to perfection:
Step 1: Preheat the Oven
Preheat your oven to 325°F (163°C). This temperature is ideal for ensuring even cooking and a juicy, flavorful turkey. You want the heat to penetrate the bird gradually and evenly, resulting in a beautifully browned and cooked turkey.
Step 2: Place the Turkey in the Roasting Pan
Place the turkey in your roasting pan, breast side up. You can add a few cups of water to the bottom of the pan to create steam and keep the turkey moist. This is a great way to prevent the turkey from drying out. You can also add a few vegetables like onions, carrots, or celery to the bottom of the pan for extra flavour.
Step 3: Cook Time
As mentioned earlier, you'll need to cook an 18-pound turkey for about 4.5 hours, or 15 minutes per pound. It's important to remember that this is just a guideline, and cooking time can vary depending on the oven and the shape of the turkey.
Step 4: Basting
Basting is a key step in ensuring a juicy and flavorful turkey. Start basting after about 1 hour of cooking. Use the pan drippings to baste the turkey, or use a mixture of butter, broth, or wine. Basting helps to keep the turkey moist and promotes even browning. It's a great way to infuse the turkey with additional flavor.
Step 5: Checking the Internal Temperature
After about 3 hours of cooking, use your meat thermometer to check the internal temperature in the thickest part of the thigh. The turkey is done when the thermometer reads 165°F (74°C). Make sure you insert the thermometer into the thickest part of the thigh, away from any bone.
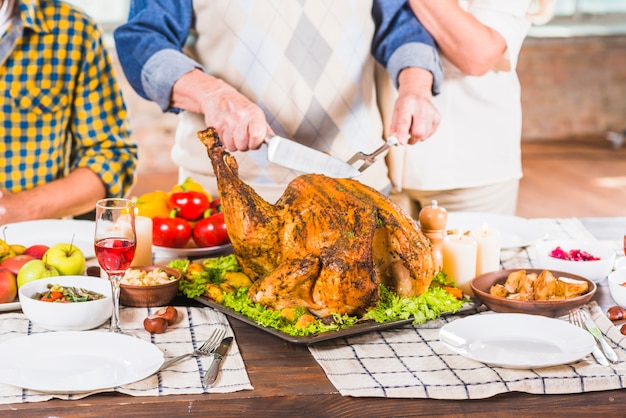
Step 6: Resting Time
Once the turkey is cooked, let it rest for at least 15 minutes before carving. This allows the juices to redistribute, resulting in a more succulent and flavorful bird. Resist the temptation to carve it right away! Allow the turkey to rest, covered with foil, for at least 15 minutes, preferably longer. This gives the juices time to settle back into the meat, creating a more tender and flavorful turkey.
Beyond the Basics: Advanced Techniques
Now, for those of you who want to take your turkey cooking game to the next level, here are a few advanced techniques that can make a big difference in the taste and texture of your bird. These are not essential, but they can add a touch of culinary magic to your turkey.
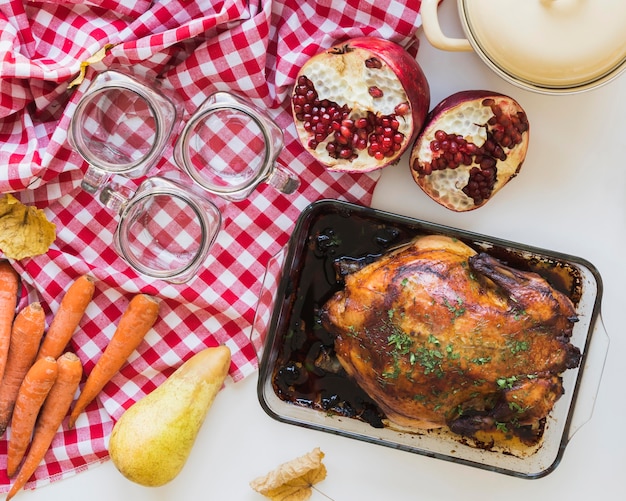
Brining: A Secret Weapon for juicy turkey
Brining is a technique that involves soaking the turkey in a saltwater solution for several hours or overnight. It's a bit of a commitment, but the results are worth it. Brining helps to retain moisture and enhance flavour. It's like giving your turkey a spa treatment! You can find countless brining recipes online, but here's a simple one you can try:
Ingredients:
- 1 gallon (4 litres) of cold water
- 1 cup (240ml) kosher salt
- 1/2 cup (120ml) brown sugar
- 1/4 cup (60ml) black peppercorns
- 1/4 cup (60ml) dried thyme
- 1/4 cup (60ml) dried rosemary
Instructions:
- In a large container, combine all ingredients and stir until the salt and sugar dissolve.
- Submerge the turkey in the brine solution, making sure it's completely covered. You might need a large cooler or a stock pot for this.
- Refrigerate for 8-12 hours.
- Remove the turkey from the brine and pat it dry before cooking.
When you remove the turkey from the brine, you'll notice it feels more plump and juicy. Brining helps to lock in moisture and create a more flavorful turkey.
Roasting with a Dry Brine: Simple and Effective
If you don't have time for traditional brining, a dry brine is a great alternative. It's simple to prepare and yields excellent results. Just combine salt, pepper, and any desired herbs, then rub the mixture all over the turkey. Allow the turkey to sit in the refrigerator for at least 8 hours, uncovered. The salt draws out moisture and then reabsorbs it, resulting in a more flavorful and tender turkey. It's a simple technique that can make a big difference.
side dishes: Making the Most of Your Feast
No Thanksgiving or Christmas dinner is complete without a selection of delicious side dishes. Here are a few classics that pair perfectly with a roasted turkey, providing a balance of flavors and textures.
Classic Stuffing: A Turkey Staple
Stuffing is a must-have for many turkey dinners. It's a traditional side dish that adds warmth and comfort to the meal. It can be made with bread, vegetables, herbs, and sausage. Whether you choose a traditional sage and onion stuffing or a more modern twist, it's sure to be a hit with your guests.
Roasted Vegetables: A Healthy and Delicious Side
Roasted vegetables are a healthy and flavorful accompaniment to a roast turkey. Carrots, potatoes, Brussels sprouts, and parsnips all roast beautifully and pair well with the turkey's flavour. They add a touch of freshness and vibrant color to your table.
Cranberry Sauce: The Perfect Tangy Counterpoint
Cranberry sauce provides a delightful tangy counterpoint to the rich turkey and savory side dishes. It balances out the richness of the meal and adds a burst of freshness. You can use canned cranberry sauce, or make your own from fresh cranberries, sugar, and orange zest. A homemade cranberry sauce is a nice touch that elevates the dish to a whole new level.
Gravy: A Rich and Savory Sauce
Gravy is a must-have for any turkey dinner. It adds a rich and savory layer of flavor to the meal. You can make gravy from the turkey drippings, or use a store-bought gravy mix. Either way, gravy is a classic accompaniment that enhances the overall taste of the turkey and side dishes.
Leftovers: The Best Part (Almost)
Let's be honest, one of the best parts of a turkey dinner is the leftovers! You can create a whole new set of meals with your leftover turkey, from sandwiches to salads to soups.
turkey sandwiches: A Simple and Satisfying Meal
Turkey sandwiches are a classic way to use leftover turkey. They're a simple and satisfying meal. You can use white or wheat bread, and add your favourite toppings, such as lettuce, tomato, mayonnaise, or mustard.
turkey soup: A Hearty and Comforting Meal
Turkey soup is a delicious and comforting way to use leftover turkey. It's a warm and comforting meal that's perfect for a chilly day. You can add vegetables, noodles, or rice to your soup for a complete meal.
turkey salad: A Light and Refreshing Meal
Turkey salad is a light and refreshing way to use leftover turkey. It's a great option for lunch or a light dinner. You can combine shredded turkey with mayonnaise, celery, onion, and cranberries.
FAQs
Here are some frequently asked questions about cooking an 18-pound turkey:
1. What if My Turkey is Oversized?
If your turkey is significantly larger than 18 pounds, you may need to adjust the cooking time. It's best to err on the side of caution and add 15 minutes to the cooking time for every additional pound. You can also check the turkey's internal temperature more frequently to ensure it's cooked through.
2. Can I Cook a stuffed turkey?
You can cook a stuffed turkey, but it's important to do it safely. Make sure the stuffing reaches an internal temperature of 165°F (74°C). The safest option is to cook the stuffing separately in a casserole dish. This ensures that the stuffing is cooked evenly and to a safe temperature.
3. How Do I Know When My Turkey is Done?
The best way to determine if your turkey is done is by using a meat thermometer. Insert the thermometer into the thickest part of the thigh, making sure not to touch any bone. The turkey is done when the thermometer reads 165°F (74°C).
4. What if My turkey skin is Too Brown?
If the turkey's skin is getting too brown before it's cooked through, you can tent it with foil. This will help to slow down the browning process and allow the turkey to cook evenly.
5. What Happens if My Turkey is Overcooked?
An overcooked turkey will be dry and tough. It's best to avoid overcooking your turkey by checking its internal temperature regularly. If the turkey is overcooked, there's not much you can do to salvage it. However, you can always use the leftover turkey in other dishes, such as sandwiches or soups.
Final Thoughts: The Joy of Turkey Cooking
Cooking an 18-pound turkey is an undertaking, but it's one that can be both rewarding and delicious. With the right tools, techniques, and a bit of patience, you can create a memorable meal for yourself and your loved ones. Remember, it's all about enjoying the process and celebrating the joy of cooking. Happy feasting!
Everyone is watching

Corn on the Cob: The Ultimate Guide to Perfectly Cooked Ears
Healthy MealsAh, corn on the cob. Just the name evokes images of sunny days, barbecues, and that sweet, juicy flavour that ...

Perfect Pork Roast Oven Cooking Time: A Guide to Delicious Results
Healthy MealsThere's something truly satisfying about a perfectly roasted pork. The aroma alone is enough to make your mout...

Ham Cooking Time: How Long to Bake, Smoke, or Boil a Delicious Ham
Healthy MealsAh, ham. It's a classic, isn't it? A real crowd-pleaser, especially around holidays. And when done right, it'...

Scallops: The Ultimate Guide to Perfect Cooking
Healthy MealsAh, scallops. Those delicate, sweet, and utterly delicious morsels of the sea. They hold a special place in my...

Spaghetti Squash: The Ultimate Guide to Cooking and Serving
Healthy MealsRemember that time you saw spaghetti squash at the supermarket, looking all bumpy and strange, and thought, "W...