Let’s face it, sometimes a grill just isn’t an option. Maybe the weather’s not cooperating, or you’re stuck in a tiny apartment kitchen. But that doesn’t mean you have to give up on juicy, delicious burgers! Cooking a burger on the stovetop is a simple, achievable feat that can be just as satisfying as grilling.
I've been perfecting my stovetop burger game for years, and I'm here to share everything I’ve learned. This guide isn’t just about timing, it’s about mastering the art of the stovetop burger. From choosing the right pan to getting that perfect sear, we’ll cover every step to ensure you end up with a burger that’s not just cooked, but cooked to perfection.
(Part 1) The Essentials: What You’ll Need

Before we dive into the heat of the kitchen, let’s make sure we have everything we need to make a truly great burger.
The Right Pan: A Cast Iron Champion
Now, I’m a die-hard believer in a good cast iron skillet. They’re incredibly versatile and, let’s be honest, just plain cool. The way they distribute heat evenly and retain it for ages is a game-changer, especially when it comes to achieving that irresistible sear on your burger. You’ll get a beautiful crust that’s crispy on the outside and juicy on the inside.
But don’t worry if you don’t have a cast iron pan. A heavy-bottomed stainless steel pan will work just fine. You just want a pan that’s large enough to fit your patties without overcrowding them. A good rule of thumb is to use a pan that’s at least 10 inches in diameter.
Choosing Your Meat: A Matter of Taste
Let’s talk about the heart of the burger: the meat. I usually go for 80/20 ground beef. This blend has the perfect balance of leanness and fat, ensuring that you get a juicy, flavorful burger. If you prefer a leaner option, 90/10 is a good choice, but remember, a little fat goes a long way in terms of taste and texture.
And don’t forget the seasoning! Salt and pepper are essential, but don’t be afraid to get creative. I love adding a pinch of garlic powder and onion powder for an extra punch of flavor. You can also experiment with other spices like paprika, chili powder, or even a dash of cayenne pepper for a bit of heat.
(Part 2) The Art of Forming the Perfect Patty

Now that we’ve got our ingredients, it’s time to sculpt the stars of the show: the patties. Here’s how to make sure they turn out perfectly even and delicious.
1. Gentle Hands: No Over-Working the Meat
Start by dividing your ground beef into equal portions. I usually aim for about 4 ounces per patty, but you can adjust based on your appetite. Then, gently form the patties with your hands. Don’t overwork the meat, or you’ll end up with a tough burger. Just a gentle press is all you need to create a nice, even disc.
2. A Little Indentation: Preventing Puffing
Now, here’s a little trick I learned from a seasoned grill master: make a small indentation in the centre of each patty using your thumb. This simple step helps prevent the burgers from puffing up during cooking, resulting in a more even cook and a perfectly formed burger.
3. Chill Out: Patience is Key
Once you've formed your patties, pop them in the fridge for about 30 minutes. This chills the meat, which helps to keep it from falling apart during cooking and prevents the burgers from cooking too quickly. Patience is key!
(Part 3) Prepping the Stovetop: Setting the Stage

Now, it’s time to set the stage for our burger performance! We need to get our stovetop ready for the main event.
1. Heat Up: Get That Pan Sizzling
Get your chosen pan nice and hot over medium-high heat. You want the pan hot enough to sear the outside of the patties without burning them, creating a beautiful crust and locking in those juicy flavors. A good indicator is when you flick a drop of water onto the pan and it sizzles and evaporates almost instantly. This means your pan is ready to rock!
2. Grease Up: A Slick Surface
Once the pan is screaming hot, add a tablespoon or two of oil, butter, or a combination of both. This creates a nice, slick surface that prevents the patties from sticking and ensures even browning. My personal preference is a combination of olive oil and butter for a rich, flavorful sear.
(Part 4) The Great Burger Cook-Off: Time for the Main Event
Okay, the stage is set. Now it’s time for the star of the show to take center stage: your burger patties.
1. Gentle Placement: No Force Required
Carefully place the patties in the hot pan. There’s no need to cram them together. Give them some breathing room to cook evenly. If you're using a smaller pan, cook the burgers in batches to ensure they have adequate space.
2. The First Side: Locking in the Juices
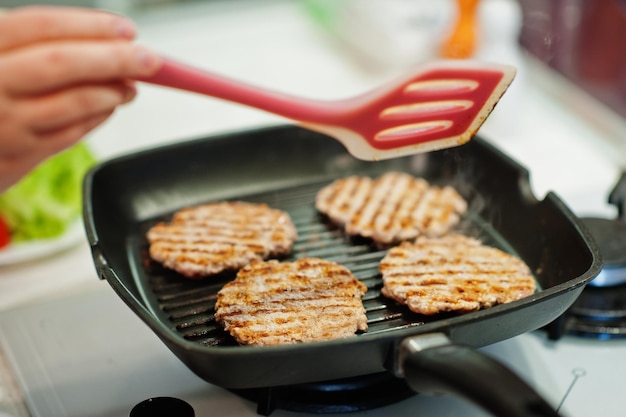
Let the patties cook for about 4-5 minutes on the first side, without touching them! This initial cook is crucial for developing that beautiful, flavorful crust we talked about. Resist the urge to flip them prematurely; let the magic happen. You’ll be rewarded with a burger that’s crispy on the outside and juicy on the inside.
3. Flipping Time: A Moment of Truth
Once the first side is golden brown and nicely seared, it’s time to flip those patties. Use a spatula to gently flip them over. I like to give them a little press to make sure they’re cooked through evenly. Now, cook for another 3-4 minutes on the second side.
(Part 5) The Finishing Touches: Elevate Your Burger
We’re nearing the finish line, but don't forget the finishing touches that elevate your burger from good to gourmet.
1. Adding Cheese: A Melty Dream
If you’re a cheese lover like myself, now’s the time to add it. Place slices of your favorite cheese on top of the patties, cover the pan with a lid, and let it melt for a minute or two. I always go for cheddar, but you can get adventurous with mozzarella, Swiss, or even blue cheese for a more intense flavor.
2. Toppings: The Perfect Pair
Once the cheese is melted, take the burgers off the heat. Let them rest for a few minutes before assembling your masterpiece. Now, it’s time to add your favorite toppings. My go-to combo is lettuce, tomato, onion, and a dollop of mayonnaise. But the possibilities are endless, so don’t be afraid to experiment. Try adding guacamole, roasted peppers, jalapenos, or even a fried egg for a truly unique experience.
(Part 6) Doneness: Cooked to Perfection
Now, the crucial part: how do you know when your burgers are perfectly cooked?
1. The Colour Test: A Visual Clue
As the burgers cook, the color of the meat will change from red to brown. A well-done burger will have a deep brown color, while a medium-rare burger will have a slightly pink centre. Use your eyes to assess the level of doneness, but remember that color can be deceiving.
2. The Finger Test: A Gentle Press
If you're unsure about the doneness, try the finger test. Press the centre of the patty with your finger. If it feels firm and springy, it’s cooked through. If it feels soft and squishy, it needs more time.
3. The Thermometer Test: For the Precisionist
For the ultimate peace of mind, use a meat thermometer. Insert the thermometer into the thickest part of the patty. The ideal temperature for well-done is 160°F (71°C), medium is 145°F (63°C), and medium-rare is 130°F (54°C).
Remember, the internal temperature will continue to rise after you remove the patties from the heat, so don't worry if it's a little below the desired temperature.
(Part 7) The Resting Game: A Short Timeout
After cooking, let the burgers rest for 5-10 minutes before serving. This allows the juices to redistribute, resulting in a more juicy and tender burger. It’s a small step, but it makes a big difference in the final outcome.
(Part 8) Burgers Beyond the Basics: Variations and Ideas
Now that you’ve mastered the classic stovetop burger, let's explore some variations to keep things interesting.
1. Beyond Beef: Spice It Up with Turkey or Chicken
Don’t be afraid to break free from the traditional beef patty. Try ground turkey, chicken, or even a veggie burger for a meatless option. These alternatives can add a whole new dimension of flavor to your burger repertoire.
2. Spicing Things Up: Flavourful Additions
Add some flavour to your patties by incorporating herbs, spices, or even finely chopped vegetables. Try adding chopped mushrooms, onions, or peppers to your ground beef for an extra dimension of flavor. You can also get creative with herbs like rosemary, thyme, or oregano.
3. Burger Mania: Beyond the Bun
Get creative with your burger presentation. Try wrapping it in lettuce instead of a bun for a low-carb option. You can also serve burgers on top of a bed of salad or in a pita pocket. The possibilities are endless!
FAQs
Now, let’s address some common questions about cooking burgers on the stovetop:
1. Can I use a nonstick pan?
Yes, you can use a nonstick pan. Just make sure it's a good quality pan that can withstand high heat and won't warp. While cast iron and stainless steel are ideal, a nonstick pan will do the trick in a pinch.
2. What if my burgers are sticking?
If your burgers are sticking to the pan, it’s probably because the pan isn’t hot enough. Let the pan heat up for a few minutes before adding the patties. You can also add a bit more oil or butter to the pan.
3. How long should I cook a burger for?
The cooking time will depend on the thickness of the patty and your desired level of doneness. A thinner patty will cook faster than a thicker one. A well-done burger will take longer to cook than a medium-rare burger. Refer to the guide above for specific cooking times and doneness indicators.
4. What are some good toppings for burgers?
There are endless topping possibilities! Some classic choices include lettuce, tomato, onion, pickles, cheese, mayonnaise, ketchup, mustard, and bacon. You can also get creative with toppings like guacamole, roasted peppers, or jalapenos.
5. Can I cook multiple burgers at once?
Yes, you can cook multiple burgers at once. Just make sure you have enough space in your pan and that they're not overcrowded. If you're cooking multiple burgers, it's best to use a larger pan or cook them in batches to ensure even cooking.
Now that you’ve got all the secrets, go forth and conquer the world of stovetop burgers. Happy cooking!
Everyone is watching

Corn on the Cob: The Ultimate Guide to Perfectly Cooked Ears
Healthy MealsAh, corn on the cob. Just the name evokes images of sunny days, barbecues, and that sweet, juicy flavour that ...

Scallops: The Ultimate Guide to Perfect Cooking
Healthy MealsAh, scallops. Those delicate, sweet, and utterly delicious morsels of the sea. They hold a special place in my...

Spaghetti Squash: The Ultimate Guide to Cooking and Serving
Healthy MealsRemember that time you saw spaghetti squash at the supermarket, looking all bumpy and strange, and thought, "W...

Salmon Cooking Times: Perfect Guide for Every Recipe
Healthy MealsLet me tell you, cooking salmon is an art form. It's all about getting that perfect balance: juicy and tender,...

Ham Cooking Time: How Long to Bake, Smoke, or Boil a Delicious Ham
Healthy MealsAh, ham. It's a classic, isn't it? A real crowd-pleaser, especially around holidays. And when done right, it'...
