I've always loved sweet corn. That sweet, juicy flavour, the delightful crunch, and the way it transports you to summer barbecues and sunny picnics – it's just pure joy on a plate! But let’s be honest, we've all experienced the disappointment of dry, rubbery corn. It's a culinary crime, isn’t it? I've definitely had my fair share of those moments. But over the years, I've learned a thing or two about cooking corn to perfection, and I'm here to share my secrets with you. So, get ready to elevate your corn game and say goodbye to those dreaded undercooked or overcooked disasters!
(Part 1) Getting to Know Your Corn

Before we jump into the cooking, let's get acquainted with our main ingredient – sweet corn. It’s not just about grabbing the first ear you see, you know. The type of corn, its freshness, and even its size can have a big impact on how it cooks.
The Importance of Freshness
The first rule of thumb? Freshness is key! fresh corn is packed with flavour and a delightful crunch. You’ll want to pick corn that's still young and tender, with a vibrant green husk and moist feel. If the husks are dry and brown, it's likely that the corn is a bit past its prime.
A Look at the Kernels
The kernels are your next clue to freshness. They should be plump and full, not shrunken or wrinkled. Look for corn with kernels that are close together – gaps between them usually mean the corn is a bit older.
Checking the Silk
Don’t forget about the silk strands at the end of the ear. Fresh corn will have silky strands that are moist and not overly dry.
The Pinch Test: A Final Check
And finally, give the corn a gentle squeeze. It should feel firm and slightly springy, not mushy or soft. If it feels mushy, it's probably not going to cook up as well.
I remember once, I bought a whole bag of corn at the supermarket, it looked perfectly fine, but it was drier than the Sahara Desert! It was a real disappointment! That's when I learned to always check the silk, the kernels, and give it that little squeeze.
(Part 2) The Great Corn Debate: Boiling vs. Grilling

Okay, now comes the big question: boiling or grilling? This is where the real debate starts! Both methods have their devoted fans, and I have to admit, it's a tough choice. Let's delve into the pros and cons of each side, so you can decide which method suits your taste buds and cooking style.
Boiling: The Classic Approach
boiling corn is a classic technique, and for good reason! It’s a simple, reliable method that many of us grew up with. It’s a tried and true technique, but it also has its limitations.
Boiling Method: The Good Stuff
- Simplicity: It’s as easy as filling a pot with water, adding salt, and dropping in the corn. No fancy equipment or special skills needed!
- Even Cooking: Boiling ensures even cooking, so you’ll be less likely to have overcooked or undercooked areas.
- Convenience: You can cook multiple ears at once, making it ideal for those summer gatherings or family meals.
Boiling Method: The Not-So-Good
- Can Be Bland: Sometimes, boiling can result in corn that lacks flavour. The sugars in the corn can leach out into the water, making for a less flavorful experience.
- Lack of Char: You won’t get that beautiful char that grilling provides.
Grilling: The Flavor Explosion
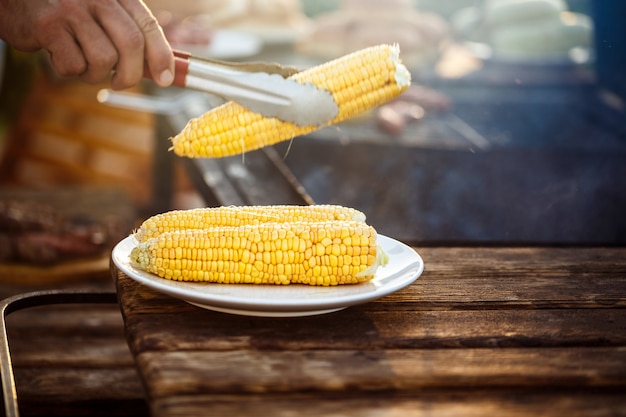
grilling corn takes things up a notch! It brings out the sweet, smoky flavour that only an open flame can deliver. There’s just something about that smoky char that elevates corn to a whole new level.
Grilling Method: The Good Stuff
- Flavour: grilled corn has a unique, sweet, smoky flavour that’s truly irresistible.
- Char: The char adds a delicious, slightly bitter flavour, and a fantastic texture.
- Versatility: You can grill corn on the cob, or even shuck it and grill it flat for a different flavour experience.
Grilling Method: The Not-So-Good
- Timing: Grilling requires more attention and precise timing to ensure the corn doesn’t burn. You’ll want to keep a close eye on it!
- Uneven Cooking: It can be a bit trickier to achieve even cooking, especially if you’re grilling multiple ears at once.
I've had my share of grilling mishaps, resulting in some tragically burnt corn. It’s a lesson learned, trust me! But you know what? Even a slightly charred cob can be delicious. It’s all part of the grilling experience.
(Part 3) Mastering the Art of Boiling Corn

Let’s dive into the boiling method. It’s a classic for a reason! It’s reliable and easy, and it always delivers tender, juicy corn.
Preparing the Corn
The first step is to prepare your corn. If you have fresh corn, you'll want to remove the husks and silks. But for frozen corn, you can skip this step!
- Removing Husks: Pull back the husks, but don’t remove them completely. This will help protect the corn while it’s boiling.
- Removing Silks: Carefully pull out the silk strands. This can be a bit messy, but trust me, it's worth it.
Boiling Time: The Key to Perfection
The boiling time depends on the freshness of your corn. Fresh corn takes a bit longer to cook, while frozen corn cooks more quickly.
| Corn Type | Boiling Time |
|---|---|
| Fresh Corn | 5-7 minutes |
| Frozen Corn | 3-5 minutes |
Always check the corn after the minimum time and adjust as needed. You want the kernels to be tender, but not mushy. A little firmness is good!
Boosting the Flavour
For a more flavourful experience, you can add a few extra ingredients to your boiling water.
- Salt: A generous pinch of salt will enhance the sweetness of the corn.
- Sugar: A teaspoon of sugar can balance out the saltiness and add a hint of sweetness.
- Herbs: A sprig of thyme or basil can add a fragrant touch.
One time, I tried adding a bay leaf to my boiling water, and the corn had this amazing earthy flavour. Don’t be afraid to experiment!
(Part 4) Grilling Corn: The Charcoal Experience
Now, let’s talk about grilling. It’s where the real fun begins! Grilling corn brings out the sweet, smoky flavour that can only be achieved over an open flame. It's a delicious and exciting way to cook corn, but it does require a bit more attention.
Prepping for a Charcoal Feast
Before you start grilling, you'll need to prep your charcoal grill. This might seem obvious, but you’d be surprised!
- Hot Coals: You want your coals to be hot and glowing. If they’re too cool, the corn won’t get that beautiful char.
- Clean Grill: Make sure your grill is clean and well-oiled to prevent sticking.
- Direct Heat: Position the corn directly over the hot coals for the best char.
The Perfect Grill Time: A Balancing Act
The grilling time for corn depends on the heat of your coals and your desired level of char.
- Medium Heat: 10-15 minutes, turning every few minutes to ensure even cooking and charring.
- High Heat: 8-10 minutes, turning frequently to avoid burning.
My best advice? Keep a close eye on it! You’ll know it’s done when the kernels are tender, and the husks are slightly charred.
Grill Enhancement Tips: Taking It to the Next Level
Here are a few extra tips to make your grilled corn even more delicious.
- Butter and Seasoning: Once the corn is cooked, brush it with melted butter and sprinkle with salt, pepper, or your favorite seasoning.
- Wrap in Foil: For a more even cooking experience, wrap the corn in foil before grilling. This will help prevent burning.
- Grill with Herbs: For a burst of flavour, toss a few sprigs of herbs like thyme, rosemary, or oregano on the grill with the corn.
One time, I tried grilling corn with a bit of smoked paprika, and it was divine! It added a lovely smoky depth to the flavour.
(Part 5) The Microwave Method: A Quick and Easy Fix
Okay, we all have those nights when time is tight, and a quick fix is needed. The microwave is our culinary hero in those situations. While it won’t give you the same level of flavour as boiling or grilling, it can still be a decent option.
Microwave Prep: Keeping it Simple
First, remove the husks and silks from fresh corn. For frozen corn, you can use it as is.
Microwave Time: Depending on the Size
The microwave time depends on the size of the corn.
- Small Ears: 2-3 minutes
- Large Ears: 4-5 minutes
Keep in mind that microwave times can vary depending on your microwave's wattage.
Enhance the Flavor: A Few Extra Touches
To make your microwave corn a bit more exciting, you can add a splash of water and a pat of butter to the microwave-safe container.
You can also experiment with seasonings like garlic powder, chili powder, or even a bit of parmesan cheese.
Let's be honest, microwave corn isn’t going to win any culinary awards, but it's a quick and easy way to get your corn fix when you’re in a hurry.
(Part 6) Exploring Other Cooking Methods
If you’re looking for different ways to cook corn, there are plenty of options beyond the cob!
Corn on the Cob: Roasted Perfection
roasted corn on the cob is a fantastic way to bring out its natural sweetness and create a delicious, crispy texture. It's a great alternative to grilling or boiling.
Roasted Corn Method: Simple and Delicious
- Preheat your oven to 200°C (400°F).
- Remove the husks and silks from the corn.
- Drizzle the corn with olive oil and season with salt and pepper.
- Place the corn on a baking sheet and roast for 20-25 minutes, turning halfway through.
Roasted corn is a delicious side dish for any meal and is also great for adding to salads and other dishes.
Shucked Corn: A Versatile Ingredient
Cooking shucked corn opens up a world of possibilities. You can sauté, pan-fry, or add it to soups and stews. It’s a versatile ingredient that can add a sweet and tender flavour to any dish.
Shucked Corn Methods: A Variety of Options
- Sautéed: Heat some olive oil in a pan and sauté the corn kernels for about 5-7 minutes, stirring occasionally.
- Pan-Fried: Heat a bit of butter or oil in a pan and fry the corn kernels until they’re crispy.
- Soups and Stews: Add shucked corn to soups and stews for a sweet and tender flavour.
I've used shucked corn in a variety of dishes, from corn fritters to creamy corn soup, and it always adds a lovely touch.
(Part 7) The Importance of Timing: perfect corn, Every Time
You’ve got your chosen method, but now comes the crucial part: timing. It’s all about striking that perfect balance between tenderness and firmness.
Undercooked Corn: A Culinary Crime
Nobody wants to bite into a hard, uncooked kernel. It's a real mood killer.
- Boiling: Undercooked corn will be hard and chewy.
- Grilling: Undercooked corn won’t have the desired char and will be tough.
- Microwave: Undercooked corn will be hard and chewy.
Overcooked Corn: A Mushy Mess
On the other hand, overcooked corn becomes mushy and loses its flavour.
- Boiling: Overcooked corn will be soft and mushy.
- Grilling: Overcooked corn will be burnt and dry.
- Microwave: Overcooked corn will be soft and mushy.
So, how do you avoid these pitfalls? The best way is to check the corn frequently.
- Boiling: Use a fork to test the kernels. They should be tender but not mushy.
- Grilling: Turn the corn often and check for charring. Once the husks are slightly charred, the corn is likely cooked.
- Microwave: Check the corn after the minimum time and continue cooking in 30-second increments until it’s tender.
(Part 8) FAQs: Your Burning Corn Questions Answered
I know you've probably got a few questions about corn. Let's tackle them head-on!
Q1: How do I store fresh corn?
Fresh corn is best enjoyed immediately, but it can be stored in the refrigerator for a few days.
- Refrigeration: Store the corn in the refrigerator with the husks still on, but remove the silk strands. Place the corn in a plastic bag or wrap it in paper towels to keep it moist.
- Freezing: You can also freeze corn. Remove the husks and silks, blanch the corn in boiling water for 2-3 minutes, and then freeze the kernels in a freezer-safe container.
Q2: Can I freeze cooked corn on the cob?
While you can freeze cooked corn on the cob, it’s not ideal. The texture might be slightly affected, and it can be difficult to thaw.
Instead, try freezing the kernels of cooked corn, as this will preserve the flavour and texture better.
Q3: How do I remove the kernels from the cob?
There are a few ways to do this.
- Knife: Hold the cob upright and use a sharp knife to slice the kernels off.
- Corn Kernel Remover: This tool can be helpful for quickly removing the kernels.
- Use a Skewer: This is a great method for frozen corn. Simply slide the skewer down the cob, and the kernels will pop off.
Q4: What are some delicious ways to serve corn?
The possibilities are endless!
- As a Side Dish: Corn on the cob is a classic side dish for barbecues, summer picnics, and any meal.
- In Salads: Add cooked corn kernels to salads for a sweet and crunchy flavour.
- In Soups and Stews: Corn kernels can add a delicious depth of flavour to soups and stews.
- In Cornbread: Cornmeal is a key ingredient in cornbread, a classic American dish.
- In Fritters: Corn fritters are a delicious way to use up leftover corn.
Q5: What are the health benefits of corn?
Corn is a good source of fiber, vitamins, and minerals, including:
- Fiber: Helps with digestion and promotes satiety.
- Vitamin A: Important for vision, skin, and immune function.
- Vitamin C: An antioxidant that helps protect cells from damage.
- Folate: Essential for cell growth and development.
- Magnesium: Important for muscle and nerve function.
So there you have it! A comprehensive guide to cooking sweet corn to perfection. With these tips and tricks, you'll be able to create a delicious and satisfying corn experience, whether you're boiling, grilling, or simply microwaving.
Now, go forth and conquer the world of corn!
Everyone is watching

Corn on the Cob: The Ultimate Guide to Perfectly Cooked Ears
Healthy MealsAh, corn on the cob. Just the name evokes images of sunny days, barbecues, and that sweet, juicy flavour that ...

Perfect Pork Roast Oven Cooking Time: A Guide to Delicious Results
Healthy MealsThere's something truly satisfying about a perfectly roasted pork. The aroma alone is enough to make your mout...

Ham Cooking Time: How Long to Bake, Smoke, or Boil a Delicious Ham
Healthy MealsAh, ham. It's a classic, isn't it? A real crowd-pleaser, especially around holidays. And when done right, it'...

Scallops: The Ultimate Guide to Perfect Cooking
Healthy MealsAh, scallops. Those delicate, sweet, and utterly delicious morsels of the sea. They hold a special place in my...

Spaghetti Squash: The Ultimate Guide to Cooking and Serving
Healthy MealsRemember that time you saw spaghetti squash at the supermarket, looking all bumpy and strange, and thought, "W...
