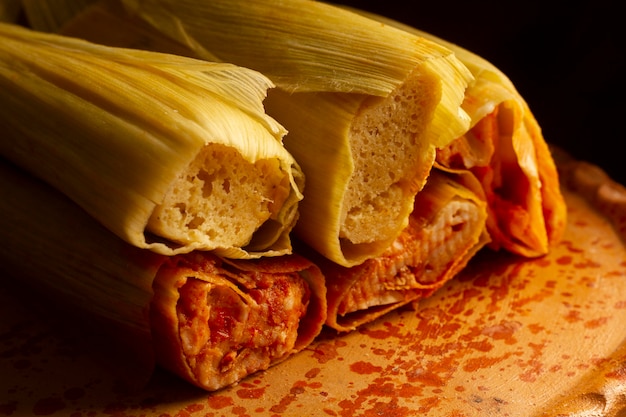
Ah, tamales. Those little bundles of joy, wrapped in corn husks and filled with flavour, are a real treat. They've been a part of my family's tradition for as long as I can remember, and the aroma of steaming masa always brings back warm memories of family gatherings. But let's be honest, mastering the art of making perfect tamales takes more than just a good recipe. It's about understanding the nuances of each step – and that includes knowing how long to cook those delicious parcels to achieve that perfect balance of tenderness and flavour.
So, I'm sharing my experience and insider tips with you today. Think of this as your guide to cooking perfect tamales, a journey from my kitchen to yours. Let's get started, shall we?
Part 1: Setting the Stage for Tamale Success

Before we even touch a corn husk, let's get our tamale game plan in order. Think of it like prepping your kitchen before you start cooking up a storm – it makes everything smoother. We need to gather our ingredients, get the fillings ready, and make sure our steamer is all set.
1.1 Gathering Your Tamale Arsenal
Let's start with the basics. You'll need your masa harina – that magical corn flour that forms the foundation of your tamale dough. Then, there's the essential lard or vegetable shortening, which gives the dough its richness and tenderness. Next, you'll need chicken broth or water for moisture, salt to enhance the flavour, and baking powder to give your dough that light and fluffy texture. These are your tamale building blocks.
1.2 Filling Up with Flavour: Prepping Your Choice of Goodies
Now, for the heart of your tamale – the filling! This is where the fun begins. You can go classic with pork, chicken, or beef, or you can get creative with vegetarian options like black beans, cheese, or even sweet corn. The key is to have your filling pre-cooked and ready to go before you start wrapping your tamales.
If you're using a protein like pork or beef, you'll want to cook it until it's tender and juicy, and then shred it or chop it into bite-sized pieces. For chicken, you can roast or poach it and shred it. For vegetarian fillings, make sure you cook the black beans, corn, or other vegetables thoroughly.
Remember, your filling is the star of the show, so season it generously with your favourite spices. You can use a simple combination of salt, pepper, and cumin, or get adventurous with chili powder, paprika, or garlic powder.
1.3 The Steam Team: Preparing Your Tamale Steamer
The steamer is where the magic truly happens. A good steamer is essential for creating perfectly cooked, moist tamales. You can use a large pot with a steamer basket, or even invest in a dedicated tamale steamer. The important thing is to have a steamer large enough to accommodate all your tamales.
Before you start steaming, line the bottom of your steamer with damp cloths to prevent the tamales from sticking. This little trick will make your life much easier when you're ready to unwrap those delicious bundles.
Part 2: Mastering the Masa Dough: The Heart of Your Tamale

Now, it's time to tackle the heart of your tamale – the masa dough. This is where the real magic happens. Don't be intimidated, because it's really not as complicated as it seems. It's just a matter of getting the consistency right, and I'm here to guide you through every step.
2.1 Bringing Your Masa Dough to Life: A Slow and Steady Approach
Gather your masa harina, lard or shortening, chicken broth or water, salt, and baking powder. Start by slowly adding your liquid to the masa harina, whisking constantly to avoid lumps. As you mix, the dough will start to come together, but don't stop there.
2.2 Kneading for Perfection: Bringing Out the Best in Your Dough
Once the dough is mostly mixed, it's time to get your hands involved. Knead the dough for at least 5 minutes. This is a bit like making bread dough – the kneading develops the gluten and gives the dough a beautiful texture. You'll know it's ready when it's smooth, elastic, and doesn't stick to your fingers.
2.3 The Dough's Consistency: A Balancing Act
The key to perfect tamales is achieving the right consistency for your dough. It should be firm enough to hold its shape, but not so dry that it cracks. If it's too dry, add a bit more broth or water, one tablespoon at a time. If it's too wet, add more masa harina, also one tablespoon at a time. It's all about finding that sweet spot – the point where the dough feels just right.
Part 3: Wrapping Your Delicious Bundles: A Labour of Love

Alright, the dough is ready, the fillings are prepped, and our steamer is hot and waiting. Now, it's time for the fun part – wrapping those delicious bundles of flavour!
3.1 Choosing Your Corn Husks: The Perfect Wrap
You'll need corn husks – the traditional wrapping for tamales. Make sure they are dried and then soaked in hot water for at least 30 minutes. This softens them, making them pliable and easy to work with.
3.2 Preparing the Husks: A Little TLC for a Smooth Wrap
Once the husks are softened, remove them from the water and gently pat them dry. Then, trim the ends to create a smooth, even surface for wrapping. This will help you create a nice, neat tamale that will steam evenly.
3.3 Spreading the Masa: A Gentle Touch
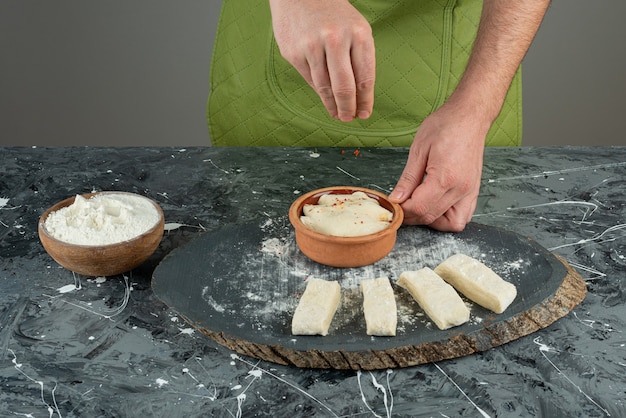
Now, take a husk and place it on a flat surface with the wider end facing you. Use a spoon to scoop a small amount of masa dough and spread it evenly across the husk, leaving a border on the sides. Don't spread it too thinly or too thickly. The idea is to have a thin layer of masa that will hold the filling nicely.
3.4 Filling the Tamale: A Dash of Creativity
Here comes the fun part! Place a spoonful of your prepped filling in the centre of the masa. Make sure to distribute it evenly, leaving a little space around the edges for the masa to seal.
Don't be afraid to get creative with your fillings. You can combine different flavours for a truly unique tamale experience. For example, you could try a mix of pork and black beans, or chicken and sweet corn. The sky's the limit!
3.5 Folding for a Perfect Seal: Keeping the Flavour Inside
Once your filling is in place, fold the husk up to cover the filling, then fold the sides over and tuck the ends in. You want to create a snug, sealed package that will keep all that deliciousness inside during the steaming process.
If you're feeling extra cautious, you can use a small piece of kitchen twine to tie the top of the tamale to ensure a tight seal. But honestly, I find that a good, firm fold usually does the trick.
Part 4: The Art of Steaming: A Journey to Deliciousness
Now that your tamales are all wrapped and ready, it's time for the grand finale – steaming them to perfection!
4.1 Arranging Your Tamales: Like Soldiers in a Row
Arrange your tamales in the steamer, standing upright, and make sure they are close enough to ensure steam circulates evenly. If you're using a steamer basket, you can use toothpicks or skewers to hold the tamales in place. This will prevent them from falling over during the steaming process.
4.2 Timing is Everything: The Crucial 1 to 2 Hours
Now, the big question: how long do you cook them? That depends on the size and thickness of your tamales. Generally, it takes 1 to 2 hours to steam them to perfection.
Here's a rough guide:
- Small tamales: 1 to 1.5 hours
- Medium tamales: 1.5 to 2 hours
- Large tamales: 2 to 2.5 hours
4.3 The Tell-Tale Signs of Doneness: Knowing When It's Ready
As your tamales are steaming, keep an eye on them. You'll know they're done when the masa is firm and pulls away easily from the husk, and the filling is cooked through. You can also check the masa by gently pressing on it with your finger. If it springs back, it's ready.
If you're unsure, you can always use a meat thermometer to check the temperature of the filling. It should reach an internal temperature of 165°F (74°C) to ensure the filling is cooked thoroughly.
Part 5: Unveiling Your Tamale Treasures: The Moment of Truth
After the magic of steaming, it's time for the unveiling. Take those beautiful bundles out of the steamer and let them cool for a few minutes. Then, gently peel back the husk, and get ready to experience a taste sensation!
Part 6: Serving Up Perfection: The Finishing Touches
Your tamales are ready to be devoured! You can serve them plain, or you can add a few finishing touches to take them to the next level.
6.1 Topping with Love: A Dash of Flavour
A dollop of salsa, a sprinkle of cilantro, or a drizzle of sour cream can really elevate your tamales. You can also experiment with other toppings, such as chopped onions, avocado, or a squeeze of lime juice.
6.2 Pairing with Perfection: The Right Sides
For a complete meal, serve your tamales with rice, beans, or a fresh salad. You can also add a side of guacamole or pico de gallo for a touch of extra flavour.
Part 7: Mastering the Art of Tamale Making: A Journey of Practice
I hope this guide has been helpful! Creating perfect tamales is all about understanding the process and mastering the details. Don't be discouraged if your first batch isn't perfect. With practice and patience, you'll become a tamale pro in no time.
7.1 Tips for Success: A Little Extra Help
Here are a few additional tips to help you on your tamale journey:
- When preparing the corn husks, soak them in hot water for at least 30 minutes. This will make them pliable and easy to work with.
- To prevent the masa from sticking to your fingers, use a bit of lard or shortening to grease your hands.
- If your tamales are sticking to the steamer basket, you can place a piece of parchment paper between the tamales and the basket.
- If you're worried about the tamales drying out during the steaming process, you can add a cup of water to the bottom of the steamer. This will help create a more humid environment.
- If your tamales are a bit too dry after steaming, you can wrap them in a damp tea towel for a few minutes to help them steam a little more.
Part 8: FAQs: Your Tamale Questions Answered
Here are some of the most common questions about tamale cooking, answered.
8.1 Can I freeze tamales?
Absolutely! You can freeze tamales for up to 3 months. To freeze them, wrap them individually in plastic wrap and then place them in a freezer-safe bag. To reheat frozen tamales, place them in the steamer for 1 hour. You can also reheat them in the microwave for a quicker option.
8.2 What if my tamales are too dry?
If your tamales are too dry, it could be because the masa dough was too dry or the steaming time wasn't long enough. If you're worried about drying out, you can add a cup of water to the bottom of the steamer to help create a more humid environment. You can also try wrapping the tamales in a damp tea towel for a few minutes to help them steam a little more.
8.3 What if my tamales are too wet?
If your tamales are too wet, it could be because the masa dough was too wet. You can try adding a little more masa harina to the dough to absorb the excess moisture. Make sure you knead the dough well to incorporate the additional masa harina.
8.4 Can I make tamales ahead of time?
Yes, you can make tamales ahead of time. Just wrap them and place them in the refrigerator for up to 2 days. When you're ready to cook them, simply steam them as usual.
8.5 What are some creative tamale fillings?
The beauty of tamales is that you can get creative with the fillings. Some popular options include:
| Filling | Description |
|---|---|
| Pork | Classic and flavorful, often seasoned with chili powder, cumin, and oregano. |
| Chicken | Mild and versatile, can be paired with a variety of sauces and spices. |
| Beef | Hearty and satisfying, often seasoned with chili powder, cumin, and garlic. |
| Black Beans | Vegetarian and flavorful, often seasoned with cumin, chili powder, and garlic. |
| Cheese | Creamy and comforting, often paired with spinach, mushrooms, or other vegetables. |
| Sweet Corn | Sweet and savory, often paired with peppers, onions, and cilantro. |
| Shrimp | A delightful seafood option, seasoned with spices like garlic, chili powder, and paprika. |
| Mushroom and Spinach | A hearty vegetarian option, filled with earthy flavors and creamy textures. |
| Pumpkin and Spice | A unique and flavorful option for the fall season, with warming spices like cinnamon and nutmeg. |
Don't be afraid to experiment! You can create your own unique flavour combinations to suit your taste buds. The possibilities are truly endless!
Everyone is watching

Corn on the Cob: The Ultimate Guide to Perfectly Cooked Ears
Healthy MealsAh, corn on the cob. Just the name evokes images of sunny days, barbecues, and that sweet, juicy flavour that ...

Perfect Pork Roast Oven Cooking Time: A Guide to Delicious Results
Healthy MealsThere's something truly satisfying about a perfectly roasted pork. The aroma alone is enough to make your mout...

Ham Cooking Time: How Long to Bake, Smoke, or Boil a Delicious Ham
Healthy MealsAh, ham. It's a classic, isn't it? A real crowd-pleaser, especially around holidays. And when done right, it'...

Scallops: The Ultimate Guide to Perfect Cooking
Healthy MealsAh, scallops. Those delicate, sweet, and utterly delicious morsels of the sea. They hold a special place in my...

Spaghetti Squash: The Ultimate Guide to Cooking and Serving
Healthy MealsRemember that time you saw spaghetti squash at the supermarket, looking all bumpy and strange, and thought, "W...
