Let's face it, sometimes the craving for a juicy burger strikes when you're least prepared. You're staring into the depths of your freezer, and there they are – those trusty frozen patties, ready to save the day. But how long do you cook them for? How do you ensure they're cooked through without turning into dry, flavorless discs? Fear not, fellow burger enthusiasts, I'm here to share my hard-earned wisdom and guide you towards burger perfection, even when starting with frozen patties.
(Part 1) Choosing Your Equipment: Skillets, Pans, and More
The first step in conquering the frozen burger is selecting the right cookware. You can't just toss it into any old pan and expect a masterpiece. Trust me, I've learned this the hard way. Here's a rundown of the best options for tackling frozen burgers on the stovetop:
1. cast iron skillet: A Kitchen Classic
For seasoned cooks, a trusty cast iron skillet is often the first choice. It distributes heat evenly, ensuring a consistently cooked burger. My own cast iron skillet is older than my first car, and it's still going strong. It gets incredibly hot, essential for achieving that coveted crispy sear we all crave. Just remember to preheat it thoroughly – a good hot skillet is crucial for a successful burger.
2. Non-Stick Skillet: Convenience and Ease
A non-stick skillet offers a convenient alternative, especially if you're not keen on the upkeep of a cast iron pan. It's easier to clean and prevents the burger from sticking. However, non-stick skillets don't get as hot as cast iron, so cooking might take a bit longer. And for goodness sake, don't use metal utensils – you'll scratch the surface, ruining the non-stick properties.
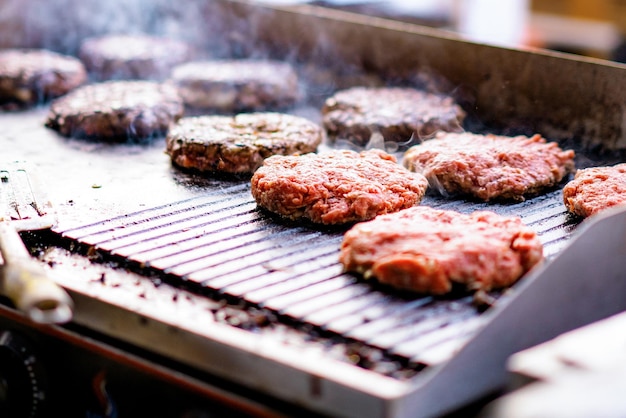
3. Grill Pan: For Those Perfect Grill Marks
For that signature grill aesthetic, a grill pan is the way to go. It has raised ridges that create those enticing grill marks. While grill pans can produce excellent results, they require a bit more attention to ensure even cooking. Preheating is essential, just like with the cast iron skillet.
(Part 2) Prepping Your Frozen Burger: The Essential Steps
Now that you've chosen your weapon of choice, it's time to prepare your frozen burger for battle. This might seem simple, but proper prepping makes a significant difference in the final product. Here's how to do it right:
1. Unpacking and Wiping
First, remove the burger from its packaging. You want the entire surface exposed to the heat for even cooking. Give it a quick wipe with a paper towel to remove any excess moisture. Nobody wants a soggy burger, do they?
2. Leave It Frozen: Defrosting is a No-No
One common misconception is that you must defrost your burger before cooking. Forget it! Cooking straight from frozen is perfectly acceptable, and in some ways, even preferable. It helps prevent the burger from drying out. Think of it as a time-saving hack – who wants to wait for a burger to defrost? Not me!
3. Fat is Your Friend
If your burger is on the leaner side, consider adding a bit of extra fat to your pan to prevent sticking and add a delicious, juicy flavor. A tablespoon of butter or oil should do the trick. Get creative with your oil choices – olive oil, avocado oil, or even something more flavorful like sesame oil can add unique nuances. It's your burger, so make it yours!
(Part 3) The Cooking Process: Timing, Temperature, and Techniques
Now, for the moment of truth, the actual cooking process. You've got your equipment, the burger is prepped, and you're ready to get cooking. Let's dive into the specifics of timing, temperature, and techniques.
1. Preheat Your Pan: The Heat is On
Start by getting your chosen pan screaming hot. I'm talking about the kind of heat that makes you feel it radiating from the surface. You can test it by dropping a tiny bit of water on the pan – if it sizzles and evaporates immediately, you're ready to go. This ensures a great sear and prevents your burger from simply steaming in the pan. A good sear adds flavor, texture, and that satisfying "crisp" we all love in a burger.
2. Cook Time: A Guide, Not a Dictate
cooking time for a frozen burger depends on its thickness, your pan's heat, and your desired doneness. As a general guide, aim for about 8-10 minutes per side. But, this is crucial, watch it closely! You're not dealing with a set-it-and-forget-it situation. Keep an eye on it, especially with a non-stick pan, as it can cook faster than you think.
3. How to Tell If It's Done: Doneness Indicators
So, how do you know when your burger is cooked through? Safety is paramount, and reaching the right internal temperature is key. A meat thermometer is your best friend here. Aim for 160°F (71°C). You can also gauge doneness by pressing gently on the center. If it springs back, it's cooked. If it feels mushy, it needs a little more time.
4. The Art of Flipping: Patience and Timing
Let's talk flipping. Resist the temptation to flip constantly. It hinders the development of a good sear. Flip only once, or maybe twice, when the bottom is nicely browned and releases easily from the pan. If it sticks, gently nudge it with a spatula. Don't force it.
(Part 4) Cooking to Perfection: Doneness and Temperature
Now, let's delve into the topic of doneness. This is where personal preference reigns supreme. Some folks prefer a rare burger, while others favor a well-done patty. My personal sweet spot is a medium-rare burger, but you do what makes your taste buds sing.
1. Rare: A Red Center
A rare burger has a reddish-brown center and a shorter cooking time, resulting in a juicy, tender texture. However, be cautious with this level of doneness. If you're unsure about raw meat, opting for a more well-done option is recommended. The internal temperature should be around 125°F (52°C).
2. Medium-Rare: Pink and Juicy
This is my go-to. A medium-rare burger has a pink center and a slightly browned exterior. It's cooked longer than rare, offering a more flavorful, slightly firmer texture. The internal temperature should be around 130-135°F (54-57°C).
3. Medium: A Touch of Pink
A medium burger has a slightly pink center and is cooked a bit longer than medium-rare. This option caters to those who prefer a little less pink but still crave juiciness. The internal temperature should be around 140-145°F (60-63°C).
4. Medium-Well: Barely Any Pink
A medium-well burger has a very slight pink center and is cooked longer than medium. It's a safe choice for those who enjoy a well-done burger but still want some moisture. The internal temperature should be around 150-155°F (66-68°C). This is a great choice if you're cooking for children or those with sensitive stomachs.
5. Well-Done: Browned Throughout
A well-done burger has a brown center and is cooked the longest. It's the safest option, but it can become dry and tough. The internal temperature should be 160°F (71°C) or above.
(Part 5) Extra Flavor: Toppings and Sauces
With your burger cooked to perfection, it's time to add the finishing touches – delicious toppings and sauces. This is where you can really unleash your creativity. You can go classic with cheese and lettuce or experiment with more exotic flavors. The possibilities are endless!
1. Classic Toppings: A Timeless Combination
Start with the tried and true. A slice of cheddar or American cheese, crisp lettuce, juicy tomato slices, and a creamy slice of onion are always winners. Don't forget the pickles! A few dill pickles add that tangy kick that balances out the burger's richness.
2. Elevated Options: A Gourmet Touch
For a more sophisticated burger, try artisanal cheeses like Gruyere or blue cheese. You can also explore roasted peppers, caramelized onions, or even a fried egg. I'm a big fan of adding a dollop of guacamole for a creamy, flavorful twist.
3. Sauces: The Finishing Touch
No burger is complete without a good sauce. Ketchup, mustard, and mayonnaise are classics. If you're feeling adventurous, try sriracha mayo, bbq sauce, or even a tangy chimichurri sauce. The choice is yours!
(Part 6) Serving Your perfect burger: Presentation Matters
So, your burger is cooked, topped, and sauced to perfection. It's time to serve it up and savor the moment! But before you dive in, there are a few things to consider to elevate the experience.
1. Serving Temperature: Hot and Ready
Ideally, you want your burger served piping hot. Keep it warm on a plate or in a warming oven until you're ready to serve it. But don't let it sit for too long, as it can become dry and chewy.
2. Accompaniments: The Perfect Pairing
No burger is complete without tasty accompaniments. Think crunchy fries, onion rings, or a refreshing salad. I like to serve my burgers with a side of creamy coleslaw or a simple green salad. The options are endless, so let your creativity guide you.
(Part 7) Handling Leftovers: Maximizing Your Burger Experience
I know what you're thinking: "leftovers?" But let's be real – sometimes you end up with more burger than you can handle. I'm not suggesting you eat the whole thing at once (that's just not healthy). Here's what to do when you've got leftovers:
1. Storing Your Burger: Keep It Fresh
Store leftover burgers in an airtight container in the fridge for up to 3-4 days. Let them cool completely before storing. You can also freeze leftovers for a longer period, but try to eat them within a month or two for optimal taste. To reheat, use the oven, microwave, or a pan on the stovetop. Remember, reheating can make the burger dry, so adding some sauce or toppings might be necessary.
(Part 8) Tips and Tricks for the Perfect Burger: From a Seasoned Pro
I've been cooking burgers for years, and I've learned a few things along the way. Here are some tips and tricks that can make all the difference in your burger game:
1. Embrace the Meat Thermometer: A Must-Have Tool
I can't stress this enough. A meat thermometer is crucial for ensuring your burger is cooked to your preferred doneness and safe to eat. It's a small investment that can save you from a lot of disappointment (and potential foodborne illnesses). You don't want a dry, overcooked burger, and a meat thermometer helps you avoid that.
2. Don't Overcrowd the Pan: Space is Key
If you're cooking multiple burgers, don't overcrowd the pan. This lowers the temperature, leading to uneven cooking. You want those beautiful sear marks, not a steamed burger. Cook in batches, ensuring enough space between each patty.
3. Add a Little Moisture: Preventing Dryness
To prevent your burger from drying out, add a little moisture during cooking. Sprinkle a few drops of water on the burger, or even add a tablespoon of stock to the pan. It adds a little extra flavor, too. Do this towards the end of cooking.
4. Let It Rest: Distributing the Juices
Once your burger is cooked, let it rest for a few minutes before assembling your sandwich. This allows the juices to redistribute throughout the patty, resulting in a juicier, more flavorful burger. I usually let it rest for about 5 minutes, but you can let it rest for even longer if you're patient.
FAQs: Common Burger Queries
I'm sure you have questions. Everyone does, even seasoned burger veterans like myself. Let's tackle some of the most common inquiries.
1. Can I Cook Frozen Burgers in the Oven?
Yes, you can. Preheat your oven to 400°F (200°C). Place the frozen burger on a baking sheet lined with parchment paper. Cook for 15-20 minutes, or until the internal temperature reaches 160°F (71°C). While it works, I prefer the stovetop method, as it delivers that crispy sear that the oven can't replicate.
2. Can I Cook Frozen Burgers on the Grill?
Absolutely! Preheat your gas or charcoal grill to medium-high heat (around 350-400°F, or 175-200°C). Place the frozen burger directly on the grill grate. Cook for 8-10 minutes per side, or until the internal temperature reaches 160°F (71°C). Use a meat thermometer to check for doneness. And enjoy those delectable grill marks!
3. How Do I Prevent My Burger from Sticking to the Pan?
Preheat your pan thoroughly. Use a high-quality non-stick pan or cast iron skillet. Add a tablespoon of oil or butter to the pan before adding the burger. Avoid using metal utensils on a non-stick pan – they can scratch the surface. If you're using a cast iron pan, season it regularly to prevent sticking. With a good quality pan, sticking should be minimal. Remember, don't force the burger. If it sticks, gently nudge it with a spatula.
4. Can I Cook Frozen Burgers in an Air Fryer?
Yes, you can! Preheat your air fryer to 400°F (200°C). Place the frozen burger in the air fryer basket and cook for 8-10 minutes, or until the internal temperature reaches 160°F (71°C). You may need to adjust cooking time based on the burger size and your air fryer. Check periodically to ensure it doesn't burn.
5. What If I Overcooked My Burger?
Don't panic! A slightly overcooked burger is still edible, it might just be a little dry. To combat dryness, add more sauce or toppings. A juicy tomato slice, extra ketchup, or creamy guacamole can save a dry burger. But, if you've got a burnt burger, that's a different story. It's not worth salvaging – time to cook another one!
There you have it – a comprehensive guide to cooking frozen burgers on the stovetop. Now go forth and conquer your burger cravings, one juicy patty at a time!
Everyone is watching

Corn on the Cob: The Ultimate Guide to Perfectly Cooked Ears
Healthy MealsAh, corn on the cob. Just the name evokes images of sunny days, barbecues, and that sweet, juicy flavour that ...

Scallops: The Ultimate Guide to Perfect Cooking
Healthy MealsAh, scallops. Those delicate, sweet, and utterly delicious morsels of the sea. They hold a special place in my...

Spaghetti Squash: The Ultimate Guide to Cooking and Serving
Healthy MealsRemember that time you saw spaghetti squash at the supermarket, looking all bumpy and strange, and thought, "W...

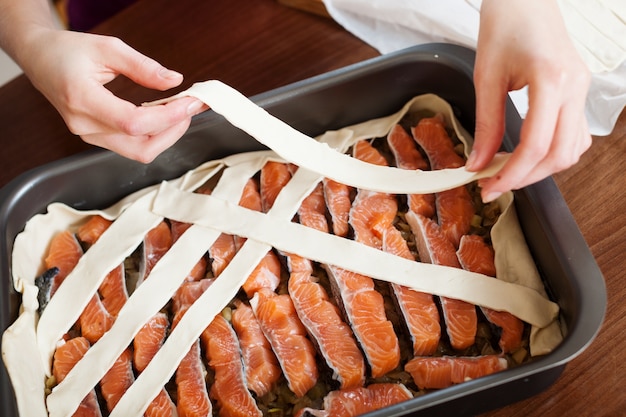
Salmon Cooking Times: Perfect Guide for Every Recipe
Healthy MealsLet me tell you, cooking salmon is an art form. It's all about getting that perfect balance: juicy and tender,...

Ham Cooking Time: How Long to Bake, Smoke, or Boil a Delicious Ham
Healthy MealsAh, ham. It's a classic, isn't it? A real crowd-pleaser, especially around holidays. And when done right, it'...