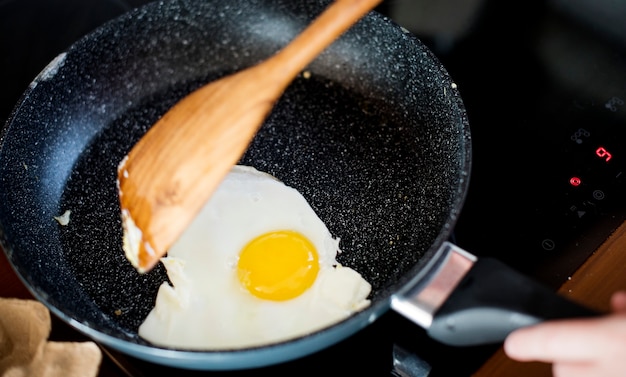
boiling eggs. It seems like such a simple task, right? Just drop them in the water, bring it to a boil, and wait. But as any seasoned cook knows, there's a whole science and art to achieving those perfect, perfectly-cooked eggs.
I've been on a lifelong quest for the ideal boiled egg – the kind where the yolk is silky smooth and runny, the white is set but still tender, and the shell peels off effortlessly. It's a journey filled with experimentation, a few burnt pots, and a whole lot of delicious discoveries.
Join me as we dive into the fascinating world of boiling eggs, exploring the science behind those different textures, uncovering the secrets to achieving perfection, and even venturing into some creative variations. Ready? Let's get cracking!
(Part 1) The Science of Boiling Eggs
Unveiling the Egg's Inner Workings
Before we even touch a pot, let's take a moment to appreciate the incredible structure of the humble egg. It's a marvel of nature, with each component playing a crucial role in how it cooks.
The yolk, that golden orb at the centre, is a powerhouse of protein and fat. As it heats up, those proteins gradually solidify, transforming from a liquidy state to a smooth, creamy texture, then firming up further. Think of it as a journey from molten gold to a gently-set gem.
The white, on the other hand, is mostly protein and water. It sets at a lower temperature than the yolk, transitioning from clear and watery to a solid, opaque white. Imagine it as a delicate cloud slowly transforming into a fluffy, yet firm, meringue.
The Heat Factor: Mastering the Transformation
How we apply heat to the egg is what ultimately determines its final texture. Gentle heat, like a simmering water bath, allows the proteins to set slowly and evenly, resulting in a tender egg white and a creamy, luxurious yolk. It's like a slow dance, where each element takes its time to transform.
High heat, such as in a vigorously boiling pot, causes the proteins to cook rapidly, leading to a firmer, slightly tougher white and a more solid yolk. Think of it as a quick burst of energy, where the proteins react rapidly and the texture shifts noticeably.
(Part 2) The Methods: Choosing Your Approach
The Classic Boil: A Tried and True Method
Now, let's move on to the actual boiling process. This is where the magic happens, and the key to success lies in precision and timing.
1. Egg Selection: Freshness matters! fresh eggs tend to have smaller air pockets, making them less likely to crack during boiling.
2. Water's Edge: Make sure your pot is large enough to completely cover the eggs with water.
3. Gentle Entry: Avoid shock! Gently lower the eggs into the boiling water using a spoon or slotted spatula. This helps prevent cracking.
4. Timing is Key: This is the pivotal moment – the length of time you boil the eggs determines the final texture. We'll explore this in detail soon.
5. The Cool Down: After the designated time, drain the water and immediately plunge the eggs into a bowl of cold water. This swiftly stops the cooking process, making peeling a breeze.
The Cold Water Start: A Gentle Touch
This method is believed to be gentler on the eggs, reducing the chances of cracking.
1. The Starting Point: Place the eggs in the pot, cover them with cold water, and bring the water to a boil.
2. Rest and Relax: Once the water boils, remove the pot from the heat and cover it with a lid. Let the eggs rest in the hot water for the desired time.
3. The Finish: Drain the water and cool the eggs in cold water.
The Hot Water Start: Quick and Efficient
This method is favoured for its speed, but it requires a little more care to prevent those dreaded cracks.
1. Start Strong: Bring a pot of water to a rolling boil.
2. Careful Entry: Gently add the eggs to the boiling water, taking your time to prevent them from bumping against the bottom of the pot.
3. Simmer Time: Reduce the heat to a simmer and cook for the desired time.
4. Cool Down: Drain the water and cool the eggs in cold water.
(Part 3) Timing is Everything: Mastering the Textures
The egg texture Chart: Your Guide to Perfection
This table outlines the approximate boiling times for different egg textures. Remember, these are just guidelines, and the actual time may vary depending on the size of your eggs and your personal preferences.
| Texture | Boiling Time (Cold Start) | Boiling Time (Hot Start) |
|---|---|---|
| Soft Boiled (Very runny yolk) | 3-4 minutes | 1-2 minutes |
| Soft Boiled (Runny Yolk) | 5-6 minutes | 3-4 minutes |
| Medium Boiled (Creamy Yolk) | 6-7 minutes | 4-5 minutes |
| Hard Boiled (Firm Yolk) | 8-10 minutes | 6-8 minutes |
| Very Hard Boiled (Overcooked Yolk) | 12 minutes | 10 minutes |
My Personal Preference: The Golden Yolk
Personally, I'm a big fan of the "golden yolk" stage – that sweet spot where the yolk is just a little bit firmer than a soft-boiled egg, but still beautifully creamy and rich. It's like a perfect balance of textures, offering a bit of resistance while still maintaining that luscious quality.
Tips for Perfect Texture
Freshness is Key: Start with fresh eggs – they're less likely to crack and have a better texture overall.
Don't Overdo It: It's better to undercook slightly than overcook. A perfectly cooked egg should have a tender white and a creamy yolk.
Time is of the Essence: Use a timer! Don't rely on your memory.
Cool It Down: Quickly cooling the eggs stops the cooking process and makes peeling much easier.
(Part 4) The Art of Peeling: Techniques for Effortless Removal
Tips for Easy Peeling: Conquering the Shell
We've all been there – wrestling with a boiled egg, ending up with a messy, cracked shell and a frustrated sigh. But fear not! Here are a few techniques to make peeling a breeze:
Older Eggs: A Secret Weapon: Older eggs tend to have larger air pockets, which makes the shell easier to remove.
Crack It Open: Crack the shell all over before peeling. This allows air to enter and loosen the shell.
Start at the Wide End: Begin peeling at the wider end, where the air pocket is located.
Spoon Assistance: Gently pry off the shell with a spoon.
Water Power: Peel under running water – the water helps loosen the shell and makes peeling a smoother process.
The "Tap and Peel" Method: My Go-to Technique
This method has become my personal favourite for peeling boiled eggs.
1. The Tap: After the eggs are boiled and cooled, gently tap the shell all over with the back of a spoon.
2. The Roll: Roll the egg between your hands, applying a bit of pressure. The shell should start to crack and loosen.
3. Water Removal: Peel the egg under running water, using your fingers to help remove the shell.
(Part 5) Beyond the Basics: Exploring New Horizons
Flavoured Eggs: A culinary adventure
Once you've mastered the basics of boiling eggs, it's time to get creative!
Herbs and Spices: Add herbs, spices, or aromatics to the boiling water for a flavourful twist. Think bay leaves, thyme, peppercorns, a pinch of cayenne pepper, or even a splash of soy sauce.
Marbled Magic: Add a tablespoon of vinegar to the boiling water for a marbled effect on the egg whites. It adds a touch of visual whimsy.
Elevated Eggs: Deviled and More
deviled eggs: A classic party appetizer, deviled eggs are always a crowd-pleaser. Simply hard-boil eggs, peel them, and mash the yolks with mayonnaise, mustard, and your favourite seasoning.
egg salad: A delicious sandwich filling, egg salad combines hard-boiled eggs with mayonnaise, celery, onion, and seasoning.
Creative Applications: A Culinary Canvas
Boiled eggs are incredibly versatile and can be incorporated into countless dishes.
Salads: A classic addition, adding protein and texture to any salad.
Breakfast Bowls: Top your favourite breakfast bowl with chopped boiled eggs for a boost of protein.
Soups: Boiled eggs can be added to soups for a hearty and nutritious meal.
pasta dishes: Boiled eggs add colour and flavour to pasta dishes, making them more appealing and satisfying.
(Part 6) Storing and Leftovers: Keeping Those Eggs Fresh
Storing Boiled Eggs: Refrigeration Essentials
Once peeled, boiled eggs should be stored in the refrigerator in a sealed container. They can last for up to a week, making them a handy ingredient to have on hand.
Leftover Boiled Eggs: Culinary Creativity
Leftover boiled eggs are a culinary treasure! Don't let them go to waste! Use them in a variety of dishes, such as:
Egg Salad Sandwiches
Deviled Eggs
Soups and Salads
(Part 7) Troubleshooting: Common Challenges and Solutions
Cracked Eggs: Preventing Those Cracks
If your eggs crack during boiling, don't panic! It won't affect the taste, but it might make peeling a bit trickier.
Salt to the Rescue: Add a tablespoon of salt to the boiling water. This helps to raise the boiling point, making the eggs less likely to crack.
Spoon Support: Place a wooden spoon over the eggs in the pot. This helps to prevent them from bumping against the bottom of the pot, reducing the risk of cracking.
Rubber Eggs: Avoiding Overcooked Whites
If your egg whites are rubbery, it's a sign of overcooking. To prevent this, reduce the boiling time or use the cold water start method.
green ring Around the Yolk: Avoiding Overcooked Yolks
A green ring around the yolk is a sign of overcooking. The green ring is caused by the reaction of iron in the yolk with hydrogen sulfide produced by the white.
Cold Water Start: Using the cold water start method helps to prevent the green ring from forming.
Time Management: Avoid overcooking the eggs.
Quick Cooling: Cool the eggs quickly after cooking.
(Part 8) FAQs: Answers to Your Burning Questions
1. What is the best way to peel a boiled egg?
The "tap and peel" method is the most effective way to peel a boiled egg. Gently tap the shell with a spoon, roll the egg between your hands to loosen the shell, and peel under running water.
2. Why do my boiled eggs have a green ring around the yolk?
A green ring around the yolk indicates overcooking. It's caused by a chemical reaction between the iron in the yolk and the hydrogen sulfide produced by the white. To prevent this, avoid overcooking and use the cold water start method.
3. Can I reuse the water I boiled the eggs in?
It's not recommended to reuse the water you boiled the eggs in. The water contains sulfur, which can make the eggs taste rubbery.
4. How long can I store boiled eggs in the refrigerator?
Boiled eggs can be stored in the refrigerator in a sealed container for up to a week.
5. What happens if I add vinegar to the boiling water?
Adding a tablespoon of vinegar to the boiling water can help to prevent the eggs from cracking. It also gives the egg whites a marbled appearance.
And there you have it! Armed with this knowledge, you're ready to conquer the art of boiling eggs. Get cracking (pun intended!), and enjoy the perfect egg every time.
Everyone is watching

Corn on the Cob: The Ultimate Guide to Perfectly Cooked Ears
Healthy MealsAh, corn on the cob. Just the name evokes images of sunny days, barbecues, and that sweet, juicy flavour that ...

Perfect Pork Roast Oven Cooking Time: A Guide to Delicious Results
Healthy MealsThere's something truly satisfying about a perfectly roasted pork. The aroma alone is enough to make your mout...

Ham Cooking Time: How Long to Bake, Smoke, or Boil a Delicious Ham
Healthy MealsAh, ham. It's a classic, isn't it? A real crowd-pleaser, especially around holidays. And when done right, it'...

Scallops: The Ultimate Guide to Perfect Cooking
Healthy MealsAh, scallops. Those delicate, sweet, and utterly delicious morsels of the sea. They hold a special place in my...

Spaghetti Squash: The Ultimate Guide to Cooking and Serving
Healthy MealsRemember that time you saw spaghetti squash at the supermarket, looking all bumpy and strange, and thought, "W...