Ah, ham. The glorious, salty, succulent star of countless festive gatherings. But let's be honest, we've all experienced the heartbreak of a dry, rubbery ham disaster. I know I have! For a while, I relied on those vague "cook for X minutes per pound" instructions on the packaging. Talk about useless! So, I decided to unravel the mysteries of ham cooking and, let me tell you, I've learned a thing or two.
Join me on a journey through the wonderful world of ham, where we'll tackle everything from understanding different types of ham to mastering the perfect cooking time and temperature. We'll explore roasting, boiling, and even delve into the art of creating a sensational glaze. I'll share my favourite recipes and tips to make your next ham a triumph.
Ready to kiss those dry ham blues goodbye and become a ham cooking pro? Let's get started!
(Part 1) Getting to Know Your Ham
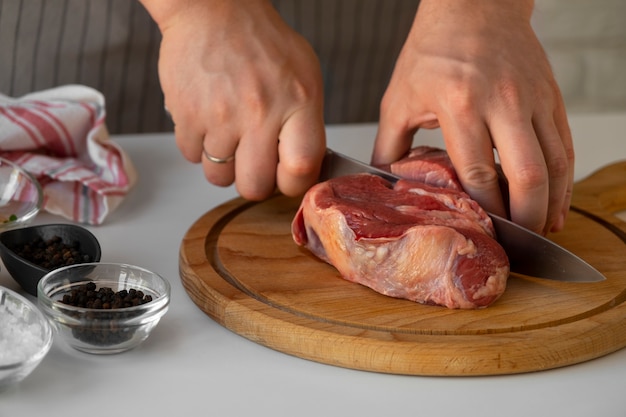
The first step to a delicious ham is choosing the right one. It might seem obvious, but there's a whole world of hams out there, each with its own unique characteristics and cooking methods.
Different Types of Ham: A culinary journey
Picture this: a vast landscape of ham varieties. It's a bit overwhelming, I know. But fear not, because understanding the different types is essential for crafting a perfectly cooked masterpiece.
- fresh ham: This is the classic, uncooked ham that requires cooking before it's ready to eat. You'll usually find it bone-in, but boneless versions are also available. Think of it as the blank canvas for your culinary creations.
- cured ham: Imagine a ham that has been treated with salt and other preservatives, giving it a longer shelf life. Cured ham can be cooked or enjoyed cold, offering a delightful range of culinary possibilities.
- smoked ham: This is where the magic of smoke comes into play. This ham has been treated with a smoky kiss, imparting a distinctive flavour that's hard to resist. Smoked ham is typically cured and can be eaten cold or cooked, adding a touch of rustic charm to any dish.
- spiral sliced ham: Ah, the ultimate convenience. This ham is already cooked and sliced, making it a perfect choice for a quick and easy meal. Simply reheat it and enjoy!
Choosing the Right Ham: A Matter of Taste
Now that you've explored the fascinating world of ham varieties, it's time to choose the perfect one for your culinary adventure. If you're looking for a simple and straightforward option, a spiral-sliced ham is your go-to. But if you're feeling adventurous and want to impress your guests with a homemade ham, a fresh or cured ham will allow you to unleash your culinary creativity.
Understanding Ham Labels: Demystifying the Packaging
Those often-intimidating labels on ham packaging actually hold valuable information. Here's a quick guide to help you decode the mysteries:
- "Fully Cooked": This is your cue that the ham is safe to eat straight from the package or can be reheated. It's a perfect choice for a quick and easy meal.
- "Uncooked": This means that the ham needs to be cooked before you can enjoy its deliciousness. It's a great option if you want to cook it from scratch and add your personal touch.
- "Cured": This indicates that the ham has been treated with salt and other preservatives, giving it a longer shelf life. It's a versatile choice for both cooking and serving cold.
- "Smoked": This label reveals that the ham has been infused with the tantalising aroma of smoke, imparting a distinctive flavour that's simply irresistible.
(Part 2) Mastering Ham cooking techniques: From Roasting to Boiling
Alright, you've chosen your perfect ham. Now it's time to get cooking! There are a few different techniques you can use, each with its own advantages.
Roasting Ham: Achieving That Crispy, Golden Crust
Roasting is the classic way to cook a ham, and it's a surefire way to get that glorious, crispy, golden crust. Here's how to do it like a pro:
- Preheat your oven to 325°F (160°C). This will ensure that your ham cooks evenly and achieves that perfect golden brown colour.
- Place the ham in a roasting pan. Choose a roasting pan that's large enough to accommodate the ham and any juices that may drip during cooking.
- Cover the ham with foil and roast for about 15 minutes per pound. This will help keep the ham moist and prevent it from drying out.
- Remove the foil and roast for another 15 minutes per pound, or until the internal temperature reaches 140°F (60°C). This will allow the ham to develop that beautiful golden crust.
- Let the ham rest for at least 15 minutes before carving. This will allow the juices to redistribute, resulting in a succulent and juicy ham.
Boiling Ham: A Simpler Approach to Tenderness
Boiling ham is a simpler method, perfect for creating a tender and moist ham. Here's how to do it:
- Place the ham in a large pot and cover with water. Make sure the pot is large enough to accommodate the ham comfortably.
- Bring the water to a boil, then reduce heat and simmer for 15-20 minutes per pound. This gentle simmering process will ensure that the ham cooks evenly and stays moist.
- Remove the ham from the pot and let it cool slightly before carving. This will allow the ham to settle and make carving easier.
reheating ham: Bringing Back the Flavour
If you're working with a pre-cooked ham, all you need to do is reheat it. Here are a few options to bring back its deliciousness:
- Oven: Preheat your oven to 325°F (160°C). Place the ham in a roasting pan and cover it with foil. Reheat for about 15-20 minutes, or until heated through.
- slow cooker: Place the ham in your trusty slow cooker and cook on low for 2-3 hours, or until it's warm and inviting.
- Microwave: Place the ham in a microwave-safe dish and cover it with plastic wrap. Microwave on high for 1-2 minutes per pound, or until it's heated through.
(Part 3) Understanding Ham Cooking Times: Beyond Minutes per Pound
Now, let's talk about ham cooking times. Those vague "minutes per pound" instructions can be a real headache! They don't always take into account the different types of ham or even the presence of a bone. So, what's a ham enthusiast to do?
Factors Affecting Ham Cooking Times: The Variables to Consider
Here are the key factors that can influence how long your ham needs to cook. Keep them in mind for your next ham cooking adventure:
- Ham Type: As we discussed, different types of ham require different cooking times. An uncooked ham will take longer than a pre-cooked ham, for example.
- Ham Size: A larger ham will obviously take longer to cook than a smaller ham.
- Ham Shape: A ham with a bone will generally take longer to cook than a boneless ham. This is because the bone helps to retain heat, slowing down the cooking process.
- Cooking Method: Roasting and boiling will require different cooking times. Roasting tends to be faster due to the higher temperature, while boiling takes longer but results in a more tender ham.
General Ham Cooking Times: A Starting Point for Your Culinary Journey
While those "minutes per pound" instructions can be a starting point, I find that using an internal temperature thermometer is a much more reliable way to ensure your ham is perfectly cooked. Here's a general guide for ham cooking times, but remember, it's always a good idea to consult the specific instructions on your ham package and use a thermometer to confirm the internal temperature.
| Ham Type | Cooking Time (minutes per pound) | Internal Temperature (°F) |
|---|---|---|
| Uncooked Fresh Ham | 20-25 | 145 |
| Cured Ham | 15-20 | 140 |
| Pre-Cooked Ham | 10-15 | 140 |
Important note: Always adjust the cooking time based on the specific instructions on your ham package. It's always better to err on the side of caution when it comes to food safety.
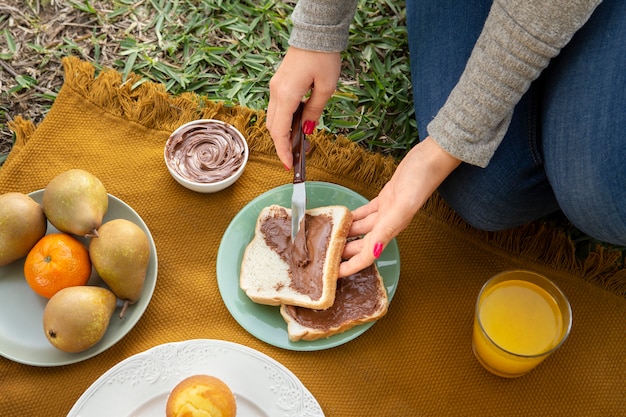
(Part 4) Mastering the Art of ham glazing: Elevating the Flavour
Now, we're getting to the fun part - glazing! Adding a glaze to your ham is like putting on the finishing touches to a masterpiece. It adds a beautiful shine, a burst of flavour, and a touch of sweetness that elevates your ham to a whole new level.
Popular ham glaze recipes: A Flavour Symphony
The possibilities are endless when it comes to ham glazes, and I've had the pleasure of trying many. Here are a few of my personal favourites:
- honey mustard glaze: This classic combination is both sweet and tangy, a perfect balance of flavours. Simply mix together honey, mustard, and a touch of brown sugar for a delightful flavour explosion.
- brown sugar glaze: Sometimes, simplicity is key. A brown sugar glaze adds a beautiful caramel colour and a subtle sweetness that's irresistible. Combine brown sugar, water, and a touch of lemon juice for a perfect glaze.
- Maple Pecan Glaze: For a truly decadent glaze, look no further. This glaze combines maple syrup, pecan pieces, and a hint of cinnamon for a rich and nutty flavour that's sure to impress.
Glazing Techniques: Making It Look and Taste Amazing
Once you've chosen your glaze, here's how to apply it like a pro:
- During Cooking: You can brush the glaze on the ham during the last 30 minutes of cooking. This will allow the glaze to caramelize and create a beautiful, crispy crust.
- After Cooking: You can also glaze the ham after it's been cooked. Simply brush on the glaze and reheat the ham in the oven or on the stovetop until the glaze is melted and bubbly.
(Part 5) Serving Your Perfectly Cooked Ham: A Culinary Triumph
Your ham is cooked to perfection, glistening with a beautiful glaze. Now, it's time to serve it up and enjoy the fruits of your culinary labour!
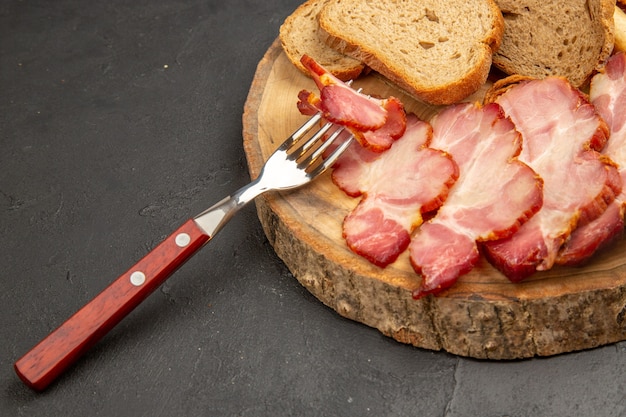
Carving Your Ham: A Skillful Technique
Carving a ham can seem daunting, but it's actually quite simple. Here's how to do it like a pro:
- Use a sharp carving knife. A sharp knife will ensure clean cuts and prevent the ham from tearing.
- Start by cutting off a thin slice of ham from the end. This will give you a flat surface to work with and make slicing easier.
- Cut the ham into thin slices, cutting against the grain. Cutting against the grain will result in more tender slices.
- If you're dealing with a bone-in ham, use a bone-carving knife to remove the bone. This will make carving easier and allow you to serve the ham without the bone.
Accompanying Your Ham: A Delicious Symphony of Flavours
A perfectly cooked ham deserves a side dish that's just as delicious! Here are some of my go-to pairings that will complement the flavours of your ham beautifully:
- mashed potatoes: Creamy, comforting, and a classic side dish for any ham. The creamy texture of mashed potatoes provides a lovely contrast to the salty, succulent ham.
- green bean casserole: This festive and delicious side dish is a crowd-pleaser, adding a touch of nostalgia to any meal. The creamy sauce and crispy fried onions complement the ham perfectly.
- sweet potato Casserole: This sweet and savoury side dish is the perfect balance for the saltiness of the ham. The sweetness of the sweet potato casserole will enhance the flavour of your ham and create a delightful culinary experience.
- fruit salad: A refreshing and healthy side dish that adds a burst of sweetness and colour to your plate. The contrasting flavours of the fruit salad will cleanse your palate and create a delightful balance.
(Part 6) leftover ham: Don't Throw It Away!
You've enjoyed your delicious ham feast, but now you have leftovers. Don't even think about throwing them away! Leftover ham is a culinary treasure trove, waiting to be transformed into new and exciting dishes.
Leftover ham recipes: A Culinary Adventure
Here are a few ideas to spark your culinary creativity and get those taste buds tingling:
- ham and cheese quiche: A savoury and satisfying breakfast or brunch option. The salty ham and creamy cheese filling will make for a delightful start to your day.
- Ham and bean soup: A hearty and comforting soup perfect for a chilly day. The rich, savoury flavours of the ham and beans will warm you from the inside out.
- Ham and potato salad: A classic picnic or potluck favourite. The creamy potato salad with chunks of ham is a crowd-pleasing dish that's always a hit.
- Ham and Pineapple Pizza: This sweet and savoury pizza is sure to be a hit with the whole family. The combination of salty ham and sweet pineapple is a delicious and unexpected twist on classic pizza.
- Ham and asparagus pasta: A light and refreshing pasta dish perfect for a spring meal. The salty ham and tender asparagus combine beautifully in this simple yet elegant pasta dish.
(Part 7) The Importance of Food Safety: Handling Ham with Care
Now, let's talk about food safety. It's crucial to handle and cook your ham properly to prevent foodborne illness. I'm not trying to scare you, but food safety is always a top priority in the kitchen.
Safe Ham Handling: Key Tips for a Healthy Kitchen
Here are some key tips to ensure you're handling your ham safely:
- Wash your hands thoroughly with soap and water before and after handling raw ham. This will help prevent the spread of bacteria.
- Don't leave raw ham at room temperature for more than two hours. Refrigerate it immediately to prevent bacteria from growing.
- Use separate cutting boards for raw ham and cooked food. This will prevent cross-contamination.
- Cook your ham to the recommended internal temperature. Use a meat thermometer to ensure your ham is cooked to the right temperature, which will kill any harmful bacteria.
Storing Ham: Keeping It Fresh and Delicious
Proper storage is crucial to keep your ham safe and tasty. Here are some tips for storing your ham:
- Refrigerate leftover ham within two hours of cooking. This will help prevent the growth of bacteria.
- Store leftover ham in an airtight container in the refrigerator for up to 3-4 days. This will help keep the ham moist and prevent it from drying out.
- Freeze leftover ham for up to 2-3 months. Wrap it tightly in plastic wrap or aluminum foil and store it in a freezer-safe bag.
(Part 8) My Top Ham cooking tips: From Experience to Wisdom
Alright, I've been there, done that, and learned a lot about cooking ham. Here are some of my top tips to help you achieve ham perfection and create a culinary masterpiece:
- Don't be afraid to experiment with different glazes! Get creative and try new flavour combinations.
- Use a meat thermometer to ensure your ham is cooked to the right temperature. This is the most reliable way to ensure that your ham is cooked through and safe to eat.
- Let the ham rest for at least 15 minutes after cooking before carving. This allows the juices to redistribute and prevent the ham from drying out.
- Serve the ham with a variety of sides to create a balanced meal. Consider a mix of textures and flavours to enhance your culinary experience.
- Don't throw away the leftover ham! Get creative and use it in delicious recipes. Think soups, stews, salads, sandwiches, pizzas, and more. The possibilities are endless!
FAQs
Now, I know you might have a few questions about ham cooking. So, I've compiled a list of FAQs to help you out.
1. How do I know if my ham is cooked through?
The most reliable way to check if your ham is cooked through is to use a meat thermometer. Insert the thermometer into the thickest part of the ham, ensuring it doesn't touch the bone. The internal temperature should reach 140°F (60°C) for a cured or pre-cooked ham and 145°F (63°C) for an uncooked ham.
2. Can I cook a ham in a slow cooker?
Absolutely! You can cook a ham in a slow cooker. Simply place the ham in the slow cooker and cook on low for 6-8 hours, or until the internal temperature reaches 140°F (60°C). The slow cooker will create a tender and moist ham, perfect for a hearty meal.
3. What can I do with leftover ham?
The culinary possibilities are endless! You can use leftover ham in soups, stews, salads, sandwiches, pizzas, and more. Get creative and let your imagination run wild!
4. How long can I store leftover ham in the refrigerator?
You can store leftover ham in the refrigerator for up to 3-4 days. Make sure it's stored in an airtight container to prevent it from drying out and preserve its flavour.
5. Can I freeze ham?
Yes, you can freeze ham for up to 2-3 months. Wrap it tightly in plastic wrap or aluminum foil and store it in a freezer-safe bag. When you're ready to use it, defrost it in the refrigerator for a few days, or thaw it in the microwave or cold water.
Everyone is watching

Corn on the Cob: The Ultimate Guide to Perfectly Cooked Ears
Healthy MealsAh, corn on the cob. Just the name evokes images of sunny days, barbecues, and that sweet, juicy flavour that ...

Perfect Pork Roast Oven Cooking Time: A Guide to Delicious Results
Healthy MealsThere's something truly satisfying about a perfectly roasted pork. The aroma alone is enough to make your mout...

Ham Cooking Time: How Long to Bake, Smoke, or Boil a Delicious Ham
Healthy MealsAh, ham. It's a classic, isn't it? A real crowd-pleaser, especially around holidays. And when done right, it'...

Scallops: The Ultimate Guide to Perfect Cooking
Healthy MealsAh, scallops. Those delicate, sweet, and utterly delicious morsels of the sea. They hold a special place in my...

Spaghetti Squash: The Ultimate Guide to Cooking and Serving
Healthy MealsRemember that time you saw spaghetti squash at the supermarket, looking all bumpy and strange, and thought, "W...