There’s something undeniably magical about grilling corn on the cob. The smoky aroma, the satisfying sizzle, the sweet, juicy kernels bursting with flavour – it's a summer sensory experience that makes me smile. But let's be honest, achieving that perfect grill-marked, tender corn without burning the husks can feel like a culinary tightrope walk. Fear not, my fellow corn lovers, because this guide is your map to mastering the art of grilling corn on the cob in husks.
I’ve been grilling corn for years, experimenting with different techniques and timing methods. Over time, I've developed a system that consistently delivers melt-in-your-mouth kernels, gently charred husks, and an aroma that will have your neighbours knocking on your door. So, grab your favourite corn, gather your grilling gear, and let's embark on this flavourful journey together.
(Part 1) The Quest for the Perfect Ear

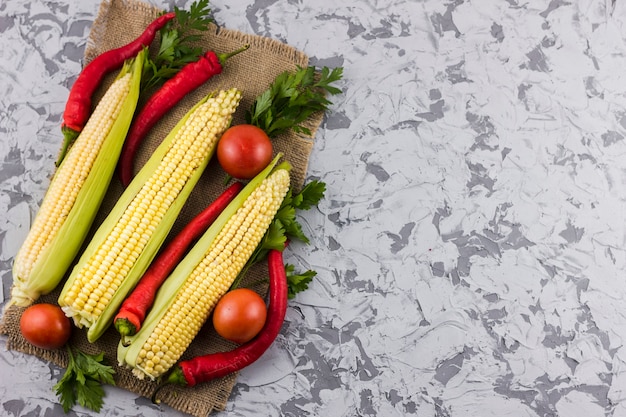
The journey to grilled corn perfection begins with selecting the right corn. Think of it as choosing the perfect canvas for your culinary masterpiece. You want corn that’s fresh, plump, and bursting with juicy kernels. And no, I'm not talking about the kind with those measly rows of kernels that leave you feeling like you just ate a mouthful of air!
Choosing the Right Corn:
- Freshness is Key: Look for corn that was picked recently. The husks should be green and moist, not dry and wilted. If you're buying from a farmer's market, ask about the harvest date.
- The Weight Test: Hold the corn in your hand. A good ear of corn will feel heavy for its size, indicating it's packed with kernels.
- Check the Silk: The silk should be fresh and brown, not dried out or discolored. This is a telltale sign of freshness.
- Don't be Shy: Ask the vendor for advice! They’re the experts and can help you find the perfect corn.
(Part 2) Prepping the Corn for Grilling: A Hands-On Approach

Now that you have your prized corn, it's time to get it ready for its starring role on the grill. Don't worry, this part is a breeze. Just a few simple steps, and your corn will be ready for its transformation into grilled perfection.
Step 1: Shedding the Outer Layers
Gently peel back the outer husks, leaving 2-3 layers intact. These remaining husks will act as a protective shield, preventing the corn from scorching while allowing the heat to penetrate for even cooking. Think of it as a natural, flavourful barrier.
Step 2: The Silk Removal: A Little Messy, But Worth It
Let's get rid of the silk, that fuzzy stuff at the tip of the corn. Wear gloves if you prefer, as it can get a little messy. You can pull it off by hand, or use a kitchen towel to get a better grip. Be thorough, as you don't want bits of silk interfering with the flavour.
Step 3: The Soaking Ritual: Unlocking Juiciness
Here comes the secret weapon: soaking the corn in water. This isn't just about keeping the corn hydrated. Soaking helps to steam the kernels, making them extra juicy and tender. It also prevents the husks from burning too quickly. Fill a large bowl or container with cold water, immerse the corn, and let it soak for at least 30 minutes. I usually go for an hour, just to be sure!
(Part 3) Setting the Stage: A Grill Master's Prep

The grilling stage is where the magic happens. Your grill is about to become your culinary playground, so let's get it ready for the corn's grand entrance. We’re aiming for medium-high heat – the sweet spot for creating those delicious char marks without burning the husks.
Step 1: Preheat the Grill: A Warming Welcome
Turn your gas grill on to medium-high heat. For charcoal lovers, light a good amount of charcoal and let it burn until you have hot coals. The goal is a nice, even heat distribution.
Step 2: Grease the Grates: Preventing Stickiness
Before placing the corn on the grill, lightly grease the grates to prevent sticking. Use a grill brush or a folded paper towel dipped in oil. This will make it easy to remove your corn later and prevent any unfortunate grill-related mishaps.
Step 3: Wrapping the Corn: A Secure Embrace
While the grill is heating, take your soaked corn and shake off any excess water. Fold the husks back over the corn, tucking them in tightly. Think of it as giving your corn a comforting hug. You can secure the husks with a few twists of kitchen twine, or a piece of foil if you prefer.
(Part 4) The Grilling Ritual: Time for a Transformation
With your preheated grill and your corn all set, we're ready for the grand grilling moment. It's all about timing and a little watchful eye to ensure that your corn reaches its peak flavour potential.
Step 1: Placing the Corn: Finding the Perfect Spot
Carefully place the corn cobs on the hot grill, making sure there's some space between them for even heat circulation. Close the lid and let them cook for about 15-20 minutes. The exact time will depend on your grill's heat and the size of the corn cobs.
Step 2: Rotating for Even Cooking: A Dance of Heat
After about 10 minutes, rotate the corn cobs so all sides get equal exposure to the heat. This ensures they cook evenly and develop that beautiful, mottled char. You can also use tongs to gently lift the husks slightly, allowing some steam to escape and create those characteristic char marks.
Step 3: Checking for Doneness: Signs of Perfection
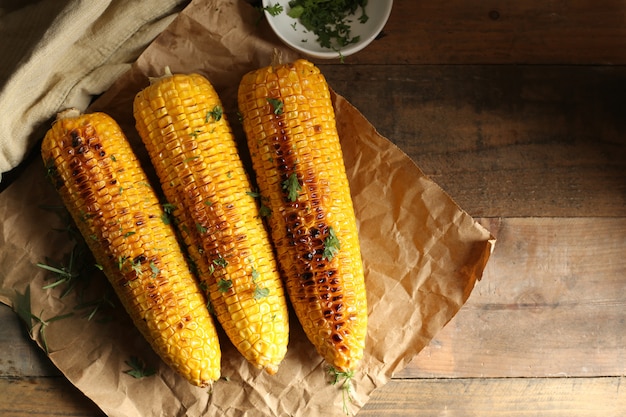
To check for doneness, carefully pull back a husk. The kernels should be tender, plump, and slightly translucent. If the husks are starting to brown and you see char marks on the corn, it's likely ready. But remember, patience is key! Don’t rush the process.
(Part 5) The Final Touches: Elevating the Flavour
We’re nearing the end of our grilling journey, but the excitement is far from over. This is the moment to add those final touches that transform your grilled corn into a true culinary masterpiece.
Step 1: Taking the Corn Off the Grill: Time for a Rest
Carefully lift the corn cobs off the grill using tongs or a grill mitt – the husks will be hot! Let them cool down slightly on a plate or platter.
Step 2: Butter and Season: Adding a Personal Touch
Now comes the fun part: flavouring your corn! Some people prefer to add butter and seasoning right after grilling, while others wait until later. The key is to find what works best for you.
- Classic: A pat of butter and a sprinkle of salt and pepper is always a winner.
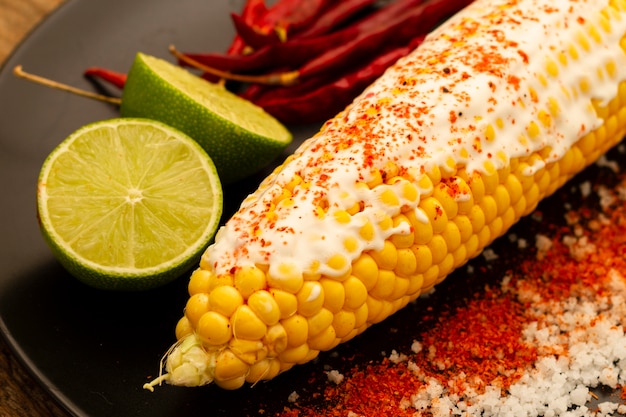
- Zesty: A squeeze of lime or lemon juice adds a bright, refreshing twist.
- Herby: Chopped parsley, chives, or oregano add a fragrant touch.
- Spicy: For those who like it hot, try a dash of cayenne pepper or a drizzle of hot sauce.
- Cheesy: Grated parmesan or a mix of cheddar and mozzarella add a creamy, savoury note.
Step 3: Serving and Enjoying: The Grand Finale
Once your corn has cooled down slightly, it's time for the grand finale: enjoying your culinary creation. Serve it hot or warm, and don't forget napkins!
Grilled corn is delicious on its own, but it also pairs well with:
- Grilled meats: Think juicy burgers, smoky chicken, or flavorful steaks.
- Fish: A touch of sweetness from grilled corn complements grilled salmon, mahi-mahi, or tuna perfectly.
- Salads: Add grilled corn to a summer salad for a burst of texture and flavour.
- Cold beverages: A refreshing lemonade or iced tea perfectly complements the sweet and smoky flavours of grilled corn.
(Part 6) Grilling Wisdom: Tips for Success
To help you on your grilling journey, here are a few extra tips that will elevate your corn-grilling game:
- Space Matters: Make sure there’s enough space between the corn cobs on the grill to allow for even cooking and prevent overcrowding.
- Heat Control: Monitor your grill’s heat throughout the cooking process. Adjust the flames or charcoal as needed to maintain a steady medium-high heat.
- Cleanliness is Key: Clean the grill grates between batches of corn, or if you’re grilling other foods. This prevents sticking and ensures even cooking.
- Steam is Your Friend: The steam trapped inside the husks is essential for cooking the corn. If you see too much steam escaping, try tucking the husks in more tightly.
- Experiment with Flavors: Get creative with seasonings! Add garlic powder, paprika, onion powder, or a drizzle of honey to the corn before grilling.
- Embrace the Smoke: For a bolder smoky flavour, soak the corn in a brine solution before grilling. Combine water with salt, sugar, and a few drops of liquid smoke.
- Store Leftovers Wisely: If you have leftover corn, store it in the refrigerator for up to 3 days. Wrap it tightly in plastic wrap or store it in an airtight container. You can reheat it in the microwave or oven, or simply enjoy it cold.
(Part 7) Beyond the Classic: Variations on the Theme
While classic grilled corn on the cob is a timeless favourite, there are endless possibilities for putting your own personal spin on it. Let's explore some exciting variations that will add a touch of adventure to your grilling routine.
1. Spicy Grilled Corn:
Add a dash of cayenne pepper or chili powder to the corn before grilling for a kick of heat. For an extra spicy touch, you can create a spicy butter by combining butter with your favourite hot sauce or chili flakes.
2. Herbed Grilled Corn:
Elevate your corn's flavour with a medley of fresh herbs. Try a mix of parsley, chives, dill, and oregano. You can also add a few sprigs of fresh herbs to the water when soaking the corn.
3. Cheesy Grilled Corn:
For a cheesy twist, sprinkle grated parmesan cheese or a blend of cheddar and mozzarella over the corn before grilling. Wrap the corn tightly in foil to prevent the cheese from dripping.
4. Grilled corn salad:
Once the corn is cooked and cooled, cut the kernels off the cob and toss them with your favorite ingredients. Here are some inspiring grilled corn salad ideas:
- Mediterranean Corn Salad: Combine corn kernels with cherry tomatoes, red onion, feta cheese, olives, and a lemon vinaigrette.
- Mexican Corn Salad: Mix corn kernels with black beans, corn, diced avocado, cilantro, and lime juice.
- Asian-Inspired Corn Salad: Toss corn kernels with shredded cabbage, carrots, sesame seeds, and a ginger-soy dressing.
(Part 8) FAQs: Answering Your Burning Questions
I've gathered some common questions about grilling corn on the cob in husks, along with my expert answers to help guide you through any grilling dilemmas.
1. Can I use frozen corn instead of fresh?
While you can grill frozen corn on the cob, it won't have the same texture and flavour as fresh corn. Frozen corn is usually already cooked, so it won't get as tender or juicy. Plus, the husks won't protect frozen corn as well. For the best results, stick with fresh corn.
2. What if my corn starts to burn before it’s cooked through?
If you notice the husks are starting to burn, but the corn isn't fully cooked, simply reduce the heat on your grill. You can also try wrapping the corn in a layer of foil to protect it from direct heat.
3. Can I grill corn on the cob without husks?
Yes, you can grill corn on the cob without husks. Just make sure to brush the corn with oil to prevent sticking and watch it carefully to avoid burning. You can also try grilling the corn in a grilling basket.
4. How long can I store grilled corn?
Grilled corn on the cob can be stored in the refrigerator for up to 3 days. Wrap it tightly in plastic wrap or store it in an airtight container.
5. Can I make grilled corn on the cob ahead of time?
You can prepare the corn by soaking it in water and wrapping it in husks ahead of time. Store it in the refrigerator until you're ready to grill. However, grilling the corn right before serving is ideal for optimal flavour and texture.
(Part 9) Conclusion:
Grilling corn on the cob in husks is a simple, yet incredibly rewarding culinary adventure. It's about embracing the process, finding your own rhythm, and relishing the delicious results. By following the tips and tricks in this guide, you’ll be able to create perfectly char-marked, juicy, and flavourful corn that will have everyone around your grill begging for more. So, fire up your grill, gather your favourite people, and celebrate the magic of summer with a plate of perfectly grilled corn. Happy grilling!
| Step | Task |
|---|---|
| 1 | Select fresh, plump corn with green and moist husks. |
| 2 | Peel back outer husks, leaving 2-3 layers intact. |
| 3 | Remove silk from the corn. |
| 4 | Soak the corn in cold water for at least 30 minutes. |
| 5 | Preheat grill to medium-high heat. |
| 6 | Grease grill grates to prevent sticking. |
| 7 | Wrap corn in husks, securing with twine or foil. |
| 8 | Place corn on preheated grill and cook for 15-20 minutes. |
| 9 | Rotate corn after 10 minutes to ensure even cooking. |
| 10 | Check for doneness by peeking at the kernels. |
| 11 | Remove corn from grill and let it cool slightly. |
| 12 | Add butter and seasonings as desired. |
| 13 | Serve hot or warm and enjoy! |
Everyone is watching

Corn on the Cob: The Ultimate Guide to Perfectly Cooked Ears
Healthy MealsAh, corn on the cob. Just the name evokes images of sunny days, barbecues, and that sweet, juicy flavour that ...

Perfect Pork Roast Oven Cooking Time: A Guide to Delicious Results
Healthy MealsThere's something truly satisfying about a perfectly roasted pork. The aroma alone is enough to make your mout...

Ham Cooking Time: How Long to Bake, Smoke, or Boil a Delicious Ham
Healthy MealsAh, ham. It's a classic, isn't it? A real crowd-pleaser, especially around holidays. And when done right, it'...

Scallops: The Ultimate Guide to Perfect Cooking
Healthy MealsAh, scallops. Those delicate, sweet, and utterly delicious morsels of the sea. They hold a special place in my...

Spaghetti Squash: The Ultimate Guide to Cooking and Serving
Healthy MealsRemember that time you saw spaghetti squash at the supermarket, looking all bumpy and strange, and thought, "W...
