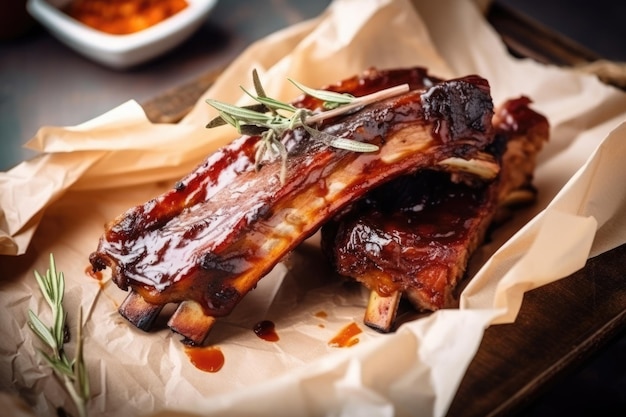
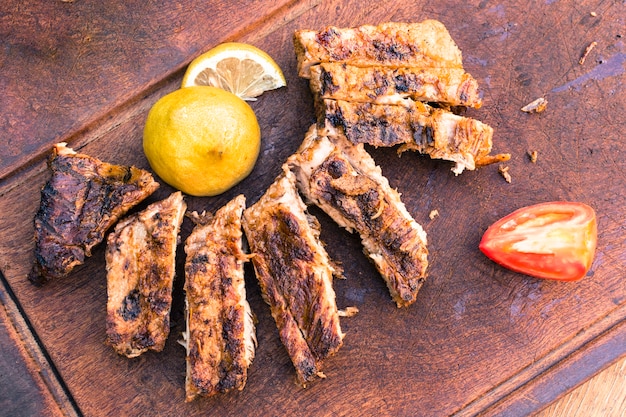
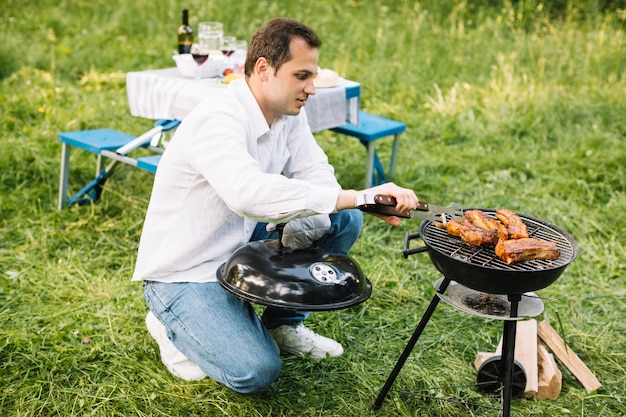
Let's talk ribs, specifically those glorious, meaty baby back ribs. I'm not going to lie, I've been obsessed with these bad boys for years. There's something so satisfying about biting into a perfectly cooked rib, the meat falling off the bone, drenched in a sweet and smoky sauce. You can't beat it, can you?
I've tried countless recipes, experimented with different rubs and sauces, and learned a thing or two along the way. And let me tell you, getting those ribs just right takes a bit of practice, but the results are absolutely worth the effort.
So, buckle up, folks, because I'm about to share all my secrets for achieving the ultimate grilled baby back ribs. From choosing the right cut to nailing the perfect cook, I'll guide you through every step of the way.
(Part 1) Choosing Your Ribs: It All Starts with a Good Cut

Okay, the first step, obviously, is picking the right ribs. Now, I'm a firm believer in getting the best quality you can afford. We're talking good, thick slabs of baby back ribs, not those thin, weedy ones you see at some supermarkets.
Look for These Clues:
- Thickness: The ribs should be nice and thick, at least 1.5 inches. This ensures they won't dry out during cooking. A thicker cut means more meat and a more substantial eating experience. Think of it like this: you wouldn't want a thin, flimsy burger, right? Same goes for ribs.
- Marbling: A good amount of marbling throughout the meat will add flavor and juiciness. The fat in those marbled ribbons will melt during cooking, basting the meat and making it incredibly tender. It's like having a built-in sauce!
- Color: The ribs should be a light pink color, not too pale. A pale color could indicate the meat has been sitting around for too long.
If you're not sure what to look for, just ask your butcher. They're usually happy to help you find the perfect cut. They'll be able to point out the best ribs and might even have some tips on how to prepare them.
Why Baby Back Ribs?
Now, you might be wondering, why choose baby back ribs over spare ribs? Well, I'll tell you why:
- Flavor: They're generally considered more flavorful than spare ribs because of their higher fat content. That fat not only adds juiciness but also contributes to a richer, more complex flavor.
- Tenderness: They're also a bit more tender than spare ribs due to their location on the pig. Baby backs are from the upper back, where the meat is less worked and therefore more delicate.
- Size: They're smaller and more manageable to cook, perfect for a family meal or a gathering with friends. You don't have to worry about these ribs taking up your entire grill!
(Part 2) Preparing Your Ribs: Getting Ready for the Grill

Right, now that you've got your ribs, it's time to get them ready for the grill. First things first, you'll need to give them a good wash. Don't forget to rinse off any leftover butcher paper or packaging.
The Importance of Trimming
Next, you need to trim those ribs. I'm not talking about going all fancy chef on you, but it's important to remove any excess fat or membrane. That membrane is a tough, chewy bit that you really don't want hanging around on your ribs.
To remove it, just use a sharp knife to make a small cut in the membrane and then peel it back. It should come off in one piece, but you might need to use your fingers to help it along. If you can, try to remove as much of the membrane as possible. You can also try using paper towels to get a better grip.
Think of it as giving your ribs a spa treatment. Removing that membrane will allow the rub and sauce to penetrate the meat more easily, resulting in more tender and flavorful ribs.
The Key to tender ribs: Scoring and Brining
Now comes the fun part: scoring those ribs! This is where you make those nice little criss-cross cuts across the surface of the meat. This does a couple of things:
- Allows Flavor to Penetrate: It helps the rub and sauce penetrate deeper into the meat, creating more flavorful ribs. Imagine the rub and sauce as tiny flavor soldiers, and those cuts are like bridges allowing them to get deeper into the heart of the meat.
- Tenderness: It also helps the ribs cook more evenly, reducing the risk of them drying out. Those cuts help the heat penetrate the meat more evenly, ensuring that the outside doesn't get overcooked before the inside reaches the perfect temperature.
Don't go overboard with the scoring, though. You just want some nice, neat cuts. About a quarter inch deep is ideal.
And after scoring, I always like to give my ribs a little soak in a brine. It helps tenderize the meat and makes them even more flavorful. The brine acts like a moisture magnet, drawing water into the meat and helping it retain its juiciness.
Brine Recipe:
- 1 cup kosher salt
- 1 cup brown sugar
- 1 gallon water
Simply mix everything together in a large container and submerge your ribs. Let them sit in the brine for 2-4 hours. Remember to cover them with plastic wrap or a lid and place them in the fridge.
You can also add other ingredients to your brine, like garlic, onion, peppercorns, or even a little bit of lemon juice. Experiment and find what works best for you.
(Part 3) Rubbing Your Ribs: The Flavor Foundation

Okay, your ribs are brined and ready to be rubbed. This is where you get to unleash your creativity. A good rub will give your ribs a smoky, earthy flavor that will make your mouth water.
Classic Rub Recipe:
- 1 cup brown sugar
- 1/2 cup smoked paprika
- 1/4 cup garlic powder
- 1/4 cup onion powder
- 2 tablespoons chili powder
- 1 tablespoon black pepper
- 1 tablespoon salt
Mix all the ingredients together in a bowl and then generously rub it all over your ribs, making sure to cover every surface. You can also add a touch of cayenne pepper for some heat, if you like.
Tips for Rubbing:
- Use Your Hands: Get in there with your hands and really massage that rub into the meat. It helps the flavor penetrate deeper.
- Don't Be Shy: Don't be afraid to use a generous amount of rub. You can always add more if you think it needs it.
- Let It Sit: After rubbing, wrap your ribs in plastic wrap and let them sit in the fridge for at least 2 hours, or even better, overnight. This allows the flavors to really meld together.
If you're feeling adventurous, you can create your own custom rubs with different spices and herbs. Some popular additions include thyme, rosemary, cumin, coriander, or even a hint of cinnamon. The possibilities are endless!
(Part 4) Setting Up Your Grill: A Smoky Paradise
Alright, your ribs are prepped, your rub is ready, and it's time to fire up the grill. I'm a big fan of using a charcoal grill for that smoky flavor, but you can definitely use a gas grill if that's what you've got.
The Importance of Indirect Heat:
The key here is to cook the ribs over indirect heat. You don't want the flames licking at your ribs and burning them. So, build your fire on one side of the grill and leave the other side empty. The ribs will cook indirectly over the empty side, allowing them to cook slowly and evenly.
Using the 2-Zone Method:
You can also use the 2-zone method, which is a great technique for achieving that smoky, tender finish. This involves dividing the grill into two zones: a hot zone and a cool zone. You'll build your fire on one side of the grill (the hot zone) and leave the other side empty (the cool zone). This method provides a range of temperatures on the grill, allowing you to cook different items simultaneously.
Creating Your Smoke:
Once you've got your fire going, it's time to add some smoke. The classic choice, of course, is hickory wood. It gives the ribs a lovely smoky flavor. But you can also use other woods like pecan, applewood, or cherry. Each wood will impart a slightly different flavor profile, so experiment and find your favorites.
Just remember to soak the wood chips in water for at least 30 minutes before adding them to the fire. This will prevent them from burning too quickly. Place the soaked wood chips in a smoker box or directly on the coals. You want a steady stream of smoke, not a blazing inferno.
(Part 5) Cooking Your Ribs: The Art of Low and Slow
Okay, now the moment of truth: cooking your ribs. This is where patience is key. You're going for low and slow, which will give you those melt-in-your-mouth ribs.
Maintaining Consistent Temperature:
The key to success with low and slow cooking is maintaining a consistent temperature. You want to keep the grill around 225-250°F (107-121°C).
You can use a grill thermometer to monitor the temperature. If it drops below 225°F, just add a few more coals to the fire. Be careful not to add too many, as this could cause the temperature to spike too high.
The Role of Wrapping:
After about 2-3 hours of cooking, your ribs will start to get a nice crust on the outside. Now, it's time to wrap them up. This helps to steam the ribs and makes them even more tender.
Wrap your ribs tightly in aluminum foil, and then return them to the grill. You can add a little bit of butter, sauce, or even apple cider to the foil for extra moisture and flavor.
The Importance of Patience:
The wrapping step is crucial because it allows the internal temperature of the ribs to rise, which in turn breaks down the connective tissue and makes the meat incredibly tender. It's like a little sauna for your ribs, helping them to relax and become luxuriously soft.
(Part 6) Checking for Doneness: The "Rib Test"
Now, how do you know if your ribs are done? You want them to be fall-off-the-bone tender. And here's a simple test to check:
The Rib Test:
Just gently lift up one of the ribs. If it bends easily and the bone shows through, then your ribs are ready.
The "Wiggle Test":
You can also use the "wiggle test". Just gently wiggle a rib. If it moves back and forth easily, your ribs are cooked.
Internal Temperature:
You can also use a meat thermometer to check the internal temperature. The ribs should reach an internal temperature of 190-205°F (88-96°C).
Don't worry, if your ribs aren't quite done yet, just keep cooking them until they pass the "Rib Test".
(Part 7) Adding Sauce: The Final Touch
Okay, your ribs are cooked to perfection. Now, for the grand finale: the sauce!
Sauce Options:
There are endless possibilities when it comes to sauce. You can find pre-made sauces at most grocery stores, but you can also easily make your own.
I'm a big fan of a classic sweet and smoky sauce, but you can also try a tangy barbecue sauce, a spicy sauce, or even a vinegar-based sauce.
Adding Sauce Strategically:
Here's the key to adding sauce:
- Don't Overdo It: Less is more. A little sauce goes a long way. You want to enhance the flavor of the ribs, not drown them in sauce.
- Basting: Baste the ribs with sauce during the last 30 minutes of cooking. This will help create a delicious, sticky glaze.
Serving Your Ribs:
Once the ribs are done, let them rest for about 10 minutes before slicing and serving. This will allow the juices to redistribute throughout the meat, ensuring that your ribs are juicy and flavorful. I like to serve my ribs with a side of coleslaw, potato salad, and corn on the cob.
(Part 8) Tips and Tricks: Mastering the Rib Game
Alright, we've covered the basics, but here are a few extra tips and tricks to take your rib game to the next level:
Use a Water Pan:
Place a pan of water underneath your ribs on the grill. It helps create steam and prevents the ribs from drying out. The water pan will also help to regulate the temperature of the grill, making for a more even cooking experience.
Don't Overcook:
Overcooked ribs are dry and tough. Keep a close eye on them and use the "Rib Test" to make sure they're cooked just right. Once those ribs are fall-off-the-bone tender, they're ready to go.
Experiment with Rubs and Sauces:
Don't be afraid to get creative! There are endless possibilities when it comes to rubs and sauces. Try different combinations and find your own favorites. The world of barbecue is full of delicious surprises.
The Importance of Resting:
Once your ribs are done, let them rest for about 10 minutes before slicing and serving. This allows the juices to redistribute throughout the meat, making for incredibly tender and flavorful ribs.
FAQs
Q1: What's the difference between baby back ribs and spare ribs?
Baby back ribs are taken from the upper back of the pig, while spare ribs come from the lower ribs. Baby backs are generally more tender and flavorful due to their higher fat content. They're also smaller and easier to manage. Spare ribs are typically larger and can be more challenging to cook evenly.
Q2: Do I need to trim the membrane off my ribs?
Yes! The membrane is a tough, chewy bit that will make your ribs difficult to eat. It's best to trim it off before cooking. It's a small step, but it makes a big difference in the overall texture and enjoyment of your ribs.
Q3: Can I use a gas grill instead of a charcoal grill?
Absolutely! While a charcoal grill provides a unique smoky flavor, you can definitely cook ribs on a gas grill. Just make sure to use the indirect heat method and create a "smoke zone" by adding soaked wood chips to your grill.
Q4: How do I tell if my ribs are done?
Use the "Rib Test". Gently lift a rib. If it bends easily and the bone shows through, your ribs are ready. You can also use the "wiggle test" or check the internal temperature with a meat thermometer.
Q5: What if my ribs are a bit dry?
Don't worry! There are ways to remedy dry ribs. You can try wrapping them in foil with a bit of butter or sauce during the last 30 minutes of cooking. This will help steam the ribs and make them nice and juicy.
There you have it, folks. Your ultimate guide to grilling those irresistible baby back ribs. Go forth and conquer those grill grates! Remember, practice makes perfect. So, don't be afraid to experiment and have fun with it. And most importantly, enjoy those delicious ribs!
Everyone is watching

Corn on the Cob: The Ultimate Guide to Perfectly Cooked Ears
Healthy MealsAh, corn on the cob. Just the name evokes images of sunny days, barbecues, and that sweet, juicy flavour that ...

Scallops: The Ultimate Guide to Perfect Cooking
Healthy MealsAh, scallops. Those delicate, sweet, and utterly delicious morsels of the sea. They hold a special place in my...

Spaghetti Squash: The Ultimate Guide to Cooking and Serving
Healthy MealsRemember that time you saw spaghetti squash at the supermarket, looking all bumpy and strange, and thought, "W...

Salmon Cooking Times: Perfect Guide for Every Recipe
Healthy MealsLet me tell you, cooking salmon is an art form. It's all about getting that perfect balance: juicy and tender,...

Ham Cooking Time: How Long to Bake, Smoke, or Boil a Delicious Ham
Healthy MealsAh, ham. It's a classic, isn't it? A real crowd-pleaser, especially around holidays. And when done right, it'...
