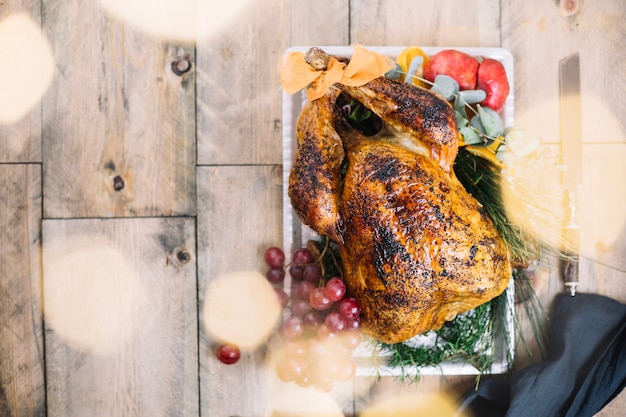
Let's be honest, grilling chicken breasts can be a bit of a gamble. You either end up with a juicy, flavorful masterpiece, or a dry, rubbery disappointment. I've been there, and I know the feeling! But fear not, my fellow grill enthusiasts, because I'm about to spill all my secrets for achieving grill chicken breast perfection.
This comprehensive guide will walk you through every step of the process, from prepping the chicken to mastering different grilling techniques and, of course, nailing those crucial cooking times. So grab your tongs, fire up the grill, and get ready to become a grilling master!
(Part 1) The Foundation: Preparing for Grill Success
Choosing Your Champion: The perfect chicken
First things first, we need to choose the right chicken. Now, I'm a big fan of boneless, skinless chicken breasts. They're versatile, cook quickly, and make for easy slicing. However, don't feel limited! Bone-in breasts offer a more intense flavor, and if you're after a juicier experience, consider chicken thighs. The key is to select fresh, high-quality chicken, no matter which cut you choose.
The Magic Touch: The Power of Brining
Now, here's a little secret weapon: brining. Think of it as a luxurious spa treatment for your chicken. By soaking the chicken in a salt-water solution, you infuse it with moisture and flavor, resulting in a tender, juicy final product. For a simple brine, dissolve salt in water and submerge your chicken breasts for about 30 minutes. This is a lifesaver, especially for thicker cuts.
Flavor Bomb: Mastering the Marinade
Marinades are the next level of flavor infusion. They're like a flavorful hug for your chicken, adding tenderness and depth of taste. My go-to marinade is a simple blend of soy sauce, lemon juice, olive oil, garlic, and herbs. But the world is your oyster! Experiment with different flavors, from honey-ginger to spicy chipotle or even a classic herb-and-garlic combination.
Prep Work: Essential Tips
Dry It Out: After brining or marinating, pat your chicken breasts dry with paper towels. This helps achieve a beautiful, golden-brown sear on the grill.
Temperature is Key: Always ensure your chicken is chilled before grilling. This prevents it from cooking too quickly and becoming dry.
Chill Time: Let your marinated chicken chill in the refrigerator for at least 30 minutes, or better yet, overnight. This allows the flavors to deeply penetrate the chicken, creating a truly flavorful experience.
(Part 2) Tools of the Trade: Your Grilling Arsenal
The Grill: The Heart of Your Operation
Now, let's talk about grills. Honestly, you can grill chicken on almost anything – gas, charcoal, even those cute tabletop grills. But, for serious grilling, I recommend a gas grill. It offers consistent heat and precise temperature control, making it much easier to achieve that perfect cook.
Grill Grates: Choosing the Right Surface
When it comes to grill grates, I'm a cast iron fan. They retain heat beautifully, creating those iconic grill marks. But stainless steel is a great alternative, especially for its ease of cleaning. No matter your choice, just make sure they're clean and lightly oiled before grilling.
Essential Tools for Grilling Success
Grill Tongs: These are your trusty companions for flipping, moving, and checking your chicken with ease.
meat thermometer: This is absolutely crucial for accurate temperature checks, especially when it comes to chicken. Don't rely solely on visual cues!
Grill Brush: Keeping your grill clean is vital for delicious grilling. A good brush makes this task a breeze.
(Part 3) The Art of the Sear: Achieving Crispy Perfection
Setting the Stage: Preheating Your Grill
The key to a phenomenal sear is a hot grill. Get your grill nice and hot, around medium-high heat (about 400-450°F). I usually use the "high" setting on my gas grill, but you might need to adjust depending on your specific grill.
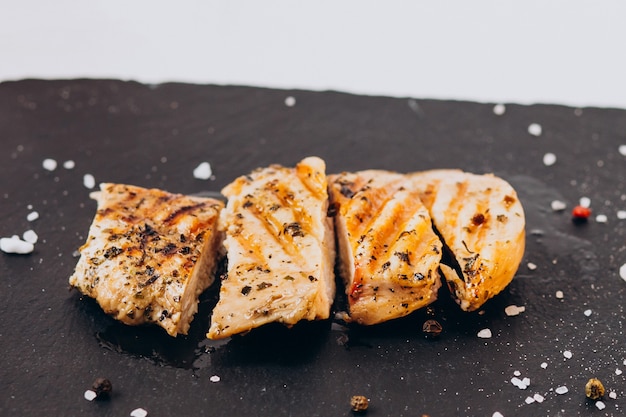
Grill Marks: A Visual Cue to Perfection
Once your grill is roaring, place your chicken breasts on the grates, making sure they're not crowded. The intense heat will quickly sear the surface, creating those delectable grill marks and locking in the juices.
Flipping and Rotating: Even Cooking, Beautiful Marks
After about 3-4 minutes, flip the chicken breasts and rotate them 90 degrees. This technique creates those beautiful criss-cross grill marks, ensuring even cooking and a visually appealing final product.
(Part 4) Mastering the Cooking Times: The Key to juicy chicken
Time, Temperature, and Thickness: The Golden Triangle
The cooking time for chicken breast depends on its thickness. Here’s a general guide:
| Chicken Breast Thickness | Cooking Time (Minutes) |
|---|---|
| Thin (under 1 inch) | 8-10 minutes |
| Medium (1-1.5 inches) | 10-12 minutes |
| Thick (over 1.5 inches) | 12-15 minutes |
The Thermometer Test: Ensuring Safety and Perfection
Always check the internal temperature of your chicken breast with a meat thermometer to ensure it's cooked through. A safe internal temperature for chicken is 165°F (74°C). Use a digital thermometer for fast and accurate results.
Visual Cues: Beyond the Thermometer
While the thermometer is your most reliable tool, here are some visual cues to look for:
No More Pink: When the chicken is fully cooked, it will have lost its pink color and turned a nice white throughout.
Clear Juices: When you pierce the chicken with a fork or knife, the juices should run clear. If they're still pink, the chicken needs more cooking.
(Part 5) The Resting Period: Allowing the Juices to Redistribute
Let It Rest: The Secret to Tenderness
Once your chicken breast is cooked, resist the urge to dive in immediately. Allow it to rest for 5-10 minutes before slicing and serving. This resting period allows the juices to redistribute throughout the chicken, resulting in a much more succulent and tender experience.
Keeping It Warm: Tips for a Delicious Rest
You can keep your chicken warm while it rests:
Foil Wrap: Wrapping the chicken in foil traps the heat and keeps it moist.
Cutting Board Haven: Place the chicken on a cutting board, allowing it to rest in its own juices. Just make sure the cutting board is placed over a heat source, like a grill or a stovetop, to keep the chicken warm.
(Part 6) Tips and Tricks: Elevating Your grilled chicken Game
Flavor Explosion: Spices for Added Depth
Don't be afraid to experiment with different spices. Add a pinch of your favorites, like paprika, garlic powder, or onion powder, before grilling.
Fresh and Flavorful: Herbs for an Aromatic Touch
Fresh herbs, like rosemary, thyme, or oregano, add a burst of flavor. I like to rub them directly onto the chicken before grilling.
Citrus Burst: Lemon or Lime for Bright Zing
A squeeze of lemon or lime juice adds a bright, tangy flavor. Just squeeze some juice over the chicken right before serving.
Saucy Delights: Glazes and Marinades for Extra Flavor
Grilling sauces and marinades are a great way to add a burst of flavor to your chicken. I love using a honey-mustard glaze or a barbecue sauce for a classic touch.
(Part 7) Variations: Beyond the Basic Chicken Breast
Chicken Skewers: Easy and Fun
If you're looking for a quick and easy option, try grilling chicken skewers. Simply thread bite-sized pieces of chicken onto skewers, along with your favorite vegetables. Marinate the skewers for at least 30 minutes before grilling.
Chicken Fajitas: A Southwestern Delight
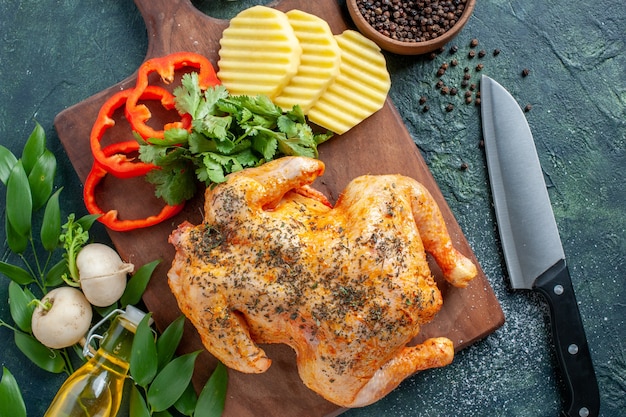
Grilled chicken fajitas are always a crowd-pleaser. Simply grill sliced chicken breasts with peppers and onions, and serve them with warm tortillas, salsa, sour cream, and guacamole.
Chicken with Vegetables: A Healthy and Flavorful Option
Grilling chicken with vegetables is a healthy and delicious option. Simply grill chicken breasts alongside your favorite vegetables, such as zucchini, asparagus, or bell peppers.
(Part 8) FAQs: Your Questions Answered
What's the best way to keep grilled chicken moist?
Brining or marinating the chicken is essential for keeping it moist. You can also use a meat thermometer to ensure the chicken is cooked to the right temperature, preventing overcooking.
Can I grill frozen chicken?
It's not recommended to grill frozen chicken. Frozen chicken needs to be thawed completely before grilling to ensure it cooks evenly and safely.
How do I know if my chicken is fully cooked?
The best way to check if your chicken is cooked through is to use a meat thermometer. The chicken should reach an internal temperature of 165°F (74°C). You can also look for visual cues, such as the chicken being no longer pink and the juices running clear.
How long can I store grilled chicken in the fridge?
You can store grilled chicken in the refrigerator for up to 3-4 days. Make sure to store it in an airtight container.
Can I freeze grilled chicken?
You can freeze grilled chicken for up to 2-3 months. Wrap it tightly in plastic wrap or aluminum foil, and store it in a freezer-safe bag. Thaw it in the refrigerator before reheating.
Everyone is watching

Corn on the Cob: The Ultimate Guide to Perfectly Cooked Ears
Healthy MealsAh, corn on the cob. Just the name evokes images of sunny days, barbecues, and that sweet, juicy flavour that ...

Perfect Pork Roast Oven Cooking Time: A Guide to Delicious Results
Healthy MealsThere's something truly satisfying about a perfectly roasted pork. The aroma alone is enough to make your mout...

Ham Cooking Time: How Long to Bake, Smoke, or Boil a Delicious Ham
Healthy MealsAh, ham. It's a classic, isn't it? A real crowd-pleaser, especially around holidays. And when done right, it'...

Scallops: The Ultimate Guide to Perfect Cooking
Healthy MealsAh, scallops. Those delicate, sweet, and utterly delicious morsels of the sea. They hold a special place in my...

Spaghetti Squash: The Ultimate Guide to Cooking and Serving
Healthy MealsRemember that time you saw spaghetti squash at the supermarket, looking all bumpy and strange, and thought, "W...