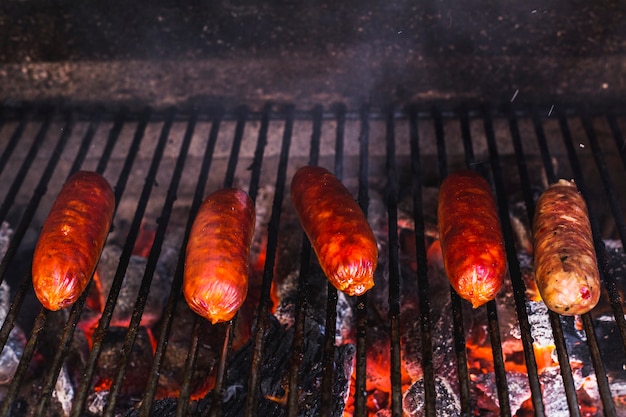
Alright, my fellow grilling enthusiasts, let's talk ribs! Specifically, gas grill ribs. I've spent countless hours in front of my grill, experimenting with different techniques and flavour combinations. It’s a journey that's led me to master the art of cooking those melt-in-your-mouth, smoky ribs. Today, I'm sharing my secrets to achieving rib perfection, right on your gas grill.
From choosing the perfect ribs and mastering the prep work to understanding the magic of the 3-2-1 method and navigating all those tricky questions, like "How long do I cook ribs at what temperature?" and "What's the deal with the 3-2-1 method?", we’re going to cover it all. I'll also be sharing my personal tips and tricks, gleaned from years of grilling experience. So, grab your apron, fire up your gas grill, and get ready for a rib-tastic adventure!
(Part 1) Choosing Your Ribs: The Foundation of Flavor

Before we even think about firing up the grill, we need to start with the right foundation. And for ribs, that means selecting the perfect cuts. I’ve got a soft spot for baby back ribs, but spare ribs are also a fantastic choice. Both offer a unique texture and flavor, but it's essential to choose ribs that are thick, meaty, and generously marbled. That marbling is key for juicy, flavorful ribs.
The Rib Inspection: What to Look For
When you're at the butcher's, here's what to keep in mind when picking out your ribs:
- Thickness: Forget about those skinny ribs. You want ribs with plenty of meat to ensure a satisfyingly tender and juicy result.
- Marbling: Look for ribs with a good amount of fat interspersed with the meat. This marbling provides the rib's natural moisture and contributes to its rich, savory flavor.
- Colour: The ribs should be a vibrant, rosy red colour, indicating freshness. Avoid any ribs that look discoloured or have an odd smell.
- Bones: The bones should be intact, not cracked or broken.
Remember, choosing the right ribs is the first step in achieving those melt-in-your-mouth ribs. It's an investment that pays off in every bite!
(Part 2) Prepping Your Ribs: Unveiling the Flavor

Now that you've got your ribs, it's time to bring out their full potential. This is where we'll do some prep work to enhance the flavor and ensure a delicious cooking experience.
Seasoning and Wrapping: Setting the Stage for Flavor
Here’s my tried-and-true method for prepping ribs, which I’ve perfected over years of grilling adventures:
- Trim the Membrane: That thin, silvery membrane on the back of the ribs is tough and can prevent the ribs from getting tender and absorbing flavors. Using a sharp knife, carefully peel back a corner of the membrane and use a paper towel to grip it firmly. With a steady pull, carefully remove the membrane.
- Season Liberally: Don't be shy with the seasoning! I love using a blend of salt, pepper, paprika, garlic powder, and onion powder. Feel free to add your favourite spices for a personalised touch. Experiment with other herbs and spices, like smoked paprika, cayenne pepper, or even a touch of brown sugar.
- Wrap Them Up: Wrap the seasoned ribs tightly in plastic wrap, and refrigerate them for at least 4 hours, or even overnight. This chilling time allows the flavours to deeply penetrate the meat, creating a more intense and flavorful rib experience.
Remember, the more flavour you infuse into the ribs during this prep stage, the more delicious your final result will be.
(Part 3) The Magic of the 3-2-1 Method: Unveiling the Secret to tender ribs

Now we're getting to the heart of the matter: the 3-2-1 method. This method is a favourite among grill masters, and for good reason. It involves three distinct stages, each playing a crucial role in achieving perfectly tender and flavorful ribs.
Stage 1: The Smoke Bath (3 Hours)
This stage is all about building the foundation of smoky flavour. It's a slow and deliberate process that infuses the ribs with an irresistible aroma. Here's how it works:
- Pre-heat the Grill: Set your gas grill to medium heat (around 275°F or 135°C) and let it heat up for about 15 minutes. This allows the grill to reach a stable temperature, ensuring even cooking.
- Add Wood Chips: Soak a handful of wood chips (I love using hickory or mesquite) in water for about 30 minutes. Soaking helps them to smolder slowly, creating a consistent smoke.
- Place the Ribs on the Grill: Place the ribs directly on the grill grates.
- Smoke It Up: Close the lid and let the ribs smoke for 3 hours, adding more wood chips as needed. The longer the smoke bath, the deeper the smoky flavour will penetrate the ribs.
You'll notice the smoke swirling around the grill, adding a delightful fragrance to the air. This is the first step in transforming ordinary ribs into something extraordinary.
Stage 2: The Wrap Party (2 Hours)
Now it's time to take those ribs to the next level of tenderness and juiciness. This stage involves wrapping the ribs to create a steamy environment that helps to break down the connective tissue.
- Wrap 'em Up: Remove the ribs from the grill and wrap them tightly in aluminum foil.
- Boost the Moisture: Before sealing the foil, add a tablespoon of butter and a splash of apple cider vinegar. This will help create a steamy environment inside the foil, contributing to tender and flavorful ribs.
- Back to the Grill: Return the wrapped ribs to the grill and cook for another 2 hours. The heat from the grill, combined with the steamy environment, will work its magic, breaking down those tough tissues and making the ribs incredibly tender.
This is a crucial step in the process, and it's where you'll start to see the ribs become incredibly tender, almost ready to fall off the bone.
Stage 3: The Glaze and Finish (1 Hour)
We're in the final stage now! This is where the ribs get their beautiful glaze and achieve that crispy bark. Here's how to nail it:
- Unwrap and Glaze: Remove the ribs from the grill, unwrap them, and generously brush them with your favourite bbq sauce. I like to use a sauce with a balance of sweet, smoky, and tangy flavours.
- Back on the Grill: Place the ribs back on the grill, uncovered, and cook for another hour.
- Check for Tenderness: Use a meat thermometer to ensure the internal temperature reaches 190°F (90°C).
The uncovered cooking allows the sauce to caramelize, creating a beautiful, glossy finish, and helps the ribs develop a crispy bark. You'll smell that irresistible aroma of BBQ sauce mingling with the smoky flavour as the ribs cook.
(Part 4) Variations on the 3-2-1 Method: Customizing Your Rib Experience
While the 3-2-1 method is a fantastic starting point, you can certainly tailor it to your preferences.
Tweaking the Cook Time: Finding Your perfect tenderness
Adjust the cook time based on the thickness of your ribs and your desired level of tenderness.
- Longer Smoke: For an even deeper smoky flavour, consider increasing the smoking time in the first stage to 4 hours.
- Shorter Wrap: If you prefer a slightly firmer rib with a little more bite, you can shorten the wrap time in the second stage to 1 hour.
- Glaze Time: The glaze time can be adjusted based on your desired level of sauce thickness and caramelization.
Experimenting with these variations allows you to find your perfect balance of tenderness, smokiness, and glaze.
Exploring Different BBQ Sauces: A Flavor Adventure
Don't be afraid to unleash your creativity with your BBQ sauce! Experimenting with different flavours and textures is part of the fun.
- Sweet and Smoky: Try a sauce with brown sugar, molasses, and smoked paprika. It creates a rich, balanced flavour with a hint of sweetness and a touch of heat.
- Spicy Kick: Add a touch of heat with cayenne pepper, chipotle powder, or jalape??o. These options provide a welcome kick of heat that adds another dimension to the flavour.
- Fruity Fusion: Incorporate fruit flavours like cherry, pineapple, or peach. This adds a unique sweetness and a burst of flavour to the ribs.
Remember, the right sauce can elevate your ribs to a whole new level.
(Part 5) Gas Grill Tips and Tricks: Mastering the Art of Gas Grilling
Now, let's talk about those essential gas grill tips and tricks that can make all the difference in your rib-cooking journey.
Maintaining Consistent Heat: The Key to Even Cooking
Keeping a consistent grill temperature is crucial for achieving evenly cooked ribs.
- Use a Meat Thermometer: A meat thermometer is your best friend, allowing you to monitor the grill temperature and ensure it stays within the desired range.
- Adjust the Gas Flow: Adjust the gas flow as needed to maintain the correct temperature. A steady temperature is essential for even cooking and for ensuring the ribs don't dry out.
- Avoid Opening the Lid Too Often: Every time you open the lid, you let heat escape, which can disrupt the cooking process and cause temperature fluctuations.
By keeping a close eye on the temperature and making adjustments as needed, you'll ensure your ribs cook evenly and achieve that perfect tenderness.
Managing Flare-Ups: Preventing Unwanted Burning
Flare-ups are a common occurrence when grilling ribs, caused by fat dripping from the ribs onto the hot grill grates. Here's how to prevent those unwanted flames.
- Clean the Grill: Make sure your grill grates are clean before cooking to prevent fat buildup. A clean grill will help prevent flare-ups and ensure even heat distribution.
- Use a Drip Pan: Place a drip pan beneath the grill grates to help catch dripping fat. This will minimize the amount of fat that comes into contact with the hot grates, reducing the risk of flare-ups.
- Trim Excess Fat: Trim any excess fat from the ribs before cooking to reduce the risk of flare-ups.
By taking these preventative measures, you can enjoy a smooth grilling experience without any unwelcome flare-ups.
(Part 6) Checking for Doneness: Knowing When Your Ribs Are Perfect
Now, it’s important to know when your ribs are cooked to perfection. This is where you can apply both science and a little bit of culinary intuition.
The Meat Thermometer Test: The Scientific Approach
The most reliable way to check for doneness is with a meat thermometer. It's the scientific approach that guarantees accuracy and eliminates guesswork.
- Insert the Thermometer: Insert the thermometer into the thickest part of the meat, making sure it doesn't touch any bone. This will give you the most accurate reading of the internal temperature.
- Target Temperature: The ribs are cooked through when the internal temperature reaches 190°F (90°C).
This method gives you a definitive answer and helps you avoid overcooking or undercooking the ribs.
The "Bone Wiggle" Test: The Hands-On Approach
Here's a handy trick that can help you gauge doneness without a thermometer, especially when you're just starting out.
- Wiggle the Bone: Gently wiggle one of the rib bones.
- The Wiggle Test: If the bone wiggles easily and the meat pulls away from the bone, the ribs are cooked. If the bone feels tight and the meat doesn't readily come away from the bone, you need to cook them a little longer.
This hands-on approach can be a useful guide, but remember, the meat thermometer is your ultimate tool for ensuring accurate doneness.
(Part 7) Serving Your Ribs: A Feast for the Senses
The moment has arrived! Your ribs are cooked to perfection, and it's time to bring them to the table.
Presentation Matters: Making Your Ribs Look as Good as They Taste
Presentation is key to making your ribs look as impressive as they taste.
- Slice the Rack: Slice the rack of ribs into individual ribs for easy serving. This makes it convenient for your guests to grab a rib and enjoy it.
- Garnish with Love: Add some fresh herbs, chopped onions, or a drizzle of BBQ sauce for a finishing touch. A sprinkle of fresh parsley or a drizzle of your favourite BBQ sauce adds a touch of elegance.
- Plate with Pride: Arrange the ribs on a platter or serve them on individual plates.
A beautifully presented platter of ribs is a feast for the eyes and an invitation to savour every bite.
side dishes and Beverages: Completing the Culinary Experience
Ribs pair well with a variety of side dishes, offering a symphony of flavours and textures.
| Side Dish | Description |
|---|---|
| potato salad | Creamy and tangy, a classic pairing with ribs. It offers a refreshing contrast to the rich, smoky flavours of the ribs. |
| Coleslaw | Refreshing and crunchy, adds a nice contrast to the richness of the ribs. The tangy, crunchy coleslaw is a perfect foil to the tender ribs. |
| corn on the cob | Sweet and buttery, a simple yet satisfying side. It adds a touch of sweetness and a rustic charm to your meal. |
| Baked Beans | Hearty and flavorful, perfect for soaking up the BBQ sauce. The baked beans add a layer of smoky sweetness and a comforting texture. |
As for beverages, a cold beer or a refreshing iced tea always goes down well, complementing the smoky flavours of the ribs.
(Part 8) FAQs: Addressing Your Rib-Related Questions
Here are some commonly asked questions about cooking ribs on a gas grill. I've compiled the most frequently asked questions and provided detailed answers to help you navigate your rib-cooking journey with confidence.
Q1: Can I use a different kind of wood chips for smoking?
Absolutely! Experiment with different wood chips to find your favourite flavour profile. Some popular options include hickory, mesquite, pecan, cherry, and apple. Each wood type imparts its own unique flavour profile to the ribs.
Q2: What if I don't have a smoker?
You can still achieve a smoky flavour without a smoker. Just use the wood chips method described in the 3-2-1 guide. The wood chips method is a great alternative to a smoker, allowing you to infuse the ribs with a smoky flavour.
Q3: Is it okay to cook ribs on high heat?
Cooking ribs on high heat can result in dry, tough meat. It's best to cook them at a low and slow temperature to achieve the desired tenderness. Low and slow cooking allows the connective tissue to break down, resulting in tender, flavorful ribs.
Q4: How do I prevent the ribs from drying out?
The wrapping stage in the 3-2-1 method is crucial for keeping the ribs moist. You can also add a little liquid, like apple cider vinegar or beer, to the foil for extra moisture. This creates a steamy environment that helps retain the natural moisture of the ribs.
Q5: Can I make ribs ahead of time?
Yes, you can! You can prepare the ribs, wrap them, and refrigerate them overnight. Just make sure to bring them to room temperature before cooking. This allows you to plan ahead and have the ribs ready to go when you’re ready to grill.
And there you have it, folks! Your comprehensive guide to gas grill ribs, filled with tips, tricks, and insights from my years of grilling experience. Now go forth and grill with confidence! Remember, practice makes perfect, and with a little patience and attention, you'll be making rib-tastic memories in no time.
Everyone is watching

Corn on the Cob: The Ultimate Guide to Perfectly Cooked Ears
Healthy MealsAh, corn on the cob. Just the name evokes images of sunny days, barbecues, and that sweet, juicy flavour that ...

Scallops: The Ultimate Guide to Perfect Cooking
Healthy MealsAh, scallops. Those delicate, sweet, and utterly delicious morsels of the sea. They hold a special place in my...

Spaghetti Squash: The Ultimate Guide to Cooking and Serving
Healthy MealsRemember that time you saw spaghetti squash at the supermarket, looking all bumpy and strange, and thought, "W...

Salmon Cooking Times: Perfect Guide for Every Recipe
Healthy MealsLet me tell you, cooking salmon is an art form. It's all about getting that perfect balance: juicy and tender,...

Ham Cooking Time: How Long to Bake, Smoke, or Boil a Delicious Ham
Healthy MealsAh, ham. It's a classic, isn't it? A real crowd-pleaser, especially around holidays. And when done right, it'...
