Ever seen those incredible cakes with perfectly smooth surfaces and intricate decorations? You know, the ones that make you think, "How did they do that?!" Well, the secret's out: it's fondant. It’s a magical, sugar-based paste that transforms ordinary cakes into edible masterpieces. And the good news is, you can do it too!
I remember my first foray into the world of fondant. I was all excited, envisioning a cake that would blow everyone's minds. But then reality hit. My fondant was a sticky mess, the colors bled, and the whole thing looked like a toddler had gone wild with a paintbrush. I was ready to throw in the towel, but then I realised, I just needed to learn the basics. That's what this guide is all about.
We're going to break down everything you need to know about fondant, from the different types and how to work with them, to the secrets of achieving a flawless finish. I’ll share my favourite recipes, handy tips, and common pitfalls to avoid. By the end of this journey, you'll be a fondant pro, ready to tackle any cake decorating challenge with confidence.
(Part 1) The Wonderful World of Fondant
Let’s begin by getting to know the star of the show: fondant. It’s not a one-size-fits-all thing, you know. There are actually a few different types, each with its own personality.
1.1. Marshmallow Fondant: The Beginner's Best Friend
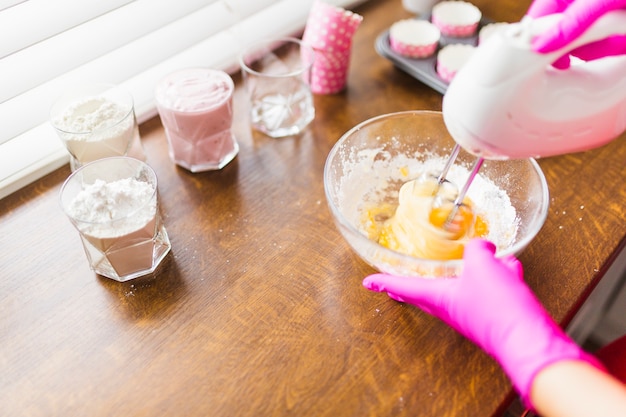
This is where I’d recommend starting your fondant adventure. It's so easy to make, forgiving, and perfect for learning the basics. Think of it as marshmallow fluff, powdered sugar, and a touch of butter. You melt the marshmallow fluff, whisk in the powdered sugar, and knead it until it's smooth and pliable. The best part? You probably already have all the ingredients in your pantry!
1.2. Rolled Fondant: The Workhorse
This is the classic, the one you see on those fancy cakes. It's made with powdered sugar, shortening, and a little bit of gelatine or tylose powder. Rolled fondant is known for its smooth, polished finish and its ability to hold intricate details. It's also relatively easy to work with, but it does require a bit more practice than marshmallow fondant.
1.3. Gum Paste: For the Bold and the Brave
Gum paste is a whole different ball game. It's like a super-strong rolled fondant, made with gum tragacanth or tylose powder. This makes it incredibly sturdy, perfect for creating delicate flowers, intricate decorations, and even tiny figurines. But be warned, gum paste can be a little temperamental, requiring a bit of finesse and a steady hand.
1.4. Making Your Own Fondant: Homemade vs. Store-Bought
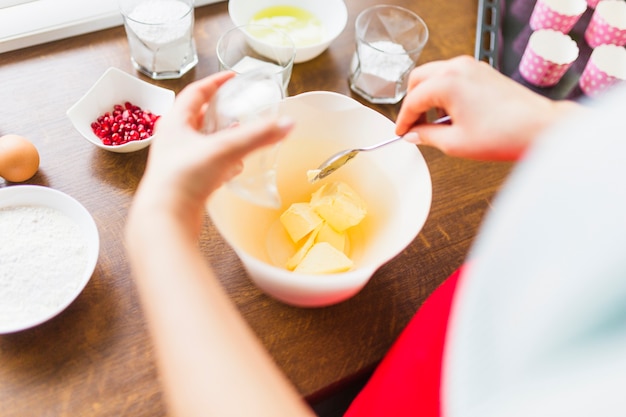
Now, you've got a decision to make: DIY or store-bought? Both have their perks, really. Making your own gives you total control over the ingredients and flavour, plus it's often cheaper. You can experiment with different flavours and colours too! But, it does require time and effort. Store-bought fondant is super convenient, comes in a variety of colours, and has a longer shelf life. However, you have less control over the ingredients and it can be a bit more expensive.
Ultimately, it's up to you! If you're feeling adventurous and have some spare time, I'd encourage you to try homemade fondant. You might be surprised at how easy it is. But if you’re looking for a quick and easy solution, store-bought fondant is a great option.
(Part 2) Fondant Recipes: My Tried and True Favourites
Now that you have a basic understanding of the different types of fondant, let's get into the good stuff: recipes! I'll share a few of my favourites, both homemade and store-bought, that I’ve used and loved over the years.
2.1. The Ultimate marshmallow fondant recipe
This recipe is my go-to for beginner-friendly fondant. It's incredibly versatile, perfect for everything from simple cakes to intricate decorations. It's also a great base for experimenting with different flavours and colours.
Ingredients:
- 450g (1lb) Large Marshmallows
- 3 tbsp Water
- 1 tsp Vanilla Extract
- 1/2 tsp Salt
- Around 600g (4 cups) Powdered Sugar, plus more for dusting
- 1-2 tbsp Butter, softened
Instructions:
- Combine the marshmallows, water, vanilla, and salt in a heatproof bowl. Microwave in 30-second intervals, stirring after each interval, until the marshmallows are completely melted and smooth. Be careful, it can get hot!
- Gradually add the powdered sugar, mixing with a wooden spoon until a dough forms. You might need to add a little more or less depending on the humidity.
- Transfer the dough to a lightly floured surface and knead for 5-10 minutes, until it is smooth and pliable. If it feels too sticky, add a bit more powdered sugar. If it’s too dry, add a tiny bit more butter.
- Wrap the fondant tightly in plastic wrap and let it rest for at least 30 minutes at room temperature. This will allow the fondant to become more manageable.
- Before you use it, knead it again for a minute or two to get it nice and smooth.
2.2. The Classic rolled fondant recipe
This recipe is a bit more involved than the marshmallow version, but it produces a beautifully smooth and polished finish. It's perfect for covering cakes, creating intricate designs, and even making fondant flowers.
Ingredients:
- 450g (1lb) Powdered Sugar, sifted
- 60ml (1/4 cup) Shortening, softened
- 3 tbsp Corn Syrup
- 1 tbsp Glycerin
- 1 tsp Vanilla Extract
- 2 tsp Tylose Powder (optional, for a stronger fondant)
Instructions:
- Combine the powdered sugar, shortening, corn syrup, glycerin, vanilla, and tylose powder (if using) in a large bowl.
- Mix with a wooden spoon until a dough starts to form. Then, transfer to a lightly floured surface and knead for 5-10 minutes, until the fondant is smooth and elastic.
- Wrap tightly in plastic wrap and let rest for at least 30 minutes at room temperature. This allows the fondant to become more workable.
- Before you use it, knead it for a minute or two to get it nice and smooth.
2.3. Store-Bought Fondant: Tips and Tricks
Let's be honest, sometimes you just need a quick and easy solution. That's where store-bought fondant comes in. It's readily available, comes in a variety of colours, and is great for beginners. Here are a few tips for making the most of store-bought fondant:
- Knead it: Don't be tempted to use store-bought fondant straight from the package. Knead it for a few minutes to make it more pliable and workable.
- Add moisture: If the fondant is too dry, add a teaspoon or two of shortening or glycerin to make it more manageable.
- Add flavour: You can easily add flavour to store-bought fondant by kneading in a teaspoon or two of your favourite extract.
- Warm it up: If the fondant is too stiff, try warming it up slightly in the microwave for a few seconds, or just by kneading it with your hands for a few minutes.
(Part 3) The Art of Fondant Colouring: Mastering the Hues
Now that you've got your fondant ready, it's time to get creative with colour! Fondant is incredibly versatile when it comes to colour, allowing you to achieve a wide range of shades and effects.
3.1. The Colour Palette: Choosing the Right Tools
First things first, you'll need the right tools for the job. When it comes to fondant colouring, you've got two main choices: food colouring gels and powdered food colouring.
3.1.1. Food Colouring Gels: The Pros and Cons
Food colouring gels are concentrated, intensely pigmented, and generally considered the best choice for fondant. They offer rich colours, won't thin out your fondant, and are great for achieving vibrant shades. However, they can be a bit pricey.
3.1.2. Powdered Food Colouring: A budget-friendly Option
Powdered food colouring is a more budget-friendly option and often readily available. It can work well for fondant, but it's important to note that it can sometimes make the fondant a little drier. You'll need to be careful not to use too much, as it can make your fondant clumpy.
3.2. Colouring Techniques: From Subtle to Bold
There are a few different techniques you can use to colour fondant, each yielding different results.
3.2.1. Kneading: For Even Colour Distribution
This is the most common and basic method. Simply add a small amount of food colouring to your fondant and knead it thoroughly until the colour is evenly distributed. This works best for solid colours and subtle shades.
3.2.2. Marbling: Creating Swirls and Patterns
This technique creates a beautiful marbled effect. Simply divide your fondant into a few sections and colour each section a different colour. Then, gently knead the sections together until they create a swirling pattern.
3.2.3. Airbrushing: Achieving a Professional Look
Airbrushing is a more advanced technique that allows you to create stunning gradients and intricate designs. It involves using an airbrush to spray food colouring onto the fondant. You'll need to invest in an airbrush set, but the results are well worth it.
3.3. Colour Mixing: Unleashing Your Inner Artist
One of the fun things about fondant is that you can mix colours to create a wide range of shades. It's like having your own little paint palette! Remember, a little goes a long way, so start with a tiny amount of colour and add more as needed.
(Part 4) rolling fondant: Achieving a Perfect Surface
So, you've got your coloured fondant ready to go, but how do you actually get it onto your cake? Rolling is the key! It's a bit like making pastry, but with a bit more finesse.
4.1. The Tools of the Trade: Essential Rolling Equipment
You'll need a few key tools to help you roll fondant like a pro.
- Rolling Pin: A good rolling pin is essential for getting an even thickness of fondant. I personally prefer a lightweight, non-stick rolling pin.
- Rolling Surface: You need a surface that's smooth and non-stick. A marble countertop or a silicone rolling mat are good options. Make sure to dust your surface with powdered sugar to prevent sticking.
- fondant smoother: This handy tool helps you create a perfectly smooth finish on your fondant. There are a variety of shapes and sizes available, so choose one that feels comfortable in your hand.
- Cake Board: A cake board is a sturdy piece of cardboard that provides a stable base for your cake. It also makes it easier to transport your cake without damaging the fondant.
4.2. The Rolling Process: Step-by-Step Guide
Let's walk through the rolling process step-by-step:
- Prepare your surface: Dust your rolling surface with powdered sugar to prevent the fondant from sticking.
- Knead your fondant: Knead the fondant for a few minutes until it's smooth and pliable.
- Form a ball: Form the fondant into a ball.
- Roll it out: Place the fondant ball on your prepared surface and start rolling. Use even pressure and roll in a back-and-forth motion.
- Check the thickness: Use a ruler or fondant thickness gauge to ensure the fondant is rolled to your desired thickness. For covering cakes, aim for about 1/4 inch thickness.
- Lift and check: Lift the fondant gently to make sure it's not sticking to the surface. If it does, add more powdered sugar.
- Transfer to the cake: Once the fondant is rolled to the desired thickness, carefully lift it and place it over your cake.
- Smooth it out: Use a fondant smoother to gently smooth out the fondant, removing any air bubbles and creases.
(Part 5) The Finishing Touches: Making it Perfect
You've successfully covered your cake in fondant, but it's not quite finished yet. It's time to add those finishing touches that will make your cake truly stand out.
5.1. Smoothing the Surface: Achieving a Flawless Finish
There are a few tricks you can use to ensure your fondant surface is perfectly smooth.
- Warm water: Dip your fondant smoother in warm water and gently rub it over the surface of the fondant. This will help to melt any small bumps or imperfections.
- Plastic wrap: Use a piece of clean plastic wrap and gently rub it over the surface of the fondant. This will help to smooth out any wrinkles or creases.
- Fondant smoother: A good quality fondant smoother is essential for achieving a flawless finish. There are a variety of styles available, so choose one that feels comfortable to use.
5.2. Removing Air Bubbles: Getting Rid of Those Bumps
Air bubbles can really mar your fondant finish. You can often remove them using a few simple techniques.
- Fondant smoother: Gently push the bubble with a fondant smoother to pop it.
- Toothpick: Carefully prick the bubble with a toothpick to release the air.
- Water: Dampen your finger with water and gently press the bubble to release the air.
5.3. Adding Embellishments: Making Your Cake Sparkle
Now it's time to have some fun and add embellishments to your cake. You can go as simple or as elaborate as you like.
- Fondant flowers: You can create beautiful fondant flowers using a variety of tools and techniques.
- Fondant figures: Use fondant to create fun and whimsical figures, like animals, characters, or even letters.
- Edible glitter: Add some sparkle to your cake with edible glitter.
- Sugar pearls: Sugar pearls add a touch of elegance and sophistication.
- Sprinkles: Who doesn't love sprinkles? They're perfect for adding a burst of colour and whimsy.
(Part 6) Storing Fondant: Keeping it Fresh and Ready to Go
You've made your fondant, covered your cake, and added all the finishing touches. Now, it's time to store your masterpiece and keep it looking its best.
6.1. Fondant Storage: Keeping it Fresh and Pliable
To ensure your fondant stays fresh and pliable, follow these tips:
- Airtight container: Store leftover fondant in an airtight container at room temperature.
- Plastic wrap: Wrap the fondant tightly in plastic wrap before placing it in the container. This will prevent it from drying out.
- Don't refrigerate: Refrigerating fondant can make it harden and become difficult to work with.
6.2. Storing Covered Cakes: Keeping the Fondant Perfect
Once your cake is covered in fondant, you need to keep it safe from damage and moisture.
- Cake box: Store your fondant-covered cake in a cake box or a similar container. This will help to protect it from dust and moisture.
- Don't refrigerate: Refrigerating a fondant-covered cake can cause condensation, which can make the fondant soggy.
- Room temperature: Store your cake at room temperature, away from direct sunlight.
(Part 7) Troubleshooting: Solving Common Fondant Problems
Even the most experienced fondant users have run into a few problems. Let's explore some of the most common issues and how to fix them.
7.1. Sticky Fondant: Getting It Under Control
You've kneaded the fondant, but it's still sticking to your hands and the rolling surface.
- Add powdered sugar: Gently knead in a small amount of powdered sugar, a tablespoon at a time, until the fondant becomes less sticky.
- Use cornstarch: If powdered sugar isn't doing the trick, try dusting your hands and rolling surface with cornstarch instead.
- Let it rest: Sometimes, sticky fondant just needs a little rest. Wrap it tightly in plastic wrap and let it sit at room temperature for 30 minutes.
7.2. Dry Fondant: Reviving a Stiff Dough
Your fondant has become hard and dry, making it difficult to roll and work with.
- Add shortening or glycerin: Knead in a teaspoon or two of shortening or glycerin to add moisture back into the fondant.
- Warm it up: If the fondant is still too dry, warm it up slightly by microwaving it for a few seconds or kneading it with your hands for a few minutes.
7.3. Cracking Fondant: Preventing Those Unsightly Lines
You've carefully covered your cake, but the fondant is cracking.
- Too thin: The fondant may be too thin. Roll it out again, this time to a slightly thicker thickness.
- Dry fondant: The fondant may be too dry. Try adding a bit of shortening or glycerin to make it more pliable.
- Uneven rolling: Ensure that you're rolling the fondant evenly and not applying too much pressure in certain areas.
7.4. Bleeding Colors: Keeping the Hues Vibrant
You've carefully coloured your fondant, but the colours are bleeding into each other.
- Use gel colours: Gel food colouring is less likely to bleed than powdered food colouring.
- Avoid over-colouring: Too much colour can make the fondant more prone to bleeding. Start with a small amount of colour and add more as needed.
- Let it rest: Once you've coloured your fondant, let it rest for a few minutes to allow the colours to settle.
(Part 8) FAQs: Addressing Your Fondant Queries
Here are some frequently asked questions about fondant, answered in a way that will make you a fondant expert!
8.1. Can I eat fondant?
Absolutely! Fondant is made from edible ingredients, so it's perfectly safe to eat. It's a bit like a sweet, chewy candy, though it can be a little dense and sugary, so a little goes a long way.
8.2. How long can I keep fondant?
Homemade fondant can last for a couple of weeks, stored properly at room temperature in an airtight container. Store-bought fondant often has a longer shelf life, usually around a few months. However, it's best to check the expiration date on the package.
8.3. What can I use to smooth out fondant?
A fondant smoother is the best tool for achieving a smooth and flawless fondant finish. You can also use warm water, plastic wrap, or even your fingers to smooth out the fondant.
8.4. How do I make fondant flowers?
There are a variety of tools and techniques for making fondant flowers. You can use fondant cutters, cutters, or even just your hands to shape the flowers. There are tons of tutorials online that can show you step-by-step instructions.
8.5. Can I make fondant figures?
You can absolutely make fondant figures! You'll need to use a bit more gum paste for stronger figures, but it's definitely possible to create fun and whimsical shapes. There are plenty of online tutorials to help you along the way.
And there you have it! You've now got the knowledge and skills to create stunning cakes covered in smooth, beautiful fondant. Remember, practice makes perfect, so don't be afraid to experiment and have fun with it. You'll be amazed at what you can create with a little bit of patience and a whole lot of creativity.
(Part 9) Beyond the Basics: Elevating Your Fondant Skills
So, you've mastered the basics of fondant, but are you ready to take your cake decorating to the next level? Here are a few ideas to expand your skills and explore the world of fondant beyond the basics.
9.1. Creating Fondant Flowers: A Symphony of Sugar
Fondant flowers are a beautiful and delicate way to add elegance and beauty to your cakes. There are countless styles and techniques to explore, from simple roses to intricate lilies. You can find detailed tutorials online or in cake decorating books that guide you through shaping, cutting, and assembling petals for stunning results.
9.2. Sculpting with Fondant: Transforming Your Creations
Sculpting with fondant allows you to create unique and personalized decorations. You can sculpt everything from cute animals to whimsical characters. Remember to use gum paste for sculpting, as it holds its shape better than rolled fondant. You'll need a steady hand and a keen eye for detail, but the results are truly magical.
9.3. Exploring Fondant Techniques: Unveiling New Possibilities
The world of fondant techniques is vast and exciting. Beyond the basics of rolling and smoothing, there are endless possibilities to explore.
- Draped Fondant: This technique creates elegant, flowing designs that are perfect for adding a touch of sophistication to your cakes.
- Lace Fondant: Create delicate and intricate lace patterns using fondant cutters or stencils.
- Ruffled Fondant: Add texture and dimension to your cakes with ruffled fondant.
- Veined Fondant: Create realistic veins and textures on leaves and flowers.
The beauty of fondant is that it's a canvas for creativity. Don't be afraid to experiment and try new things. You'll be surprised at what you can achieve!
(Part 10) Fondant Inspiration: A Gallery of Ideas
To fuel your imagination and spark your creativity, let’s take a look at some inspirational fondant cakes that showcase the incredible possibilities of this versatile medium.
Imagine a simple vanilla cake transformed into a stunning woodland scene. The cake is covered in a deep green fondant, representing a lush forest floor. Delicate fondant mushrooms sprout up, while a tiny woodland creature, perhaps a fox or a deer, peeks out from behind a fondant tree. The scene is complete with edible glitter for a touch of magic.
Now picture a wedding cake with a cascading waterfall of white fondant. The cake tiers are intricately decorated with fondant flowers and delicate sugar pearls, creating an elegant and romantic feel. The cascading fondant waterfall adds a touch of drama and grandeur to the design.
These are just a few examples of the incredible designs you can achieve with fondant. Don't be afraid to let your imagination run wild!
(Part 11) The Final Word: Embrace the Journey
As you delve into the world of fondant, remember this: it's a journey, not a destination. It's okay to make mistakes, to get frustrated, and to start over. But with each attempt, you’ll learn, grow, and discover new possibilities. And who knows, maybe you'll even become a fondant master one day!
So, what are you waiting for? Gather your ingredients, grab your rolling pin, and get ready to create something truly special! The world of fondant awaits you.
Everyone is watching

Corn on the Cob: The Ultimate Guide to Perfectly Cooked Ears
Healthy MealsAh, corn on the cob. Just the name evokes images of sunny days, barbecues, and that sweet, juicy flavour that ...

Perfect Pork Roast Oven Cooking Time: A Guide to Delicious Results
Healthy MealsThere's something truly satisfying about a perfectly roasted pork. The aroma alone is enough to make your mout...

Ham Cooking Time: How Long to Bake, Smoke, or Boil a Delicious Ham
Healthy MealsAh, ham. It's a classic, isn't it? A real crowd-pleaser, especially around holidays. And when done right, it'...

Scallops: The Ultimate Guide to Perfect Cooking
Healthy MealsAh, scallops. Those delicate, sweet, and utterly delicious morsels of the sea. They hold a special place in my...

Spaghetti Squash: The Ultimate Guide to Cooking and Serving
Healthy MealsRemember that time you saw spaghetti squash at the supermarket, looking all bumpy and strange, and thought, "W...