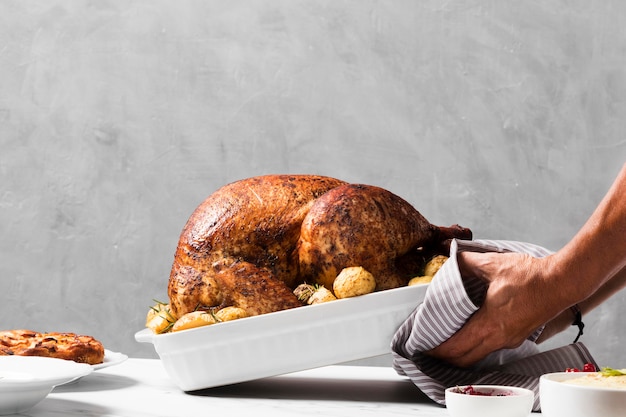
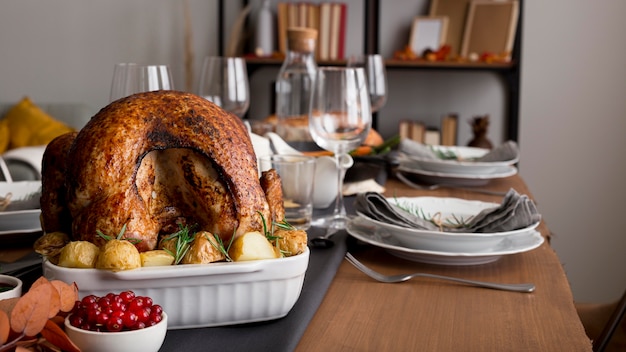
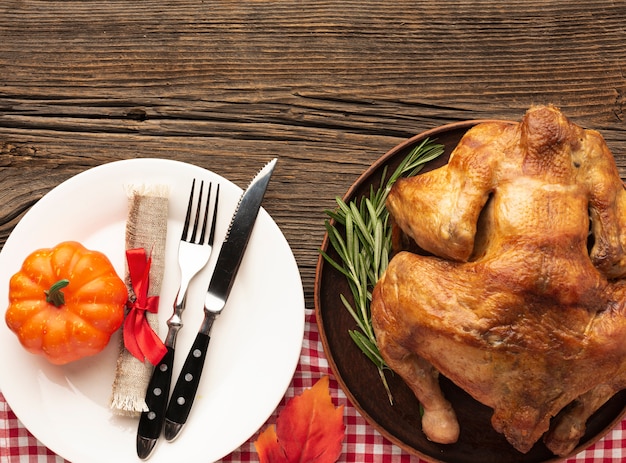
Ah, the humble turkey. A symbol of festive gatherings, family feasts, and delicious, comforting meals. But let's face it, cooking a turkey can be a bit daunting, especially if you're new to the game. And when it comes to electric roasters, there's a whole other level of questions and concerns. Fear not, my friends! I'm here to guide you through the process, from choosing the right turkey to achieving that perfectly golden-brown skin and juicy, succulent meat. I've learned a thing or two (and even had a few turkey-related mishaps along the way) but I'm confident this guide will help you create a delicious turkey masterpiece.
Part 1: Choosing the Right Turkey

The first step to a perfect turkey is choosing the right bird. Don't just grab the first one you see, take your time to find the perfect fit for your needs. Here's what to keep in mind:
Size Matters:
A good rule of thumb is 1 lb of turkey per person, but I find that often leaves a lot of leftovers. I'd rather have a slightly smaller turkey and have the meat be beautifully cooked throughout. Just remember, a smaller turkey will cook faster. Do you want to feed a crowd or just a few? The size you need will dictate how much space you have in your roaster as well.
Fresh or Frozen?
Fresh turkeys are my personal preference. They tend to have a more vibrant flavor and are easier to handle. But if you're buying your turkey in advance, frozen is a great option. Just make sure to defrost it properly in the fridge, allowing plenty of time to thaw before you start cooking. A good rule of thumb is to allow 24 hours for every 5 pounds of turkey.
Check the Colour:
The turkey should have a nice, even colour. Look for a pale, pinkish-white colour, not too yellow. And give the skin a gentle poke. It should feel firm and springy. A turkey with a mottled colour or one that feels soft and squishy might not be the best choice.
Don't Forget the Extras:
While you're picking up your turkey, grab a bag of giblets and neck. They're fantastic for making a rich and flavorful gravy or stock. You can also use the giblets for stuffing or even create a delicious giblet gravy for a special touch.
Part 2: Prepping Your Turkey

Once you've got your beautiful bird home, it's time to prepare it for its roaster debut. This step is crucial for ensuring a delicious and evenly cooked turkey.
Pat it Dry:
Remove the turkey from its packaging and pat it thoroughly dry with paper towels. This will help the skin crisp up beautifully while roasting and create a lovely golden-brown color.
Season It Up:
Now, this is where you get to be creative. I love to give my turkey a good rub with a blend of herbs and spices. My go-to mix includes paprika, garlic powder, onion powder, thyme, and rosemary. But feel free to experiment and find what works best for your taste buds. A little salt and pepper are always a good starting point, and you can even try adding a little brown sugar to the mix for a touch of sweetness.
Stuff or Not?
Stuffing is a classic turkey companion, but it's not essential. If you're opting for a stuffed turkey, make sure the stuffing is cooked separately to avoid undercooked poultry. I'm a fan of stuffing the turkey after it's cooked. This helps ensure the bird stays moist and prevents any potential food safety concerns. Plus, it allows you to cook the stuffing to perfection without worrying about overcooking the turkey.
Part 3: Setting Up Your Electric Roaster

Now, let's talk about the star of the show: your trusty electric roaster. This is where the magic happens.
Cleaning Up:
Before you start, give your roaster a good scrub with hot, soapy water. Make sure it's completely dry before you start. This will ensure that the roaster is clean and ready to cook your turkey safely. A clean roaster also helps prevent any unwanted flavors from previous meals from transferring to your turkey.
The Rack is Key:
Place the rack in the bottom of the roaster. This allows for proper airflow around the turkey, ensuring it cooks evenly. It also helps to prevent the turkey from sitting in its own juices, which can make it soggy.
Pour in the Liquid:
Here's a little secret I've learned over the years: add a cup of water or chicken broth to the bottom of the roaster. This creates steam and helps keep the turkey moist and tender. Don't be afraid to get creative! Add some flavor to the liquid with herbs like parsley, thyme, or rosemary, sliced vegetables like onions or carrots, or even a splash of white wine or apple cider for a touch of sweetness.
Part 4: Time to Roast!
The anticipation is building! Now it's time to pop that turkey into the roaster and let it work its magic.
Preheating is Essential:
Before you place the turkey in the roaster, preheat it to 325 degrees Fahrenheit (160 degrees Celsius). This helps ensure that the turkey cooks evenly and doesn't stick to the roaster. It also creates a more consistent cooking environment, which leads to a more delicious and evenly cooked turkey.
Placement is Important:
Position the turkey in the roaster, making sure it's not touching the sides or the lid. Give it some space to breathe! This allows for proper airflow and ensures that the turkey cooks evenly on all sides.
Cover It Up:
Place the lid on the roaster and set the timer. The cooking time will depend on the size of your turkey. As a general rule, allow about 15 minutes per pound of turkey. But remember, this is just a guideline. It's always best to check the turkey's internal temperature to ensure it's cooked through.
Monitoring is Key:
While the turkey is roasting, keep an eye on it. Every hour or so, baste the turkey with the pan juices. This helps keep the meat moist and tender and adds a beautiful golden-brown color to the skin.
Part 5: Checking for Doneness
Your turkey is happily roasting away, but how do you know when it's ready to feast? Here are a few ways to check for doneness:
The Temperature Test:
The most reliable way to determine if your turkey is cooked through is to use a meat thermometer. Insert the thermometer into the thickest part of the thigh, making sure it doesn't touch any bone. The internal temperature should reach 165 degrees Fahrenheit (74 degrees Celsius). A meat thermometer is your best friend for ensuring a safe and delicious turkey.
The Juices Test:
If you don't have a thermometer, you can check the turkey's doneness by pressing the thigh. If the juices run clear, it's cooked. If the juices are still pink, it needs more time. This method can be a little less precise than a thermometer, but it can be helpful in a pinch.
The Leg Test:
Another simple test is to wiggle the leg. If it moves freely, it's done. If it's still stuck, give it a bit more time. This method can be a little less precise than a thermometer, but it can be helpful in a pinch.
Part 6: Resting is Essential
Once your turkey is cooked, don't rush to carve it. Let it rest for at least 15 minutes before you start carving. This allows the juices to redistribute, resulting in a juicier, more flavorful turkey.
Cover It Up:
Cover the turkey loosely with foil while it's resting. This helps keep it warm and moist. It also prevents the turkey from drying out while it's resting, which is essential for maintaining that delicious juiciness.
Don't Forget the Gravy:
While the turkey is resting, you can make your gravy. The pan juices from the roaster are the perfect base for a delicious gravy. You can make your own gravy from scratch or use a store-bought gravy mix. Either way, the pan juices will add a delicious depth of flavor.
Part 7: Carving Time!
The moment has arrived: it's time to carve that beautiful turkey! But before you grab the knife, there are a few things to keep in mind.
Safety First:
Always use a sharp carving knife, and keep your fingers away from the blade. Carve the turkey on a sturdy, stable surface. A sharp knife makes the carving process easier and safer. A cutting board or a large platter provides a stable base for carving, preventing accidents.
The Right Technique:
Start by removing the legs and thighs. Then, carve the breast meat into slices. Be careful not to overwork the meat, as this can make it dry. Remove the wing bones before carving the wings. Carving the turkey in the right order ensures that the meat stays juicy and flavorful.
Presentation is Key:
Once you've carved the turkey, arrange the meat attractively on a platter. Add some garnishes, like parsley or cranberries, for a festive touch. A well-presented turkey makes for a more enjoyable dining experience.
Part 8: Serving Time!
The turkey is cooked, carved, and ready to be served. Gather your guests, pour the gravy, and enjoy! Here are some tips for serving your turkey:
Keep it Warm:
Keep the carved turkey warm in a chafing dish or on a serving platter over a low heat. This helps ensure the turkey stays warm and inviting until everyone is ready to eat.
Offer a Variety:
Provide your guests with a variety of sides to accompany the turkey. Some classic choices include mashed potatoes, stuffing, gravy, cranberry sauce, and green beans. Offering a variety of sides allows guests to create their own personalized plates and ensures that everyone has something they enjoy.
Don't Forget the Leftovers:
No turkey dinner is complete without a few leftovers! Store the turkey in the fridge for up to three days and use it in sandwiches, salads, or soups. turkey leftovers are a delicious way to extend the festive meal.
Part 9: Tips and Tricks for Electric Roaster Turkey
Over the years, I've learned a few tips and tricks for cooking turkey in an electric roaster. Here are a few of my favourites:
The "Double-Roasting" Technique:
If you're cooking a large turkey, you can use the "double-roasting" technique. This involves roasting the turkey for half the time covered, and the other half uncovered. This helps the turkey cook more evenly and achieve a crispy skin. This technique is especially useful for large turkeys, as it ensures that the turkey is cooked through without drying out the breast meat.
Don't Overcrowd the Roaster:
Avoid overcrowding the roaster. If you're cooking a large turkey, you may need to use two roasters. Overcrowding the roaster can prevent proper airflow and make it difficult for the turkey to cook evenly.
Use a Roasting Bag:
A roasting bag can help keep the turkey moist and tender. Just make sure to pierce the bag a few times to allow steam to escape. Roasting bags are especially helpful for smaller turkeys or when you want to ensure extra moistness.
Add a Little Sweetness:
To add a touch of sweetness to your turkey, try adding a few tablespoons of honey or maple syrup to the basting sauce. The sweetness balances out the savory flavors of the turkey and adds a nice caramelized flavor to the skin.
Experiment with Flavours:
Don't be afraid to experiment with different flavors. Try adding different herbs, spices, or even fruit to your turkey. The possibilities are endless! Experimentation is a great way to find new and exciting flavor combinations.
Part 10: FAQs
Here are some frequently asked questions about cooking turkey in an electric roaster:
Q: How long does it take to cook a turkey in an electric roaster?
A: The cooking time for a turkey in an electric roaster will vary depending on the size of the turkey and the type of roaster. As a general rule, allow about 15 minutes per pound of turkey. Always use a meat thermometer to ensure the turkey is cooked through.
Q: What temperature should I cook a turkey in an electric roaster?
A: The recommended temperature for cooking a turkey in an electric roaster is 325 degrees Fahrenheit (160 degrees Celsius).
Q: Can I stuff a turkey in an electric roaster?
A: Yes, you can stuff a turkey in an electric roaster, but it's best to cook the stuffing separately. This will help prevent undercooked poultry. If you're stuffing the turkey after it's cooked, be sure to let it cool slightly before stuffing.
Q: What should I do if my turkey is not cooked through?
A: If your turkey is not cooked through, continue roasting it until it reaches the recommended internal temperature of 165 degrees Fahrenheit (74 degrees Celsius). You can also check the turkey's doneness by pressing the thigh. If the juices run clear, it's cooked. If the juices are still pink, it needs more time.
Q: Can I reheat a turkey in an electric roaster?
A: Yes, you can reheat a turkey in an electric roaster. Set the roaster to a low temperature and reheat the turkey until it's warmed through.
Part 11: Let's Get Cooking!
So, there you have it! My ultimate guide to cooking a perfect turkey in an electric roaster. With a little planning and the right techniques, you can create a truly unforgettable turkey dinner for your family and friends. Don't be afraid to get creative and experiment with different flavors. And most importantly, have fun with it! Remember, it's not just about the turkey, it's about the memories you create around the table. Happy roasting!
Everyone is watching

Corn on the Cob: The Ultimate Guide to Perfectly Cooked Ears
Healthy MealsAh, corn on the cob. Just the name evokes images of sunny days, barbecues, and that sweet, juicy flavour that ...

Perfect Pork Roast Oven Cooking Time: A Guide to Delicious Results
Healthy MealsThere's something truly satisfying about a perfectly roasted pork. The aroma alone is enough to make your mout...

Ham Cooking Time: How Long to Bake, Smoke, or Boil a Delicious Ham
Healthy MealsAh, ham. It's a classic, isn't it? A real crowd-pleaser, especially around holidays. And when done right, it'...

Scallops: The Ultimate Guide to Perfect Cooking
Healthy MealsAh, scallops. Those delicate, sweet, and utterly delicious morsels of the sea. They hold a special place in my...

Spaghetti Squash: The Ultimate Guide to Cooking and Serving
Healthy MealsRemember that time you saw spaghetti squash at the supermarket, looking all bumpy and strange, and thought, "W...
