Let's talk about eggs. I confess, I'm a bit of an egg enthusiast! I love them in every form – scrambled, fried, poached, boiled – you name it. And after years of experimenting (and some culinary mishaps, let's be real), I've finally mastered the art of cooking perfect eggs, every single time.
Whether you're a complete beginner or think you know your way around an egg, get ready for a journey into the wonderful world of egg cookery. Let's dive in!
(Part 1) The Eggs Themselves: Choosing Your Weapons

Before we even start cooking, we need to talk about the eggs themselves. choosing the right eggs is crucial for achieving those perfect results you're after.
Freshness is King
Always opt for the freshest eggs you can find. Those "best before" dates on the carton? They're not just for show. Fresher eggs boast a brighter yolk, while the white will be thicker and firmer. Trust me, it makes a huge difference.
Size Matters
Eggs come in various sizes, and knowing which ones work best for your needs is important. Here's a little guide:
- Small: Ideal for boiling or poaching, as they cook faster. However, you'll need several for a decent omelette.
- Medium: The most common size and a great all-rounder. Perfect for most recipes.
- Large: Great for omelettes, where you want a generous amount of egg. They also work well for boiling, but you might need to cook them a little longer.
- Extra Large: These are best for recipes demanding a lot of egg, like fluffy sponge cakes or creamy custards.
Free Range vs. Barn Eggs: The Great Debate
Ah, the eternal egg debate. free-range eggs often have a richer yolk and a deeper flavour. Barn eggs, however, are also excellent and more budget-friendly. Ultimately, it comes down to your personal preference.
(Part 2) The Tools of the Trade

Now, let's talk about the equipment. Having the right tools makes all the difference in the kitchen.
A Quality Pan: Your Cooking Companion
A good, non-stick pan is a must-have for frying and scrambling eggs. Look for one with an even base and a heavy bottom – this prevents hot spots and ensures even cooking. Remember to season your pan properly before you start cooking – it helps prevent sticking and makes cleaning a breeze.
A Whisk: Your Fluffy Friend
A whisk is your best friend when scrambling eggs. It incorporates air, resulting in a light and fluffy texture. I prefer a balloon whisk – its large surface area handles even the biggest egg jobs with ease.
A Spatula: Your Kitchen Multi-tasker
You'll need a good spatula for flipping fried eggs, turning omelettes, and generally maneuvering around your pan. I recommend a silicone spatula; it won't scratch your non-stick pan and is easy to clean.
A Poaching Pan: For Fancy Eggs
If you're feeling fancy, a poaching pan is a great investment. It helps create perfectly round poached eggs. However, you can always use a saucepan with a few ramekins if you don't have one.
An egg timer: Keeping Track of Time
You'll definitely need a timer, especially when boiling eggs. Even a few seconds can make a difference! I use one of those cute little hourglass timers – it adds a retro touch and is accurate.
(Part 3) The Art of Boiling Eggs: A Masterclass in Patience

Let's start with the basics: boiling eggs. It's a skill everyone should master, and it's surprisingly simple once you get the hang of it.
The Perfect Soft-boiled egg: Runny Goodness
For a perfect soft-boiled egg, follow these steps:
- Bring a pan of water to a rolling boil.
- Carefully lower the eggs into the boiling water using a spoon. Don't drop them in, or they could crack!
- Set a timer for 3-4 minutes for a runny yolk.
- Once the timer goes off, drain the water and immediately run the eggs under cold water to stop the cooking process.
- Gently tap the end of the egg on a hard surface to crack the shell, then peel away the shell under cold running water.
The Perfect Medium-Boiled Egg: A Balanced Bite
For a medium-boiled egg, follow the same steps as above, but set the timer for 6-7 minutes. This results in a firm white and a slightly runny yolk.
The Perfect Hard-Boiled Egg: Firm and Solid
For a hard-boiled egg, follow the same steps, but set the timer for 10-12 minutes. This produces a completely solid egg.
Tips for Perfect Boiling: Mastering the Art
Here are a few tips to help you achieve those perfect boiled eggs:
- Add a teaspoon of salt to the boiling water. This helps prevent the eggs from cracking.
- Use a spoon to gently lower the eggs into the water. No dropping allowed!
- Don't overcook your eggs. The longer you cook them, the harder they'll become.
- Once the eggs are cooked, immediately run them under cold water to stop the cooking process. This also makes peeling easier.
(Part 4) The Art of frying eggs: Golden Perfection
Now, let's move on to frying eggs. It's a straightforward technique, but a few tricks can help you achieve those perfectly cooked eggs every time.
The Perfect Sunny-Side-Up Egg: A Burst of Flavor
For a perfect sunny-side-up egg, follow these steps:
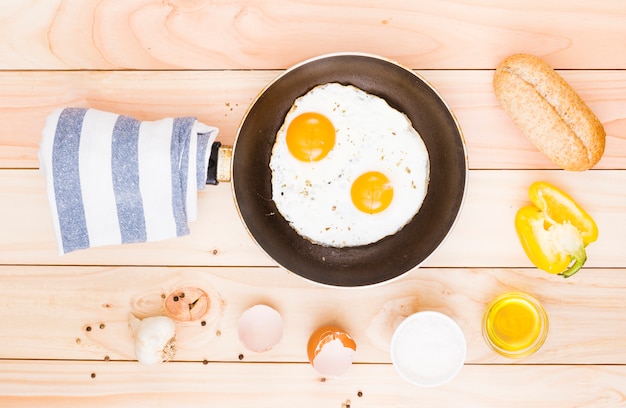
- Heat a non-stick pan over medium heat.
- Add a little butter or oil to the pan, just enough to coat the bottom.
- Gently crack the egg into the pan.
- Cook for 2-3 minutes, or until the white is set and the yolk is still runny.
- For a crispy edge, carefully lift the pan and tilt it slightly for a few seconds, allowing the oil to run underneath the egg.
- Slide the egg onto a plate using a spatula.
The Perfect over-easy egg: Just a Hint of Firmness
For an over-easy egg, follow the same steps as above, but cook for a little longer, until the white is set, and the yolk is slightly firm.
The perfect over-medium egg: A Smoother Yolk
For an over-medium egg, follow the same steps, but cook for even longer, until the yolk is mostly set but still slightly runny.
The Perfect Over-Hard Egg: Solid Satisfaction
For an over-hard egg, cook until the yolk is completely set.
Tips for Perfect Frying: Avoiding Mistakes
Here are a few tips to help you get those perfect fried eggs:
- Don't overcrowd the pan. If you fry multiple eggs at the same time, they might not cook evenly.
- Don't overcook your eggs. They'll become tough and rubbery if you cook them for too long.
- If you want a crispy edge, tilt the pan slightly and let the oil run underneath the egg.
(Part 5) The Art of scrambled eggs: Fluffy and Delicious
Scrambled eggs are a breakfast classic, incredibly versatile. But achieving that perfect fluffy texture can be tricky. Here's how to master the art of scrambling:
The perfect scrambled eggs: A Culinary Triumph
For perfect scrambled eggs, follow these steps:
- Crack the eggs into a bowl and whisk them together with a fork or whisk until frothy.
- Add a splash of milk or cream, if you like. This makes the eggs even fluffier.
- Add a pinch of salt and pepper to taste.
- Heat a non-stick pan over medium heat.
- Add a little butter or oil to the pan, just enough to coat the bottom.
- Pour the eggs into the pan and cook, stirring constantly, until they are just set.
- Don't overcook the eggs! They'll become tough and rubbery if you cook them for too long.
- Serve immediately, garnished with chopped chives or parsley, if you like.
Tips for Perfect Scrambling: Avoiding Common Pitfalls
Here are a few tips to help you get those perfect scrambled eggs:
- Don't overwhisk the eggs. Overwhisk, and you'll end up with tough, rubbery eggs.
- Cook the eggs over medium heat. Don't rush it, or they'll burn on the outside before they're cooked through.
- Stir constantly while cooking. This prevents the eggs from sticking to the pan and ensures even cooking.
- Use a spatula to scrape the bottom of the pan as you cook. This helps create those beautiful, fluffy curds.
(Part 6) The Art of poaching eggs: A Culinary Challenge
Poaching eggs requires practice, but it's worth the effort. They are incredibly delicious and look incredibly fancy, perfect for brunch or a special occasion.
The Perfect Poached Egg: Effortless Elegance
For a perfect poached egg, follow these steps:
- Fill a saucepan with about 2 inches of water and bring it to a simmer.
- Crack the egg into a small bowl or ramekin.
- Gently swirl the water in the saucepan to create a whirlpool. This helps keep the egg white from spreading too much.
- Carefully slide the egg into the swirling water. Don't drop it!
- Cook for 3-4 minutes for a runny yolk.
- Remove the egg from the water using a slotted spoon.
- Serve immediately, on toast, in a salad, or in a soup.
Tips for Perfect Poaching: Mastering the Technique
Here are a few tips to help you get those perfect poached eggs:
- Add a splash of vinegar to the water. This helps the egg white to coagulate and create a neater shape.
- Don't overcrowd the pan. If you poach multiple eggs at the same time, they might not cook evenly.
- Use a slotted spoon to remove the eggs from the water. This helps prevent them from breaking.
(Part 7) The Art of Omelettes: A Culinary Canvas
Omelettes are a fantastic way to use up leftover vegetables and cheese, and they're quick and easy to make.
The perfect omelette: A Delicious Creation
For a perfect omelette, follow these steps:
- Crack the eggs into a bowl and whisk them together with a fork or whisk until frothy.
- Add a splash of milk or cream, if you like.
- Add a pinch of salt and pepper to taste.
- Heat a non-stick pan over medium heat.
- Add a little butter or oil to the pan, just enough to coat the bottom.
- Pour the eggs into the pan and cook, stirring constantly, until they're just set.
- Don't overcook the eggs! They'll become tough and rubbery if you cook them for too long.
- Use a spatula to fold the omelette in half.
- Slide the omelette onto a plate using a spatula.
- Serve immediately, garnished with chopped herbs, cheese, or your favourite fillings.
Tips for Perfect Omelettes: Essential Techniques
Here are a few tips to help you get those perfect omelettes:
- Don't overwhisk the eggs. Overwhisk, and you'll end up with tough, rubbery eggs.
- Cook the omelette over medium heat. Don't rush it, or they'll burn on the outside before they're cooked through.
- Add your fillings to the omelette just before you fold it in half. This helps prevent them from burning.
- Don't overcook the omelette. It should be soft and fluffy, not tough and rubbery.
(Part 8) Beyond the Basics: Exploring Egg Recipes
Now that you've mastered the basics, let's explore some exciting egg recipes.
A Classic French Toast: Sweet and Savoury Delight
French toast is a delicious breakfast treat, surprisingly easy to make. Here's my recipe:
- Crack the eggs into a bowl and whisk them together with a fork or whisk until frothy.
- Add a splash of milk or cream, if you like.
- Add a pinch of cinnamon, nutmeg, and vanilla extract.
- Dip slices of bread into the egg mixture, ensuring they are completely coated.
- Heat a little butter in a non-stick pan over medium heat.
- Cook the bread slices for 2-3 minutes per side, or until they are golden brown and cooked through.
- Serve immediately, with maple syrup, fresh fruit, or whipped cream.
A Creamy Carbonara: Italian Pasta Perfection
Carbonara is a classic Italian pasta dish, surprisingly easy to make. Here's my recipe:
- Cook the pasta according to the package directions.
- While the pasta is cooking, crack the eggs into a bowl and whisk them together with a fork or whisk until frothy.
- Add a splash of milk or cream.
- Grate the parmesan cheese and add it to the bowl.
- Add a pinch of salt and pepper to taste.
- Once the pasta is cooked, drain it and add it to the bowl with the eggs and cheese.
- Stir everything together until the cheese melts, and the sauce thickens.
- Serve immediately, garnished with freshly ground black pepper.
A Delicious Quiche: Versatile and Flavorful
Quiche is a delicious and versatile dish perfect for brunch, lunch, or dinner. Here's my recipe:
- Preheat the oven to 180 degrees Celsius (350 degrees fahrenheit).
- Grease a pie dish with butter.
- Line the pie dish with a sheet of puff pastry.
- Prick the bottom of the pastry with a fork to prevent it from puffing up.
- Bake the pastry for 10 minutes, or until golden brown.
- While the pastry is baking, crack the eggs into a bowl and whisk them together with a fork or whisk until frothy.
- Add a splash of milk or cream.
- Add a pinch of salt and pepper to taste.
- Add the cheese, vegetables, or other fillings of your choice.
- Pour the egg mixture into the pastry crust.
- Bake for 30-40 minutes, or until the quiche is set.
- Serve immediately, warm or at room temperature.
(Part 9) The Dos and Don'ts of Egg Cookery
Here's a quick recap of the dos and don'ts of egg cookery. Keep these in mind, and you'll be well on your way to becoming an egg master!
Dos
- Use fresh eggs.
- Season your eggs with salt and pepper.
- Cook eggs over medium heat.
- Stir scrambled eggs constantly to prevent them from sticking.
- Add a splash of milk or cream to your scrambled eggs or omelettes for a fluffier texture.
- Use a slotted spoon to remove poached eggs from the water.
- Don't overcook your eggs.
Don'ts
- Don't overwhisk your eggs.
- Don't overcrowd your pan.
- Don't drop your eggs into boiling water.
- Don't forget to remove the eggs from the heat immediately after they're cooked.
FAQs
Still have some questions? Here are some frequently asked questions about eggs.
1. How do I know if an egg is fresh?
There are a few ways to tell if an egg is fresh. The easiest is to check the "best before" date on the carton. You can also try the float test. If an egg sinks to the bottom of a bowl of water, it's fresh. If it floats, it's old and should be discarded.
2. What's the best way to peel hard-boiled eggs?
The key to easy peeling is to start by cracking the egg all over. Then, hold the egg under cold running water and peel away the shell. If you're having trouble, try peeling the egg under the water. The water will help loosen the shell.
3. What happens if I eat an undercooked egg?
Eating undercooked eggs can put you at risk of salmonella poisoning. Salmonella is a type of bacteria that can cause food poisoning. Symptoms of salmonella poisoning include nausea, vomiting, diarrhoea, and abdominal cramps. The best way to prevent salmonella poisoning is to cook eggs thoroughly.
4. Can I freeze eggs?
You can freeze egg yolks but not the whites. To freeze egg yolks, separate the yolks from the whites and place them in a freezer-safe container. You can freeze them for up to 6 months.
5. What's the best way to store eggs?
The best way to store eggs is in the refrigerator. Store them in the original carton, with the pointy end down. This helps keep the yolks from moving around and breaking.
Now, go forth and conquer the world of egg cookery! Remember, practice makes perfect. Don't be afraid to experiment, and have fun. Happy cooking!
Everyone is watching

Corn on the Cob: The Ultimate Guide to Perfectly Cooked Ears
Healthy MealsAh, corn on the cob. Just the name evokes images of sunny days, barbecues, and that sweet, juicy flavour that ...

Perfect Pork Roast Oven Cooking Time: A Guide to Delicious Results
Healthy MealsThere's something truly satisfying about a perfectly roasted pork. The aroma alone is enough to make your mout...

Ham Cooking Time: How Long to Bake, Smoke, or Boil a Delicious Ham
Healthy MealsAh, ham. It's a classic, isn't it? A real crowd-pleaser, especially around holidays. And when done right, it'...

Scallops: The Ultimate Guide to Perfect Cooking
Healthy MealsAh, scallops. Those delicate, sweet, and utterly delicious morsels of the sea. They hold a special place in my...

Spaghetti Squash: The Ultimate Guide to Cooking and Serving
Healthy MealsRemember that time you saw spaghetti squash at the supermarket, looking all bumpy and strange, and thought, "W...
