Oh, the joys of a perfectly roasted duck! The crispy skin, the succulent meat, the aroma that fills your home… it's a culinary experience that's simply divine. For years, I shied away from tackling a whole duck, thinking it was some sort of culinary wizardry reserved for seasoned chefs. Turns out, it's not as intimidating as it seems. With a bit of patience and the right techniques, anyone can achieve that glorious crispy skin and juicy meat that'll have your guests singing your praises.
This isn't just a recipe; it's a journey. We're going to explore every step, from choosing the right duck to achieving that heavenly crispy skin. We'll even delve into the perfect sides to complement your masterpiece. So, grab your apron, get ready to roll up your sleeves, and let's embark on this delightful duck adventure!
(Part 1) Choosing the Right Duck: The Foundation of Your Feast
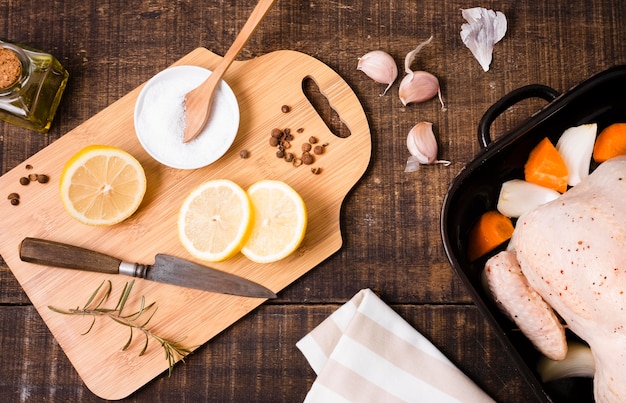
You wouldn't start building a house without the right foundation, would you? The same goes for your duck dinner. Choosing the right duck is absolutely crucial to creating a truly memorable meal. So, let's get picky.
1. Size Matters: Feeding the Crowd
First things first, size. You want a duck that's big enough to feed your guests, but not so large that it turns into a culinary wrestling match. I usually aim for a duck that's around 2-2.5kg (4.5-5.5lbs). It's a good middle ground, enough for a hearty meal without leaving you with enough leftovers to feed a small army.
2. A Duck with a Past (and a Future): Flavor Starts with the Source
Okay, maybe "past" is a bit strong, but the duck's diet plays a crucial role in its flavor. Ducks that have been fed a diet rich in grains and vegetables tend to be more flavorful. Look for labels that mention "free-range" or "organic" if you can. It's worth the extra pennies, trust me. Plus, you can feel good about knowing the duck had a happy life. We all deserve a little bit of happiness, right?
3. Skin Deep: A Smooth, Taut Canvas for Crispy Perfection
Now, let's talk about the skin. That's where all the magic happens! Look for a duck with a smooth, taut skin. You want it to be nice and firm, not flabby. A good, tight skin is going to give you that perfect crispy texture when it's cooked. It's the canvas for your culinary masterpiece, so make sure it's a good one!
(Part 2) Prepping the Duck: The Secret to a Knockout Roast
You've got your duck, now it's time to get it ready for its star turn. This part is all about preparation, which is key to achieving that crispy skin we're after. It might seem like a lot of steps, but trust me, it's worth it. This is where the real magic starts to happen!
1. Patting it Down: Dry is the Key to Crispy
First, give your duck a good pat down with some kitchen paper. We want to get rid of any excess moisture, which will help the skin crisp up nicely. Remember, dry is the key here! Think of it as preparing a canvas for a painting - the smoother and drier the surface, the better the final result.
2. The Salt Game: Drawing Out Flavor and Tautness
Now, this is where things get interesting. We're going to dry-salt the duck. This might sound like something straight out of a culinary wizard's playbook, but it's actually pretty simple. Just sprinkle the duck liberally with salt. I use a good quality sea salt, but regular table salt works fine too. Make sure you get right under the skin, too. The salt will draw out moisture and help the skin become more flavorful. Don't be shy with the salt; you can always adjust later.
Think of it as a massage for the duck's skin - the salt helps to tighten and firm it up, making it ready to crisp up beautifully. It's also a fantastic way to add flavor to the meat.
3. Taking a Chill Pill: Patience is a Virtue (Especially with Ducks)
The next step is crucial: chilling. You want to let your salt-encrusted duck hang out in the fridge for at least 4 hours, or even better, overnight. This gives the salt time to do its thing and the duck's skin to become beautifully tight and ready to crisp. Think of it as a spa day for the duck, preparing it for its big moment.
(Part 3) The Roasting Ritual: Bringing Out the Best in Your Duck
Alright, the big moment has arrived. It's time to roast your duck! Don't worry, this is where it all comes together, with a little bit of help from you and a hot oven.
1. The Oven's Calling: Preheat for Perfection
First things first, preheat your oven to 200°C (400°F). You want the oven nice and hot to give the duck a good head start on that crispy skin. While the oven is preheating, it's a good time to take a moment to admire your duck and congratulate yourself for coming this far. You're a culinary artist, remember that!
2. A Duck in a Dress: The Importance of a Good Roasting Tin
Now, it's time to dress up your duck. I like to use a roasting tin with a rack, which allows hot air to circulate all around the duck, ensuring even cooking. If you don't have a rack, just place some vegetables underneath for support. Now, here's a little trick: before placing the duck in the tin, give it a quick rub with oil. I use olive oil, but you can use any oil you like. This will help the skin get that beautiful golden-brown colour and achieve that satisfyingly crispy texture.
3. The Great Roast: Patience, Timing, and the Signs of Perfection
Finally, it's time to roast your masterpiece! Pop your duck into the preheated oven and give it about 1 hour 30 minutes to 2 hours. The exact time will depend on the size of your duck. For smaller ducks, 1 hour 30 minutes should be enough, while larger ones might need a little extra time. You'll know the duck is done when the juices run clear when you pierce the thickest part of the thigh with a skewer. The skin should also be nicely golden brown and crisp.
Don't be afraid to check on your duck periodically during the roasting process. If you notice the skin is browning too quickly, you can loosely cover it with foil for a portion of the cooking time to prevent burning. Remember, patience is key!
(Part 4) The Resting Game: A Moment of Patience for Flavor and Texture
So, your duck is out of the oven, looking magnificent. But don't be tempted to dive in just yet! You need to give it a little rest. This is important for two reasons. Firstly, it allows the juices to redistribute throughout the meat, making it even more succulent. And secondly, it gives the skin a chance to harden up a bit more, ensuring it stays crispy.
The ideal resting time is around 15-20 minutes. While you wait, you can get started on your sides. I know it's hard to resist the allure of that crispy skin, but trust me, it's worth the wait. This is a crucial step in the process, so don't rush it!
(Part 5) The Cutting Ceremony: Time to Feast!
Okay, the resting period is over. You're ready to carve your masterpiece. Remember, the aim is to make your duck look as impressive as it tastes. Don't be afraid to get creative with your carving.
1. A Little TLC for the Skin: A Separate Star of the Show
Before you start carving, make sure to carefully remove the skin from the breast. This is important because the skin is the star of the show. You want to keep it intact, separate from the meat, so you can enjoy it in its full glory. The skin is best enjoyed as is, but you can also break it into pieces and sprinkle it on top of the duck, adding a delightful crunch.
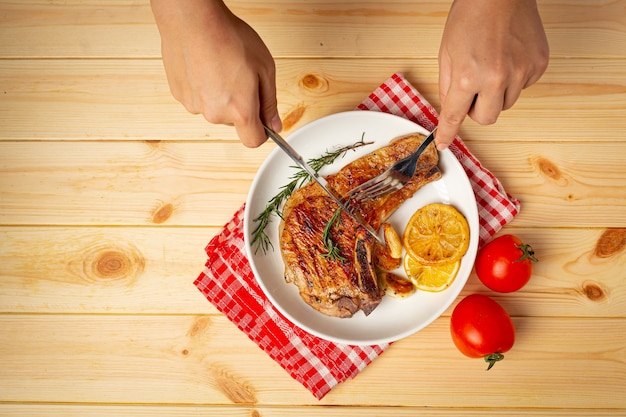
2. Carving Like a Pro: Elegant Presentation for a Delicious Dinner
Now, it's time to carve. Start with the breast. Cut through the skin carefully, separating it from the meat. Then, slice the breast into thin, neat pieces. Now, move on to the legs. Carve the legs at the joint, separating them from the thighs. You can then carve the thighs into smaller pieces. You should have a beautiful, impressive platter of duck, ready to be devoured!
(Part 6) side dishes: Completing the Feast
What's a duck dinner without a spectacular array of side dishes? The right sides will elevate your dish and create a symphony of flavors. Here are some of my favourites that go beautifully with a crispy duck:
1. A Green Delight: Balancing Richness with Freshness
Nothing beats a crisp, green salad to cut through the richness of the duck. Think mixed greens, a vibrant vinaigrette, and perhaps some crunchy vegetables like cucumber and carrots. A simple salad allows the flavours of the duck to shine, without overpowering it. It's the perfect way to cleanse the palate and add a touch of freshness to your meal.
2. A Touch of Comfort: Creamy mashed potatoes
If you're looking for something more substantial, try a comforting side like mashed potatoes. The creamy texture of mashed potatoes contrasts beautifully with the crispy skin and succulent meat of the duck. You can add a touch of flavour with some fresh herbs or a sprinkle of parmesan cheese. It's the perfect comfort food to pair with a special occasion meal.
3. A Sweet and Savoury Symphony: Roasted Root Vegetables
For a touch of sweetness, consider a side of roasted root vegetables. The sweetness of the vegetables complements the savoury flavour of the duck. Try roasting carrots, parsnips, and beetroot together for a truly satisfying side dish. You can even add a drizzle of honey or maple syrup for a touch of extra sweetness. It's a delicious way to bring out the best in your duck.
(Part 7) The Sauce Situation: Elevating the Flavour
No duck dinner is complete without a delectable sauce to complement the rich flavours. While a simple gravy will always do the trick, why not push the boundaries and create a sauce that will truly elevate your duck to new heights?
1. A Classic: Orange Sauce
For a classic and crowd-pleasing sauce, look no further than orange sauce. It's a perfect combination of sweet and tangy, complementing the duck perfectly. You can make it from scratch, or simply use a good quality orange marmalade. Serve it warm and let it dribble over the duck, giving it an extra touch of flavour.
2. A Touch of Spice: Plum Sauce
If you're looking for a sauce with a bit more oomph, try a plum sauce. It has a sweet and sour flavour with a hint of spice, adding a touch of excitement to your duck. You can find ready-made plum sauce at most supermarkets, or try making your own at home. It's the perfect sauce for those who like a bit of heat.
3. A Simple Elegance: Gravy
Don't underestimate the power of a simple gravy. It's a classic for a reason. The richness of the gravy goes wonderfully with the duck. Make a gravy from the pan drippings, adding a touch of stock or wine for extra depth. You can even add some herbs like rosemary or thyme for a touch of extra flavour.
(Part 8) A Final Flourish: Presentation Matters
You've spent hours preparing your duck, roasting it to perfection, and creating a symphony of flavours with your side dishes. Now, it's time to give your duck dinner a final flourish: the presentation. After all, food should be a feast for the eyes as well as the palate. Here are some tips for plating your duck dinner like a pro:
1. A Canvas of Colour: Let Your Duck Shine
Use a platter that complements the colour of your duck. A white or black platter will make the golden brown skin of the duck really stand out. You can even add a splash of colour with a few sprigs of fresh herbs, like rosemary or thyme. They not only add visual appeal but also fragrance, enhancing the overall experience.
2. Strategic Placement: Harmonious Arrangement of Flavors
Arrange your side dishes strategically around the duck. Don't be afraid to play with textures and colours. For example, you can place the green salad around the duck, creating a refreshing contrast to the golden-brown skin. The creamy mashed potatoes can be placed in a separate dish or even artfully arranged alongside the duck, adding a touch of elegance. The key is to create a visually appealing and harmonious arrangement.
3. A Final Touch: The Importance of Sauce
Finally, don't forget the sauce. A simple drizzle of sauce over the duck can make all the difference. You can either pour the sauce directly over the duck or place it in a separate bowl for guests to serve themselves. It's a great way to add a final touch of flavour and visual appeal to your duck dinner.
FAQs
1. Can I use a frozen duck?
While you can certainly use a frozen duck, it's best to opt for a fresh duck if possible. Frozen ducks tend to lose some of their moisture during the freezing process, which can make them a little dry. However, if you're using a frozen duck, make sure to thaw it completely in the fridge before roasting. This will ensure it cooks evenly and the skin crisps up properly.
2. What if my duck skin isn't crispy enough?
Don't despair! If your duck skin isn't as crispy as you'd like, you can try a few things. First, make sure your oven is preheated to the right temperature. Second, try using a higher heat setting for the last 15-20 minutes of roasting. This will help to crisp up the skin even further. You can also try putting the duck under the grill for a few minutes, but watch carefully to avoid burning the skin. Be patient, and you'll get that crispy skin you're after!
3. What can I do with the leftover duck?
Leftover duck is a culinary treasure! It can be used in a variety of dishes. Try shredding it and adding it to a salad or soup for a hearty, flavorful boost. You can also use it to make delicious sandwiches, tacos, or even a hearty pasta dish. Get creative and experiment with different flavour combinations. You can even use the bones to make a delicious stock for soups and stews. No duck should go to waste!
4. How do I make sure the duck is cooked through?
The best way to make sure your duck is cooked through is to use a meat thermometer. Insert the thermometer into the thickest part of the thigh. The duck is cooked when the internal temperature reaches 85°C (185°F). You can also check the juices. When the juices run clear when you pierce the thigh with a skewer, the duck is cooked.
5. What's the best way to store leftover duck?
Leftover duck can be stored in the fridge for up to 3 days. Make sure to wrap it tightly in plastic wrap or aluminum foil to prevent it from drying out. You can also freeze leftover duck for up to 3 months. To freeze, wrap it tightly in plastic wrap, then place it in a freezer bag. When you're ready to use it, thaw it in the fridge overnight.
Everyone is watching

Corn on the Cob: The Ultimate Guide to Perfectly Cooked Ears
Healthy MealsAh, corn on the cob. Just the name evokes images of sunny days, barbecues, and that sweet, juicy flavour that ...

Perfect Pork Roast Oven Cooking Time: A Guide to Delicious Results
Healthy MealsThere's something truly satisfying about a perfectly roasted pork. The aroma alone is enough to make your mout...

Ham Cooking Time: How Long to Bake, Smoke, or Boil a Delicious Ham
Healthy MealsAh, ham. It's a classic, isn't it? A real crowd-pleaser, especially around holidays. And when done right, it'...

Scallops: The Ultimate Guide to Perfect Cooking
Healthy MealsAh, scallops. Those delicate, sweet, and utterly delicious morsels of the sea. They hold a special place in my...

Spaghetti Squash: The Ultimate Guide to Cooking and Serving
Healthy MealsRemember that time you saw spaghetti squash at the supermarket, looking all bumpy and strange, and thought, "W...