There’s something about the aroma of crackling pork belly that makes your stomach rumble with anticipation. That irresistible crisp, the tender, juicy meat beneath, the symphony of flavors—it’s a culinary experience that’s hard to resist. But getting that perfect, mouthwatering result isn’t always as easy as it looks. I’ve certainly had my share of disappointments: dry, tough, or lacking that crucial crunch. But I’ve also had those moments of pure porky bliss, and those are the experiences that drive me to share my knowledge and help you unlock the secrets to crispy pork belly perfection.
(Part 1) choosing the right cut: The Foundation of Flavor

Just like you wouldn’t build a house with substandard bricks, you wouldn’t attempt a delicious pork belly dish without the right foundation. The quality of the cut matters, and it makes a world of difference in the final outcome. When it comes to pork belly, I always recommend looking for a piece with a good amount of fat—it's the key to achieving that glorious crackling. This fat renders down, creating a symphony of flavors and textures that truly elevates the dish.
The perfect pork belly Profile
Here's what I look for in my ideal pork belly:
- The Skin: It should be smooth, unblemished, and have a nice, even layer of fat. A bit of marbling throughout the meat is also a good sign. This indicates a well-nourished pig and contributes to the richness of the finished dish.
- The Fat: A good layer of fat is crucial for that crackling, but not excessively thick. Aim for a balance, a piece where you can see the meat underneath, but where there's a generous layer of fat to render down and create that glorious crunch.
- The Meat: The meat itself should be firm to the touch and have a good color, indicating freshness. Avoid any cuts with a dull or discolored appearance.
If you're buying your belly pork from a butcher, don't hesitate to ask for their recommendations. They'll be able to guide you towards the best cut and share their insider tips for prepping it.
(Part 2) Prepping the Pork Belly: Unlocking Maximum Flavor
Now that you’ve got your perfect pork belly, it's time to get prepping. This stage is crucial for maximizing the crispness and flavor of your final dish. Here are a few key steps to follow:
1. The Salt Cure: A Symphony of Flavor and Texture
This is a game-changer for achieving that perfect crispy skin. Salting the pork belly overnight draws out excess moisture and helps to firm up the skin, making it more receptive to crackling. It also adds a depth of flavor that will have you craving more.
Here’s my foolproof salt cure recipe:
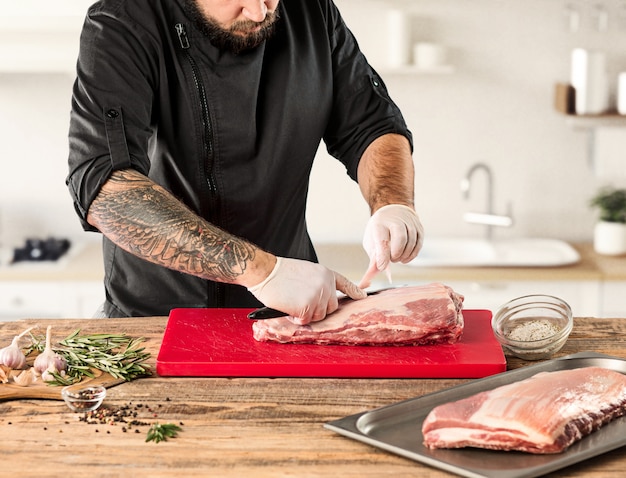
- Score the skin: Using a sharp knife, score the skin of the pork belly in a criss-cross pattern, making sure to cut through the fat layer but not into the meat. This helps the fat render down evenly and creates those irresistible crackling bits. Be sure to make your cuts about 1/2 inch apart, and don’t press too hard—a gentle touch will do the trick.
- Rub it down: Generously rub the entire pork belly with a mixture of salt and pepper. Don’t be shy with the salt! It's the key to drawing out moisture and building that beautiful crackling. You can also add other spices, like smoked paprika, garlic powder, or herbs like rosemary and thyme, to create your own unique flavour profile.
- Time for a chill: Place the pork belly in a roasting tin or container, ensuring that all surfaces are covered with the salt rub. Cover it with cling film and refrigerate for at least 6 hours, and ideally overnight. The longer you salt it, the better the flavour and texture will be.
2. The Rinse and Dry: Achieving the Perfect Crackle
After its salt-induced slumber, it’s time to wake up your pork belly. The final stages of prepping are crucial for that all-important crackling.
- Wash away the salt: Rinse the pork belly thoroughly under cold water, removing any excess salt and spices. This will prevent it from being overly salty.
- Pat it dry: Thoroughly pat the pork belly dry with kitchen paper. The drier the skin, the crispier it will be. This is a crucial step—thoroughly patting it down removes any remaining moisture, allowing the skin to crisp up beautifully.
- Air it out: If time allows, let the pork belly air dry, uncovered, in the fridge for a few hours. This helps the skin to firm up even further and creates a more intense crackling. The key is to let the skin dry out, so it’s ready to form those delightful crackling bits during the cooking process.
(Part 3) The Art of Roasting: A Culinary Symphony
We’ve arrived at the moment of truth—the roasting process. This is where the magic happens, where those crackling bits become a reality. But it’s not just about roasting, it’s about understanding the science behind the sizzle.
1. Setting the Stage: The Roasting Tin
Don’t underestimate the importance of your roasting tin. It’s the stage for your pork belly performance. I prefer to use a large roasting tin with a rack, as this helps to ensure even cooking and allows the fat to drain away. This helps to avoid soggy, unevenly cooked pork belly, resulting in a more flavorful and satisfying dish.
2. The Low and Slow Approach: The Secret to Tenderness
The key to perfectly cooked pork belly is a low and slow approach. This ensures that the meat becomes tender and succulent while the skin achieves that coveted crackling. I recommend starting the roasting process at a low temperature and gradually increasing it towards the end. This helps to render down the fat without drying out the meat.
Here’s my recommended roasting schedule:
- The initial sear: Preheat your oven to 180°C (350°F). Place the pork belly in the roasting tin and roast for 30 minutes. This helps to give the skin a head start on crackling and creates a beautiful, golden-brown colour. The initial sear helps to set the skin and allows it to become more receptive to crackling.
- The slow roast: Reduce the oven temperature to 140°C (280°F) and continue roasting for another 2-3 hours, or until the meat is fork-tender. A meat thermometer inserted into the thickest part of the meat should register an internal temperature of 75°C (165°F). This slow roast allows the fat to render down, resulting in a tender and juicy piece of pork belly.
- The crackling finale: Turn up the oven to 220°C (430°F) and continue roasting for another 30-45 minutes, or until the skin is golden brown and crackling. This final blast of heat ensures that the skin reaches its peak crispiness. The high heat helps to crisp up the skin, resulting in that irresistible crackling that we all love.
As the pork belly roasts, keep an eye on it. If the skin starts to brown too quickly, cover it with a sheet of foil to prevent burning. This helps to prevent the skin from becoming overcooked and potentially burnt, while still allowing the meat to cook to perfection.
3. Mastering the Fat: A Culinary Symphony
The fat that renders down from the pork belly is pure liquid gold. It’s packed with flavour and can be used to make the most incredible sauces, glazes, and even roasted vegetables. As the pork belly roasts, you’ll notice a pool of fat accumulating in the bottom of the roasting tin. Don’t discard this precious liquid!
Here are a few ideas for using rendered pork fat:
- roast potatoes: Toss your potato wedges in rendered pork fat before roasting them for a flavour explosion. This adds a rich, savory flavour that complements the pork belly perfectly.
- Savoury crumble topping: Use rendered pork fat to add rich, decadent flavour to your crumble topping. It adds a beautiful depth of flavour and texture to any crumble topping, making it truly irresistible.
- homemade gravy: Add rendered pork fat to your gravy for a deep, savory flavour that will enhance any meal. It adds a luxurious richness and depth of flavour that will elevate your gravy to new heights.
(Part 4) Rest, Relax, and Enjoy: The Final Touches
After its sizzling symphony in the oven, your pork belly needs a well-deserved rest. Let it rest for at least 15 minutes before slicing and serving. This allows the juices to redistribute, resulting in a more tender and succulent final product. It also gives the meat a chance to cool slightly, making it easier to slice and serve.
(Part 5) Pork Belly Masterpieces: Beyond the Basics
Now that you’ve mastered the art of crispy pork belly, it’s time to get creative. There are countless ways to elevate this delicious dish and create culinary masterpieces.
1. Glazing for a Sweet and Savoury Symphony
A simple glaze can transform your pork belly into a culinary masterpiece. Here are a few ideas:
- Honey-soy glaze: Combine honey, soy sauce, ginger, and garlic for a sweet and savoury glaze that will complement the pork belly perfectly. The sweet and savory notes of this glaze create a beautiful contrast with the richness of the pork belly.
- Apple cider glaze: A sweet and tangy glaze made with apple cider, brown sugar, and cinnamon. This glaze adds a touch of autumnal warmth and sweetness to the dish.
- Maple syrup glaze: A rich and decadent glaze made with maple syrup, Dijon mustard, and a touch of cayenne pepper. This glaze creates a beautiful caramelized crust with a hint of heat, enhancing the flavor of the pork belly.
To glaze your pork belly, simply brush it with the glaze during the final 30 minutes of roasting, ensuring that the skin is still exposed. The glaze will caramelize and create a beautiful, glossy finish. This adds a layer of sweetness and depth of flavor to the pork belly, enhancing the overall taste and visual appeal.
2. Adding a Burst of Freshness: Accompaniments for Perfection
A delicious pork belly dish deserves equally delicious accompaniments. Here are a few ideas to inspire your culinary creativity:
- crispy roast potatoes: The ultimate partner in crime for pork belly, roast potatoes soaked in rendered pork fat for extra flavour. These potatoes offer a delightful contrast in texture and provide a delicious complement to the rich, savory pork belly.
- Braised greens: A bed of braised greens, like kale or spinach, adds a touch of freshness and colour to your plate. The earthy, slightly bitter notes of the greens balance the richness of the pork belly, creating a well-rounded and flavorful dish.
- Apple sauce: A classic pairing for pork, apple sauce adds a sweet and tangy contrast to the richness of the pork belly. This adds a delightful balance to the richness of the pork belly and provides a refreshing contrast in texture.
Experiment with different accompaniments to find your perfect pairings. Don’t be afraid to get creative and try new combinations—the possibilities are endless!
(Part 6) Pork Belly Adventures: Beyond the Oven
While roasting is the classic method for cooking pork belly, there are other exciting ways to explore this culinary treasure.
1. The Sizzling Pan: Achieving Crispness on the Stovetop
For a faster and more hands-on approach, consider pan-frying your pork belly. This method works best for smaller pieces of pork belly and results in a beautifully crisp skin.
- Prepping the pork: Score the skin of the pork belly and salt it as described in the pre-roasting steps. Let it air dry in the fridge for at least 2 hours. This ensures that the skin is well-seasoned and ready to crisp up beautifully.
- The sizzling pan: Heat a heavy-bottomed pan over medium heat. Place the pork belly in the pan, skin-side down, and cook for 10-15 minutes, or until the skin is golden brown and crackling. This method allows you to control the heat more precisely, ensuring a beautifully crisp skin.
- The flip: Carefully flip the pork belly and cook for another 5-10 minutes, or until the meat is cooked through. Use a meat thermometer to ensure the internal temperature reaches 75°C (165°F). This ensures that the meat is cooked to perfection while the skin remains crisp and delicious.
2. The BBQ Blitz: A Smoky Flavour Journey
For a smoky, barbecue flavour, consider cooking your pork belly on the grill or in a smoker. This method takes a bit longer but yields incredibly tender and flavorful results.
- Prepping the pork: Follow the pre-roasting steps, scoring the skin and salting the pork belly. Let it air dry in the fridge for at least 4 hours. This helps to ensure that the skin is ready for a beautiful crackling finish.
- The smoke and slow cook: Preheat your smoker or grill to medium heat. Place the pork belly in the smoker or grill, skin-side up, and cook for 4-6 hours, or until the meat is tender and the skin is crackling. This slow, low-temperature cooking process allows the pork belly to absorb the delicious smoky flavors.
- The glaze: During the final hour of cooking, brush the pork belly with your favourite barbecue sauce or glaze. This adds a final layer of flavor and creates a beautiful, glossy finish.
Experiment with different woods for smoking, such as hickory, mesquite, or applewood, to enhance the flavour of your pork belly. This adds a unique layer of flavor to the pork belly and enhances the overall culinary experience.
(Part 7) Pork Belly Variations: A Culinary Playground
Now that you've mastered the basics, it's time to explore the endless possibilities of pork belly.
1. The Asian Fusion: A Taste of the Orient
Pork belly is a star ingredient in many Asian cuisines. Here are a few ideas to inspire your culinary adventures:
- Crispy pork belly with ginger-scallion sauce: A classic Cantonese dish, where crispy pork belly is served with a fragrant ginger-scallion sauce. This dish is a perfect example of the interplay of sweet, savory, and aromatic flavors.
- Pork belly stir-fry: Dice up the cooked pork belly and add it to a stir-fry with your favourite vegetables and sauces. This is a quick and easy way to enjoy pork belly, and it's a versatile dish that can be customized with your favorite ingredients.
- Pork belly ramen: Add slow-cooked pork belly to a bowl of ramen noodles for a hearty and flavorful meal. The rich, savory pork belly adds a delightful depth of flavor to the ramen broth, making it a truly satisfying dish.
2. The Modern Twist: Elevate the Classic
Pork belly is a blank canvas for culinary creativity.
- Pork belly tacos: Shred the cooked pork belly and add it to tacos with your favourite toppings, like salsa, guacamole, and sour cream. This is a fun and flavorful way to enjoy pork belly, and it's perfect for a casual meal or gathering.
- Pork belly sliders: Create miniature sliders with crispy pork belly, tangy slaw, and a dollop of bbq sauce. These sliders are a delightful bite-sized treat that are perfect for parties or gatherings.
- Pork belly mac and cheese: Add diced pork belly to your mac and cheese recipe for a rich and decadent twist. This adds a rich, savory flavor to the mac and cheese, making it a truly indulgent dish.
(Part 8) pork belly storage and Leftovers: Maximize the Magic
You’ve cooked up a storm of crispy pork belly, and now it's time to make sure you can enjoy it for days to come.
1. Refrigerating for Later: Keeping the Crackle
To store leftover pork belly, allow it to cool completely before placing it in an airtight container in the refrigerator. It should last for up to 4 days.
When you’re ready to enjoy it again, you can reheat it in the oven at a low temperature, or in the microwave. The crackling may not be as crispy as it was initially, but it will still be delicious.
2. Freezing for Future Feasting: Preserving the Porky Goodness
To freeze pork belly, allow it to cool completely and then wrap it tightly in cling film or aluminum foil. Place the wrapped pork belly in a freezer-safe bag and remove as much air as possible before sealing the bag. Frozen pork belly can last for up to 3 months.
To defrost frozen pork belly, transfer it from the freezer to the refrigerator overnight. Once it's defrosted, you can cook it as usual. The texture might be slightly different, but it will still be delicious and flavorful.
3. Leftover Pork Belly Magic: Making the Most of Every Bite
Leftover pork belly is a culinary goldmine. Here are a few ideas to inspire your leftovers:
- Pork belly hash: Dice up the leftover pork belly and cook it with potatoes, onions, and your favourite spices. This is a hearty and flavorful way to use up leftover pork belly and make a delicious breakfast or brunch dish.
- Pork belly salad: Add shredded pork belly to a salad for a hearty and flavorful meal. This adds a delicious layer of richness and texture to your salad, making it a more substantial and satisfying meal.
- Pork belly sandwiches: Create delicious sandwiches with leftover pork belly, tangy slaw, and your favourite bread. This is a great way to use up leftover pork belly and create a tasty and satisfying sandwich.
The possibilities for leftover pork belly are endless. Get creative and enjoy the deliciousness!
FAQs
1. How do I know when the pork belly is cooked through?
The best way to determine if pork belly is cooked through is to use a meat thermometer. The internal temperature should reach 75°C (165°F) in the thickest part of the meat. If you don't have a meat thermometer, you can check if the meat is cooked through by inserting a fork into the thickest part. The meat should be tender and easily pierced. If it's still firm, it needs more time in the oven.
2. What if the skin doesn’t crackle?
If the skin doesn’t crackle, it’s likely that it wasn’t dried out enough before roasting. Make sure to pat the skin dry with kitchen paper and let it air dry in the fridge for at least 2 hours before roasting. You can also try increasing the oven temperature to 220°C (430°F) for the final 30 minutes of roasting to encourage crackling. The increased heat will help to crisp up the skin and achieve that coveted crackling.
3. What if the pork belly is too salty?
If the pork belly is too salty, you can try soaking it in cold water for 30 minutes before cooking. This will help to draw out some of the excess salt. You can also adjust the amount of salt you use in the recipe next time. Experiment with the amount of salt and find what works best for your taste preferences.
4. Can I cook pork belly in the slow cooker?
Yes, you can cook pork belly in the slow cooker. However, it's unlikely to achieve the same level of crispy skin as roasting or pan-frying. For a tender and flavorful pork belly in the slow cooker, try cooking it on low for 6-8 hours. You can also add a small amount of liquid, such as apple cider or broth, to the slow cooker to help prevent the pork belly from drying out. While the skin won’t be crispy, the slow cooker will result in incredibly tender and flavorful meat.
5. What are some other good cuts of pork to cook?
pork tenderloin, pork loin, and pork chops are all delicious cuts of pork that are easy to cook. Pork tenderloin is a leaner cut that cooks quickly, while pork loin and pork chops are fattier and more flavorful. Experiment with different cuts of pork to find your favourites! Each cut offers a unique flavor and texture, providing a range of options for exploring pork-based dishes.
With a little practice and a willingness to experiment, you’ll be creating crispy pork belly masterpieces in no time. So gather your ingredients, preheat your oven, and let the crackling begin!
Everyone is watching

Corn on the Cob: The Ultimate Guide to Perfectly Cooked Ears
Healthy MealsAh, corn on the cob. Just the name evokes images of sunny days, barbecues, and that sweet, juicy flavour that ...

Perfect Pork Roast Oven Cooking Time: A Guide to Delicious Results
Healthy MealsThere's something truly satisfying about a perfectly roasted pork. The aroma alone is enough to make your mout...

Ham Cooking Time: How Long to Bake, Smoke, or Boil a Delicious Ham
Healthy MealsAh, ham. It's a classic, isn't it? A real crowd-pleaser, especially around holidays. And when done right, it'...

Scallops: The Ultimate Guide to Perfect Cooking
Healthy MealsAh, scallops. Those delicate, sweet, and utterly delicious morsels of the sea. They hold a special place in my...

Spaghetti Squash: The Ultimate Guide to Cooking and Serving
Healthy MealsRemember that time you saw spaghetti squash at the supermarket, looking all bumpy and strange, and thought, "W...