Let's be honest, there's nothing quite like sinking your teeth into a perfectly crispy potato chip. Forget those limp, greasy bags you find at the supermarket - we're talking about the real deal, the kind of homemade chips that are so good, they'll have you reaching for another handful before you even realise it.
Making your own potato chips is more than just a recipe; it's a culinary adventure. You get to choose the potatoes, experiment with different seasonings, and witness the transformation from humble spud to crunchy perfection right before your eyes. It's a satisfying experience that goes beyond simply eating a tasty snack.
So grab your apron, gather your ingredients, and join me on this delicious journey to crispy homemade potato chip perfection.
(Part 1) The Foundation: choosing the right potatoes

The Starch Factor: Why It Matters
You might think any old potato will do, but trust me, the type of potato you choose will dramatically affect the outcome of your chips. It all comes down to their starch content, which determines how they'll behave in hot oil.
Starchy vs. Waxy: A Tale of Two Potatoes
starchy potatoes: These are your go-to for chips! They're packed with starch, ensuring they'll get extra crispy and maintain their shape beautifully. Think Russets, maris piper, or even king edward potatoes.
waxy potatoes: While great for boiling or roasting, waxy potatoes tend to get mushy when fried. You'll want to steer clear of Yukon Golds, Red Bliss, or any other potato with a lower starch content.
Picking the Perfect Spud: A Guide to Potato Shopping
Head to your local market and select potatoes that are:
Firm and Smooth: You want potatoes that are free of any bumps or bruises, as these can lead to uneven cooking.
Similar in Size: Choosing potatoes that are roughly the same size ensures they'll cook evenly.
Free of Green Patches: Green patches on potatoes indicate a high concentration of solanine, a toxic substance. Avoid these potatoes altogether.
(Part 2) Prepping the Potatoes: Thinly Sliced Perfection

The Mandoline: Your New Best Friend
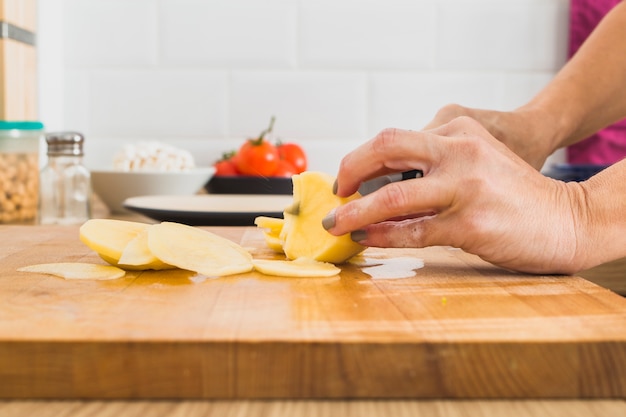
Now that you've got your perfect potatoes, it's time to get slicing. The key to delicious homemade chips is thin, even slices that will cook quickly and evenly. For achieving this, a mandoline is a game-changer. It helps create consistently thin slices with ease, making the process much more efficient.
The Sharp Knife Alternative
If you don't have a mandoline, a sharp chef's knife will do the trick. Just be careful, and practice your slicing skills!
Steps for Perfect Preparation
1. Wash and Peel: Give those potatoes a good scrub and remove the skin.
2. Slice Thin: Aim for about 1/8-inch thickness. Don't stress about perfectly uniform slices; a little variation adds character.
3. Soak in Cold Water: This helps remove excess starch and prevents the potato slices from sticking together while frying. Let them soak for at least 30 minutes, changing the water once or twice.
(Part 3) The Drying Process: The Key to Extra crispy chips

Why Drying Matters: Avoiding Soggy Disasters
Drying the potato slices is a step that's often overlooked, but it's absolutely crucial for achieving those gloriously crispy chips. Any remaining moisture on the potato slices will turn into steam during frying, making your chips soggy and disappointing.
Drying Techniques: Ensuring Moisture-Free Perfection
Pat Them Dry: Use paper towels or a clean tea towel to dry each potato slice thoroughly.
Air Dry: Spread the potato slices out on a wire rack or a baking sheet lined with parchment paper and let them air dry for at least 30 minutes. This allows any remaining moisture to evaporate.
(Part 4) Seasoning Adventures: From Classic to Creative
The Salt and Pepper Classic: A Timeless Choice
Let's be honest, sometimes simple is best. Salt and pepper is a timeless classic for a reason. A sprinkle of each on your potato slices before frying adds a touch of flavour and enhances the natural potato flavour.
Get Creative with Flavours: Explore the World of Seasonings
But don't be afraid to think outside the box! Here are a few of my favourite flavour combinations for potato chips:
Smoky Paprika and Garlic Powder: A combination of heat and flavour that's simply irresistible.
Herbs de Provence and Parmesan: This combination adds a touch of sophisticated elegance to your chips.
Chili Powder and Lime Zest: A zesty kick that's perfect for those who love a little heat.
Tips for Successful Seasoning
Season Before Frying: Coat the potato slices with your chosen seasonings before they go into the oil. This allows the flavours to permeate the chips during the frying process.
Use a Light Hand: A little bit of seasoning goes a long way. You can always add more later, but it's easier to start with less and adjust to your taste.
(Part 5) The Art of Frying: From Oil Choice to Perfect Crispness
Choosing Your Oil: The Key to Success
High smoke point: Look for an oil with a high smoke point, like vegetable oil, peanut oil, or canola oil. These oils can withstand high temperatures without burning or imparting unpleasant flavours.
Neutral Flavour: You want an oil that won't overwhelm the flavour of your chips. Avoid strongly flavoured oils like olive oil or sesame oil.
Mastering the Fry: Steps to Chip Perfection
1. Preheat Your Oil: Heat the oil in a large saucepan or deep fryer to 350°F (175°C). This is the ideal temperature for crispy chips.
2. Fry in Batches: Don't overcrowd the pan. Fry the potato slices in batches for about 2-3 minutes per side, until they're golden brown and crispy. Overcrowding the pan will lower the oil temperature and result in soggy chips.
3. Drain on Paper Towels: Remove the chips from the oil with a slotted spoon and drain on paper towels to absorb any excess oil. This prevents the chips from becoming greasy.
(Part 6) Serving and Storing: Enjoying Your Crispy Creations
The Ultimate Chip Experience: Serving with Style
Serve Immediately: Potato chips are best enjoyed fresh and hot, straight from the frying pan. Their crispness diminishes as they cool.
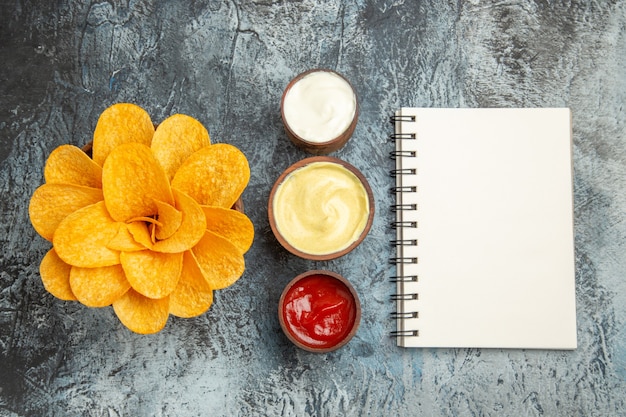
Dip into Your Favourite Sauce: Mayonnaise, ketchup, salsa, or even a creamy avocado dip - the possibilities are endless.
Storing Your Chips: Keeping Them Crispy
Airtight Container: Store leftover chips in an airtight container at room temperature for up to 2 days. The container should be airtight to prevent the chips from becoming stale.
Reheat: If you want to enjoy your chips warm, pop them in a preheated oven at 250°F (120°C) for a few minutes. This will warm them up without making them soggy.
(Part 7) Troubleshooting: Addressing Common Chip Challenges
Soft, Not Crispy: Diagnosing the Problem
Overcrowding: Make sure you're not overcrowding the pan while frying. This can lower the oil temperature and result in soft chips.
Oil Not Hot Enough: Ensure the oil is heated to the correct temperature (350°F/175°C) before adding the potato slices.
Burnt Chips: Avoiding Disaster
Oil Too Hot: If the chips start to burn, reduce the heat slightly.
Overcooked: Remove the chips from the oil as soon as they reach the desired colour. Don't leave them in the hot oil for too long, or they'll burn.
(Part 8) Variations and Fun Ideas: Expanding Your Chip Horizons
sweet potato Chips: A Sweet and Savoury Treat
Prep: Peel and slice sweet potatoes thinly, using a mandoline or a sharp knife.
Seasoning: Try a sprinkle of cinnamon and nutmeg for a warm and comforting flavour.
Purple Yam Chips: A Vibrant and Delicious Choice
Prep: Peel and slice purple yams thinly. They have a beautiful vibrant colour that makes them visually appealing.
Seasoning: Sea salt and a drizzle of honey for a unique sweetness that complements the yam's flavour.
Herbed Chips: A Fresh and Aromatic Twist
Prep: Add chopped fresh herbs like rosemary, thyme, or oregano to the potato slices before frying. This adds a lovely aroma and flavour to the chips.
(Part 9) Table of Comparison: A Guide to potato types
Here is a table summarizing the different potato types and their best uses, so you can choose the perfect potato for your homemade chips:
| Potato Type | Starch Content | Best Uses |
|---|---|---|
| Russet | High | french fries, mashed potatoes, baked potatoes, chips |
| Maris Piper | High | roast potatoes, chips, gratins |
| King Edward | High | Roast potatoes, chips, mashed potatoes |
| Yukon Gold | Medium | boiled potatoes, salads, roasted potatoes |
| Red Bliss | Low | Boiling, salads, mashed potatoes |
(Part 10) FAQs: Answering Your Chip-Related Questions
Q1: Can I reuse frying oil?
A1: It's not recommended to reuse frying oil for more than 3-4 times. After that, it starts to break down and lose its smoke point. This can lead to burnt chips and an unpleasant flavour. It's best to use fresh oil for the best results.
Q2: How do I know if my oil is hot enough?
A2: You can test the oil temperature by dropping a small piece of potato into it. If it sizzles and bubbles vigorously, the oil is ready. You can also use a candy thermometer for a more precise measurement.
Q3: Can I make chips in the oven?
A3: Yes, you can make oven-baked chips! Toss the potato slices in oil and seasonings, then spread them out on a baking sheet lined with parchment paper. Bake at 400°F (200°C) for about 20-25 minutes, flipping halfway through. Oven-baked chips will be slightly less crispy than fried chips, but still delicious.
Q4: Can I freeze potato chips?
A4: It's best to enjoy potato chips fresh, but you can freeze them for later if you need to. Store them in an airtight container and they'll last for up to 3 months in the freezer. To enjoy frozen chips, simply thaw them at room temperature and reheat them in a preheated oven at 250°F (120°C) for a few minutes.
Q5: How can I make chips extra crispy?
A5: To achieve the ultimate crispy chip, make sure to dry the potatoes thoroughly, fry them in hot oil, and avoid overcrowding the pan. Also, a little trick is to sprinkle a pinch of cornstarch on the potato slices before frying. The cornstarch helps absorb excess moisture, resulting in even crispier chips.
Now you have everything you need to embark on your journey to crispy homemade potato chip perfection! Experiment with different flavours, enjoy the process, and most importantly, relish the delicious results.
Everyone is watching

Corn on the Cob: The Ultimate Guide to Perfectly Cooked Ears
Healthy MealsAh, corn on the cob. Just the name evokes images of sunny days, barbecues, and that sweet, juicy flavour that ...

Perfect Pork Roast Oven Cooking Time: A Guide to Delicious Results
Healthy MealsThere's something truly satisfying about a perfectly roasted pork. The aroma alone is enough to make your mout...

Ham Cooking Time: How Long to Bake, Smoke, or Boil a Delicious Ham
Healthy MealsAh, ham. It's a classic, isn't it? A real crowd-pleaser, especially around holidays. And when done right, it'...

Scallops: The Ultimate Guide to Perfect Cooking
Healthy MealsAh, scallops. Those delicate, sweet, and utterly delicious morsels of the sea. They hold a special place in my...

Spaghetti Squash: The Ultimate Guide to Cooking and Serving
Healthy MealsRemember that time you saw spaghetti squash at the supermarket, looking all bumpy and strange, and thought, "W...
