The mere mention of "country ham" evokes images of smoky kitchens, crackling fires, and the inviting aroma of a culinary legacy passed down through generations. My Grandma, bless her soul, always had a country ham hanging in her pantry, ready for slicing and serving with biscuits and gravy on a chilly morning. It was pure magic, a taste of home that I still cherish today. Now, I've been making my own country ham for years, and let me tell you, there's a special kind of satisfaction that comes with turning a humble pork leg into something so remarkable.
This guide is my heartfelt tribute to country ham, a journey that takes you from the initial brining process to the moment you savor the first bite. We'll explore the rich history of this Southern delicacy, uncover the secrets to creating a truly outstanding ham, and of course, delve into the diverse ways you can prepare and enjoy this culinary masterpiece. Grab a cuppa, settle in, and let's embark on this delicious adventure together.
(Part 1) The Alluring History of Country Ham: A Taste of Time
Country ham isn't just a dish; it's a story etched in time. It's a tale of resourcefulness and ingenuity, born out of the need to preserve food in a world before refrigeration. Picture this: early settlers in the American South, struggling to make ends meet. They raised pigs, but keeping the meat fresh was a constant challenge. Salt, a precious commodity back then, became their saving grace.
The curing process involved rubbing the pork legs generously with salt, then hanging them in cool, dry places to age. The salt drew out moisture, creating a naturally preserved product that could last for months. This method, passed down through generations, gave birth to the iconic country ham we know and love today.
Beyond its practicality, country ham quickly became a symbol of Southern hospitality. Imagine a table groaning with delicacies, the centerpiece a magnificent country ham, sliced thin and served alongside creamy grits, collard greens, and sweet potato casserole. It was a true feast, a celebration of the land, the people, and the enduring tradition of this cherished food.
(Part 2) The Art of Brining: Laying the Foundation for Flavor

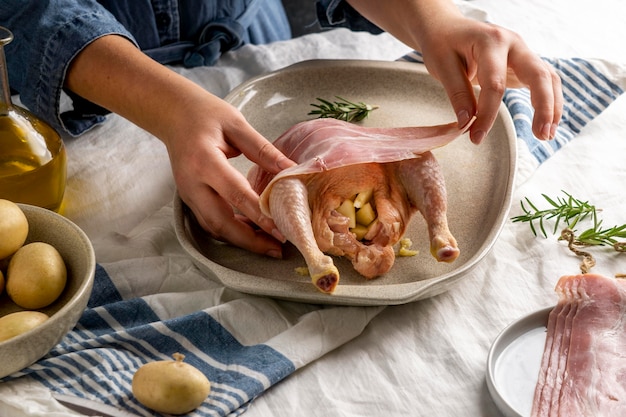
Now, let's get into the nitty-gritty of making your own country ham. The first step is brining, and it's crucial to get it right. Brining is essentially soaking the ham in a salt-based solution, allowing the salt to permeate the meat and draw out moisture. This process helps preserve the ham and develops its rich, savory flavor.
The Brine Recipe: A Balancing Act
There are countless brining recipes out there, but a good basic recipe involves salt, sugar, and water, sometimes with the addition of spices like black peppercorns, bay leaves, or juniper berries. I've found that using a combination of kosher salt and pickling salt gives the best results. The key is to achieve the perfect balance of saltiness and sweetness. The goal is not to drown the ham in salt but to create a delightful salty-sweet harmony that complements the meat's natural flavors.
Here's a basic recipe you can experiment with:
- 1 gallon of water
- 1 cup kosher salt
- 1/2 cup pickling salt
- 1 cup brown sugar
- 1/4 cup black peppercorns
- 10 bay leaves
- 5 juniper berries
Bring the water to a boil, dissolve the salt and sugar, and then add the spices. Allow the brine to cool completely before immersing your ham.
The Brining Process: Time is of the Essence
Once the brine is ready, submerge your ham in the solution and let it sit for an extended period. The required brining time can vary depending on the size of the ham and the desired level of saltiness. For a traditional country ham, you're looking at a minimum of 2-3 weeks, and in some cases, even longer. The longer the ham soaks in the brine, the more the salt permeates the meat, resulting in a stronger, more intensely flavored ham.
I like to think of brining as a slow dance between the salt and the meat, a delicate ballet where time and patience are the key partners. Give the ham ample time to absorb the brine and develop its unique flavor profile.
Troubleshooting Tips: Don't Panic, It's All Fixable
Let's be honest, making country ham isn't always a walk in the park. There will be times you'll think, "Have I gone mad? I'm drowning my ham in a salty bathtub!" But don't worry. If your brine seems too salty, just add a little more water. If it's not salty enough, you can always add a bit more salt. Remember, patience is your ally in this process. A little tweaking here and there is perfectly normal. The goal is to create a brine that balances sweetness and saltiness to create a truly flavorful ham.
(Part 3) The Curing Process: Letting Time Work Its Magic
After the brining process, your ham is ready for the curing stage. This is where time transforms the ham into a culinary masterpiece. It's a slow and deliberate process that allows the salt to penetrate the meat and develop its characteristic flavor.
Drying Time: Patience is Key
The ham needs to be hung in a dry, well-ventilated area, like a pantry, basement, or dedicated curing room. The idea is to let the ham dry slowly, allowing the salt to work its magic. The drying time can range from a few weeks to several months, depending on the desired level of dryness and the humidity of your environment.
Remember, patience is a virtue when it comes to curing ham. The longer the ham dries, the more intense its flavor will become. It's a waiting game, but trust me, the reward is worth it.
Temperature and Humidity: Finding the Sweet Spot
The ideal temperature for curing is around 50-60°F (10-15°C), with low humidity. You don't want the ham to dry too quickly, or it will become tough and dry. You also don't want it to dry too slowly, or it will become moldy. Finding the sweet spot is crucial for successful curing.
To monitor the temperature and humidity levels, consider using a hygrometer. This device will give you accurate readings, allowing you to make adjustments to your curing environment as needed.
The Importance of Ventilation: A Breath of Fresh Air
Proper ventilation is crucial for the curing process. The ham needs to breathe, allowing air circulation to dry it properly and prevent mold growth. I recommend using a fan to create a gentle breeze, ensuring the ham is exposed to a constant flow of air.
If you're curing your ham in a humid environment, you may need to increase the ventilation to ensure it dries properly. Regularly checking the ham for signs of mold is essential, and if you notice any, wipe it off immediately with a clean cloth.
(Part 4) The Smoking Process: Adding a Smoky Depth
While not a necessary step, smoking your country ham adds an extra layer of depth and complexity to its flavor profile. It's a traditional method used by many Southern cooks, and it's definitely worth trying if you've got the time and the inclination.
Choosing Your Wood: A Smoky Symphony
The choice of wood for smoking is a matter of personal preference. Popular options include hickory, pecan, oak, or applewood, each imparting a distinctive flavor profile. I personally favor hickory, which delivers a rich, smoky aroma that complements the ham's savory flavor perfectly.
Here's a quick guide to the different wood types and their flavor profiles:
- Hickory: Strong, smoky flavor with a hint of sweetness.
- Pecan: Mild, sweet, and nutty flavor.
- Oak: Robust, smoky flavor with a slightly bitter edge.
- Applewood: Mild, sweet, and fruity flavor.
Smoking Time: A Slow and Steady Approach
Smoking a country ham is a slow and deliberate process. You need to smoke the ham at a low temperature, around 150-175°F (65-80°C), for a period of 4-8 hours, depending on the size of the ham and the desired level of smokiness. The key is to cook it slowly and evenly, ensuring the ham is thoroughly smoked.
A slow smoking process allows the smoke to penetrate the ham, resulting in a deep, smoky flavor. Avoid rushing the process, as this could lead to uneven cooking and a less flavorful ham.
Maintaining a Consistent Temperature: The Key to Success
Maintaining a consistent temperature throughout the smoking process is crucial. Use a thermometer to monitor the temperature of the smoker, adjusting the airflow and the amount of fuel as needed to maintain the desired temperature range.
If the temperature fluctuates too much, the ham could cook unevenly. Aim for a steady temperature throughout the smoking process for the best results.
(Part 5) Preparing Your Country Ham: From Cure to Kitchen
Now that your country ham is cured and smoked (or just cured!), it's time to prepare it for consumption. But before you start slicing and dicing, there's a little more prep work to do.
Soaking: Rehydrating the Ham
cured ham is incredibly salty and dry, so it needs to be soaked before cooking. This process helps rehydrate the ham and draw out some of the excess salt. Soaking can be done in cold water for several hours or overnight. The key is to ensure the ham is fully submerged in water.
I recommend using a large pot or container for soaking, ensuring the ham is fully covered with water. You can also add a few bay leaves or peppercorns to the water for additional flavor.
Boiling: Bringing Out the Flavor
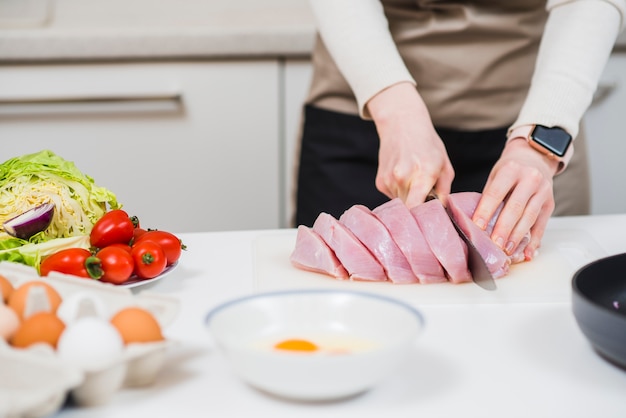
After soaking, the ham needs to be boiled to further rehydrate it and bring out its full flavor. You can boil the ham in water, adding a few bay leaves and peppercorns for extra flavor. Boiling time will vary depending on the size of the ham, but typically takes around 2-3 hours.
During the boiling process, the ham's fat will start to render out. This is a good thing, as the fat will add flavor and richness to the ham. You can skim off the rendered fat and save it for later use, perhaps in a delicious gravy or soup.
The Importance of Fat Rendering: Unlocking the Taste
As the ham boils, the fat will start to render out. This is a good thing, as the fat will add flavor and richness to the ham. You can skim off the rendered fat and save it for later use.
The rendered fat can be used in various ways. It can be added to gravy, soups, or even used for frying vegetables. It imparts a unique, savory flavor that complements the ham beautifully.
(Part 6) Cooking Your Country Ham: From Stovetop to Oven
Now that the ham is soaked and boiled, it's ready to be cooked. There are a few different methods you can use, each resulting in a unique flavor profile.
slow cooking: The Ultimate in Tenderness
Slow cooking is an excellent way to cook country ham, resulting in a tender and succulent product. Simply place the ham in a slow cooker, add a bit of water, and cook on low heat for several hours, until the ham is fall-apart tender.
The slow cooking process allows the ham to break down slowly, resulting in an incredibly tender and flavorful product. It's a perfect method for busy cooks who want a stress-free approach to cooking country ham.
Baking: A Classic Approach
Baking is another classic method for cooking country ham. Place the ham in a baking dish, add some water, and bake in a preheated oven at 325°F (165°C) for 2-3 hours, or until the ham is heated through.
Baking the ham in the oven allows for even cooking, resulting in a tender and flavorful ham. You can also add spices, such as black pepper, garlic powder, or paprika, to the baking dish for an added flavor boost.
Pan-Frying: Crispy Perfection
For a crispy and flavorful finish, you can pan-fry the ham after it's been cooked. Simply heat some oil in a skillet over medium heat and add the ham slices. Cook for a few minutes on each side, until golden brown and crispy.
Pan-frying adds a lovely crispy texture to the ham, complementing its savory flavor. It's a great method for adding a bit of extra crunch to your country ham dish.
(Part 7) Serving Your Country Ham: A Culinary Celebration
Your country ham is cooked, and now it's time to enjoy the fruits of your labor. Here are some ways you can serve it up:
Classic Southern Fare: A Taste of Tradition
A classic way to serve country ham is alongside biscuits and gravy, a true southern comfort food. The salty ham complements the creamy gravy and fluffy biscuits perfectly. Other traditional accompaniments include collard greens, black-eyed peas, and sweet potato casserole.
This is a timeless combination that captures the essence of Southern cooking. The salty ham provides a savory contrast to the creamy gravy and the fluffy biscuits, while the side dishes add a touch of sweetness and earthiness to the meal.
Creative Options: Stepping Outside the Box
For a more contemporary approach, try serving country ham with roasted vegetables, such as Brussels sprouts, asparagus, or butternut squash. You can also use it to make a delicious ham and cheese sandwich, or add it to a salad for a savory twist.
Country ham is a versatile ingredient that can be incorporated into a wide range of dishes. Its savory flavor can enhance both sweet and savory dishes, adding a touch of Southern charm to any meal.
Leftover Magic: Making the Most of Every Bite
Leftover country ham is a culinary treasure. You can use it to make a flavorful soup, a savory quiche, or even a delicious ham and bean casserole. The possibilities are endless!
Country ham is a delicious ingredient that can be enjoyed in various ways. Don't throw away those leftovers, get creative, and experiment with different recipes to find your favorites.
(Part 8) FAQs: Answering Your Country Ham Questions
1. What if my country ham is too salty?
If you find your country ham is overly salty, you can soak it in cold water for an extended period, changing the water every few hours to help draw out excess salt. You can also cook it in a large volume of water to help dilute the saltiness.
The key is to give the ham ample time to soak, allowing the water to draw out excess salt. If the ham is still too salty, you can also consider adding a bit of sugar to the cooking water to help balance the flavors.
2. Can I freeze country ham?
Yes, you can freeze country ham. Wrap it tightly in plastic wrap and aluminum foil and freeze for up to 3 months.
Freezing country ham is a great way to preserve it for longer periods. When you're ready to use it, thaw the ham in the refrigerator overnight before cooking.
3. How long can I store country ham in the refrigerator?
Cured country ham can be stored in the refrigerator for up to 3 weeks.
The refrigerator is the best place to store cured country ham, as it helps to maintain its quality and prevent spoilage. Make sure to wrap the ham tightly in plastic wrap or aluminum foil before storing it in the refrigerator.
4. What are the signs of a spoiled country ham?
Signs of spoiled country ham include a foul odor, a slimy texture, and a change in color. If you notice any of these signs, discard the ham immediately.
It's essential to inspect your country ham for signs of spoilage before using it. If you notice any of the signs mentioned above, it's best to err on the side of caution and discard the ham.
5. How do I know when my country ham is done?
You can tell if your country ham is done by inserting a meat thermometer into the thickest part of the ham. The internal temperature should reach 160°F (71°C) for safe consumption.
Using a meat thermometer ensures that your country ham is cooked to a safe internal temperature, killing any harmful bacteria. Always check the temperature to ensure your ham is properly cooked before serving.
Table: Country ham cooking methods
Here's a handy table summarizing the different cooking methods for country ham:
| Cooking Method | Description | Cook Time | Temperature |
|---|---|---|---|
| Slow Cooking | Cook in a slow cooker on low heat | 6-8 hours | Low |
| Baking | Bake in a preheated oven | 2-3 hours | 325°F (165°C) |
| Pan-Frying | Fry in a skillet over medium heat | 5-10 minutes | Medium |
Final Thoughts: A Culinary Legacy
And there you have it, a comprehensive guide to country ham, from the initial brining process to the moment you savor the first bite. It's a culinary tradition that has been passed down through generations, and one that I hope you'll embrace. Whether you're a seasoned Southern cook or a curious novice, this guide provides all the knowledge and inspiration you need to make your own country ham. So, grab your ingredients, embrace the process, and let the magic of country ham work its culinary wonders.
Everyone is watching

Corn on the Cob: The Ultimate Guide to Perfectly Cooked Ears
Healthy MealsAh, corn on the cob. Just the name evokes images of sunny days, barbecues, and that sweet, juicy flavour that ...

Perfect Pork Roast Oven Cooking Time: A Guide to Delicious Results
Healthy MealsThere's something truly satisfying about a perfectly roasted pork. The aroma alone is enough to make your mout...

Ham Cooking Time: How Long to Bake, Smoke, or Boil a Delicious Ham
Healthy MealsAh, ham. It's a classic, isn't it? A real crowd-pleaser, especially around holidays. And when done right, it'...

Scallops: The Ultimate Guide to Perfect Cooking
Healthy MealsAh, scallops. Those delicate, sweet, and utterly delicious morsels of the sea. They hold a special place in my...

Spaghetti Squash: The Ultimate Guide to Cooking and Serving
Healthy MealsRemember that time you saw spaghetti squash at the supermarket, looking all bumpy and strange, and thought, "W...