(Part 1) A Bird with a Story: The Cornish Hen
Before we delve into the nitty-gritty of cooking times, let's take a moment to appreciate these little birds. Technically, Cornish hens are a hybrid – a crossbreed between a Cornish and a White Plymouth Rock chicken. They were first bred in the early 20th century, aiming for a chicken with rapid growth and plump, meaty breasts.
A Misleading Name: Cornish Hens and Their Roots
The name "Cornish" might be a bit misleading. These birds weren't originally from Cornwall, but from the United States! The Cornish breed, renowned for its fast growth and compact size, was brought over to the UK and crossed with the White Plymouth Rock – a pairing that resulted in the delightful Cornish hen we know and love today.
Why Cornish Hens? A Case for the Miniature Chicken
I'm a big fan of Cornish hens. They're so versatile – you can roast them, grill them, fry them, even braise them! And because they're smaller, they're ideal for smaller households or when you're just after a single-serving meal. Plus, let's face it, they're absolutely adorable!
(Part 2) Picking the Perfect Bird: Choosing Your Cornish Hen
The first step to a delicious Cornish hen is selecting a good one. You want a bird that's plump, has a nice, healthy yellow colour, and feels firm to the touch. Don't be shy! Get your hands on it.
The Feel Good Factor: Looking for Signs of Quality
- Plump and Well-Shaped: You want a hen that feels substantial, not too skinny or misshapen. A nice, rounded shape is a good sign.
- Colour Counts: The skin should be a lovely yellow colour – this indicates a healthy bird. Avoid any hens with discolouration, bruising, or a dull appearance.
- Feel for Firmness: Gently press the breast of the hen. It should feel firm and springy, like a well-muscled bird. A soft or mushy breast might mean the hen isn't fresh.
- Fresh is Best: Go for fresh cornish hens whenever possible. If you're opting for frozen, make sure the packaging is intact and there's no freezer burn.
(Part 3) Prepping for Perfection: Getting Your Hen Ready to Cook
Alright, so you've got your Cornish hen. Now it's time to get it ready for cooking. Don't worry, it's easier than you might think.
Simple Prep, Big Flavour: A Few Steps to Take
- Pat it Dry: Grab some paper towels and give the hen a good pat-down. We want to get rid of any excess moisture. This helps the skin get nice and crispy.
- Season Liberally: Now's the fun part! Salt and pepper are the basics, but don't be afraid to experiment. Herbs, spices, rubs - go wild! Remember, a good rub adds a lot of depth of flavour.
- Stuff or Don't Stuff: Stuffing is a matter of preference. If you're going for it, use a bread-based stuffing and make sure it's not packed too tightly. I usually prefer to roast mine without stuffing because it allows the skin to crisp up beautifully.
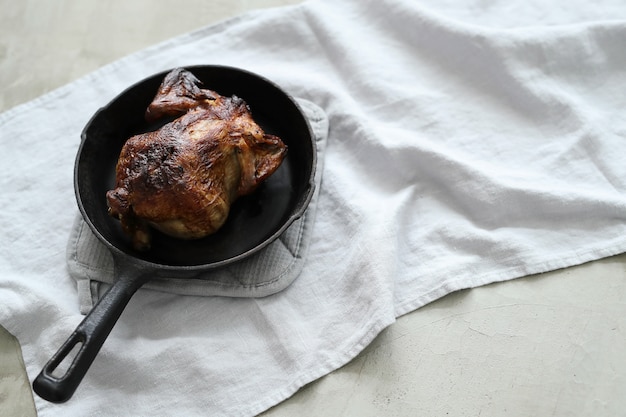
(Part 4) The Classic Approach: Roasting Your Cornish Hen
Roasting is the tried-and-true method for cooking cornish hens. It results in juicy, tender meat and a wonderfully crispy skin.
roasting time: A Guide for Different Sizes
The cooking time for a Cornish hen is going to vary depending on its size. Here's a general guide to help you out:
| Hen Size | Roasting Time |
|---|---|
| Small (1-1.5 pounds) | 30-40 minutes |
| Medium (1.5-2 pounds) | 40-50 minutes |
| Large (2-2.5 pounds) | 50-60 minutes |
roasting tips: Maximising Flavour and Crispiness
- Preheat Your Oven: Always preheat your oven to 375°F (190°C) for best results. This ensures the hen cooks evenly and develops a lovely golden crust.
- Use a roasting pan: A roasting pan is ideal for Cornish hens, but if you don't have one, a baking dish or even a dutch oven will do the trick. Just make sure it's big enough to hold the hen comfortably.
- Don't Overcrowd the Pan: If you're cooking multiple hens, make sure there's enough space between them for even cooking. They shouldn't be touching.
- Basting is Key: Regularly basting the hen with its own juices during cooking keeps the meat moist and enhances its flavour. Use a spoon to drizzle the juices over the bird every 15-20 minutes.
(Part 5) Smokin' Hot: Grilling Your Cornish Hen
If you're lucky enough to have a grill, Cornish hens are fantastic on the barbie! They get a delicious smoky flavour, and the skin gets crispy and charred.
Grilling Time: Adjusting for Heat and Size
The grilling time will depend on the size of the hen and the heat of your grill. Again, this is a general guide:
| Hen Size | Grilling Time |
|---|---|
| Small (1-1.5 pounds) | 20-25 minutes |
| Medium (1.5-2 pounds) | 25-30 minutes |
| Large (2-2.5 pounds) | 30-35 minutes |
grilling tips: Achieving that Perfect Charcoal Kiss
- Preheat Your Grill: Heat the grill to medium-high heat. If you're using a gas grill, aim for a temperature of around 400°F (200°C).
- Cook Over Direct Heat: Place the hen directly over the heat source. This ensures it cooks quickly and gets that lovely grill mark.
- Flip It Over: Flip the hen over halfway through cooking to ensure even cooking and browning.
- Use a Grill Basket: A grill basket can help prevent the hen from falling through the grates and ensures even cooking. It also makes flipping easier.
(Part 6) The Fast Lane: Pan-Frying Your Cornish Hen
Pan-frying is a great option if you're looking for a quicker way to cook cornish hens. It's ideal for smaller hens and delivers a deliciously crispy skin.
Pan-Frying Time: Getting It Right for Smaller Birds
Cooking time will vary based on the size of the hen and the heat of your pan.
| Hen Size | Pan-Frying Time |
|---|---|
| Small (1-1.5 pounds) | 15-20 minutes |
| Medium (1.5-2 pounds) | 20-25 minutes |
Tips for Pan-Frying: Crisp Skin and Tender Meat
- Use a Heavy-Bottomed Pan: A good heavy pan helps ensure even heat distribution. This is crucial for getting the skin nice and crispy.
- Preheat the Pan: Heat the pan over medium-high heat before adding the hen. This prevents the hen from sticking and ensures it browns nicely.
- Add Some Oil: Add a generous amount of oil to the pan, enough to coat the bottom. This helps the hen brown and crisp up.
- Cook on Both Sides: Cook the hen for about 5-7 minutes on each side, or until golden brown and cooked through. Use tongs to carefully flip the hen so you don't tear the skin.
(Part 7) Doneness Detectives: Ensuring Your Hen is Perfectly Cooked
Now, one of the most crucial things is to make sure your Cornish hen is cooked through. You don't want to undercook it, but overcooking can dry it out.
Checking for Doneness: Methods for a Perfectly Cooked Bird
- Use a meat thermometer: This is the most reliable method. Insert the thermometer into the thickest part of the thigh, avoiding the bone. The internal temperature should reach 165°F (74°C). This ensures the hen is safe to eat.
- Check the Juices: If the juices run clear when you pierce the thigh, it's cooked through. If they're still pink, it needs more time.
- Look at the Skin: The skin should be golden brown and crispy. If it's still pale, it might need a bit more time.
(Part 8) A Well-Deserved Rest: Let Your Hen Relax
Once your Cornish hen is cooked, it's important to give it a rest. This allows the juices to redistribute, resulting in a more tender and flavorful bird.
Resting Time: Letting the Juices Settle In
Rest the hen for 10-15 minutes before carving and serving. This is a crucial step in ensuring a juicy and flavourful hen.
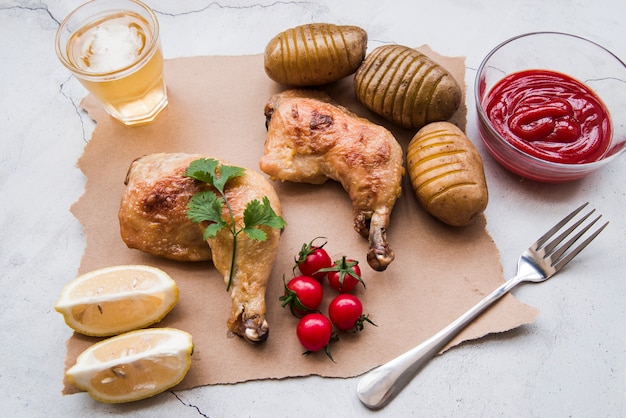
Serving Suggestions: Sides for a Wonderful Meal
Cornish hens are incredibly versatile! They go beautifully with a variety of sides. Here are a few ideas to get you started:
- Roasted Vegetables: roasted carrots, potatoes, Brussels sprouts, asparagus – all fantastic pairings. The roasting process complements the hen beautifully.
- green beans: A classic side dish that complements the hen perfectly. You can steam, saute, or roast them for a variety of textures.
- rice pilaf: A flavourful and comforting side. A simple rice pilaf adds a touch of elegance to your meal.
- fruit salad: For a lighter touch, try a fresh fruit salad with berries and citrus. The acidity of the fruit cuts through the richness of the hen.
- Gravy: Don't forget the gravy! You can make it from the pan drippings for extra flavour. This is a must-have for a truly comforting meal.
(Part 9) Saving the Best for Last: Storing and Using Leftovers
So, you've cooked up a delicious Cornish hen, and you might have some leftovers. Don't fret! You can store those leftovers for later.
Storing Leftovers: Keeping Your Chicken Safe and Fresh
- Refrigerate: Let the hen cool to room temperature before storing it in the fridge in an airtight container. It will keep for 3-4 days.
Leftover Ideas: Giving Your Chicken a Second Life
- chicken salad: Shred the leftover meat and toss it with mayonnaise, celery, and your favourite seasonings for a classic chicken salad. A great option for sandwiches or wraps.
- Chicken Sandwiches: Use the leftover meat in sandwiches with lettuce, tomato, and your favourite sauce. A simple and satisfying meal.
- Chicken Soup: Add the leftover meat to your favourite soup recipe for a boost of flavour and protein. The chicken will lend a wonderful depth of flavour to your soup.
FAQs
1. Can I cook Cornish hens from frozen?
Yes, you can cook Cornish hens from frozen. Just add about 30 minutes to the cooking time. Be sure to check for doneness using a meat thermometer.
2. What is the best way to keep the skin crispy?
The key to crispy skin is to pat the hen dry before cooking and to roast it on a rack. This allows air to circulate around the bird, promoting crisping. You can also brush the skin with a little oil before roasting.
3. Can I stuff a Cornish hen with a traditional stuffing?
You can, but it's important to cook the stuffing separately to ensure it reaches a safe internal temperature. You can also stuff the hen with a bread-based stuffing that’s cooked during roasting. Just make sure it's not packed too tightly, as this can prevent the hen from cooking evenly.
4. How can I tell if a Cornish hen is fresh?
A fresh Cornish hen will have a light yellow skin, firm breast, and no odour. You can also check the date on the packaging to ensure it's within the sell-by date.
5. How do I make sure the Cornish hen is cooked evenly?
To ensure even cooking, you can use a meat thermometer to check the internal temperature of the thickest part of the thigh. You can also rotate the hen halfway through cooking to ensure it cooks evenly. If you're roasting, consider using a roasting rack so heat circulates around the bird.
I hope this comprehensive guide has given you all the information you need to cook up a delicious Cornish hen. Remember, it's all about practice and having fun! Go forth, my culinary comrades, and conquer the Cornish hen!
Everyone is watching

Corn on the Cob: The Ultimate Guide to Perfectly Cooked Ears
Healthy MealsAh, corn on the cob. Just the name evokes images of sunny days, barbecues, and that sweet, juicy flavour that ...

Scallops: The Ultimate Guide to Perfect Cooking
Healthy MealsAh, scallops. Those delicate, sweet, and utterly delicious morsels of the sea. They hold a special place in my...

Spaghetti Squash: The Ultimate Guide to Cooking and Serving
Healthy MealsRemember that time you saw spaghetti squash at the supermarket, looking all bumpy and strange, and thought, "W...

Salmon Cooking Times: Perfect Guide for Every Recipe
Healthy MealsLet me tell you, cooking salmon is an art form. It's all about getting that perfect balance: juicy and tender,...

Ham Cooking Time: How Long to Bake, Smoke, or Boil a Delicious Ham
Healthy MealsAh, ham. It's a classic, isn't it? A real crowd-pleaser, especially around holidays. And when done right, it'...