corn on the cob. It’s a classic summer treat, a barbecue staple, and a nostalgic reminder of childhood. But let’s face it, getting it perfectly cooked – tender, sweet, and bursting with flavour – takes a little more than just tossing it on the grill. It’s an art, my friends, and one I’ve dedicated myself to mastering.
This isn't just a simple how-to, though. This is a deep dive into the world of corn cobbettes, exploring every method, from the classic boiling to the fancy-pants oven roasting. I've been on this culinary journey for years, experimenting, learning, and discovering some real gems along the way. So, grab a cuppa, settle in, and let's get cooking!
(Part 1) The Essentials

Before we get into the nitty-gritty of cooking, let's start with the basics. You need the right corn, you see. Now, I'm a big fan of fresh corn, straight from the farm, bursting with sweetness and flavour. But, let’s be honest, you can absolutely get away with frozen or even canned if that's what's available. But honestly, nothing beats that fresh, summery taste.
Choosing Your Corn
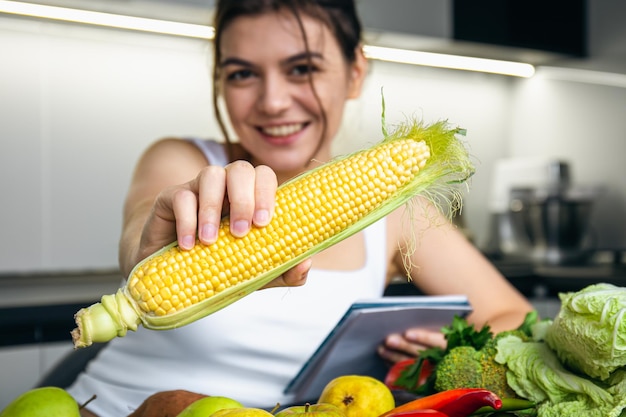
When picking out your corn, look for cobs with tight, green husks. The silks should be fresh and light brown, not dry and grey. That's a sign that it's been sitting around a bit too long. If you're feeling adventurous, you can even give the cob a little squeeze. It should feel firm and plump, not soft or mushy. That's the sign of a good corn cob, my friend.
Shucking Your Corn
Now, this might seem straightforward, but there’s a right way and a wrong way to shuck corn. You want to avoid ripping off the husks and leaving bits of silk all over the place. Trust me, it's not a fun clean-up! Instead, grab the husk at the bottom, pull it back gently, and peel it away, leaving the silk intact. Then, you can simply pull the silk off in one go. It's a much cleaner, less messy way to go about it.
(Part 2) Boiling Your Corn

Right, the classic method. boiling corn is simple, straightforward, and perfect for a quick weeknight dinner. But don't just chuck it in a pot of boiling water and call it a day. There are a few tricks to getting that perfect boiled corn.
The Boiling Technique
First, fill a large pot with enough water to cover the corn cobs. Bring it to a rolling boil, then add the corn cobs. Now, here’s the key: cook them for only about 5-7 minutes. You want the corn to be tender but still have a nice bite to it. Overcooked corn becomes mushy and loses its flavour. It’s a real shame to waste good corn!
Adding Some Zing
Now, plain boiled corn is fine, but it can be a bit bland. To spice things up, you can add a bit of flavour to the water. A teaspoon of sugar, a pinch of salt, or even a squeeze of lemon juice can make a difference. You can also add a bay leaf or a sprig of thyme for a touch of herbiness. I’ve found that a little bit of sugar really brings out the natural sweetness of the corn.
(Part 3) Grilling Your Corn

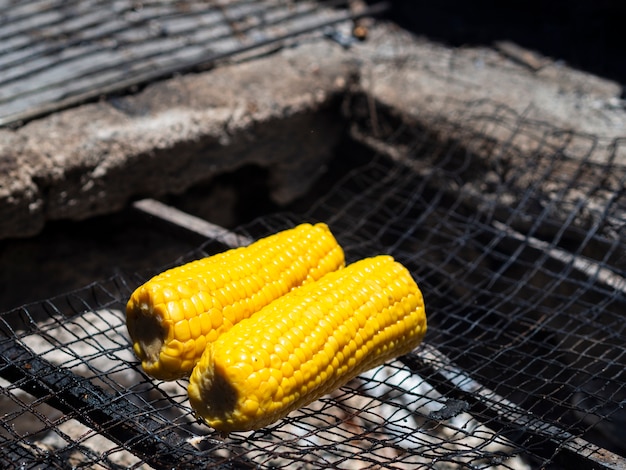
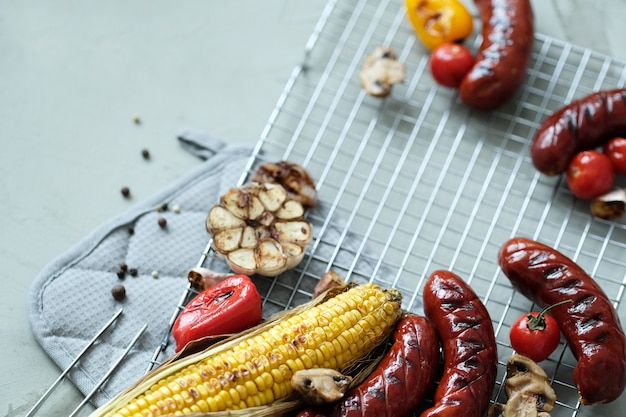
Okay, this is where things get fun. grilling corn is the quintessential summer cooking method, and it brings out that smoky, charred flavour that we all love. But, you’ve got to be careful not to burn it, and there are some tricks to getting it just right.
The Grilling Technique
First, preheat your grill to medium-high heat. You’ll want those grill marks, but you don’t want to burn the corn. Next, you need to remove the husks and silks, but leave the outer leaves intact. This creates a natural wrapper for the corn, helping it to cook evenly and prevent it from drying out. It’s a little trick I learned from my Dad, and it makes a real difference.
Now, you can grill the corn directly on the grill grate, but I prefer to use a grilling basket. This helps to keep the corn from rolling around and makes it easier to turn. Trust me, you don't want to be juggling hot corn on the grill! Grill the corn for about 10 minutes, turning it every few minutes to ensure even cooking.
The Glaze Touch
And here’s the fun part. Once the corn is cooked, you can brush it with a simple glaze. A mix of butter, garlic, and herbs is classic, but you can get creative with your own combinations. I like to add a little bit of honey for a touch of sweetness. Just remember, the glaze should be applied while the corn is still hot so that it melts and coats the kernels.
(Part 4) Roasting Your Corn
Now, you might be thinking, roasting corn? That seems a bit fancy, right? But trust me, it’s worth it. Roasting brings out a depth of flavour and a beautiful caramelization that you just can’t get from other methods.
The Roasting Technique
Preheat your oven to 400°F (200°C). You can roast corn with or without the husks, depending on your preference. If you’re leaving the husks on, soak the corn in water for about 30 minutes before roasting. This helps to prevent the husks from burning. It’s a little trick I learned from my grandma, and it always works a treat.
Place the corn in a roasting pan and roast for 30-40 minutes, turning halfway through. The corn is ready when the kernels are tender and slightly caramelized. You’ll know it’s ready when you can smell that sweet, roasted corn aroma.
The Flavour Boost
You can enhance the roasting process by adding some flavour to the pan. A drizzle of olive oil, a sprinkle of herbs, or even a few slices of lemon can elevate the flavour of your roasted corn. I like to add a sprig of rosemary for a touch of earthiness. It’s a flavour combination that never fails.
(Part 5) Microwaving Your Corn
Okay, I know, microwaving corn might sound sacrilegious to some, but hear me out. It’s a quick and easy way to cook corn when you’re in a pinch. You can even achieve a surprisingly decent result if you know what you’re doing.
The Microwaving Technique
First, remove the husks and silks from the corn. Next, place the corn on a microwave-safe plate and cover it with a damp paper towel. This helps to keep the corn moist and prevents it from drying out. Microwave the corn on high power for 3-5 minutes, or until the kernels are tender.
The Quick Fix
Microwaving corn is perfect for a quick snack or side dish. It’s especially handy when you’re short on time. You can even add a sprinkle of salt and pepper for a little extra flavour.
(Part 6) Serving Your Corn
Right, your corn is cooked to perfection, what now? You can serve it plain, but where’s the fun in that? Here are some ideas to take your corn to the next level:
Butter and Salt
The classic combo, simple yet effective. Just melt some butter, season it with salt, and brush it over the cooked corn. It’s a classic for a reason. You can even add a squeeze of lemon juice for a bit of tang.
Herbs and Spices
Get creative with your herbs and spices! You can use a mix of fresh herbs, like parsley, chives, and dill, or go for a more robust flavour with paprika, cayenne pepper, or even a pinch of cumin. Don’t be afraid to experiment!
Cheeses
For a cheesy twist, try topping your corn with grated Parmesan, cheddar, or even crumbled feta. You can even melt the cheese over the corn for a gooey, cheesy delight. I love to add a sprinkle of crumbled bacon to my cheesy corn – it’s a match made in heaven!
(Part 7) Corn Cobbettes: Beyond the Basics
Now, we’ve covered the basic methods for cooking corn, but let’s talk about some more adventurous approaches. We’re going beyond the ordinary here, folks, venturing into the realm of corn cobbettes.
Corn Cobbettes: The Ultimate Side Dish
A corn cobette is essentially a small, bite-sized version of a corn on the cob. They’re perfect for parties, potlucks, or any occasion where you want to serve a fun and delicious side dish. They’re a real crowd-pleaser, I’ve found.
Corn Cobbettes: A Creative Twist
The beauty of corn cobbettes is that they can be cooked in all sorts of ways. You can grill them, roast them, bake them, or even fry them. You can also add different flavours and toppings to create unique and exciting variations. The possibilities are endless, really.
Corn Cobbettes: The Recipe
1. Cut the corn cob in half or into thirds, depending on the desired size of your cobbettes.
2. Remove the husks and silks.
3. Brush the cobbettes with butter, olive oil, or your chosen glaze.
4. Season with salt, pepper, and any other desired herbs or spices.
5. Cook according to your chosen method.
(Part 8) Corn Cobbettes: Creative Variations
Now, we’re getting into the real fun stuff. Here are some ideas for creating unique and delicious corn cobette variations:
Spicy Corn Cobbettes
For a kick of heat, add a pinch of cayenne pepper, chili powder, or even a few slices of jalapeno to your corn cobbettes. You can also serve them with a spicy dipping sauce, like sriracha mayo or chipotle cream. It’s a real flavour bomb!
Herbed Corn Cobbettes
For a fresh and flavourful option, try brushing your corn cobbettes with a mix of herbs, like parsley, chives, thyme, or rosemary. You can also add a squeeze of lemon juice for a touch of tang. It’s a simple but delicious combination.
sweet corn Cobbettes
If you’re looking for a sweet and savoury treat, try brushing your corn cobbettes with a mix of honey, butter, and cinnamon. You can also add a sprinkle of brown sugar for extra sweetness. It’s a real crowd-pleaser, especially with kids.
Cheesy Corn Cobbettes
For a cheesy indulgence, try topping your corn cobbettes with grated cheese, like Parmesan, cheddar, or Monterey Jack. You can even melt the cheese over the corn for a gooey, cheesy delight. I like to add a little bit of crumbled bacon to mine – it’s a real game-changer!
(Part 9) FAQs
Now, let’s address some common questions about corn cobbettes.
1. How long do corn cobbettes take to cook?
The cooking time for corn cobbettes varies depending on the method you choose. Grilling takes about 10 minutes, roasting about 30-40 minutes, baking about 20-30 minutes, and frying about 5-7 minutes.
2. Can I freeze corn cobbettes?
You can freeze cooked corn cobbettes, but it’s best to freeze them before they’ve been glazed or topped with cheese. To freeze, place the cobbettes in a freezer bag and freeze for up to 3 months. When you’re ready to use them, simply thaw them in the refrigerator overnight and reheat them in the oven, microwave, or grill.
3. What are the best toppings for corn cobbettes?
There are endless possibilities when it comes to toppings for corn cobbettes. You can go for classic butter and salt, get creative with herbs and spices, or add a touch of cheese or sweetness. You can also experiment with different dipping sauces, like sour cream, ranch dressing, or even spicy mayonnaise. The only limit is your imagination.
4. How do I know when corn cobbettes are cooked?
Corn cobbettes are cooked when the kernels are tender and slightly caramelized. You can also test them by piercing the kernel with a fork. If it’s tender and releases easily, it’s ready.
5. What are some tips for keeping corn cobbettes warm?
If you’re serving corn cobbettes at a party or potluck, you can keep them warm by placing them in a slow cooker on low heat. You can also wrap them in foil and keep them in a warm oven until ready to serve.
Conclusion
There you have it, folks, the ultimate guide to cooking corn cobbettes perfectly. From classic boiling to creative variations, there’s a method and a topping for everyone. So next time you’re looking for a delicious and easy side dish, give corn cobbettes a try. You won’t be disappointed!
Everyone is watching

Corn on the Cob: The Ultimate Guide to Perfectly Cooked Ears
Healthy MealsAh, corn on the cob. Just the name evokes images of sunny days, barbecues, and that sweet, juicy flavour that ...

Perfect Pork Roast Oven Cooking Time: A Guide to Delicious Results
Healthy MealsThere's something truly satisfying about a perfectly roasted pork. The aroma alone is enough to make your mout...

Ham Cooking Time: How Long to Bake, Smoke, or Boil a Delicious Ham
Healthy MealsAh, ham. It's a classic, isn't it? A real crowd-pleaser, especially around holidays. And when done right, it'...

Scallops: The Ultimate Guide to Perfect Cooking
Healthy MealsAh, scallops. Those delicate, sweet, and utterly delicious morsels of the sea. They hold a special place in my...

Spaghetti Squash: The Ultimate Guide to Cooking and Serving
Healthy MealsRemember that time you saw spaghetti squash at the supermarket, looking all bumpy and strange, and thought, "W...
