(Part 1) The Foundation: Choosing and Prepping Your Chicken

The Chicken: Quality Matters
First things first, the chicken itself. It’s the star of the show, so we need to get this right. Boneless, skinless chicken breasts are the go-to choice. They're easy to work with, and you get a consistent texture throughout. You can buy them pre-cut into strips, which is super convenient, or you can slice them yourself. My personal preference is to slice them a bit thicker - gives you a more satisfying chew and doesn't dry out as quickly.A Quick Wash and Dry
Once you’ve got your chicken strips ready, give them a good rinse under cold water. This removes any loose bits and gets rid of any lingering unpleasant smells. Now, pat them dry with paper towels. You want them completely dry before you start battering - this helps the batter adhere better, giving you that beautiful crispy coating.(Part 2) The Secret Weapon: Mastering the Batter

Buttermilk: Your Secret Weapon
There are countless batter recipes out there, but I've always found a simple buttermilk batter to be a real winner. It’s light, it’s crispy, and it adds a touch of tangy flavour that really elevates the chicken. It creates a lovely, airy texture that doesn't feel heavy or greasy.Here’s a basic buttermilk batter recipe that you can use as your starting point:
- 1 cup buttermilk
- 1 teaspoon salt
- 1/2 teaspoon black pepper
- 1 cup all-purpose flour
- 1/2 cup cornstarch
Simply whisk together the buttermilk, salt, and pepper. In a separate bowl, combine the flour and cornstarch. Dip the chicken strips in the buttermilk mixture, making sure to coat them thoroughly, then dredge them in the flour mixture, ensuring they’re completely coated. You want a nice, even layer of batter on all sides.
Variations on a Theme: Adding Flavour and Crunch
If you want to get a little more adventurous, you can add some extra flavour to your batter. Here are a few ideas:- Herbs and Spices: A pinch of paprika, garlic powder, onion powder, or even a hint of cayenne pepper can give your chicken strips a delicious kick.
- Cheese: Grating some parmesan or cheddar cheese into the batter adds a cheesy flavour and a satisfying texture.
- panko breadcrumbs: Replacing some of the flour with panko breadcrumbs creates a crispier, more substantial coating.
(Part 3) Cooking Time: The perfect chicken Strip Finish

Oven-Baked: The Healthier Choice
For those who prefer a healthier option, oven-baked chicken strips are the way to go. You get that lovely crispy exterior without all the added grease.Preheat your oven to 400°F (200°C). Line a baking sheet with parchment paper - this prevents sticking and makes cleanup a breeze. Arrange the chicken strips in a single layer, giving them space to breathe. Bake for 15-20 minutes, or until the chicken is cooked through and the breading is a beautiful golden brown. Flip them halfway through for even cooking.
Pan-Fried: For That Classic Crunch
For that classic, crispy texture, pan-frying is the way to go. This method delivers the most authentic chicken strip experience.Heat a large skillet over medium heat. Add about 1/4 inch of oil to the pan - enough to cover the bottom but not so much that the chicken is swimming in it. Once the oil is hot, carefully add the chicken strips, being careful not to overcrowd the skillet. Fry for 5-7 minutes per side, or until golden brown and cooked through.
Air Fryer: Speed and Crispness
For the ultimate in crispy chicken strips, consider the air fryer. It’s a great option for cooking up a batch quickly and efficiently.Preheat your air fryer to 400°F (200°C). Place the chicken strips in the air fryer basket, making sure they aren’t overlapping. Cook for 8-10 minutes, or until the chicken is cooked through and the breading is golden brown. Shake the basket halfway through to ensure even cooking.
(Part 4) Doneness: Ensuring Safety and Texture
The internal temperature Test: The Gold Standard
The most reliable way to check for doneness is with a meat thermometer. The internal temperature of the chicken strips should reach 165°F (74°C). This ensures that the chicken is cooked through and safe to eat.Visual Cues: The Colour Test
If you don't have a thermometer, you can use visual cues. The chicken strips should be cooked through and have a white, opaque appearance. The breading should be golden brown and crispy. Avoid any pinkness in the chicken.The Touch Test: A Gentle Probe
Give the chicken a gentle poke with a fork or your finger. If it feels firm and springy, it's cooked through. If it feels soft and mushy, it needs more cooking time.(Part 5) The Perfect Finishing Touches: Serving and Saucing
Dipping Delights: A Saucy Symphony
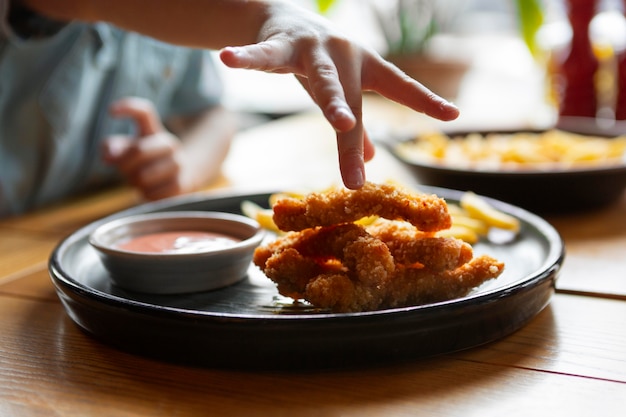
Now that your chicken strips are cooked to perfection, it’s time to pair them with the perfect dipping sauce. Here are a few of my personal favourites, but feel free to experiment and find your own perfect match:- Honey Mustard: A classic and crowd-pleasing choice.
- bbq sauce: Tangy and smoky, perfect for a BBQ-inspired meal.
- Ranch Dressing: Creamy and tangy, a classic pairing for chicken.
- Blue Cheese Dressing: A bolder flavour with a creamy texture.
- Sriracha Mayo: A spicy kick with a creamy base.
Sidekicks: The Perfect Accompaniments
Chicken strips pair perfectly with a variety of sides. Consider:- french fries: A classic combo that never fails.
- mashed potatoes: Creamy and comforting, a perfect match for crispy chicken.
- Fresh Salad: A healthy and refreshing addition.
(Part 6) Tips for Success: From Batter to Bite
Don't Overcrowd the Pan
When pan-frying, make sure to give your chicken strips ample space. Overcrowding the pan leads to steaming instead of frying, resulting in soggy chicken strips.Use a High-Heat Oil
A high-heat oil like vegetable oil or canola oil is best for frying chicken strips. It won't smoke or break down at high temperatures, ensuring a consistent cooking experience.Seasoning: Adding Your Personal Touch
Don't be afraid to experiment with different seasonings to create your own signature chicken strip flavor. A blend of paprika, garlic powder, onion powder, and a pinch of cayenne pepper is a great starting point.Resting: A Moment of Relaxation for Tenderness
Once your chicken strips are cooked through, let them rest for a few minutes before serving. This allows the juices to redistribute, resulting in more flavorful and tender chicken.(Part 7) Troubleshooting: Fixing Common Issues
Soggy Chicken Strips: A Problem Solved
This is a common issue, and it usually happens when the chicken is overcrowded in the pan or when the oil isn't hot enough. Ensure ample space and heat the oil to the correct temperature before adding the chicken.Dry Chicken Strips: Avoiding Overcooking
Dry chicken strips are typically a result of overcooking. Check the chicken strips regularly and remove them from the heat once they’re cooked through.Lack of Crispness: A Batter Adjustment
If your chicken strips aren't crispy, the oil might not be hot enough or the breading might be too thick. Try adding a little bit more flour to the batter or increasing the cooking temperature.(Part 8) Planning Ahead: Making and Freezing Chicken Strips
Making Chicken Strips in Advance
If you’re short on time, you can make your chicken strips ahead of time and store them in the refrigerator until you're ready to cook them. Just let them come to room temperature before cooking to ensure even cooking.Freezing for Future Enjoyment
You can freeze cooked chicken strips for later use. Simply place them in an airtight container or freezer bag and freeze for up to 3 months. To reheat, thaw them in the refrigerator overnight. Then, bake them in a preheated oven at 350°F (175°C) for 10-15 minutes, or until heated through.(Part 9) Chicken Strips Around the World: A Global Favourite
Chicken strips are a beloved dish across the globe. In the United States, they’re often served as a fast food item. In the United Kingdom, they’re known as “chicken goujons,” while in Japan they’re called “chicken karaage” and often served with a soy sauce-based dipping sauce. No matter what you call them, they're a delicious and versatile dish enjoyed by people of all ages.(Part 10) Chicken Strips Fun Facts: A Journey Through Time
Did you know that the first chicken strip restaurant was opened in 1953 in Los Angeles, California? It was called the "Chicken Shack" and served a simple menu of chicken strips, fries, and milkshakes. Chicken strips have since become one of the most popular fast food items in the world, a testament to their enduring appeal.(Part 11) FAQs: Answering Your Burning Questions
What's the Best Way to Cook Chicken Strips?
There is no one "best" way. It really depends on your personal preferences and how much time you have. Oven baking is a healthier option, while pan-frying yields a crispier texture, and air frying provides a convenient and quick option.How Long Should I Cook Chicken Strips?
Cooking time varies based on the method you choose. Oven baking takes 15-20 minutes, pan-frying takes 5-7 minutes per side, and air frying takes 8-10 minutes.What Temperature Should Chicken Strips Be Cooked To?
Chicken strips should be cooked to an internal temperature of 165°F (74°C) to ensure they're safe to eat.Can I Freeze Chicken Strips?
Yes, you can freeze cooked chicken strips for up to 3 months. Thaw them in the refrigerator overnight before reheating.What Are Some Good Dipping Sauces for Chicken Strips?
The world is your oyster! Some popular choices include honey mustard, BBQ sauce, ranch dressing, blue cheese dressing, and sriracha mayo. Experiment and discover your favourites!I hope this guide has been helpful! Now go forth and create some delicious chicken strips!
Everyone is watching

Corn on the Cob: The Ultimate Guide to Perfectly Cooked Ears
Healthy MealsAh, corn on the cob. Just the name evokes images of sunny days, barbecues, and that sweet, juicy flavour that ...

Scallops: The Ultimate Guide to Perfect Cooking
Healthy MealsAh, scallops. Those delicate, sweet, and utterly delicious morsels of the sea. They hold a special place in my...

Spaghetti Squash: The Ultimate Guide to Cooking and Serving
Healthy MealsRemember that time you saw spaghetti squash at the supermarket, looking all bumpy and strange, and thought, "W...

Salmon Cooking Times: Perfect Guide for Every Recipe
Healthy MealsLet me tell you, cooking salmon is an art form. It's all about getting that perfect balance: juicy and tender,...

Ham Cooking Time: How Long to Bake, Smoke, or Boil a Delicious Ham
Healthy MealsAh, ham. It's a classic, isn't it? A real crowd-pleaser, especially around holidays. And when done right, it'...
