chicken drumsticks! A culinary icon, a crowd-pleasing staple, and a personal favourite of mine. Honestly, there's just something about a plate piled high with crispy, juicy drumsticks that makes my heart sing. It's a simple dish, but getting it right – perfectly cooked, with that irresistible crispy skin and succulent, tender meat – takes a bit of know-how. And that's where I come in, ready to share my wisdom, gleaned from years of experimenting in the kitchen (and let's be honest, a few burnt offerings along the way).
This article is your ultimate guide to cooking chicken drumsticks to absolute perfection. We'll explore different cooking methods, delve into the importance of temperature, and uncover some insider tips and tricks that'll take your drumstick game to the next level. By the end, you'll be a drumstick maestro, whipping up meals that'll have your family and friends begging for seconds. Ready to embark on this culinary adventure? Let's get cooking!
Part 1: Demystifying the Drumstick: A culinary journey Begins
The Anatomy of a Chicken Leg: Understanding the Parts
Let's start with the basics. A chicken leg isn't just one piece of meat, it's a dynamic duo: the drumstick (that thick, lower portion) and the thigh (the upper part). These two are connected by a bone that runs through both. This unique structure makes chicken legs a bit more demanding than other cuts of meat. We need to ensure both the drumstick and thigh cook evenly. Otherwise, you'll end up with a dry, tough drumstick and a raw thigh – not a good look!
Temperature: The King of Chicken Cooking
Here's the golden rule of chicken cooking: always ensure your chicken reaches an internal temperature of 165°F (74°C). This is crucial for eliminating harmful bacteria and ensuring a safe, delicious meal. No one wants a case of food poisoning, trust me!
Cook Time: A Guide Through the Culinary Maze
Now, let's tackle the cooking time. Unfortunately, there's no single answer that fits every situation. The time it takes to cook chicken drumsticks varies depending on their size, the chosen cooking method, and your desired level of doneness. Here's a general guide to get you started:
| Cooking Method | Approximate Time |
|---|---|
| Oven | 30-45 minutes at 350°F (175°C) for drumsticks |
| Grilling | 15-20 minutes over medium heat, turning halfway through |
| Frying | 10-15 minutes in hot oil, until golden brown and cooked through |
| slow cooker | 4-6 hours on low, or 2-3 hours on high |
| instant pot | 15-20 minutes on high pressure, followed by a quick release |
Remember, these are just estimations. Always use a meat thermometer to confirm the internal temperature has reached 165°F (74°C) to ensure your drumsticks are safely cooked through.
Part 2: Exploring the Culinary Landscape: Different Cooking Methods
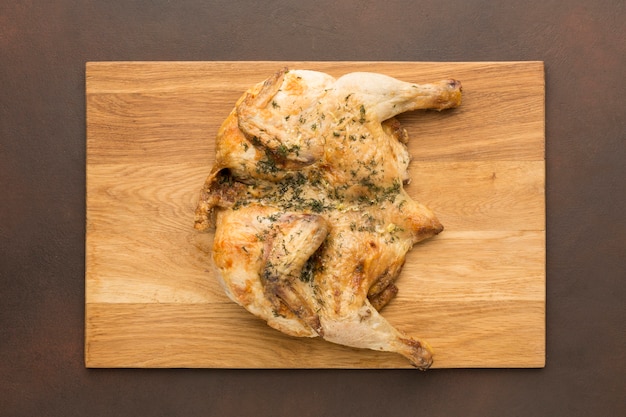
Oven-Baked Drumsticks: A Classic for a Reason
Oven-baking is a classic and reliable method for cooking chicken legs. Here's my tried-and-true approach:
- Preheat your oven to 350°F (175°C).
- Season your drumsticks generously with salt, pepper, and your favourite herbs and spices. For a bold flavour, I often go with paprika, garlic powder, and onion powder.
- Arrange the drumsticks in a single layer on a baking sheet. Don't overcrowd them, or they won't cook evenly. Think of it as giving them space to breathe and brown beautifully.
- Bake for 30-45 minutes, or until the internal temperature reaches 165°F (74°C).
- For an extra crispy finish, consider broiling the drumsticks for a few minutes at the end. Keep a close eye on them, as they can burn easily.
grilled drumsticks: Summertime Flavour
Ah, grilled chicken. There's nothing like that smoky flavour. Here's my grilling strategy for perfectly charred drumsticks:
- Preheat your grill to medium heat.
- Season your drumsticks with salt, pepper, and any other desired seasonings. I love to use a citrusy rub with lemon zest and herbs for a bright, refreshing flavour.
- Place the drumsticks on the grill and cook for 15-20 minutes, turning them halfway through.
- For an extra smoky punch, add some wood chips to your grill. Mesquite or hickory chips work well and add that fantastic smoky aroma.
- To achieve char marks and a crispy crust, grill the drumsticks over high heat for a couple of minutes at the end. Just watch them closely, as they can burn quickly.
Pan-Fried Drumsticks: Quick and Crispy
Sometimes, you just need a quick and easy meal. Pan-frying is a great option for those nights when you're short on time:
- Heat a tablespoon of oil in a large skillet over medium-high heat.
- Season your drumsticks with salt, pepper, and any other desired seasonings. A simple blend of garlic powder, onion powder, and black pepper is my go-to.
- Place the drumsticks in the skillet and cook for 10-15 minutes, turning them halfway through.
- For extra crispiness, add a tablespoon of butter to the skillet at the end and baste the drumsticks with the melted butter. It adds a beautiful sheen and deepens the flavour.
Slow-Cooker Drumsticks: Fall-Off-The-Bone Tenderness
If you're looking for a hands-off way to create melt-in-your-mouth chicken, the slow cooker is your best friend.
- Place your drumsticks in a slow cooker and season them generously with salt, pepper, and your favourite herbs and spices. A blend of paprika, garlic powder, onion powder, and thyme works wonders.
- Add a cup of chicken broth or water to the slow cooker. This will help create a delicious sauce that you can use to drizzle over the chicken.
- Cook on low for 4-6 hours, or on high for 2-3 hours.
- Shred the cooked chicken with two forks and serve it with the delicious sauce from the slow cooker.
Instant Pot Drumsticks: Fast and Convenient
The Instant Pot is a modern kitchen marvel, and it can work wonders with chicken drumsticks. This method is perfect for busy weeknights when you need a quick and easy meal.
- Place your drumsticks in the Instant Pot and season them with salt, pepper, and any other desired seasonings. A simple blend of garlic powder, onion powder, and paprika often does the trick.
- Add a cup of chicken broth or water to the Instant Pot.
- Cook on high pressure for 15-20 minutes.
- Allow the pressure to release naturally for 10 minutes, then release the remaining pressure manually. This ensures the chicken is perfectly cooked and tender.
Part 3: Beyond the Basics: Creative Flavour Combinations
Now that we've covered the fundamentals, let's get creative and explore some exciting flavour combinations to elevate your drumsticks to new heights.
Spicy Drumsticks: A Touch of Heat
For those who enjoy a bit of fire, add a pinch of cayenne pepper, chili powder, or even some chopped jalapeno peppers to your seasoning mix. You can also try adding a dash of smoked paprika for an extra depth of flavour.
Sweet and Savoury Drumsticks: A Deliciously Balanced Bite
For a delightful balance of sweet and savoury, combine the best of both worlds. A drizzle of honey or maple syrup, a sprinkle of brown sugar, or even some chopped dates or dried apricots can add a touch of sweetness that complements the savoury notes of the chicken perfectly.
Herbed Drumsticks: Fresh and Aromatic
Fresh herbs like rosemary, thyme, oregano, or parsley can add a beautiful aroma and flavour to your drumsticks. Simply chop the herbs finely and incorporate them into your seasoning mix. You can also use a blend of dried herbs, which are just as effective and easier to store.
Citrusy Drumsticks: A Zesty Twist
For a bright and refreshing taste, add some citrus zest and juice to your drumsticks. Lemon, lime, or orange zest can add a lovely citrusy aroma, while a squeeze of juice can help tenderize the meat. This is particularly effective when using the oven or slow cooker method.
Part 4: Insider Tips and Tricks: Mastering the Drumstick Game
The Art of Brining: Unveiling the Secrets to juicy chicken
Brining, the process of soaking chicken in a salty solution, can significantly enhance its juiciness and tenderness. Submerge your drumsticks in a brine made with water, salt, and your favourite seasonings for a few hours (or even overnight) before cooking. This allows the salt to draw moisture out of the chicken and then back in, creating a more succulent and flavorful result.
The Secret to Crispy Skin: Achieving that Perfect Golden Brown
For that irresistible crispy skin, pat your drumsticks dry before cooking. This helps the skin to brown and crisp up beautifully. You can also use a dry rub or a little cornstarch to enhance the crispiness. The key is to ensure the skin is as dry as possible to encourage browning.
Don't Overcrowd the Pan: Giving Each Drumstick its Space
When cooking drumsticks in the oven or on the stovetop, make sure they are spread out in a single layer. Crowding them will prevent them from cooking evenly and lead to steaming rather than browning. Give them some space to breathe and cook evenly.
Resting: Allowing the Juices to Redistribute
After cooking, let your drumsticks rest for a few minutes before carving and serving. This allows the juices to redistribute throughout the meat, resulting in a more tender and juicy final product. This simple step makes a big difference in the overall texture and flavour.
Part 5: Serving Up Perfection: Delicious Ways to Enjoy Your Drumsticks
Now that you've mastered the art of cooking chicken legs, let's talk about serving them up in style.
Classic Sides: Tried-and-True Companions
You can't go wrong with classic sides like mashed potatoes, roasted vegetables, or a simple green salad. These dishes complement the flavour and texture of the drumsticks beautifully. Think creamy mashed potatoes to soak up the delicious juices, or a vibrant green salad to add a refreshing contrast.
Global Inspiration: Taking Your Drumsticks on a Culinary Journey
For a more adventurous meal, try pairing your drumsticks with dishes from different cultures. Serve them with couscous and harissa sauce, or rice and a mango salsa for a Latin American twist. You can also explore other cuisines, like Middle Eastern or Asian, for unique and flavourful pairings.
Creative Combos: Unlocking a World of Flavour
Get creative and experiment with different flavour pairings. Try serving your drumsticks with a creamy pesto sauce, a tangy barbecue sauce, or a spicy Asian-inspired sauce. You can also get playful with dipping sauces. Consider a sweet and spicy chili sauce, a tangy garlic aioli, or a refreshing lemon-herb dressing.
Part 6: Leftover Magic: Turning Leftovers into Culinary Gold
Got leftover drumsticks? Don't throw them away! They're a culinary goldmine, ready to be transformed into delicious new dishes.
chicken salad: A Classic comfort food
Shred the leftover chicken and use it to create a delicious chicken salad. Mix it with mayonnaise, celery, onion, and your favourite seasonings. You can add chopped grapes or cranberries for a touch of sweetness. Serve it on sandwiches, crackers, or in lettuce wraps.
Chicken Soup: Warm and Comforting
Add the leftover drumsticks to a pot of chicken broth and simmer until the meat is falling off the bone. Shred the chicken and use it to create a comforting and flavourful soup. You can add vegetables like carrots, celery, and potatoes, as well as herbs like parsley and thyme.
chicken tacos: A Tex-Mex Delight
Shred the leftover chicken and use it to make delicious tacos. Top with your favourite toppings, such as shredded cheese, salsa, sour cream, and guacamole. These are perfect for a quick and easy weeknight meal.
Part 7: Storage and Reheating: Keeping Your Drumsticks Delicious
Storage: Keeping Your Chicken Fresh
Store cooked chicken drumsticks in an airtight container in the refrigerator for up to 3 days. Make sure the container is sealed tightly to prevent the chicken from drying out.
Reheating: Bringing Your Drumsticks Back to Life
To reheat your drumsticks, you can use the oven, microwave, or stovetop. For the best results, reheat them in the oven at 350°F (175°C) for 15-20 minutes. This ensures the chicken is heated through without becoming dry.
Part 8: FAQs: Addressing Your Chicken Drumstick Queries
Q: How do I know if my chicken drumsticks are cooked through?
The best way to ensure your drumsticks are cooked through is to use a meat thermometer. Insert the thermometer into the thickest part of the drumstick (avoiding the bone). The internal temperature should reach 165°F (74°C) for safe eating. If you don't have a thermometer, you can check the drumsticks by cutting into the thickest part. The juices should run clear, and the meat should be no longer pink.
Q: What happens if I overcook my chicken drumsticks?
Overcooked chicken drumsticks will be dry and tough. They will also lose a lot of their flavour. To avoid overcooking, be sure to use a meat thermometer and follow the recommended cooking times closely. If you're concerned about overcooking, it's better to err on the side of undercooking slightly and then check with a thermometer.
Q: Can I freeze chicken drumsticks?
Yes, you can freeze chicken drumsticks. Place them in a freezer-safe bag or container and freeze for up to 3 months. Thaw them in the refrigerator overnight before cooking. You can also freeze cooked drumsticks, but they will lose some of their juiciness after thawing.
Q: How can I make my chicken drumsticks more flavorful?
There are many ways to enhance the flavour of your chicken drumsticks. Try marinating them in a flavorful marinade, brining them in a salty solution, or using a dry rub with herbs and spices. You can also add a splash of lemon juice, a drizzle of honey, or a pinch of chili powder for a touch of extra flavour.
Q: What are some good substitutes for chicken drumsticks?
If you're looking for alternatives to chicken drumsticks, you can try other cuts of chicken, such as chicken thighs, chicken breasts, or chicken wings. You can also use other types of meat, such as pork chops, lamb chops, or beef shanks. These cuts can be prepared using similar techniques and will provide delicious alternatives to chicken drumsticks.
Conclusion
Mastering the art of chicken leg cooking is a culinary journey that starts with understanding the basics and then blossoms into endless possibilities. From simple oven-baked delights to sizzling pan-fried creations, the versatility of chicken drumsticks opens up a world of flavour explorations. Remember, it's all about the right temperature, the perfect cooking time, and a dash of creativity to elevate your culinary skills. So, grab those drumsticks, experiment with different techniques, and enjoy the delicious results! Happy cooking!
Everyone is watching

Corn on the Cob: The Ultimate Guide to Perfectly Cooked Ears
Healthy MealsAh, corn on the cob. Just the name evokes images of sunny days, barbecues, and that sweet, juicy flavour that ...

Perfect Pork Roast Oven Cooking Time: A Guide to Delicious Results
Healthy MealsThere's something truly satisfying about a perfectly roasted pork. The aroma alone is enough to make your mout...

Ham Cooking Time: How Long to Bake, Smoke, or Boil a Delicious Ham
Healthy MealsAh, ham. It's a classic, isn't it? A real crowd-pleaser, especially around holidays. And when done right, it'...

Scallops: The Ultimate Guide to Perfect Cooking
Healthy MealsAh, scallops. Those delicate, sweet, and utterly delicious morsels of the sea. They hold a special place in my...

Spaghetti Squash: The Ultimate Guide to Cooking and Serving
Healthy MealsRemember that time you saw spaghetti squash at the supermarket, looking all bumpy and strange, and thought, "W...