chicken breast is a kitchen staple. It's incredibly versatile, reasonably priced, and cooks up quickly. But, there's a bit of an art to getting it perfectly cooked. Nobody wants a dry, rubbery chicken breast, right? I've been there, trust me. Years of trial and error (and a few unfortunate burnt offerings) have taught me a thing or two about oven-baked chicken breast.
This guide is your recipe for juicy, tender, and flavorful chicken breast every time. We'll cover everything from picking the perfect chicken to cooking times, and I'll even throw in my favorite tips and tricks. Get ready to elevate your chicken game!
(Part 1) Why 425 Degrees? The Sweet Spot for Chicken
Why 425 degrees? It's the sweet spot for chicken! It's a high enough temperature to create that lovely golden-brown crust we all crave, but not so high that it burns before the inside is cooked through.
Think of it like a turbocharged oven. It gets things done quickly and efficiently, giving you a satisfyingly crispy exterior and juicy interior.
The Case for Higher Temperatures:
Faster Cooking: You won't be hanging around in the kitchen for ages.
Crispy Exterior: The high heat sears the outside, creating a delicious, crispy crust.
Why Not Lower Temperatures?
Some people swear by lower temperatures, like 350 or 325 degrees. But, in my experience, this can lead to dry chicken. Lower temperatures don't create that crisp sear on the outside, and the chicken can become a little bland.
(Part 2) Choosing the Right chicken breasts: The Foundation of Flavor
Now, let's talk about the stars of the show: the chicken breasts. Picking the right ones is crucial for a successful dish.
Size Matters:
First, size matters. You want chicken breasts that are roughly the same size. Why? Because they'll cook at a similar pace. If you have a mix of thick and thin breasts, the thinner ones might dry out before the thicker ones are cooked through.
Fresh vs. Frozen:
Personally, I'm a fan of fresh chicken breasts. They just taste better! But, if you're using frozen chicken, make sure to thaw it thoroughly in the refrigerator before cooking. Do not, under any circumstances, use the microwave. Trust me, you'll regret it.
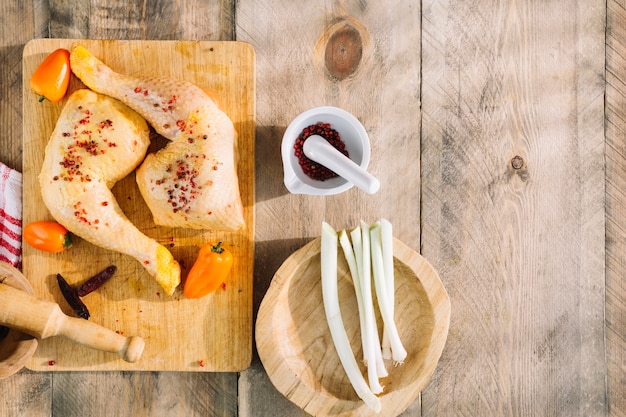
(Part 3) The Pre-Game: Preparing the Chicken for Success
Before we toss the chicken into the oven, it's important to do a little pre-game prep.
Pat Dry, Pat Dry, Pat Dry!:
This is the golden rule of cooking chicken, especially when using high heat. A wet chicken breast will steam in the oven instead of browning nicely. So, pat those breasts dry with paper towels before doing anything else.
Seasoning is Key:
Now for the fun part: seasoning! I love simplicity: Salt and pepper are a fantastic starting point. But, don't be afraid to get creative. Paprika, garlic powder, onion powder, herbs like thyme or rosemary – they all add incredible depth of flavor.
Don't Forget the Skin!:
If your chicken breasts have skin on, leave it on! It acts as a protective barrier, keeping the moisture locked in and preventing dry spots.
(Part 4) The Big Game: Oven Time for Perfect Chicken
Okay, here we are, the moment of truth. It's time to get those chicken breasts in the oven.
Heating Up:
First, preheat your oven to 425 degrees. You want it piping hot and ready to go when your chicken hits the scene.
Get Organized:
Prepare a baking sheet lined with parchment paper. This prevents sticking and makes cleanup a breeze. Now, arrange your chicken breasts on the baking sheet, making sure there's some space between them. You want them to cook evenly, not steam each other!
The Timer is Ticking:
Cooking time depends on the thickness of your chicken breasts. Here's a general guide:
- Thin breasts (less than 1 inch thick): 15-20 minutes.
- Medium breasts (1-1.5 inches thick): 20-25 minutes.
- Thick breasts (over 1.5 inches thick): 25-30 minutes.
The meat thermometer: The Ultimate Test
The ultimate test of whether your chicken is cooked through is using a meat thermometer. It's worth the investment, trust me. The chicken should reach an internal temperature of 165 degrees Fahrenheit (74 degrees Celsius).
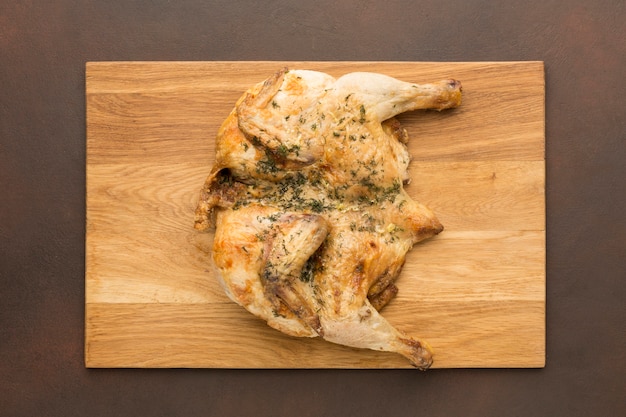
Rest Time: The Secret to juicy chicken
Once the chicken is cooked, don't rush to serve it! Let it rest for about 5-10 minutes before slicing and serving. This allows the juices to redistribute, ensuring a moist and tender result.
(Part 5) The Sidekick: Finding the Perfect Chicken Companion
Now, let's talk about the perfect side dish for your chicken breast.
Roasted Veggies: A Classic Match
Roasted vegetables are a fantastic pairing with chicken breast. Think asparagus, Brussels sprouts, carrots, or potatoes. The high heat in the oven will bring out their natural sweetness and create a beautiful caramelized flavor.
A Salad with a Punch:
A refreshing salad is a perfect contrast to the richness of the chicken. Choose a mix of greens, some crunchy veggies like cucumber or bell peppers, and a tangy dressing.
Grain Power:
For a heartier meal, consider a side of quinoa, brown rice, or couscous. These grains provide a great source of fiber and nutrients to round out your meal.
(Part 6) Spice Up Your Game: Flavoring Ideas for Chicken Breast
We've covered the basics, but now let's add some extra pizzazz to your chicken breasts!
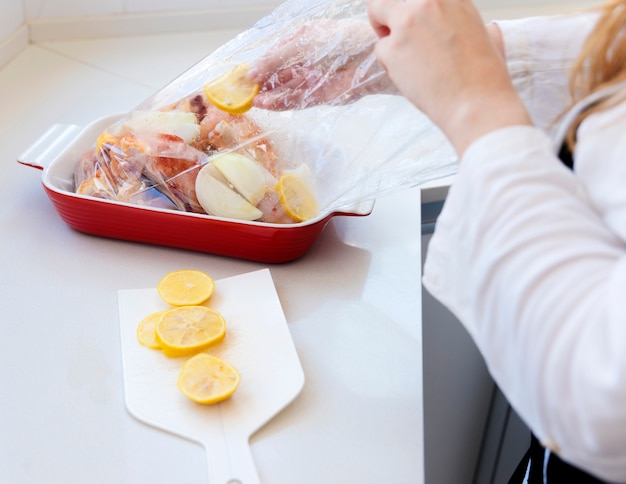
Marinade Magic: Infusing Flavor
A marinade is a fantastic way to infuse flavor into your chicken before cooking. You can use a store-bought marinade, or whip up your own.
Here are some marinade ideas:
- Lemon-herb marinade: Combine lemon juice, olive oil, fresh herbs like thyme and rosemary, garlic, and salt and pepper. This marinade creates a bright, citrusy flavor with a hint of herbaceousness.
- Soy-ginger marinade: Mix soy sauce, ginger, garlic, honey, and sesame oil. This marinade delivers a sweet and savory flavor with a touch of ginger spice.
- Spicy sriracha marinade: Combine sriracha sauce, soy sauce, honey, and a pinch of red pepper flakes. This marinade adds a kick of heat and a hint of sweetness, perfect for those who like a bit of spice.
Flavorful Rubs: Dry Seasoning for Flavor
A dry rub is another great way to add depth of flavor to your chicken. You can use a store-bought rub, or create your own.
Here are some rub ideas:
- Cajun spice rub: Blend paprika, cayenne pepper, garlic powder, onion powder, dried oregano, and salt and pepper. This rub adds a warm, spicy flavor with a hint of smokiness.
- Herby rub: Combine dried thyme, rosemary, sage, parsley, garlic powder, and salt and pepper. This rub creates a fragrant, herbaceous flavor that complements the chicken beautifully.
- Greek spice rub: Mix oregano, thyme, basil, garlic powder, lemon zest, salt, and pepper. This rub delivers a Mediterranean flavor with a bright, citrusy note.
(Part 7) Troubleshooting: When Things Go Wrong in the Kitchen
Okay, let's be honest, sometimes things don't go exactly to plan in the kitchen. But, don't fret! We've got this!
Dry Chicken Blues: The Most Common Problem
The most common problem is dry chicken. This usually happens when it's overcooked.
Solution:
- Use a meat thermometer: This is your best defense against dry chicken. It will tell you exactly when your chicken is cooked through.
- Don't overcook: Be mindful of cooking times. It's better to err on the side of undercooked than overcooked.
- Rest the chicken: Letting the chicken rest after cooking allows the juices to redistribute, preventing dryness.
Burnt Chicken Mishap: A Culinary Crisis
Another issue is a burnt exterior. This usually happens when the oven temperature is too high or the chicken is placed too close to the heat source.
Solution:
- Lower the oven temperature: If you're concerned about burning, reduce the oven temperature to 400 degrees or even 375 degrees.
- Move the chicken away from the heat: If your oven has multiple racks, try placing the chicken on a lower rack to avoid direct heat.
- Use a baking sheet with a lip: This helps prevent dripping fat from burning on the bottom of the oven, which can also lead to burnt chicken.
(Part 8) Chicken Breast Variations: Beyond the Basics
Okay, so you've mastered the basic chicken breast recipe. Now, let's get a little creative!
Lemon Herb Chicken: A Refreshing Delight
Combine lemon juice, olive oil, fresh thyme and rosemary, garlic, and salt and pepper. Marinate the chicken breasts for at least 30 minutes, then bake in a preheated oven at 425 degrees for 20-25 minutes. Serve with roasted vegetables or a green salad.
Garlic Parmesan Chicken: A Classic Italian Favorite
Mix olive oil, minced garlic, grated Parmesan cheese, dried oregano, and salt and pepper. Rub the mixture onto the chicken breasts, then bake in a preheated oven at 425 degrees for 20-25 minutes. Serve with pasta or mashed potatoes.
Honey Garlic Chicken: Sweet and Savory Perfection
Combine honey, soy sauce, garlic, ginger, and a pinch of red pepper flakes. Marinate the chicken breasts for at least 30 minutes, then bake in a preheated oven at 425 degrees for 20-25 minutes. Serve with rice or quinoa.
(Part 9) Chicken Breast Adventures: Beyond the Oven
You're a pro at oven-baked chicken breast. But what about other cooking methods?
pan-seared chicken: A Quick and Easy Option
This is a quick and easy way to cook chicken breasts. Heat a pan over medium-high heat and add olive oil. Sear the chicken breasts for 3-4 minutes per side, then reduce the heat to medium-low and cook for an additional 5-7 minutes, or until cooked through.
grilled chicken: Smoky Flavor
Grilling is a great way to add smoky flavor to your chicken breasts. Preheat your grill to medium-high heat. Season the chicken breasts with salt, pepper, and any other desired spices. Grill for 5-7 minutes per side, or until cooked through.
Chicken Stir-Fry: A Flavorful and Healthy Meal
This is a quick and easy way to make a flavorful and healthy meal. Cut the chicken breasts into bite-sized pieces. Heat a pan over medium-high heat and add olive oil. Add the chicken and cook for 5-7 minutes, or until cooked through. Add your favorite vegetables and stir-fry for a few more minutes.
(Part 10) Storage and Leftovers: Make the Most of Your Chicken
You've cooked a beautiful batch of chicken breast, and maybe you have some leftovers. Don't let those precious bits go to waste!
Storage Time: Keeping It Fresh
Let the chicken cool completely, then store it in an airtight container in the refrigerator for up to 3-4 days.
Leftover Magic: Creative Ways to Use Leftover Chicken
leftover chicken breast is a blank canvas for culinary inspiration.
Here are some ideas:
- chicken salad sandwich: Combine cooked chicken with mayonnaise, celery, onion, and herbs. Serve on bread or crackers.
- chicken noodle soup: Add cooked chicken to your favorite chicken noodle soup recipe for extra flavor and protein.
- chicken tacos: Shred cooked chicken and use it to make delicious tacos. Add your favorite toppings like salsa, sour cream, and cheese.
- Chicken stir-fry: Chop leftover chicken and add it to a stir-fry with your favorite vegetables and sauce.
- Chicken pizza: Use leftover chicken as a topping for pizza. Add your favorite cheese and vegetables.
FAQs: Your Chicken Breast Queries Answered
Let's tackle those burning questions about chicken breast.
1. Can I bake chicken breast at a lower temperature?
You can, but it will take longer. It might also result in a less crisp exterior and a slightly drier breast. If you are working with a lower temperature, it is crucial to monitor your chicken closely.
2. How do I know if my chicken is cooked through?
Use a meat thermometer! It's the most reliable way to ensure your chicken is cooked to a safe internal temperature of 165 degrees Fahrenheit (74 degrees Celsius).
3. Can I freeze cooked chicken breast?
Absolutely! Once the chicken has cooled completely, place it in a freezer-safe bag or container and freeze for up to 2-3 months. When you're ready to use it, thaw it in the refrigerator overnight.
4. Can I add other ingredients to the oven while baking chicken breast?
You can! For example, you can add vegetables like potatoes, onions, or carrots around the chicken. Just make sure they're spread out evenly on the baking sheet and don't overcrowd the chicken.
5. What if my chicken breasts are different sizes?
Try to arrange the smaller breasts around the larger ones, allowing them to cook faster without overcooking. You can also use a meat thermometer to check for doneness.
Remember, cooking is about experimenting and having fun. Don't be afraid to try new things and adjust recipes to your liking. And most importantly, enjoy the delicious results!
Everyone is watching

Corn on the Cob: The Ultimate Guide to Perfectly Cooked Ears
Healthy MealsAh, corn on the cob. Just the name evokes images of sunny days, barbecues, and that sweet, juicy flavour that ...

Scallops: The Ultimate Guide to Perfect Cooking
Healthy MealsAh, scallops. Those delicate, sweet, and utterly delicious morsels of the sea. They hold a special place in my...

Spaghetti Squash: The Ultimate Guide to Cooking and Serving
Healthy MealsRemember that time you saw spaghetti squash at the supermarket, looking all bumpy and strange, and thought, "W...

Salmon Cooking Times: Perfect Guide for Every Recipe
Healthy MealsLet me tell you, cooking salmon is an art form. It's all about getting that perfect balance: juicy and tender,...

Ham Cooking Time: How Long to Bake, Smoke, or Boil a Delicious Ham
Healthy MealsAh, ham. It's a classic, isn't it? A real crowd-pleaser, especially around holidays. And when done right, it'...