Let’s be honest, chicken breasts are a kitchen staple. Versatile, quick to cook, and a great source of protein, they’re a winner all round. But there’s nothing worse than a dry, overcooked chicken breast, right? That’s where this guide comes in. We’re diving deep into the world of baking chicken breasts at 400 degrees Fahrenheit (200 degrees Celsius), exploring the ideal timings, tips, and tricks for achieving that juicy, succulent result we all crave. Buckle up, it’s going to be a delicious journey!
(Part 1) Setting the Stage: Understanding the Basics
First things first, let’s talk about the oven. It’s our trusty sidekick in this culinary journey. We’re aiming for a hot oven, around 400 degrees Fahrenheit (200 degrees Celsius). This heat allows for a quick, even cooking process, ensuring the chicken breast stays moist and tender.
1.1. The Importance of Preheat
We’ve all been there – you’re in a rush, dinner needs to be on the table pronto, and you toss that raw chicken breast into the cold oven. Big mistake! Preheating your oven is crucial. It allows the heat to distribute evenly, ensuring that the chicken cooks evenly throughout. Think of it like this: imagine trying to bake a cake in a cold oven. It wouldn’t turn out well, would it? The same principle applies to chicken breasts.
1.2. Choosing the Right Chicken
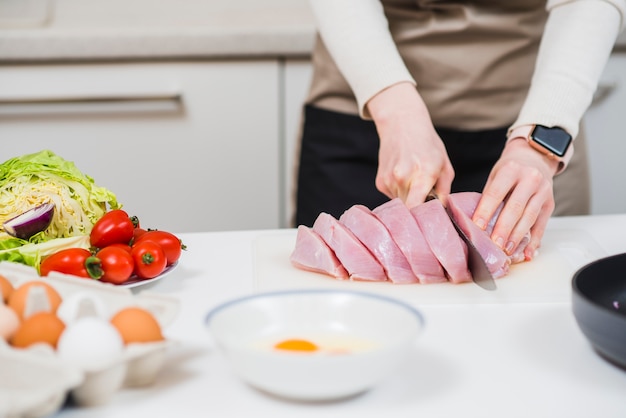
Choosing the right chicken breasts is an art form. We want those plump, juicy beauties, not the skinny, dry ones. If you’re at the supermarket, give those breasts a good look. We’re after breasts that are firm to the touch, with a nice pale colour. Avoid any that seem discoloured or have a slimy texture. It's a good idea to check the use-by date too, just to be safe.
1.3. Size Matters: Knowing Your Chicken
The chicken breast – a chameleon of sizes! It’s essential to understand that the size of your chicken breast will determine the baking time. A petite little one will be ready quicker than a hefty chunk. I’ve learned this the hard way – a few times, I ended up with a chicken breast that was burnt on the outside and raw in the middle. Not a good look! So, we’ll talk about the ideal baking times based on the size of your chicken breast.
(Part 2) The Baking Time Breakdown
Right, we’re at the heart of the matter – the baking times. This is where things get real. Remember, these are just guidelines. Every oven is different, so keep a close eye on your chicken. You know, a little peek here and there won't hurt!
2.1. Thin Chicken Breasts (Under 1 Inch Thick):
These little guys are the quickest to cook. You’re looking at about 15-20 minutes at 400 degrees Fahrenheit. But don’t get complacent! Keep an eye on them, and they’ll be ready in a flash. You can also use a meat thermometer to check if they’re cooked through. Remember, the internal temperature should reach 165 degrees Fahrenheit (74 degrees Celsius) for safe, delicious eating.
2.2. Medium Chicken Breasts (1-1.5 Inches Thick):
This is where things get interesting. The perfect sweet spot! Aim for 20-25 minutes in the oven. Don’t forget to use a meat thermometer to check the internal temperature – it should hit 165 degrees Fahrenheit (74 degrees Celsius) for safe, delicious eating. A meat thermometer is your best friend when it comes to chicken breasts. It takes the guesswork out of cooking and ensures you get perfectly cooked chicken every time.
2.3. Thick Chicken Breasts (Over 1.5 Inches Thick):
Now, these big boys need a little more TLC. You’ll want to bake them for 25-30 minutes. Make sure you flip them halfway through to ensure even cooking. Again, keep that thermometer handy – it’s your best friend in this situation. Remember, a little patience goes a long way when cooking thicker chicken breasts. It’s worth waiting a little longer to ensure they’re cooked to perfection.
(Part 3) Tips and Tricks for perfect chicken Breasts
Now, let’s talk about some handy tips and tricks to ensure those chicken breasts come out perfectly every time.
3.1. The Magic of Brining
Brining, my friends, is a game changer. This simple technique involves soaking the chicken breasts in a salty solution for a few hours before cooking. It helps to retain moisture, resulting in a juicier, more flavorful chicken breast. Don’t worry, it’s easier than it sounds. Just mix salt and water, submerge the chicken, and let it hang out in the fridge. You can even add some herbs and spices for extra flavour. I like to add a bay leaf, some peppercorns, and a few sprigs of thyme to my brine. It gives the chicken a beautiful depth of flavour.
3.2. The Importance of Seasoning
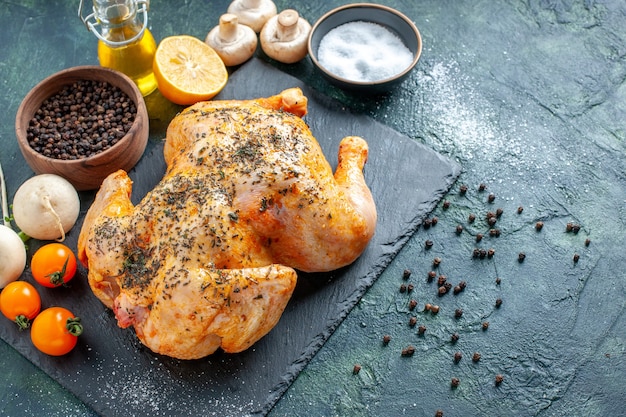
Don’t neglect the seasoning! A well-seasoned chicken breast is a happy chicken breast. Don’t be afraid to experiment. Use a simple salt and pepper combination, or go wild with your favourite herbs and spices. Personally, I love a good blend of paprika, garlic powder, and onion powder. It adds a lovely warmth and depth of flavour to the chicken. But if you’re feeling adventurous, try a Moroccan spice blend or a citrusy herb mix. The possibilities are endless!
3.3. The All-Important Meat Thermometer
No matter what you do, don’t skip the meat thermometer. It’s your ultimate tool for achieving perfectly cooked chicken. Stick it into the thickest part of the chicken breast, avoiding any bone. A temperature of 165 degrees Fahrenheit (74 degrees Celsius) indicates that the chicken is cooked through and safe to eat. You can find meat thermometers at most supermarkets and online. They’re a relatively inexpensive investment that will pay off in delicious, perfectly cooked chicken.
(Part 4) Baking with Confidence
Okay, now we’re ready to put our knowledge into practice. Let’s bake some chicken breasts with confidence.
4.1. Prepping the Chicken
First things first, we need to prepare our chicken. Pat those breasts dry with paper towels. This removes any excess moisture, which can lead to steaming and prevent browning. Now, season them liberally with your chosen spices. Remember, you can never have too much flavour!
4.2. Baking Time!
Time to get those chicken breasts in the oven! Preheat your oven to 400 degrees Fahrenheit (200 degrees Celsius). Place the chicken breasts on a baking sheet lined with parchment paper. This prevents sticking and makes for easy cleanup. Bake for the recommended time based on the thickness of your chicken breasts, remembering to flip them halfway through.
4.3. Checking for Doneness
As the chicken cooks, keep a close eye on it. The juices should run clear when you poke it with a fork. Use that meat thermometer to make sure it's reached an internal temperature of 165 degrees Fahrenheit (74 degrees Celsius). When it’s done, take those beauties out of the oven and let them rest for a few minutes before slicing and serving. This allows the juices to redistribute, resulting in a more tender and flavorful chicken breast.
(Part 5) Beyond the Basics: Exploring Different Techniques
Now, let’s delve into some additional techniques that can elevate your chicken breast game.
5.1. The Power of Marinades
Marinades are like a magic potion for chicken. They infuse the meat with flavour and help to keep it moist. You can use store-bought marinades, but whipping up your own is incredibly easy. Simply combine your favourite ingredients – soy sauce, lemon juice, olive oil, garlic, herbs – and let the chicken soak in it for a few hours. I like to marinate my chicken breasts in a blend of soy sauce, honey, ginger, and garlic. It gives them a beautiful, sweet and savory flavour.
5.2. The Art of Pan-Searing
Pan-searing is a great way to add a nice crust to your chicken breasts. After you’ve baked them in the oven, simply heat a pan over medium-high heat and sear the breasts for a minute or two on each side. This creates a delicious, caramelized texture. Use a heavy-bottomed pan for best results. It will distribute heat evenly and prevent the chicken from sticking.
5.3. Experimenting with Flavors
Don’t be afraid to get creative with your seasonings! You can go classic with salt and pepper, or try something more adventurous like a Moroccan spice blend or a citrusy herb mix. The possibilities are endless. I've even experimented with a blend of smoked paprika, cumin, and chili powder. It gives the chicken a wonderful smoky flavor.
(Part 6) Serving Suggestions
Now, let’s talk about how to enjoy those beautifully baked chicken breasts. The world is your oyster!
6.1. The Classic Combo: Roasted Vegetables
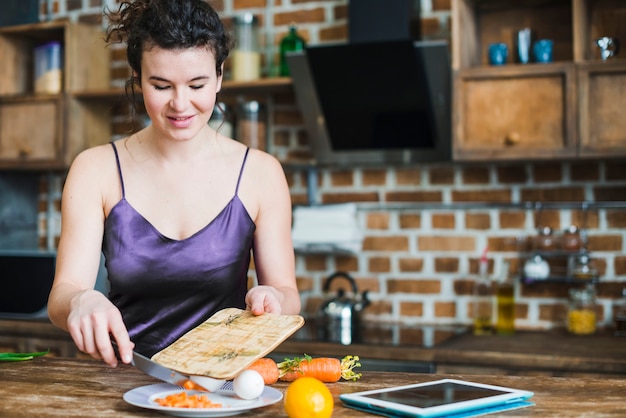
You can’t go wrong with roasted vegetables. The flavours blend perfectly with chicken. Simply toss your favourite veggies – broccoli, carrots, Brussels sprouts, asparagus – with olive oil, salt, and pepper. Spread them on a baking sheet and roast them alongside your chicken. For a bit of extra flavour, add some herbs like rosemary, thyme, or oregano to the roasting pan.
6.2. A Touch of Mediterranean Flair
Add a touch of Mediterranean flair with a simple salad. Combine chopped tomatoes, cucumbers, red onions, and feta cheese. Drizzle with olive oil and lemon juice, and sprinkle with fresh herbs like oregano and basil. A delightful combination with those baked chicken breasts. For a more substantial salad, add some grilled chicken or chickpeas.
6.3. The comfort food Classic: Mac and Cheese
For a comforting meal, pair your chicken breasts with mac and cheese. It’s the perfect combination for a cozy night in. You can find countless recipes online, from classic to gourmet. I love to make a homemade mac and cheese with a creamy béchamel sauce and a sprinkle of sharp cheddar cheese. It’s the perfect complement to the baked chicken breasts.
(Part 7) Making It a Meal
Now, let’s talk about how to turn those baked chicken breasts into a complete meal.
7.1. The Power of a Salad
A fresh salad is a must-have addition to your chicken breast meal. It adds a burst of freshness and texture. You can choose from a variety of greens, vegetables, fruits, and dressings to make it your own. I love a simple salad with mixed greens, cherry tomatoes, cucumber, red onion, and a light vinaigrette dressing.
7.2. The Starch Advantage
Don’t forget the starch! It rounds out your meal and provides a source of energy. Go for a classic like mashed potatoes, rice, or pasta. For a healthier option, try quinoa or couscous.
7.3. The Finishing Touches
To finish off your meal, consider adding a side dish. A simple green bean casserole, a creamy mushroom soup, or a refreshing fruit salad are all great options. For a special occasion, you could even add a dessert like a fruit crumble or a chocolate mousse.
(Part 8) FAQs
You’ve got questions, I’ve got answers. Let’s dive into some frequently asked questions.
8.1. Can I bake chicken breasts from frozen?
It’s possible to bake chicken breasts from frozen, but it will take longer. It’s best to thaw them in the refrigerator overnight or use the defrost setting on your microwave. Then, bake as usual. Baking chicken breasts from frozen is not recommended as it can lead to uneven cooking and a dry texture.
8.2. How long can I store baked chicken breasts in the fridge?
You can store baked chicken breasts in the refrigerator for 3-4 days. Make sure you wrap them tightly in plastic wrap or aluminum foil to prevent freezer burn. You can also freeze baked chicken breasts for up to 3 months. Just make sure to let them cool completely before freezing.
8.3. Can I bake chicken breasts with the skin on?
Absolutely! Baking chicken breasts with the skin on will help to keep them moist and give them a crispy texture. Just make sure to bake them for a few minutes longer. If you’re baking chicken breasts with the skin on, it’s a good idea to score the skin with a knife to help the fat render and crisp up.
8.4. What are some good ways to reheat baked chicken breasts?
You can reheat baked chicken breasts in the microwave, oven, or skillet. If you’re using the microwave, make sure to cover the chicken with a damp paper towel to prevent it from drying out. If you’re using the oven, reheat it at 350 degrees fahrenheit (175 degrees Celsius) for about 15-20 minutes. If you’re using a skillet, heat it over medium heat with a little bit of oil and cook the chicken for a few minutes on each side.
8.5. What are some other ways to cook chicken breasts?
Chicken breasts can be cooked in a variety of ways. You can pan-fry, grill, or roast them. They’re also great for making stir-fries, salads, and sandwiches. Get creative and experiment with different cooking methods and recipes. I particularly enjoy pan-frying chicken breasts with a bit of lemon and garlic. It’s a quick and easy way to make a delicious meal.
(Part 9) Final Thoughts
There you have it! You’re now armed with the knowledge and skills to bake chicken breasts like a pro. Remember, practice makes perfect. Don’t be afraid to experiment and find what works best for you. Happy cooking!
(Part 10) Additional Tips and Resources
To further enhance your chicken breast baking skills, here are some additional tips and resources:
10.1. Using a Baking Sheet
Using a baking sheet that is large enough to accommodate the chicken breasts is important. This will ensure that the chicken cooks evenly and doesn’t crowd the oven. A rimmed baking sheet is ideal as it will prevent any juices from spilling over.
10.2. Choosing the Right Oven Rack
For best results, it’s recommended to place the baking sheet on the middle rack of the oven. This will ensure that the chicken breasts are exposed to even heat. Avoid placing the chicken breasts on a rack that is too high or too low in the oven, as this can lead to uneven cooking.
10.3. chicken breast baking time Chart
Here’s a handy chart summarizing the baking times for different sizes of chicken breasts at 400 degrees Fahrenheit:
| Chicken Breast Thickness | Baking Time |
|---|---|
| Under 1 inch | 15-20 minutes |
| 1-1.5 inches | 20-25 minutes |
| Over 1.5 inches | 25-30 minutes |
Remember, these are just guidelines. Always check the internal temperature of the chicken with a meat thermometer to ensure it is cooked through.
(Part 11) Beyond the Oven: Exploring Other Cooking Methods
While baking is a great way to cook chicken breasts, it’s not the only option! Here are a few other methods to explore:
11.1. Pan-Frying
Pan-frying is a quick and easy way to cook chicken breasts. Simply heat a pan over medium-high heat with a little bit of oil. Then, add the seasoned chicken breasts and cook for about 5-7 minutes per side, or until cooked through. For best results, use a heavy-bottomed pan to prevent the chicken from sticking.
11.2. Grilling
Grilling is another great way to cook chicken breasts. Preheat your grill to medium heat. Then, place the seasoned chicken breasts on the grill and cook for about 6-8 minutes per side, or until cooked through. For a smoky flavor, try grilling over charcoal.
11.3. Roasting
Roasting is a great way to cook chicken breasts if you want a more hands-off approach. Preheat your oven to 400 degrees Fahrenheit (200 degrees Celsius). Then, place the seasoned chicken breasts on a baking sheet and roast for about 20-25 minutes, or until cooked through. roasting chicken breasts is a great way to make a meal for a crowd.
With this comprehensive guide, you’re ready to tackle any chicken breast recipe with confidence. Remember, the key is to practice, experiment, and find what works best for you. Happy cooking!
Everyone is watching

Corn on the Cob: The Ultimate Guide to Perfectly Cooked Ears
Healthy MealsAh, corn on the cob. Just the name evokes images of sunny days, barbecues, and that sweet, juicy flavour that ...

Perfect Pork Roast Oven Cooking Time: A Guide to Delicious Results
Healthy MealsThere's something truly satisfying about a perfectly roasted pork. The aroma alone is enough to make your mout...

Ham Cooking Time: How Long to Bake, Smoke, or Boil a Delicious Ham
Healthy MealsAh, ham. It's a classic, isn't it? A real crowd-pleaser, especially around holidays. And when done right, it'...

Scallops: The Ultimate Guide to Perfect Cooking
Healthy MealsAh, scallops. Those delicate, sweet, and utterly delicious morsels of the sea. They hold a special place in my...

Spaghetti Squash: The Ultimate Guide to Cooking and Serving
Healthy MealsRemember that time you saw spaghetti squash at the supermarket, looking all bumpy and strange, and thought, "W...