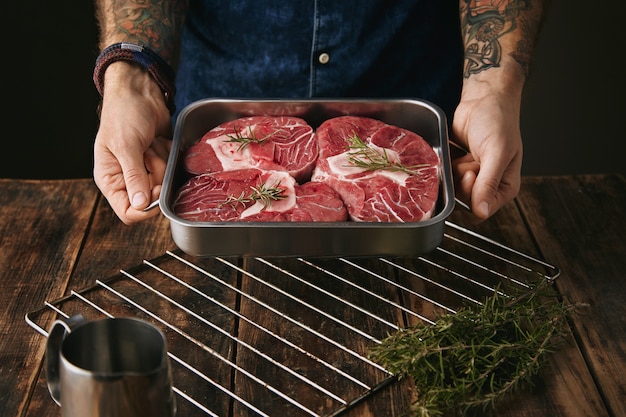
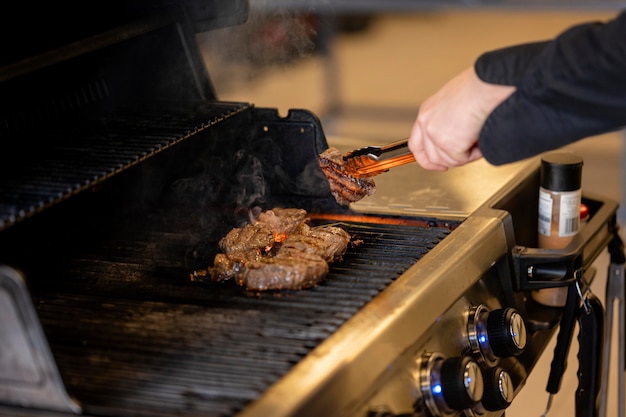
Let's talk about steak, folks. The kind of steak that sends your taste buds into orbit, the kind that leaves you craving another bite long after the plate is empty. You know, the kind that's juicy, tender, and perfectly cooked with a beautiful, crispy sear. And guess what? You can achieve steak nirvana with a simple, trusty cast iron skillet.
I've been cooking with cast iron for years, and I've learned a few things. It's been a journey, with some burnt offerings along the way, but I've also had some absolute triumphs. So, whether you're a grill master or a kitchen newbie, I'm going to share my cast iron steak wisdom with you, and together, we'll conquer those sizzling, flavorful steaks.
(Part 1) Choosing Your Cast Iron

The Cast Iron Chronicles: A Journey of Flavor
Think of choosing the right cast iron as finding the perfect culinary companion. It's not just about the pan; it's about the stories it will hold, the meals it will witness, and the legacy it will build. My first cast iron was a hand-me-down from my grandfather, seasoned with years of use. It was a bit rough around the edges, but it had character, and it taught me the importance of caring for these sturdy workhorses.
Eventually, I realized I needed a pan of my own, one that I could season and nurture, one that would grow with my cooking journey.
Finding Your Perfect Cast Iron Match
The cast iron world is vast, from the classic Lodge to premium brands like Le Creuset. But don't get overwhelmed! Here's what to keep in mind:
- Size: It depends on your cooking needs. A 10-inch skillet is perfect for one or two steaks. For larger gatherings, a 12-inch or even a larger one might be better.
- Handle: Choose a handle that feels comfortable in your hand. Some have a single, long handle, while others have a double handle for a sturdier grip.
- Weight: Cast iron is heavy, so if you plan to move it around a lot, a lighter option might be better. But the weight is also part of what makes cast iron so great for even heat distribution.
Once you've found your match, give it a good cleaning to remove any factory residue.
Seasoning: The Cast Iron's Protective Layer
Seasoning is like giving your cast iron a protective coat of armor. It's a simple process, but it's crucial. Think of it as building a non-stick barrier that will get better over time, just like a good friendship. Here's how I do it:
- Wash and Dry: Wash the cast iron with hot, soapy water. Dry it thoroughly. You want it bone dry before starting the seasoning process.
- Thin Coat of Oil: Rub a thin layer of cooking oil, like canola or grapeseed, all over the pan's surface, including the sides and bottom.
- Bake it: Place the pan in an oven preheated to 350°F (175°C) for an hour. This cures the oil, creating that protective coating.
Repeat this process a few times, and your cast iron will be ready for its first culinary adventure. Over time, it will develop a beautiful patina, a natural layer of seasoning that enhances its non-stick properties. Treat your cast iron with care, and it will reward you with years of delicious cooking.
(Part 2) Choosing Your Steak: The Foundation of Flavor

The Cut Makes the Difference: A Matter of Preference
The quality of your steak is crucial. You can't have a good steak without a good cut of meat. This is where things get personal. I have my preferences, but ultimately, it's about finding what you love.
For a steak bursting with juicy flavor, go for a cut with good marbling, like a ribeye, new york strip, or filet mignon.
If you're looking for something leaner, consider a flank steak or skirt steak.
Choosing the Right Thickness: Matching the Cook to the Cut
The thickness of your steak matters.
For a quick sear, a thinner steak, around 1 inch thick, is great. It delivers a beautiful crust and juicy interior in a flash.
For a steak that you want to cook to a perfect medium-rare, go for a thicker cut, 1.5 to 2 inches thick. This gives you more time to achieve that ideal doneness.
Steak Sizes: A Guide to Portioning
Steaks usually range from about 8 to 16 ounces. A good rule of thumb is to go for 10 to 12 ounces per person. You'll be satisfied, but not overstuffed.
Storing Your Steak: Preserving Freshness
Once you've got your perfect steak, store it properly. Keep it refrigerated, ideally on a plate or in a container, covered with plastic wrap. Avoid freezing it; it can affect the texture of the meat.
Take your steak out of the fridge 30 minutes before cooking. This allows it to come to room temperature, ensuring even cooking.
(Part 3) The Art of Seasoning: Enhancing Natural Flavor

Simple is Best: Harnessing the Power of Basics
I'm a firm believer in keeping things simple when it comes to seasoning. You don't need a million spices to bring out the natural flavor of the steak. Let the meat shine!
Salt and Pepper: The Power Duo
Salt and freshly ground black pepper are your best friends. Salt enhances the meat's flavor and helps draw out moisture, while pepper adds warmth and complexity.
Seasoning Before or After Cooking? A Matter of Preference
This is a matter of personal preference, but I like to season my steaks before cooking. It allows the salt to penetrate the meat and develop flavor.
My Seasoning Ritual: A Simple Approach
Here's my simple seasoning routine: I liberally sprinkle salt and pepper all over the steak, ensuring every surface is covered.
Then, I pat it with my hands to ensure even distribution of seasoning.
Just before cooking, I give it another light dusting of salt. This helps create a beautiful crust on the outside.
Beyond Salt and Pepper: Exploring Flavor Options
If you want to add a bit more flavor, experiment with other spices like garlic powder, onion powder, paprika, or even a touch of chili powder. Just remember, less is more.
(Part 4) The Cast Iron Steak Prep: Setting the Stage for Success
Pre-Heating: The Key to a perfect sear
Here's a crucial tip: a hot pan is the key to a perfectly seared steak. Heat your cast iron skillet over medium-high heat for 5 to 7 minutes. You want the pan to be hot, but not smoking.
Oil Up: Adding that Extra Magic
Once your pan is hot, add a tablespoon or two of oil. I like to use a high-heat oil like avocado oil or grapeseed oil. They have a high smoke point, so they won't burn easily.
Adding the Steak: A Gentle Touch
When the oil is shimmering, gently place your steak in the pan. You'll hear a satisfying sizzle as it hits the hot oil.
Don't crowd the pan. If you're cooking multiple steaks, cook them in batches to ensure they have enough space to sear properly.
(Part 5) mastering the sear: The Art of Patience and Timing
Don't Touch It: Patience is Key
This is where patience comes in. Let the steak cook undisturbed for 3 to 4 minutes per side. This allows the steak to develop a beautiful crust.
Flipping: The Art of Timing
After 3 to 4 minutes, carefully flip the steak over using tongs. Be gentle! You don't want to pierce the meat, as this can lead to moisture loss.
Achieving Even Browning: Ensuring Consistent Flavor
After flipping the steak, cook for another 3 to 4 minutes per side. At this point, you can add any additional seasonings you like, like a sprig of rosemary or a clove of garlic.
(Part 6) The Finishing Touch: Resting for Perfection
The Importance of Resting: A Critical Step
Once your steak is cooked to your liking, it's time to let it rest. This allows the juices to redistribute throughout the meat, resulting in a more tender and flavorful steak.
Resting Time: A Few Minutes for Enhanced Flavor
Transfer the steak to a cutting board and let it rest for 5 to 10 minutes before slicing and serving.
Covering the Steak: Trapping Heat and Moisture
To keep the steak warm, cover it loosely with aluminum foil. This will help to trap the heat and prevent it from drying out.
(Part 7) Gauging Your steak doneness: A Matter of Preference and Technique
Doneness: A Matter of Taste: Finding Your Ideal Level
The perfect level of doneness is a matter of personal preference. Here's a guide to different doneness levels and what to expect:
| Doneness | internal temperature (°F) | Description |
|---|---|---|
| Rare | 125-130°F | Cool center, red throughout |
| Medium-Rare | 130-135°F | Warm center, mostly red |
| Medium | 135-140°F | Warm center, pink throughout |
| Medium-Well | 140-145°F | Slightly warm center, mostly brown |
| Well-Done | 145-150°F | Hot center, completely brown |
Methods for Checking Doneness: Finding the Right Technique
There are several ways to check the doneness of your steak. Here are a few:
- Touch Method: Gently press the center of the steak. If it feels soft and squishy, it's rare. If it feels firm and springy, it's well-done. This method takes practice, but it can be a useful tool.
- meat thermometer: This is the most accurate way to check doneness. Insert the thermometer into the thickest part of the steak, making sure it doesn't touch any bone.
(Part 8) Cast Iron Steak Garnishes: Adding the Final Touches
Adding that Final Touch: Elevating the Flavor Experience
Once your steak is cooked to perfection, you've got a beautiful canvas to work with. Garnishes can really elevate your dish, adding a burst of color, aroma, and flavor.
Classic Additions: A Time-Tested Approach
- Fresh Herbs: A sprig of rosemary, thyme, or parsley adds a beautiful aroma and a touch of fresh flavor.
- Garlic Butter: A knob of melted butter infused with garlic, a sprinkle of parsley, and a pinch of salt is a classic and delicious accompaniment. It adds richness and savory notes.
- Lemon Wedge: A simple lemon wedge adds a touch of acidity and brightens up the flavor of the steak.
More Adventurous Options: Exploring New flavor combinations
For a more adventurous approach, try these garnishes:
- Blue Cheese Crumble: A sprinkle of blue cheese crumbles adds a pungent and salty flavor that contrasts beautifully with the richness of the steak.
- caramelized onions: Sweet and savory caramelized onions add a depth of flavor that compliments the steak perfectly. They provide a wonderful balance of sweet and savory.
- Roasted Vegetables: Roasted vegetables, like asparagus, Brussels sprouts, or broccoli, add a healthy and flavorful side dish. They offer a burst of fresh, roasted flavor.
(Part 9) The Cast Iron Aftercare: Caring for Your Culinary Companion
Cleaning Up: The Right Way to Care for Your Cast Iron
The beauty of cast iron is that it's practically indestructible. But it needs a bit of love and care.
After cooking, let the pan cool down completely before washing it.
Wash it with hot, soapy water and a scrub brush. Avoid using soap that's harsh or abrasive.
Rinse the pan thoroughly and dry it completely with a towel.
Keeping Your Cast Iron in Tip-Top Shape: Ensuring Long-Lasting Use
Once the pan is dry, rub a thin layer of cooking oil all over the surface. This will help to maintain the seasoning and prevent rust.
Store your cast iron in a dry place, away from direct sunlight.
(Part 10) Cast Iron steak faqs: Answering Common Questions
1. What happens if I overcook my steak?
If you overcook your steak, it will be tough and dry. The best way to prevent this is to use a meat thermometer to check the internal temperature of the steak.
2. Can I use cast iron on the stovetop and in the oven?
Yes, cast iron is a versatile cooking tool. You can use it on the stovetop, in the oven, or even over a campfire.
3. What if my cast iron starts to rust?
Rust is a natural occurrence with cast iron. To remove rust, scrub the pan with a wire brush and then re-season it.
4. How often should I season my cast iron?
You should season your cast iron after each use. This will help to maintain the protective layer and prevent rust.
5. Can I cook other things in my cast iron besides steak?
Absolutely! You can cook a wide variety of dishes in your cast iron, from breakfast hash to roasted vegetables. It's a truly versatile piece of cookware.
Everyone is watching

Corn on the Cob: The Ultimate Guide to Perfectly Cooked Ears
Healthy MealsAh, corn on the cob. Just the name evokes images of sunny days, barbecues, and that sweet, juicy flavour that ...

Perfect Pork Roast Oven Cooking Time: A Guide to Delicious Results
Healthy MealsThere's something truly satisfying about a perfectly roasted pork. The aroma alone is enough to make your mout...

Ham Cooking Time: How Long to Bake, Smoke, or Boil a Delicious Ham
Healthy MealsAh, ham. It's a classic, isn't it? A real crowd-pleaser, especially around holidays. And when done right, it'...

Scallops: The Ultimate Guide to Perfect Cooking
Healthy MealsAh, scallops. Those delicate, sweet, and utterly delicious morsels of the sea. They hold a special place in my...

Spaghetti Squash: The Ultimate Guide to Cooking and Serving
Healthy MealsRemember that time you saw spaghetti squash at the supermarket, looking all bumpy and strange, and thought, "W...
