So you've got your hands on a beautiful brisket, and you're ready to embark on the journey of transforming it into a culinary masterpiece. You've heard all the whispers about brisket being the king of barbecue, the ultimate symbol of slow-cooked goodness, and you're eager to taste the magic yourself. But before you even think about firing up the grill, you need to tackle the most crucial element: the cooking time.
Now, let me be upfront, brisket cooking is not for the faint of heart. It demands patience, a certain level of dedication, and the ability to resist the urge to peek into the oven every five minutes. But trust me, the reward is well worth the effort. That melt-in-your-mouth tenderness, the smoky aroma that permeates your kitchen, the sheer joy of witnessing your family and friends devour every morsel – that's what makes brisket so special.
In this comprehensive guide, I'm going to take you on a step-by-step journey through the entire process of cooking a brisket in the oven at 350°F. We'll cover everything from selecting the perfect brisket to achieving that coveted bark and fall-off-the-bone tenderness. So, grab a comfy seat, settle in, and let's get cooking!
(Part 1) The Holy Trinity: Brisket, Oven, and Time
Let's face it, when it comes to mastering the art of brisket, the oven is your trusty companion. It provides a consistent and controlled environment, allowing you to create that magical combination of low and slow heat, the secret to unlocking the true potential of brisket. And as for time, well, that's the magic ingredient. You'll need to embrace patience, because brisket takes its sweet time, a leisurely stroll through the culinary landscape.
Choosing Your Weapon: The Brisket
First things first, you need to choose your brisket. This isn't just a quick trip to the supermarket meat counter. You need to find a high-quality brisket, one that's going to deliver on the promise of juicy, flavorful perfection. Here's what to look for:
- A thick layer of fat: This is non-negotiable. The fat is what gives you that luscious, melt-in-your-mouth texture. As it renders down, it keeps the meat moist and infuses it with incredible flavor. Think of it as the secret ingredient to brisket bliss.
- Even marbling: Look for a brisket with fat evenly distributed throughout, creating a harmonious balance of lean and fat. This ensures a more consistent flavor profile and prevents dry patches.
- A good weight: For a large gathering, aim for a 10-12 pound brisket. It's a hefty beast, but it's going to feed a crowd and leave everyone satisfied. For smaller groups, you can always trim the brisket down or opt for a smaller cut.
When I'm choosing a brisket, I like to take my time, giving it a thorough inspection. I run my hand over the surface, feel its weight, and even take a sniff. It's part of the ritual, a way to connect with the ingredient and choose the perfect one for my culinary adventure.
The Oven: Your Faithful Companion
Now, about that faithful companion, the oven. 350°F is your target temperature, and maintaining consistency is crucial. A good oven thermometer is an invaluable tool, ensuring you stay within the sweet spot.
But here's the thing: the oven isn't just about heat, it's about space. You need enough room to comfortably accommodate your brisket, ensuring it has adequate airflow and doesn't get cramped. This is where your oven size comes into play.
Timing is Everything: The Time Factor
Okay, so we've got our brisket and our oven, but how much time are we talking? Well, that depends on the size of your brisket and your desired level of tenderness.
A good rule of thumb is to allow about 1.5 to 2 hours of cooking time per pound of brisket. So, a 10-pound brisket will take roughly 15 to 20 hours.
Yes, you read that correctly. 20 hours. It's a long commitment, but believe me, it's worth every minute. You can't rush perfection, and brisket is the embodiment of that truth. Embrace the slow, deliberate process, and you'll be rewarded with a culinary masterpiece.
(Part 2) The Prep Work: Getting Your Brisket Ready for the Oven
Alright, you've got your brisket, you've got your oven, and you've got the time. Now it's time to roll up your sleeves and get down to the nitty-gritty of prepping your brisket.
The Trim: It's All About the Fat
First things first, you need to trim the brisket. Now, I know some purists advocate for leaving all the fat intact, but I prefer a bit of trimming. This helps ensure the brisket cooks evenly and prevents excessive fat accumulation.
You can use a sharp knife to remove the excess fat, or you can ask your butcher to do it for you. I'm a hands-on kind of cook, so I usually trim the fat myself. The key is to leave a nice layer of fat on top of the brisket, the secret to juicy, flavorful perfection.
Seasoning Your Brisket: A Symphony of Flavour
Now comes the fun part: seasoning your brisket. This is your opportunity to unleash your creativity and experiment with different flavor profiles. I'm a simple soul, so I usually stick to salt and pepper, but you can add other spices like garlic powder, onion powder, paprika, or chili powder to add depth and complexity.
But here's a crucial piece of advice: don't overseason! Too much seasoning can overwhelm the natural flavor of the brisket. I usually use about 1 tablespoon of salt and 1/2 tablespoon of black pepper for a 10-pound brisket.
The Rub: A Magical Touch
For those seeking a little extra magic, consider incorporating a dry rub into your brisket routine. There are countless recipes online, allowing you to find a rub that perfectly aligns with your taste buds. Just remember to apply the rub evenly to all sides of the brisket, ensuring it's well-coated.
My personal favourite rub is a blend of smoked paprika, garlic powder, onion powder, brown sugar, and black pepper. It infuses the brisket with a smoky aroma and a touch of sweetness, creating a flavor symphony that will tantalize your taste buds.
(Part 3) Cooking the Brisket: A Journey of Patience

Alright, you've trimmed, seasoned, and you're ready to embark on the journey of cooking your brisket. Get ready, it's going to be a long and rewarding ride.
The First Few Hours: Building the Foundation
Preheat your oven to 350°F and place the brisket on a roasting rack in a large roasting pan. The rack elevates the brisket, promoting even cooking and preventing it from sitting in its own juices. You can also add a little bit of water to the bottom of the pan to create steam and help keep the brisket moist.
The first few hours of cooking are crucial for building the foundation of tenderness and flavour. Resist the urge to open the oven door too often, as this will cause the temperature to fluctuate and affect the cooking time.
The Midpoint: Time for a Wrap
After about 4 to 6 hours of cooking, your brisket will start to transform. It will become noticeably more tender, a testament to the magic of low and slow cooking. This is the perfect time to give it a warm embrace, a wrap that will elevate its tenderness to new heights.
To wrap your brisket, I recommend using a double layer of aluminum foil. Ensure it's tightly wrapped, but not overly compressed, creating a seal that traps in the moisture and heat. This wrapping technique creates a steamy environment, allowing the brisket to cook evenly and achieve an exceptional level of tenderness. It's like giving the brisket a warm hug, promoting a more even cooking process and enhancing its natural flavor.
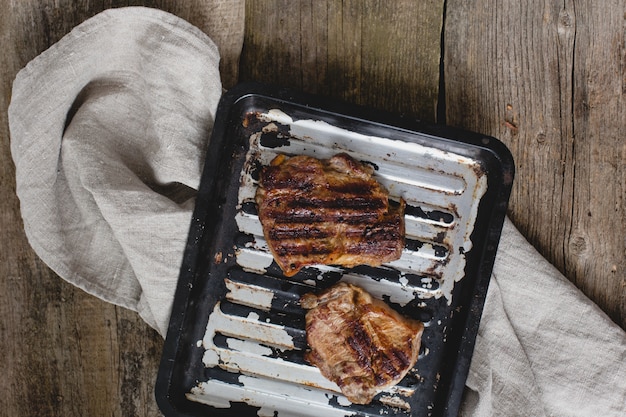
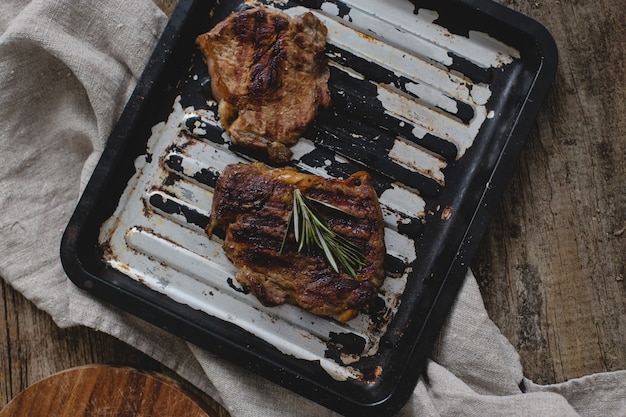
The Final Stretch: Achieving that Perfect Bark
After wrapping your brisket, return it to the oven for another 2 to 4 hours. This final stage is all about achieving that coveted bark, the crispy, caramelized exterior that adds a delightful textural contrast to the tender interior.
About an hour before you plan to take the brisket out of the oven, remove the aluminum foil. This exposes the brisket to direct heat, allowing it to develop that beautiful, golden-brown bark.
Keep a close eye on your brisket, you don't want to burn it. If the bark starts to get too dark, you can always re-wrap it in foil for a while.
(Part 4) The Rest: Giving the Brisket a Break
After you remove your brisket from the oven, resist the urge to slice it immediately. Allow it to rest for at least 30 minutes, wrapped in foil. This is a crucial step, allowing the juices to redistribute throughout the meat, resulting in a more tender and flavorful brisket.
Use this resting time to catch up with your guests, prepare your sides, and allow the anticipation to build. Try to resist the temptation to peek under the foil!
(Part 5) Slicing and Serving: The Grand Finale
After the brisket has enjoyed its well-deserved rest, it's time for the grand finale – slicing and serving your culinary masterpiece. Using a sharp knife, slice the brisket against the grain, creating thin and delicate slices that will melt in your mouth.
And now, the moment of truth. Serve your brisket with all your favorite sides, such as mac and cheese, baked beans, coleslaw, or potato salad. It's a meal that's guaranteed to leave everyone satisfied and craving for more.
(Part 6) Brisket Cooking Times: A Guide for Different Sizes
Okay, so you've got a general understanding of the cooking time, but what about specific sizes? Let's delve into more detail, providing a guide for various brisket sizes.
Table of Brisket Cooking Times
| Brisket Size (lbs) | Approximate Cooking Time (hours) |
|---|---|
| 5-6 lbs | 8-10 hours |
| 7-8 lbs | 10-12 hours |
| 9-10 lbs | 12-14 hours |
| 11-12 lbs | 14-16 hours |
| 13-14 lbs | 16-18 hours |
Remember, these are just estimates, and the actual cooking time can vary depending on the specific brisket you use, your oven, and your desired level of tenderness.
(Part 7) The Importance of Patience: A Real-Life Experience
You've got the guide, you've got the table, but how do you actually know when your brisket is done? The answer is simple: patience, a little bit of trust, and a good internal thermometer.
I remember the first time I cooked a brisket. I was so eager, I couldn't wait to taste the fruits of my labor. I kept checking the temperature, I was pacing the kitchen, and I was starting to get anxious. I was determined to get it right, but my impatience was getting the better of me.
After about 12 hours, I couldn't resist the temptation. I pulled the brisket out of the oven, sliced into it, and took a bite. It was tough and chewy. I was devastated. I had messed up!
But then, I remembered what my grandpa always said: "Patience, my dear, patience is key." So, I wrapped the brisket back up, put it back in the oven, and this time, I waited.
And you know what? It was worth it. After another couple of hours, the brisket was transformed. It was so tender, so flavorful, it just melted in my mouth. I had learned a valuable lesson that day: patience is the key to a perfect brisket.
(Part 8) The Thermometer: Your New Best Friend
A good meat thermometer is your new best friend when it comes to brisket. It's the only way to know for sure if your brisket is cooked to perfection.
The goal is to reach an internal temperature of 195°F for a perfectly tender brisket. You can use a digital thermometer or a probe thermometer. Simply insert the thermometer into the thickest part of the brisket, making sure it doesn't touch any bone.
Don't be afraid to check the temperature several times during the cooking process. This will help you monitor the progress and ensure that the brisket is cooking evenly.
(Part 9) The Art of Smoke: Adding That Extra Dimension
Now, if you're really looking to elevate your brisket game, consider adding some smoke. You can achieve this by using a smoker, a grill with a smoker box, or even a smoker pouch in your oven.
Smoke adds a delicious depth of flavor to the brisket, but it's not essential. If you don't have access to a smoker, you can still achieve a delicious brisket without it.
However, if you do have the opportunity to smoke your brisket, go for it! It's a great way to enhance the flavor and create a truly special dish.
FAQs
1. Can I cook a brisket in the oven at a lower temperature?
You can definitely cook a brisket at a lower temperature, but it will take longer. A common temperature range for cooking brisket in the oven is 225°F to 275°F. If you're using a lower temperature, you'll need to add more time to the cooking process. However, the low and slow cooking method will result in an incredibly tender and flavorful brisket. The extended cooking time allows the connective tissues to break down, creating that melt-in-your-mouth texture.
2. What happens if I overcook the brisket?
Overcooked brisket can become dry and tough. It's crucial to monitor the temperature closely and pull the brisket out of the oven when it reaches 195°F. If you overcook the brisket, it can lose its moisture and become less tender. You can try to salvage it by adding some sauce or broth, but it won't be as tender as a properly cooked brisket.
3. Can I freeze a brisket before cooking it?
Yes, you can freeze a brisket. It's best to freeze it before trimming and seasoning. To freeze a brisket, wrap it tightly in plastic wrap and then in aluminum foil. Make sure the freezer is set to 0°F or below. When you're ready to cook the brisket, thaw it in the refrigerator for 2-3 days. You can also thaw it in a cold water bath, but make sure to change the water every 30 minutes to keep it cold.
4. What are some good side dishes to serve with brisket?
Brisket pairs well with a variety of side dishes, adding a touch of culinary harmony to your meal. Here are some popular choices that complement the richness of brisket:
- Mac and cheese: A creamy and comforting classic, mac and cheese provides a delightful contrast to the savory brisket.
- Baked beans: Sweet and smoky, baked beans offer a delightful balance of flavors that harmonize perfectly with the brisket.
- Coleslaw: The coolness and freshness of coleslaw provide a welcome contrast to the richness of the brisket.
- Potato salad: Creamy and satisfying, potato salad is a classic accompaniment for brisket, offering a comforting touch to the meal.
- Cornbread: A slightly sweet and crumbly cornbread adds a touch of Southern charm to your brisket feast.
- green beans: Steamed or sauteed green beans offer a vibrant and refreshing contrast to the richness of the brisket.
- mashed potatoes: Creamy and comforting mashed potatoes are a classic pairing for brisket, adding a touch of elegance to the meal.
- sweet potato casserole: A touch of sweetness and spice, sweet potato casserole offers a delightful contrast to the savory flavors of brisket.
5. How long can I keep leftover brisket?
You can store leftover brisket in the refrigerator for up to 4 days. Make sure to wrap it tightly in plastic wrap or aluminum foil. You can also freeze leftover brisket for up to 3 months. To freeze brisket, wrap it tightly in plastic wrap and then in aluminum foil. Thaw the brisket in the refrigerator before reheating it.
Everyone is watching

Corn on the Cob: The Ultimate Guide to Perfectly Cooked Ears
Healthy MealsAh, corn on the cob. Just the name evokes images of sunny days, barbecues, and that sweet, juicy flavour that ...

Perfect Pork Roast Oven Cooking Time: A Guide to Delicious Results
Healthy MealsThere's something truly satisfying about a perfectly roasted pork. The aroma alone is enough to make your mout...

Ham Cooking Time: How Long to Bake, Smoke, or Boil a Delicious Ham
Healthy MealsAh, ham. It's a classic, isn't it? A real crowd-pleaser, especially around holidays. And when done right, it'...

Scallops: The Ultimate Guide to Perfect Cooking
Healthy MealsAh, scallops. Those delicate, sweet, and utterly delicious morsels of the sea. They hold a special place in my...

Spaghetti Squash: The Ultimate Guide to Cooking and Serving
Healthy MealsRemember that time you saw spaghetti squash at the supermarket, looking all bumpy and strange, and thought, "W...