I've always had a soft spot for ham. Not in a, "I'm a ham!" kind of way (though, let's be honest, I've definitely been called a ham in my time), but in a, "I really love a good ham!" kind of way. There's something about the smoky, salty, and oh-so-satisfying flavour that just gets me every time. I've tried all sorts of ham over the years – honey-glazed, maple-roasted, even those fancy spiral-sliced ones – but nothing quite compares to a good old-fashioned, perfectly cooked boneless ham.
Now, I know what you're thinking: "Ham? That sounds a bit… boring." But trust me, it's anything but! Boneless ham is incredibly versatile. You can roast it, bake it, grill it, even use it in sandwiches or salads! And the best part? It's a total breeze to cook.
This article is my love letter to boneless ham, a guide to cooking it to perfection, and a celebration of its delicious versatility. We'll cover everything from choosing the perfect cut to mastering the art of the glaze, including oven baking, slow cooking, grilling, and even some creative ideas for leftovers. So grab a cuppa, settle in, and let's get cooking!
(Part 1) Choosing the perfect ham: The Foundation of a Great Meal
Alright, the first step in this delicious journey is picking the right ham. Now, I'm no butcher, but I've learned a thing or two over the years. Look for a ham that's nice and plump, with a good layer of fat. Don't be afraid of the fat! It's what keeps the ham moist and flavourful. And, of course, make sure it's boneless. You don't want to be wrestling with a bone while you're trying to carve it!
types of ham: Unveiling the Options
You've got a few options when it comes to boneless ham:
- fresh ham: This is the raw ham you'll find in the butcher's section. It's typically leaner than its pre-cooked counterparts and requires a longer cooking time. Fresh ham offers a more intense flavour, but it demands a bit more commitment in the kitchen.
- pre-cooked ham: This ham has already been cooked, so it just needs to be reheated. It's a great option if you're short on time or don't want to worry about cooking it all the way through. Pre-cooked ham is a true convenience hero, perfect for busy weeknights or impromptu gatherings.
- spiral sliced ham: These hams are pre-cooked and already sliced, making them super easy to serve. They're often glazed with a sweet and sticky sauce. spiral-sliced ham is the epitome of "grab and go" convenience, ideal for those who want minimal fuss and maximum flavour.
My Personal Recommendation: A Touch of Experience
For the best flavour and versatility, I usually go for a pre-cooked ham. It's just so easy! But, if you're looking for a more robust flavour and a chance to really get creative with the cooking, a fresh ham is definitely worth trying. It's a bit like choosing between a classic comfort food and a culinary adventure – both have their own unique appeal.
(Part 2) Prep Work: Unleashing the Flavour
Once you've got your ham, it's time to prepare it for its culinary transformation. This stage might seem simple, but it's crucial for achieving a delicious result.
Removing the Packaging: A First Step
Most pre-cooked hams come wrapped in a plastic casing, while fresh hams are often wrapped in butcher paper. Carefully remove the packaging, making sure not to puncture the ham. This step ensures that the ham stays intact and ready for the next stage.
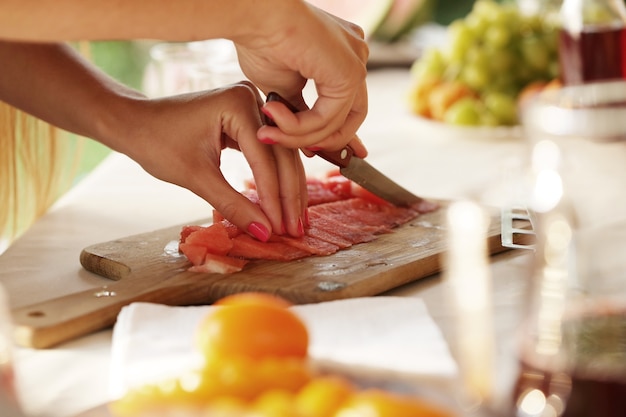
Scoring the Ham: Unlocking the Flavour
Now, this is where things get fun (and maybe a little intimidating if you're a newbie). Scoring the ham helps the fat render and the glaze penetrate. It also adds a nice visual appeal. Don't worry, it's not as scary as it sounds.
- Start by making shallow cuts across the top of the ham, about half an inch apart. These cuts create channels for the glaze to seep in and the fat to render, resulting in a more evenly cooked and flavorful ham.
- Then, make some diagonal cuts to create a criss-cross pattern. This adds a beautiful visual element to the ham and allows for even more flavour infusion.
- If you're feeling adventurous, you can even carve out some fancy shapes! Think of it as a culinary canvas, where you can create your own ham masterpiece. It's a great way to add a personal touch and impress your guests.
Adding Flavour: A Symphony of spices and herbs
Before you cook your ham, you can add a bit of extra flavour. Think of it as adding a pinch of personality to your culinary creation.
- Rub: Create a simple rub by mixing together your favourite herbs and spices. I like to use a combination of smoked paprika, brown sugar, garlic powder, and onion powder. The combination of sweet and savory, smoky and aromatic is simply irresistible.
- Marinade: For a more intense flavour, you can marinate your ham. A simple honey mustard marinade is always a winner. The tangy sweetness of honey mustard adds a layer of complexity to the ham's flavour profile.
The Importance of Scoring and Flavouring: A Culinary Edge
Trust me, the extra effort of scoring and adding flavour will make a world of difference in the final result. Your ham will be more flavorful, juicier, and more aesthetically pleasing. It's a testament to the fact that a little extra effort in the kitchen can lead to big rewards on your plate.
(Part 3) Cooking Methods: The Art of Ham Transformation
Now that we've prepared our ham, it's time to choose our cooking method. Each method brings its own unique flavour and texture, allowing you to tailor your ham experience to your taste and preferences.
Oven Baking: The Classic Approach
Oven baking is a classic way to cook ham, and it's really easy. Just follow these steps:
- Preheat your oven to 325°F (165°C). This allows the ham to cook evenly and prevents it from drying out.
- Place the ham in a roasting pan, fat side up. This ensures that the fat renders properly, keeping the ham moist and flavorful.
- Add a cup of water to the bottom of the pan to help keep the ham moist. This creates steam, which helps prevent the ham from drying out and adds to its overall tenderness.
- Bake for about 20 minutes per pound, or until the internal temperature reaches 140°F (60°C). Using a meat thermometer is essential for ensuring that the ham is cooked through and safe to eat.
Slow Cooking: The Hands-Off Approach
If you're looking for a truly hands-off way to cook ham, a slow cooker is the way to go. It's perfect for those busy days when you need a delicious meal without the constant supervision.
- Place the ham in the slow cooker, fat side up. This allows the fat to render slowly, adding to the ham's richness and flavour.
- Pour in a cup of water or broth. This helps to create a moist cooking environment, preventing the ham from drying out.
- Cook on low for 6-8 hours, or until the internal temperature reaches 140°F (60°C). Slow cooking allows the flavours to meld and the ham to become incredibly tender, making it a true comfort food classic.
Grilling: The Smoky Flavour
For a delicious and smoky flavour, grill your ham. It's a great option for summer barbecues or any time you want to add a touch of smoky goodness to your meal.
- Preheat your grill to medium heat. This allows for even cooking and prevents the ham from burning.
- Place the ham on the grill, fat side up. This allows the fat to render and infuse the ham with its delicious flavour.
- Cook for about 30 minutes, or until the internal temperature reaches 140°F (60°C). Use a meat thermometer to ensure the ham is cooked through and safe to eat.
Tips for Perfect Cooking: The Keys to Success
- Use a meat thermometer: This is essential to ensure your ham is cooked through. A meat thermometer takes the guesswork out of cooking and ensures that your ham is cooked to perfection.
- Don’t overcook: Overcooked ham can become dry and tough. Stick to the recommended cooking time and temperature. It's better to err on the side of slightly undercooked than overcooked, as you can always cook it a bit longer if needed.
- Basting: If you’re oven baking or grilling your ham, baste it with a glaze every 30 minutes to keep it moist and add flavour. This constant attention helps to create a beautiful, caramelized glaze that adds depth and richness to the ham.
(Part 4) The Glaze: The Finishing Touch of Sweetness
A glaze is the finishing touch that elevates a ham from good to amazing. A good glaze adds sweetness, shine, and a beautiful colour. It's the final act in creating a culinary masterpiece.
The Importance of Glaze: A Transformation in Flavour
Think of a glaze as the icing on the cake, the final touch that elevates the dish to new heights. It adds a layer of complexity, a touch of sweetness, and a visual appeal that makes the ham irresistible.
Classic Glaze Recipe: A Timeless Delight
Here’s a simple glaze recipe that I always use:
| Ingredients | Quantity |
|---|---|
| Brown sugar | 1/2 cup |
| Honey | 1/4 cup |
| Dijon mustard | 1 tablespoon |
| Apple cider vinegar | 1 tablespoon |
| Ground cloves | 1/4 teaspoon |
Glazing Technique: The Art of Application
Start glazing your ham about 30 minutes before the end of the cooking time. This ensures that the glaze has time to caramelize and create a beautiful, sticky finish. Brush the glaze all over the ham, making sure to get into the scored areas. You can repeat this process every 15 minutes for a nice, thick glaze. The more layers, the more intense the flavour and the more visually stunning the ham becomes.
Creative Glaze Ideas: A Journey of Flavour
If you’re looking for something a bit more adventurous, try one of these glazes:
- Maple-bourbon glaze: Mix together maple syrup, bourbon, Dijon mustard, and a pinch of ginger. This glaze adds a sophisticated sweetness and a hint of warmth that complements the ham beautifully.
- Mango-chilli glaze: Combine mango chutney, chilli flakes, honey, and lime juice. This glaze is a delightful mix of sweet, spicy, and tangy, perfect for those who like a bit of heat in their ham.
- Pineapple-ginger glaze: Whisk together pineapple juice, ginger, brown sugar, and a touch of soy sauce. This glaze adds a tropical twist to the ham, with the pineapple's sweetness and the ginger's warmth creating a flavour explosion.
Glaze Tips: Mastering the Art of Glaze
- Don't glaze too early: Glazing too early can cause the glaze to burn. Patience is key when it comes to glazing, as it allows the glaze to caramelize without burning.
- Thin out the glaze: If the glaze is too thick, add a little water or juice to thin it out. This ensures that the glaze spreads evenly and doesn't clump on the ham.
- Use a pastry brush: This will help you apply the glaze evenly. A pastry brush allows for precise application and prevents the glaze from dripping or running.
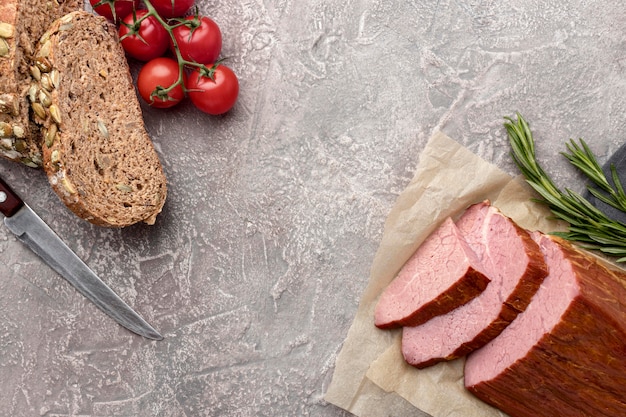
(Part 5) Carving the Ham: A Skillful Touch for a Perfect Presentation
Carving a ham is a skill that takes practice, but it's a rewarding one. It's the moment when all your hard work comes together, and you get to see the beautiful, glistening ham in its full glory.
Tools You’ll Need: Essential Equipment
You’ll need a sharp carving knife and a carving fork to carve your ham. I also like to use a cutting board that’s large enough to accommodate the ham. These tools are essential for making precise cuts and ensuring a smooth carving experience.
Carving Technique: The Art of the Slice
- Start with the fat: Cut away any excess fat from the top of the ham. This helps to create a cleaner presentation and prevents the fat from overwhelming the flavour of the ham.
- Slice across the grain: This will help ensure that your slices are tender and not tough. Slicing across the grain allows for easier chewing and prevents the ham from becoming chewy or rubbery.
- Cut thin slices: Aim for slices that are about 1/4 inch thick. This allows for a more elegant presentation and ensures that each slice is tender and flavorful.
- Use the carving fork: This will help you stabilize the ham while you’re carving. The carving fork acts as an anchor, preventing the ham from moving around while you're slicing.
Carving Tips: Tips for Success
- Let the ham rest: Before carving, let the ham rest for 10-15 minutes to allow the juices to redistribute. This allows the ham to retain its moisture and prevents it from being dry or tough.
- Don’t be afraid to ask for help: If you’re not confident in your carving skills, ask a butcher or someone experienced to help you. There's no shame in seeking help, especially when it comes to a task like carving a ham. It's always better to ask for assistance than to risk ruining the beautiful ham you've worked hard to prepare.
(Part 6) Serving the Ham: A Feast for the Eyes and Palate
The way you present your ham can really make a difference. It's the final step in creating a memorable dining experience.
Presentation Matters: Making a Statement
Think of your ham as a work of art, ready to be displayed. You can carve it into a beautiful rosette or arrange the slices on a platter with your favourite sides. A little effort in presentation goes a long way in creating a visually appealing and delicious spread.
side dishes: Complementary Flavours
Here are a few of my favourite side dishes to serve with ham:
- Roasted vegetables: Brussels sprouts, asparagus, and carrots are all delicious roasted alongside ham. The sweetness of the roasted vegetables complements the salty, smoky flavour of the ham perfectly.
- Macaroni and cheese: A classic comfort food that’s perfect for a family dinner. The creamy richness of macaroni and cheese is a perfect pairing for the ham's savoury flavours.
- potato salad: A light and refreshing side dish that pairs well with the richness of the ham. The coolness of the potato salad provides a nice contrast to the ham's warmth, creating a balanced and satisfying meal.
Drinks: The Perfect Pairing
- Beer: A good amber lager or a pale ale pairs well with ham. The bitterness of the beer balances the sweetness of the ham, creating a harmonious flavour profile.
- Wine: A dry Riesling or a Sauvignon Blanc can complement the salty and sweet flavours of the ham. The acidity of these wines cuts through the richness of the ham, creating a refreshing and palate-cleansing experience.
- Punch: A refreshing fruit punch is perfect for a festive gathering. The sweetness of the punch complements the ham, while the fruit adds a touch of vibrancy to the meal.
(Part 7) Leftovers: A Delicious Second Act
Let's face it, sometimes you end up with leftovers. But with ham, leftovers are a good thing! They're a chance to get creative and enjoy the delicious flavours of ham in a whole new way.
Storing the Leftovers: Preserving the Flavour
Once you've enjoyed your ham, store any leftovers in the refrigerator in an airtight container. It will keep for about 3-4 days. This ensures that the ham stays fresh and flavourful for later use.
Delicious Leftover Ideas: A Culinary Adventure
You can use leftover ham in a variety of ways:
- ham and cheese sandwiches: A classic and always satisfying. The salty, smoky flavour of the ham combined with the creaminess of the cheese is a match made in sandwich heaven.
- Ham and pea soup: A hearty and comforting soup. The ham adds a depth of flavour to the soup, making it a perfect choice for a chilly evening.
- Ham and potato hash: A delicious and easy breakfast or brunch option. The combination of ham, potatoes, and onions is a classic and satisfying dish that's perfect for a quick and easy meal.
- Ham quiche: A savoury and elegant dish that's perfect for a brunch or light lunch. The ham adds a savory element to the quiche, making it a complete and satisfying meal.
- Ham salad: A versatile salad that can be served on sandwiches, wraps, or crackers. The ham adds a salty, smoky flavour to the salad, making it a unique and delicious choice.
Tips for Leftovers: Maximizing Flavor
- Reheat gently: Reheat leftover ham in the oven or microwave, being careful not to overcook it. Overheating can dry out the ham and make it tough, so it's best to reheat it gently.
- Don’t be afraid to experiment: Get creative with your leftovers! There are endless possibilities. Leftovers are an opportunity to explore new flavour combinations and create delicious dishes that are both satisfying and economical. Don't be afraid to experiment and let your culinary creativity shine.
(Part 8) FAQs: Your Ham Cooking Questions Answered
Here are some frequently asked questions that can help you become a ham cooking pro.
What if my ham is too salty?
If your ham is too salty, you can try soaking it in water for a few hours before cooking. This will help to draw out some of the salt. It's a simple trick that can make a big difference in reducing the saltiness of the ham.
Can I freeze leftover ham?
Yes, you can freeze leftover ham. Wrap it tightly in plastic wrap and then in foil. It will keep for up to 2 months in the freezer. Freezing is a great way to extend the shelf life of your leftover ham, allowing you to enjoy it later on.
What’s the best way to cook a ham for a crowd?
For a large crowd, I recommend slow cooking or oven baking your ham. These methods allow you to cook a large ham without worrying about it drying out. They're also perfect for those busy days when you need to cook a large meal without the constant supervision.
What kind of glaze is best for a spiral-sliced ham?
A simple honey glaze is always a good choice for spiral-sliced ham. You can also try a maple-bourbon glaze for a more sophisticated flavour. The sweetness of the honey glaze complements the ham perfectly, while the maple-bourbon glaze adds a touch of complexity and sophistication.
What’s the secret to making the juiciest ham?
The secret is to keep the ham moist during cooking. This can be done by adding water to the bottom of the pan, basting the ham regularly, or using a slow cooker. These techniques create a moist cooking environment that prevents the ham from drying out, resulting in a juicy and tender final product.
I hope this guide has given you all the tips and tricks you need to cook a delicious boneless ham. Remember, it's all about having fun in the kitchen! Don't be afraid to experiment and add your own personal touch. And most importantly, enjoy the process and the delicious results!
Everyone is watching

Corn on the Cob: The Ultimate Guide to Perfectly Cooked Ears
Healthy MealsAh, corn on the cob. Just the name evokes images of sunny days, barbecues, and that sweet, juicy flavour that ...

Scallops: The Ultimate Guide to Perfect Cooking
Healthy MealsAh, scallops. Those delicate, sweet, and utterly delicious morsels of the sea. They hold a special place in my...

Spaghetti Squash: The Ultimate Guide to Cooking and Serving
Healthy MealsRemember that time you saw spaghetti squash at the supermarket, looking all bumpy and strange, and thought, "W...

Salmon Cooking Times: Perfect Guide for Every Recipe
Healthy MealsLet me tell you, cooking salmon is an art form. It's all about getting that perfect balance: juicy and tender,...

Ham Cooking Time: How Long to Bake, Smoke, or Boil a Delicious Ham
Healthy MealsAh, ham. It's a classic, isn't it? A real crowd-pleaser, especially around holidays. And when done right, it'...