Part 1: Setting the Stage

Before diving into the actual cooking process, let's get some basic information sorted. You'll need a good-sized pot – those peas expand quite a bit as they cook – and plenty of water. Think about a ratio of about 3 parts water to 1 part peas. And a pinch of salt is always a good idea, both for flavour and to prevent mushy peas.
1.1 The Great Pea Debate: Dried vs. Canned
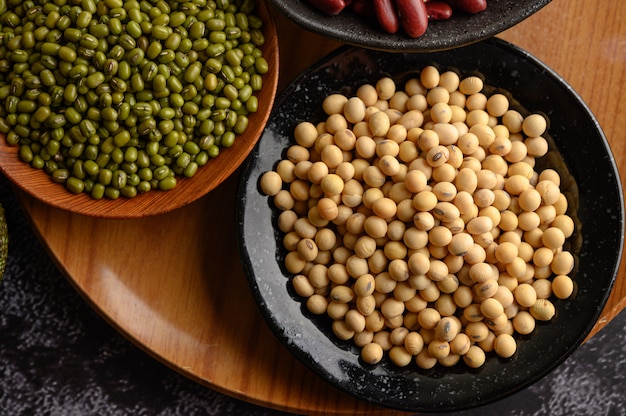
First things first, you've got a choice to make: dried or canned. dried black-eyed peas are like the seasoned veterans of the pea world, offering a deeper, more intense flavour. They're also often more affordable. But let's be real, sometimes you just need a shortcut, and that's where canned peas come in. They're already cooked, which means less time in the kitchen for you.
Personally, I love both. Dried peas for when I have time to soak them and want that extra flavour, and canned peas for a quick fix. It's all about personal preference, and I'm not here to judge!
1.2 Cooking Methods: Stovetop vs. pressure cooker
Now, you have the option of stovetop simmering or using a pressure cooker. Both have their pros and cons, but today I'm focusing on the classic stovetop method. If you're curious about pressure cooking, I've got a whole other guide dedicated to that!
Part 2: Stovetop Cooking Times Unveiled

2.1 General Guidelines
So, how long do you cook black-eyed peas on the stovetop? The general rule of thumb is about 1.5 to 2 hours. But here's the thing – that's just a guideline! Cooking time can vary depending on a few key factors: whether you're using dried or canned peas, how old those peas are, and how tender you want them to be.
2.2 Mastering Dried Black-Eyed Peas
Dried black-eyed peas are a bit more involved, but trust me, the flavour is worth it. First, you'll need to soak them – a good overnight soak in cold water is ideal. This not only softens them up, making them quicker to cook, but it also improves their digestibility.
After soaking, drain the water and add fresh water to your pot. Bring it to a rolling boil, then reduce the heat to a gentle simmer. Now, here's where the magic happens: cook for about 1 to 1.5 hours, or until those peas are tender. Remember to check on them every 30 minutes or so to make sure they're not sticking to the bottom of the pot.
A little secret I learned from my grandma: add a tablespoon or two of apple cider vinegar to the pot when the peas are halfway cooked. It helps break down the tough outer layer and makes them extra tender and delicious!
2.3 Canned Black-Eyed Peas: The Easy Route
Canned black-eyed peas are the ultimate shortcut. Drain them, rinse them off, and toss them into your pot with broth or water. Then, simmer for about 15-20 minutes to bring out the flavour. Because they're already cooked, you can add them to soups, stews, or salads at the very end without worrying about overcooking.
Part 3: Factors That Influence Cooking Time

Now, let's delve into the factors that can influence how long your black-eyed peas need to cook. This is especially important if you're working with dried peas.
3.1 Pea Age: Young vs. Old
Older peas can be a bit tougher than their younger counterparts. As peas age, the starches inside break down, making them more resistant to cooking. If you're using older peas, you might need to add a bit of extra time to the cooking process.
3.2 Water Hardness: Hard Water vs. Soft Water
Hard water, with its high mineral content, can also affect cooking time. Those minerals make it more challenging for the peas to soften. If you're using hard water, you might need to add a few extra minutes to your cooking time.
3.3 Altitude: High vs. Low
This one might surprise you: altitude can also play a role. At higher altitudes, water boils at a lower temperature. This means it takes longer for your peas to cook. If you live in a mountainous area, be prepared to add a little extra time to your recipe.
Part 4: Knowing When Your Peas Are Ready: The Tenderness Test
You've been simmering those peas, and now you're wondering, are they ready? Don't be shy, give them a taste test! Here's how to tell if your black-eyed peas have reached their peak of tenderness:
4.1 The Fork Test: The Classic Method
This is the tried-and-true method. Simply grab a fork and pierce a few peas. If they pierce easily and break apart, they're done! If they resist your fork, give them a few more minutes on the stovetop.
4.2 The Bite Test: For the Bold
If you're feeling adventurous, take a bite of a pea. It should be tender and practically melt in your mouth. If it's still a bit firm, keep cooking.
4.3 The Visual Test: Look for Plumpness
Another clue is the appearance of your peas. They should have plumped up and become slightly translucent. If they're still small and shriveled, they need more time.
Part 5: Mastering the Art of Consistency: Tender, Creamy, But Not Mushy
You want your black-eyed peas to be tender and creamy, but not mushy. It's a delicate balance, but here's how to achieve that perfect consistency:
5.1 Avoid Overcooking: A Common Mistake
Overcooking is a common mistake that can lead to a mushy mess. Keep a close eye on those peas and don't let them simmer for too long.
5.2 Add a Touch of Acid: Lemon Juice or Vinegar
Adding a bit of acid, like a squeeze of lemon juice or a splash of vinegar, can help prevent your peas from becoming too soft. The acid breaks down the starch in the peas, adding a touch of tangy flavour.
5.3 Mash for Extra Creaminess: A Simple Trick
For a super creamy consistency, mash a few of the peas with a potato masher or fork. This releases some of the starch, creating a thicker sauce.
Part 6: Storing and Reheating: Keeping Those Peas Fresh
You've got your perfect batch of black-eyed peas, so now it's time to think about storage. Here's how to keep them fresh and delicious:
6.1 Refrigerating Cooked Black-Eyed Peas
Store your cooked black-eyed peas in an airtight container in the refrigerator. They'll stay fresh for up to 3-4 days. When you're ready to use them, simply reheat them in a saucepan with a little water or broth.
6.2 Freezing Cooked Black-Eyed Peas
You can also freeze your cooked black-eyed peas for up to 3 months. Spread them out in a single layer on a baking sheet and freeze for a few hours. Then, transfer them to a freezer bag. To reheat frozen peas, add them to a pot with water or broth and simmer for about 15 minutes.
Part 7: Recipes and Variations: Beyond the Basics
Okay, you've got your perfectly cooked black-eyed peas – now it's time to get creative! They're incredibly versatile and can be the star of countless dishes. Here are a few of my favourite recipes and ideas:
7.1 black-eyed pea salad: Light and Refreshing
A perfect summer salad! Combine your cooked black-eyed peas with chopped tomatoes, red onions, bell peppers, and a simple vinaigrette. Add a sprinkle of fresh herbs like cilantro or parsley for an extra boost of flavour.
7.2 black-eyed pea soup: Hearty and Comforting
A classic for a cold day. Combine your cooked black-eyed peas with your favourite vegetables, like carrots, celery, and onions. Simmer them in a rich broth until the vegetables are tender. Top with a dollop of sour cream or a sprinkle of fresh parsley.
7.3 black-eyed pea chili: Spicy and Satisfying
A great option for a crowd. Combine your cooked black-eyed peas with ground beef, chili powder, cumin, and your favourite spices. Simmer it all together until the chili thickens. Serve with cornbread, sour cream, or avocado.
7.4 Black-Eyed Pea Burgers: Vegetarian and Delicious
These are a tasty and protein-packed vegetarian option. Combine your cooked black-eyed peas with chopped onions, carrots, and breadcrumbs. Shape the mixture into patties and cook them on the grill or in a pan until golden brown. Serve them on buns with your favourite toppings, like lettuce, tomato, and onion.
Part 8: Frequently Asked Questions
I know you might have some questions about cooking black-eyed peas, so I've compiled a list of frequently asked questions to help you out.
8.1 Can I Add Salt Before Cooking?
You can add salt, but it's generally best to wait until the peas are almost fully cooked. Adding salt too early can make the peas tougher.
8.2 What If I Don't Soak Dried Peas?
It's best to soak them! It significantly reduces cooking time, makes them easier to digest, and helps prevent mushiness.
8.3 Can I Add Other Ingredients During Cooking?
Absolutely! Onions, garlic, ginger, herbs like bay leaves and thyme, and spices like cumin are all great additions. Experiment and see what you like best!
8.4 Can I Use Black-Eyed Peas in a slow cooker?
Yes! Simply add them to your slow cooker with water or broth and cook on low for 6-8 hours or on high for 3-4 hours.
8.5 How Do I Know if They're Spoiled?
Spoiled black-eyed peas will have a sour smell or taste, and they might have a slimy texture. If you notice any of these, it's best to discard them. Always check the date on canned black-eyed peas to make sure they're fresh.
Final Thoughts
There you have it! You've got the tools and knowledge to cook up a fantastic batch of black-eyed peas. Don't be afraid to experiment and find your favourite ways to use them. Enjoy the process, and happy cooking!
Everyone is watching

Corn on the Cob: The Ultimate Guide to Perfectly Cooked Ears
Healthy MealsAh, corn on the cob. Just the name evokes images of sunny days, barbecues, and that sweet, juicy flavour that ...

Perfect Pork Roast Oven Cooking Time: A Guide to Delicious Results
Healthy MealsThere's something truly satisfying about a perfectly roasted pork. The aroma alone is enough to make your mout...

Ham Cooking Time: How Long to Bake, Smoke, or Boil a Delicious Ham
Healthy MealsAh, ham. It's a classic, isn't it? A real crowd-pleaser, especially around holidays. And when done right, it'...

Scallops: The Ultimate Guide to Perfect Cooking
Healthy MealsAh, scallops. Those delicate, sweet, and utterly delicious morsels of the sea. They hold a special place in my...

Spaghetti Squash: The Ultimate Guide to Cooking and Serving
Healthy MealsRemember that time you saw spaghetti squash at the supermarket, looking all bumpy and strange, and thought, "W...
