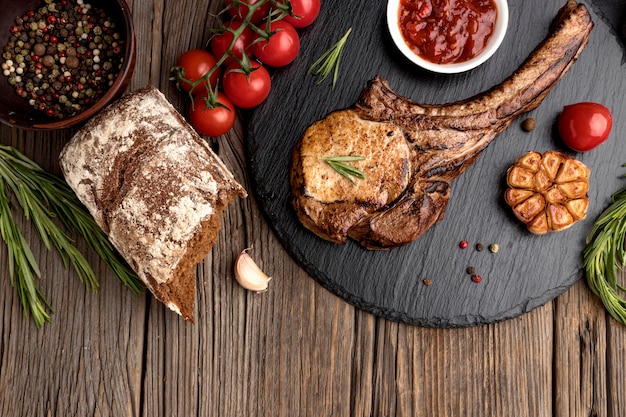
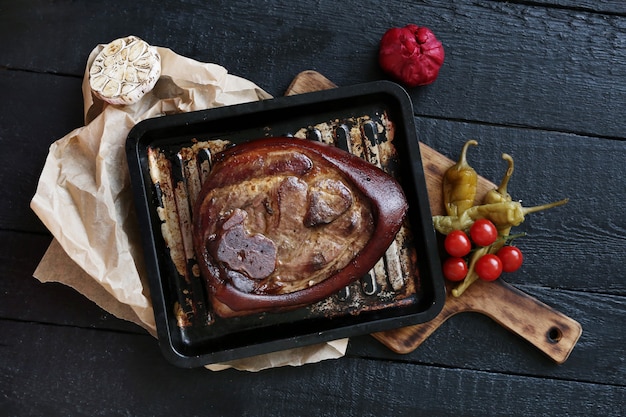
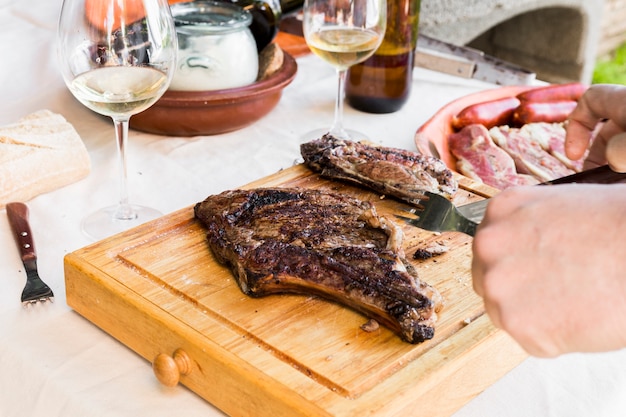
As a seasoned chef, I've spent years perfecting my roast beef technique. There's nothing quite like the smell of a succulent roast filling the kitchen, and the satisfaction of carving into a perfectly cooked piece of meat. But let's face it, roasting beef can be a little daunting. Knowing how long to cook it, what temperature to use, and how to avoid overcooking or undercooking can feel like a culinary conundrum.
Fear not! I'm here to break down the secrets of achieving a perfect beef roast every single time. From understanding different cuts of beef to mastering the art of resting, I'll guide you through every step of the process. Get ready to impress your guests and enjoy a truly delicious roast beef experience.
(Part 1) choosing the right cut

Understanding the Cuts
The first step in your roast beef journey is choosing the right cut. Each cut of beef has its own unique characteristics, influencing its cooking time, tenderness, and flavor. Think of it like choosing the right tool for the job – you wouldn’t use a hammer to drive a screw, right? Here are some popular choices for roast beef, each with its own personality:
- rib roast: This is a classic choice, known for its rich flavor and marbling. It's like the star of the show, boasting a luxurious texture and deep, beefy taste. Rib roasts are typically large and can feed a crowd, making them perfect for special occasions.
- sirloin roast: This cut is leaner than rib roast, with a more delicate flavor. It’s like the reliable friend – always there, always dependable, and always delivers a good time. It's a great option for smaller gatherings or if you prefer a less intense taste.
- top round roast: This cut is economical and flavorful, but can be a bit tougher than other cuts. It's like the underdog, requiring a little extra TLC to shine. It's ideal for slow roasting, which allows the tougher muscle fibers to break down and become tender.
- chuck roast: This cut is full of flavor but requires longer cooking times. It’s like the seasoned veteran, full of character and stories to tell. It's best for pot roasts or slow cooker recipes, where the extended cooking time transforms it into a melt-in-your-mouth masterpiece.
My Personal Preferences
Personally, I have a soft spot for rib roast. The rich flavor and tender texture are simply irresistible. It's a cut that always impresses my guests and reminds me of special occasions. It's like the grand finale, the perfect ending to a delicious meal. However, I've learned to appreciate the versatility of other cuts like sirloin and top round. Each cut offers a unique culinary experience, much like a diverse group of friends, each bringing something special to the table.
Tips for Selecting
Here are some tips to help you choose the right cut of beef for your roast, like choosing the right outfit for the occasion:
- Consider the size of your gathering: If you're feeding a large crowd, opt for a larger cut like rib roast or sirloin roast. It's like choosing a spacious venue for a party – you want everyone to feel comfortable and have room to move.
- Think about your cooking time: Some cuts, like chuck roast, require longer cooking times than others. Be sure to plan accordingly, just like scheduling your day around important appointments.
- Don't be afraid to ask your butcher for recommendations: They're experts in all things beef and can help you select the perfect cut for your needs. It's like asking a trusted advisor for guidance – they've seen it all and know what works best.
(Part 2) Preparing the Roast

The Importance of Seasoning
Seasoning your roast beef is crucial for achieving that perfect flavor. It's like adding spices to a cake – it elevates the basic ingredients to something truly special. A simple blend of salt, pepper, and garlic powder works wonders, but you can get creative with herbs and spices.
My Signature Blend
I like to use a blend of smoked paprika, onion powder, thyme, rosemary, and a touch of cayenne pepper. The smoky flavor adds a depth of richness that complements the beef beautifully. It's like adding a smoky note to a symphony – it creates a harmonious balance of flavors. But feel free to experiment with your own favorite seasoning combinations, like trying different combinations of ingredients until you find the perfect blend.
Other Seasoning Options
For a more complex flavor profile, try adding a pinch of mustard powder or a drizzle of olive oil to your seasoning mix. You can also incorporate citrus zest, such as lemon or orange, for a bright and aromatic touch. It's like adding a splash of color to a canvas, creating a more vibrant and dynamic taste.
Techniques for Applying Seasoning
There are a few ways to apply seasoning to your roast, each with its own unique effect:
- Rubbing: Simply rub the seasoning directly onto the surface of the roast. It's like giving the roast a warm massage, ensuring every part is infused with flavor.
- Sprinkling: Sprinkle the seasoning over the roast evenly. It's like dusting a cake with powdered sugar – a delicate touch that adds a final layer of flavor.
- Marinating: For a deeper flavor infusion, you can marinate the roast in a mixture of oil, herbs, and spices for a few hours or overnight. It's like giving the roast a long, luxurious bath, allowing the flavors to penetrate deep into the meat.
(Part 3) Roasting the Beef

Preheat Your Oven
Preheat your oven to the desired temperature before placing your roast in the oven. This ensures even cooking and prevents the roast from losing its internal temperature when placed in the cold oven. Think of it like warming up your car before a long drive – it allows the engine to run smoothly and efficiently.
My Preferred Temperature
I usually preheat my oven to 450°F (232°C) for the first 15 minutes to sear the roast and lock in the juices. After that, I lower the temperature to 325°F (163°C) for the remaining cooking time. It's like a two-step process – a quick burst of heat followed by a gentle simmer, creating a perfect balance of crispness and tenderness.
Tips for Achieving Even Cooking
To ensure even cooking, follow these tips, like a chef following a well-rehearsed recipe:
- Place the roast on a roasting rack: This allows air to circulate around the roast, preventing it from steaming. It's like giving the roast a little space to breathe, ensuring it cooks evenly on all sides.
- Use a meat thermometer: A meat thermometer is essential for checking the internal temperature of the roast. It's like a doctor checking your pulse – it helps you know exactly when the roast is ready.
(Part 4) Calculating Cooking Times
Factors Influencing Cooking Time
The cooking time for a roast depends on several factors, like a recipe depending on different ingredients:
- Size of the roast: Larger roasts require longer cooking times than smaller roasts. It's like a long hike versus a short stroll – the longer the distance, the more time it takes to cover.
- Thickness of the roast: Thicker roasts take longer to cook through. It's like a thick book taking longer to read than a short story – the more material there is, the longer it takes to process.
- Desired doneness: Different levels of doneness require different cooking times. It's like baking a cake – you want it to be golden brown on the outside but still moist on the inside, so you adjust the baking time accordingly.
Using a Chart for Guidance
Here's a general guideline for roast beef cooking times, based on the weight of the roast, like a roadmap for a culinary adventure:
| Weight (lbs) | Cooking Time (minutes per pound) |
|---|---|
| 3-4 lbs | 15-20 minutes |
| 5-7 lbs | 18-22 minutes |
| 8-10 lbs | 20-25 minutes |
Remember, these are just estimates. The actual cooking time may vary depending on the factors mentioned above. It's like a compass pointing you in the right direction, but you might need to adjust your course based on the terrain.
Checking the Doneness
To ensure your roast is cooked to perfection, use a meat thermometer. Insert the thermometer into the thickest part of the roast, avoiding any bone. It's like checking the temperature of a simmering stew – you want to make sure it's cooked through but not overcooked.
safe internal temperatures
Here are the recommended internal temperatures for different levels of doneness, like choosing the right shade of paint for your home – each has its own unique appeal:
- Rare: 125°F (52°C) – The center is still red, with a soft texture.
- Medium Rare: 130-135°F (54-57°C) – The center is pink, with a slightly firmer texture.
- Medium: 140-145°F (60-63°C) – The center is a light brown, with a more firm texture.
- Medium Well: 150-155°F (65-68°C) – The center is brown throughout, with a firm texture.
- Well Done: 160°F (71°C) – The center is completely brown, with a very firm texture.
(Part 5) Resting the Roast
Why Resting is Essential
Resting the roast after it's cooked is crucial for achieving a tender and juicy result. As the roast cools, the juices redistribute evenly throughout the meat, resulting in a more flavorful and tender texture. It's like letting a cake cool before frosting – it allows the flavors to settle and the structure to solidify, creating a more satisfying result.
How Long to Rest
The general rule of thumb is to rest the roast for 15-20 minutes per pound. For example, a 5-pound roast should rest for 75-100 minutes. This may seem like a long time, but it's worth the wait! Think of it like a good wine – it gets better with age.
Techniques for Resting
There are a few ways to rest your roast, each with its own advantages:
- Tent it with foil: This helps trap the heat and moisture, allowing the roast to rest evenly. It's like wrapping a warm blanket around the roast, keeping it cozy and comfortable.
- Wrap it in a clean kitchen towel: This absorbs any excess juices while the roast rests. It's like a gentle embrace, absorbing the excess moisture while allowing the roast to relax.
(Part 6) Carving and Serving
Choosing the Right Carving Tools
A sharp carving knife and a meat fork are essential for carving your roast. A good carving knife will slice through the roast easily, creating thin, even slices. A meat fork is useful for holding the roast in place while you carve. It's like having the right tools for a delicate surgery – they make the process easier and more precise.
Techniques for Carving
Here are some carving tips, like a professional chef demonstrating his skills:
- Slice against the grain: This creates tender slices that melt in your mouth. It's like cutting across the wood grain – it creates a smooth, delicate texture.
- Use a sawing motion: Avoid pressing down on the knife, as this can crush the meat. Instead, use a gentle sawing motion to cut through the roast. It's like cutting through a thick rope – a smooth, rhythmic motion is key.
- Start with a small section: Carve a few slices at a time to prevent the roast from cooling down too quickly. It's like a slow reveal, savoring each bite and letting the flavors develop.
Serving Your Roast
Serve your roast with your favorite sides. mashed potatoes, roasted vegetables, and a green salad are classic accompaniments. You can also add a dollop of horseradish cream or gravy for an extra touch of flavor. It's like choosing the perfect ensemble for your masterpiece – it completes the dining experience and elevates the roast to a new level.
(Part 7) Tips for Success
Don't Overcrowd the Oven
If you're roasting other items in the oven with your roast, make sure they have enough space to cook evenly. Overcrowding the oven can lead to uneven cooking and a dry roast. It's like a crowded dance floor – everyone needs their own space to move freely and avoid bumping into each other.
Avoid Poking the Roast
Resist the urge to poke the roast with a fork or knife while it's cooking. This allows precious juices to escape, resulting in a drier roast. It's like squeezing a sponge – you lose the moisture and the flavor.
Use a Meat Thermometer
A meat thermometer is an essential tool for ensuring your roast is cooked to perfection. It eliminates guesswork and prevents overcooking or undercooking. It's like a compass guiding you through a culinary journey, ensuring you arrive at your destination safely and successfully.
Be Patient
Roasting beef is a process that takes time. Be patient and allow the roast to cook slowly and evenly. It's worth the wait for a delicious and satisfying meal. It's like growing a garden – you need to nurture it and give it time to flourish.
(Part 8) FAQs
1. What happens if I overcook my roast?
Overcooking a roast can result in a dry and tough piece of meat. The best way to avoid overcooking is to use a meat thermometer to monitor the internal temperature. It's like cooking a delicate fish – you want to ensure it's cooked through but not overcooked, resulting in a flaky and juicy texture.
2. Can I freeze roast beef?
Yes, you can freeze roast beef. Wrap it tightly in plastic wrap or aluminum foil and freeze for up to 3 months. Thaw the roast in the refrigerator for a few days before cooking. It's like storing a precious piece of art – you want to protect it from the elements and ensure it stays in perfect condition.
3. What if my roast is undercooked?
If your roast is undercooked, you can continue cooking it in the oven until it reaches the desired internal temperature. Make sure to check the temperature frequently to prevent overcooking. It's like baking a cake – you want to ensure it's baked through but not burned, resulting in a moist and delicious treat.
4. How can I make my roast more flavorful?
You can enhance the flavor of your roast by using a flavorful marinade, adding aromatics like onions or garlic to the roasting pan, or serving it with a delicious sauce. It's like adding a dash of spice to a bland dish – it adds depth and complexity to the overall flavor profile.
5. What is the best way to reheat leftover roast beef?
You can reheat leftover roast beef in the oven, on the stovetop, or in the microwave. For the best results, heat the roast gently to prevent drying it out. It's like reheating a delicate soup – you want to preserve the flavors and texture, avoiding harsh heat that can ruin the dish.
Roasting beef is a culinary art that can be mastered with practice and patience. By following these tips, you can create a succulent and flavorful roast that will impress your family and friends. Remember to choose the right cut, season generously, and cook it to your desired doneness. Enjoy the delicious results!
Everyone is watching

Corn on the Cob: The Ultimate Guide to Perfectly Cooked Ears
Healthy MealsAh, corn on the cob. Just the name evokes images of sunny days, barbecues, and that sweet, juicy flavour that ...

Perfect Pork Roast Oven Cooking Time: A Guide to Delicious Results
Healthy MealsThere's something truly satisfying about a perfectly roasted pork. The aroma alone is enough to make your mout...

Ham Cooking Time: How Long to Bake, Smoke, or Boil a Delicious Ham
Healthy MealsAh, ham. It's a classic, isn't it? A real crowd-pleaser, especially around holidays. And when done right, it'...

Scallops: The Ultimate Guide to Perfect Cooking
Healthy MealsAh, scallops. Those delicate, sweet, and utterly delicious morsels of the sea. They hold a special place in my...

Spaghetti Squash: The Ultimate Guide to Cooking and Serving
Healthy MealsRemember that time you saw spaghetti squash at the supermarket, looking all bumpy and strange, and thought, "W...
