You’re thinking about grilling some ribs, eh? Fantastic choice! There’s nothing quite like sinking your teeth into a perfectly cooked rack of ribs, all smoky, tender, and dripping with flavour. And grilling them yourself, well, that takes the whole experience to a whole new level. It’s not just about the taste; it’s about the whole process, the aromas filling your backyard, the anticipation building as the ribs slowly cook, and that glorious moment when you finally get to enjoy your hard work.
But let’s be real, grilling ribs isn't just about throwing them on the grill and calling it a day. To achieve that mouthwatering tenderness, that perfect smoky flavour, you need a bit of knowledge, a bit of practice, and a good dose of patience. And that’s where I come in. I’ve been grilling ribs for years, experimenting with different techniques and recipes, always searching for that perfect bite. And I've learned a thing or two along the way, mate.
So, grab your apron, fire up your grill, and get ready to transform those ribs into a culinary masterpiece. This is your ultimate guide to grilling bbq ribs like a seasoned pro, packed with tips, tricks, and even a few secrets I’ve picked up over the years. We’ll cover everything from choosing the right cut, mastering the smoking process, crafting the perfect dry rub and glaze, and even how to serve those ribs like a true grilling champion.
(Part 1) Choosing the Right Ribs: The Foundation of Your BBQ Masterpiece
Now, before you get your hands dirty, you need to pick the right ribs. This is crucial, mate. It’s like choosing the right ingredients for a cake – if you start with the wrong stuff, the final product won’t be what you hoped for. There are two main types of ribs available at your butcher: baby back ribs and spare ribs. Let's break down the differences so you can choose the perfect cut for your grilling adventure.
baby back ribs: Lean, Tender, and Delicious
These ribs are smaller, leaner, and come from the upper part of the hog. They have a fantastic meat-to-bone ratio, making them a popular choice for grilling because they tend to be more tender than their spare rib counterparts. They’re a good choice for those who prefer a leaner rib with a slightly milder flavour.
Spare Ribs: Meaty, Rich, and Flavorful
Spare ribs, on the other hand, come from the lower part of the hog and are generally larger and meatier than baby backs. They also tend to have more fat, which can result in a slightly tougher texture but also a more intense flavour. I personally love spare ribs for their rich taste and the satisfying feeling of getting that meat off the bone. But remember, if you go for spare ribs, you'll want to trim off some of the excess fat before grilling, you know, just to avoid an overly fatty end product.
(Part 2) Preparing the Ribs for the Grill: Setting the Stage for Success
Alright, you’ve got your ribs, now it’s time to get them ready for the grill. There are a couple of essential steps here that make a big difference in the final outcome. We’re talking about removing that pesky membrane and trimming the excess fat.
Removing the Membrane: Unlocking Flavor and Tenderness
You’ll find a thin, tough membrane on the backside of the ribs. You need to get rid of it, mate. It's like a barrier, preventing the smoke from penetrating the meat, which would be a real shame, wouldn't it? It can be a bit tricky to remove, but trust me, it’s worth the effort. Use a paper towel, a butter knife, or even your fingers to peel it off. You’ll feel a distinct difference in the final product.
Trimming the Fat: Finding the Right Balance
Now, depending on the type of ribs you've chosen, you might need to trim off some of the excess fat. Don’t go crazy though, you want some fat, it adds flavour and keeps the ribs juicy. Just trim off any big chunks and make sure the fat is evenly distributed.
(Part 3) The Dry Rub: Infusing Your Ribs with Flavor
Now we’re getting to the fun part: the dry rub! This is where you can really add your personal touch, mate. There’s no right or wrong here, it's all about flavour. You can create your own unique blend, or follow one of my tried-and-true recipes.
The Basics of a Winning Dry Rub
A dry rub is a mix of spices that you apply to the ribs before grilling. It’s essential to bring out the flavour of the meat and gives it a beautiful, smoky crust. You'll need a good blend of spices, like salt, pepper, paprika, garlic powder, onion powder, and cumin. You can add other things like brown sugar, chili powder, cayenne pepper, and even some herbs for extra flavour.
Tips for a Killer Dry Rub
Here are a few things I've learned over the years:
- Use kosher salt. It's coarser than table salt, allowing it to dissolve slower and penetrate the meat better, giving you a more even seasoning.
- Don’t be afraid to experiment with spices. Play around with different combinations to find your perfect blend. I often add a bit of smoked paprika for extra depth of flavour.
- Apply the rub liberally and evenly to all sides of the ribs. Massage it in so it sticks to the meat.
- Let the rub sit on the ribs for at least 30 minutes. This gives the spices time to penetrate the meat and develop their flavour. If you’ve got time, leave it overnight in the fridge. That’s when the magic happens, mate!
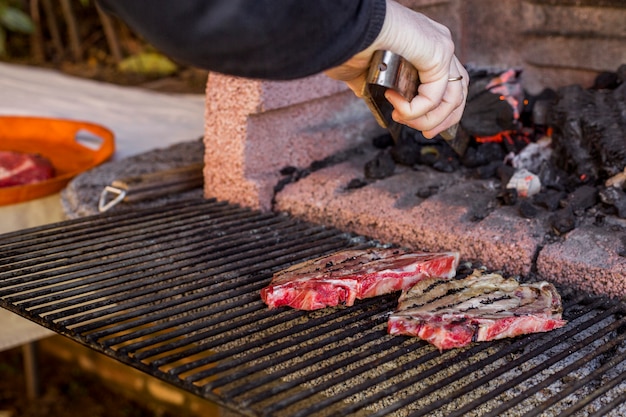
(Part 4) The Smoking Process: The Heart of the BBQ Experience
Now comes the real magic: the smoking! This is where those ribs transform from just raw meat to a masterpiece of flavour. The smoke adds depth and complexity, transforming them into something truly special.
Choosing Your Wood: The Key to Smoky Flavor
The type of wood you use for smoking makes a big difference in the flavour profile of your ribs. It’s like adding a secret ingredient, a touch of magic, that sets your ribs apart.
Here’s a quick breakdown of popular woods and their unique flavour profiles:
| Wood | Flavor Profile |
|---|---|
| Hickory | Smoky, bacon-like, with a hint of nuttiness |
| Mesquite | Strong, smoky, with a hint of sweetness |
| Oak | Slightly sweet, with a subtle smokiness |
| Apple | Sweet, fruity, and mild, perfect for pork |
| Cherry | Sweet, fruity, and slightly tart, adds a subtle sweetness |
You can mix and match different woods to create your own unique flavour profile. I tend to use a combination of hickory and oak for a classic BBQ flavour, but feel free to experiment.
Getting Started with Smoking: Setting Up for Success
Get your grill ready for smoking. If you're using a gas grill, you'll need a smoker box. If you're using a dedicated smoker, make sure it’s preheated and ready to go.
If you're using a gas grill, you can use wood chips. Soak the chips in water for at least 30 minutes before putting them in the smoker box. This will help them produce smoke without catching fire.
Smoking the Ribs: Low and Slow for Tenderness
Place your ribs on the grill, meat side up, over indirect heat. It's essential to maintain a low and slow cooking temperature, around 225–250°F (107–121°C). This ensures the meat cooks evenly and breaks down those tough connective tissues, creating that melt-in-your-mouth tenderness we all crave.
The smoking process takes time, mate. Be patient! It can take anywhere from 3 to 5 hours, depending on the size of your ribs and your desired level of tenderness.
The Wrap: Securing Tenderness and Locking in Flavor
After a few hours, your ribs should start to get tender and develop that beautiful smoky aroma. It’s time for a little trick I’ve learned: the wrap. Wrap the ribs in aluminium foil, add a few tablespoons of your favourite bbq sauce, and let them continue to cook for another hour or so. This helps create even more tenderness and locks in all that delicious flavour, creating a juicy, flavorful experience.
(Part 5) The Finishing Touches: Adding a Touch of Magic
Your ribs are looking good, they’re smelling fantastic, and they’re almost ready to eat! You’ve come so far, now let’s make sure they’re absolutely perfect. It’s time for the glaze!
The Glaze: Creating That Perfect Finish
A good BBQ glaze is the final touch, the cherry on top, that elevates your ribs from good to great. You can use your favourite store-bought sauce or make your own. I love making my own because it gives me total control over the flavour.
Tips for Glazing: The Perfect Application
When you’re glazing, apply it lightly to the ribs about 30 minutes before they're done. That way, it gets nice and sticky and caramelizes a bit, adding a bit of extra flavour and a beautiful shine to your masterpiece.
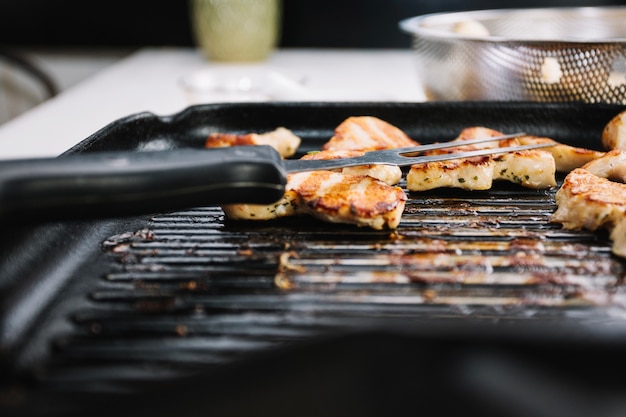
(Part 6) Checking for Doneness: Knowing When Your Ribs are Ready
It’s time to see if those ribs are ready to be devoured! Here’s how to tell:
The Meat: When you gently poke the ribs with a fork, the meat should pull away easily from the bone, revealing that beautiful, tender meat underneath.
The Bone: You should be able to see a good bit of bone exposed.
The Colour: The ribs should have a beautiful, deep mahogany colour, a sign of those smoky flavours permeating the meat.
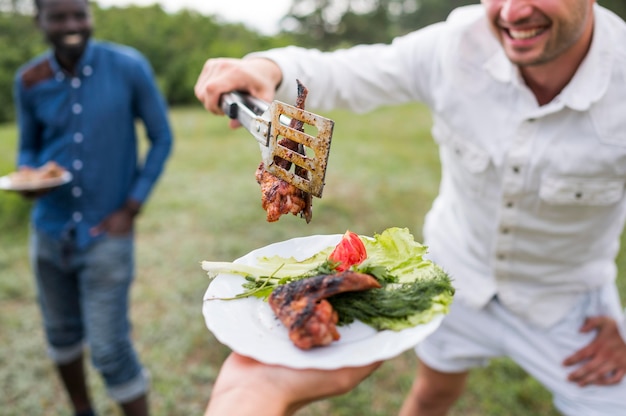
(Part 7) Serving Time! Presenting Your BBQ Masterpiece
Alright, the moment we’ve all been waiting for! Your ribs are done, they’re smelling amazing, and you’re ready to dig in. But remember, there are a few things to consider before you go wild with those ribs.
Resting the Ribs: Letting the Flavors Settle
It's crucial to let the ribs rest for at least 10 minutes before slicing them. This allows the juices to redistribute throughout the meat, resulting in a much more tender and juicy rib. Just like a good steak, it needs time to relax before you devour it.
Slicing the Ribs: Presenting Your Ribs with Care
Now, for slicing. There’s a proper way, you know. Place your ribs on a cutting board and use a sharp knife to cut between the bones. Make sure your cuts are clean and consistent, which makes them look even more appealing and shows your grilling prowess.
Sides: Completing the BBQ Feast
What’s a good BBQ without some killer sides, mate? I like to keep it simple, and there’s nothing better than some classic sides to accompany those ribs. Think coleslaw, potato salad, corn on the cob, or a big green salad.
Drinks: Quenching Your Thirst
You can’t forget about the drinks! A refreshing beer or a glass of sweet iced tea is the perfect way to cool down after a long session on the grill. Don’t forget to have plenty of napkins!
(Part 8) FAQs: Your Rib-Grilling Questions Answered
Now, let’s address some of the most common questions about grilling ribs.
1. What if my ribs are too dry?
If your ribs are too dry, there's a good chance they were overcooked. Next time, be sure to check the internal temperature often to make sure they don't get too hot. And don’t forget the wrap, it helps lock in moisture.
2. How long can I keep the dry rub on the ribs before grilling?
You can leave the dry rub on the ribs for as long as you like, really. You can even apply it the night before and leave them in the fridge. The longer it sits, the more flavour it’ll absorb.
3. How do I know if my ribs are cooked through?
The best way to check for doneness is by using a meat thermometer. You want the internal temperature to reach at least 190°F (88°C).
4. What’s the best way to reheat leftover ribs?
You can reheat leftover ribs in a slow cooker or in the oven. Just make sure you wrap them in foil to keep them moist.
5. What are some different BBQ sauces to try?
There are endless possibilities when it comes to BBQ sauce, mate. You can find all sorts of delicious sauces at the store or even make your own. I love experimenting with different flavours, from classic smoky sauces to sweet and tangy sauces, there's something out there for everyone. Just remember, it's all about personal preference.
So there you have it, mate! Your ultimate guide to grilling BBQ ribs like a pro. Now, go out there and put these tips to the test. It’s time to show everyone just how good you are at grilling those ribs! Just remember, it’s all about having fun and enjoying the process. And don’t forget to share those delicious ribs with your mates! After all, what’s a good BBQ without good company? Cheers, mate!
Everyone is watching

Corn on the Cob: The Ultimate Guide to Perfectly Cooked Ears
Healthy MealsAh, corn on the cob. Just the name evokes images of sunny days, barbecues, and that sweet, juicy flavour that ...

Perfect Pork Roast Oven Cooking Time: A Guide to Delicious Results
Healthy MealsThere's something truly satisfying about a perfectly roasted pork. The aroma alone is enough to make your mout...

Ham Cooking Time: How Long to Bake, Smoke, or Boil a Delicious Ham
Healthy MealsAh, ham. It's a classic, isn't it? A real crowd-pleaser, especially around holidays. And when done right, it'...

Scallops: The Ultimate Guide to Perfect Cooking
Healthy MealsAh, scallops. Those delicate, sweet, and utterly delicious morsels of the sea. They hold a special place in my...

Spaghetti Squash: The Ultimate Guide to Cooking and Serving
Healthy MealsRemember that time you saw spaghetti squash at the supermarket, looking all bumpy and strange, and thought, "W...