Let's be honest, the thought of wrestling with yeast can be a bit daunting, right? I get it. I used to feel the same way. The whole idea of a yeast starter, keeping it alive, and all that jazz - it seemed like a recipe for disaster! But then I discovered the joy of yeast-free bread baking, and my world completely changed. It's a game-changer, I tell you!
I'm going to share my journey with you, from that initial fear of yeast to discovering the pure satisfaction of creating delicious, fluffy loaves without any of that fussy yeast business. We'll talk about the different techniques, explore some of my favorite recipes, and even address those concerns that might be holding you back.
Ready? Let's bake!
(Part 1) The Magic of Yeast-Free Baking: Why Go Yeast-Free?

You might be thinking, why bother ditching the yeast when there's perfectly good yeast out there, ready to make fluffy loaves? Well, for one thing, there's the convenience factor. No more waiting for yeast to bloom, no need to keep track of starters. Just whip up a batch of batter and get baking.
But there's more to it than convenience. Yeast-free baking opens up a whole new world of flavors and textures. You can create breads that are dense and chewy, light and airy, or even crumbly and rustic. It's like a whole new playing field for your baking creativity!
Understanding the Power of Rising Agents
The key to yeast-free baking lies in understanding those rising agents that give your bread that fluffy, airy texture. It's not just about ditching yeast and throwing everything together, you're swapping it out for something else that will make your bread rise!
Here's the thing: each rising agent creates a different type of loaf, so choosing the right one is essential.
Yeast-Free Rising Agents: Your New Baking Buddies
Let's dive into the world of yeast-free rising agents:
- Baking Powder: The classic, go-to option for most yeast-free breads. Baking powder is a chemical leavening agent that releases carbon dioxide when it's mixed with liquid and heat, giving your bread that airy texture. Think pancakes, muffins, and light, fluffy loaves!
- Baking Soda: Another chemical leavener, baking soda shines in recipes that include acidic ingredients like buttermilk, yogurt, or lemon juice. The reaction between baking soda and those acidic ingredients produces carbon dioxide, making your bread rise. This is a great option for a denser, chewier bread with a hint of tang.
- self-raising flour: This pre-mixed flour already contains baking powder, making it a super quick and easy option for yeast-free baking. It's basically a cheat code for lazy bakers!
- Eggs: Don't underestimate the power of eggs! They contribute to the structure and texture of your bread, adding richness and flavor. In some cases, eggs can even substitute for baking powder, helping your bread rise.
The right combination of these ingredients, along with the right techniques, will give you that perfect yeast-free bread texture. We'll get into those techniques next!
(Part 2) Mastering the Techniques: Building Gluten for Success

Gluten, that protein in wheat flour, is the key to a good bread structure. It's what allows the bread to rise and hold its shape.
Gluten Development in Yeast-Free Baking
In yeast baking, the gluten has time to develop as the yeast ferments. But in yeast-free baking, we need to build it up more quickly. This means working the dough a little more vigorously, ensuring those gluten strands form and strengthen.
Techniques for Building Strong Gluten
Here's how to build up that gluten:
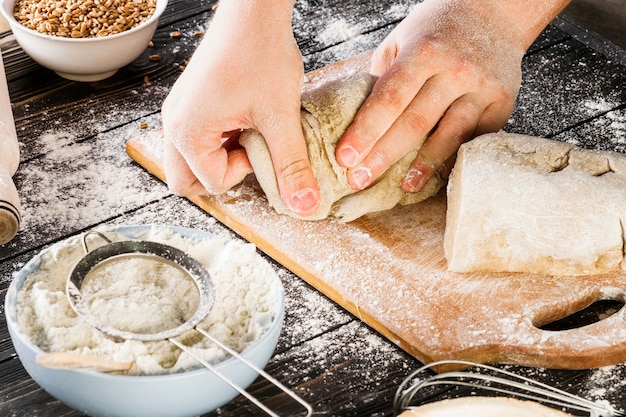
- Kneading: This classic technique involves folding and pushing the dough on a lightly floured surface for a few minutes, until it becomes smooth and elastic. Think of it as giving the dough a workout!
- Mixing: If kneading feels like too much effort, you can develop gluten by using a stand mixer or a hand mixer. Mix the dough until it forms a smooth ball.
- Resting: Even after kneading, letting your dough rest for 10-15 minutes helps the gluten relax and strengthen. This allows those gluten strands to develop, leading to a better rise.
(Part 3) Baking Secrets: The Importance of Oven Temperature

You might think it's as simple as sticking your loaf in the oven, but there's more to it! The temperature of your oven has a big impact on the texture of your yeast-free bread.
Oven Temperature: The Key to Baking Success
- Preheat, Preheat, Preheat: This is non-negotiable! Preheating your oven to the correct temperature ensures your bread bakes evenly and develops that lovely golden-brown crust.
- Don't Overbake: Keep a close eye on your bread as it bakes. Overbaking can lead to a dry and crumbly loaf. Take it out just before it's completely done, then let it cool on a wire rack for a few minutes. The residual heat will finish the baking process.
- Oven Location Matters: It might sound odd, but the location of your oven in your kitchen can actually make a difference! If it's next to a window or a drafty area, the temperature might fluctuate, making it harder to bake evenly.
(Part 4) Easy and Delicious Yeast-Free Bread Recipes: Your Baking Journey Begins
Now, I know what you're thinking: "Yeast-free bread sounds good, but is it actually tasty?" Let me assure you, it can be absolutely delicious! You're not missing out on anything!
I've got some super easy recipes that I've been making for years, and they've never failed to impress, even the most hardcore bread lovers!
Recipe 1: Classic Baking Powder Bread
Ingredients:
- 2 cups (250g) all-purpose flour
- 1 teaspoon baking powder
- 1/2 teaspoon salt
- 1 tablespoon sugar
- 1 cup (240ml) milk
- 2 tablespoons melted butter
- 1 egg, beaten
Instructions:
- Preheat your oven to 350°F (175°C).
- Grease a 9x5 inch loaf pan.
- In a large bowl, whisk together the flour, baking powder, salt, and sugar.
- In a separate bowl, whisk together the milk, melted butter, and egg.
- Add the wet ingredients to the dry ingredients and stir until just combined. Don't overmix!
- Pour the batter into the prepared loaf pan.
- Bake for 50-60 minutes, or until a toothpick inserted into the center comes out clean.
- Let the bread cool in the pan for 10 minutes before transferring to a wire rack to cool completely.
This recipe is perfect for a classic, simple loaf that's perfect for sandwiches, toast, or just enjoying on its own. It's got a lovely, soft texture and a slightly sweet flavor.
Recipe 2: Chewy Sourdough-Style Bread
Ingredients:
- 2 cups (250g) all-purpose flour
- 1 teaspoon baking powder
- 1/2 teaspoon salt
- 1/2 cup (120ml) buttermilk
- 1/4 cup (60ml) water
- 1 tablespoon olive oil
- 1 tablespoon honey
Instructions:
- Preheat your oven to 400°F (200°C).
- Grease a 9x5 inch loaf pan.
- In a large bowl, whisk together the flour, baking powder, and salt.
- In a separate bowl, whisk together the buttermilk, water, olive oil, and honey.
- Add the wet ingredients to the dry ingredients and stir until just combined.
- Pour the batter into the prepared loaf pan.
- Bake for 45-50 minutes, or until a toothpick inserted into the center comes out clean.
- Let the bread cool in the pan for 10 minutes before transferring to a wire rack to cool completely.
This recipe is a bit more involved, but trust me, it's worth it! It's a great way to get that sourdough-style flavor and texture without the long wait. This one's got that chewy, crusty goodness.
(Part 5) Exploring Beyond the Basics: Elevating Your Yeast-Free Baking
Now that you've got some basic recipes under your belt, let's get creative! There's a whole world of flavors and techniques to explore, and it's all about finding what you enjoy!
Adding Flavor and Texture: A World of Possibilities
Here are some ideas for getting creative with your yeast-free bread:
- Herbs and Spices: Think rosemary and garlic bread, or a sweet cinnamon loaf.
- Seeds and Nuts: Add texture and flavor with sesame seeds, pumpkin seeds, sunflower seeds, or chopped walnuts.
- Dried Fruits: Raisins, cranberries, or apricots are great additions to sweet breads.
- Cheeses: For savory breads, try adding shredded cheddar or mozzarella.
- Vegetables: You can even add chopped vegetables like onions, peppers, or zucchini.
Beyond the Loaf: Exploring Different Shapes
Don't limit yourself to traditional loaf shapes! Get creative!
- Rolls: These are great for parties or serving alongside soups and stews.
- Buns: Perfect for hamburgers or hot dogs.
- Flatbreads: These can be made on a griddle or in a pan, and they're great for dips and spreads.
Troubleshooting Tips: Solving Common Baking Challenges
Sometimes things don't go exactly as planned, but don't worry! Here are some common issues you might encounter and how to fix them:
- Bread is too dense: This usually means you didn't mix the batter enough, or your baking powder was expired.
- Bread is too dry: You might have overbaked it, or you didn't use enough liquid in the batter.
- Bread is sticky: You probably didn't use enough flour.
- Bread is flat: This could be because your baking powder was expired, or you didn't preheat the oven properly.
(Part 6) Yeast-Free Bread: A culinary adventure
I've found that yeast-free bread baking is a journey of constant discovery. It's about experimenting, tweaking recipes, and finding what works best for you. It's also about embracing those occasional baking mishaps and learning from them.
You don't need any fancy equipment or specialized skills to get started. All you need is a little curiosity, a willingness to experiment, and a good oven!
So, what are you waiting for? Go ahead, grab some flour and get baking!
(Part 7) FAQs: Addressing Your Concerns
Here are some of the questions I get asked a lot about yeast-free bread baking:
1. Is yeast-free bread healthy?
It's not about being "healthy" or "unhealthy" per se. Yeast-free bread doesn't magically become super healthy just because it doesn't have yeast!
It's more about how you make it. If you use whole-wheat flour, less sugar, and avoid adding too much butter or oil, you can make a more nutritious bread. But if you use white flour and lots of sugar and butter, it's not going to be super healthy, regardless of whether or not it has yeast.
Ultimately, it comes down to the ingredients you use and the amount you eat.
2. Can I freeze yeast-free bread?
Absolutely! You can freeze yeast-free bread for up to 3 months. Just wrap it tightly in plastic wrap or aluminum foil before putting it in the freezer.
When you're ready to eat it, thaw it in the refrigerator overnight, then let it come to room temperature before slicing and toasting.
3. Can I use different types of flour?
You certainly can! While all-purpose flour is a great go-to, you can also use other types of flour like whole-wheat, spelt, or even rye. Just keep in mind that each type of flour will have a different texture and flavor, so you might need to adjust the amount of liquid in your recipe.
For example, whole-wheat flour absorbs more liquid than all-purpose flour, so you might need to add a bit more milk or water.
4. What happens if I use expired baking powder?
If you use expired baking powder, your bread might not rise as much, and it could have a slightly metallic taste. It's best to use fresh baking powder for the best results.
5. Any tips for getting a crispy crust?
To get a crispy crust, try baking your bread on a baking sheet lined with parchment paper. This will help the air circulate around the bread, making it crispier.
You can also try brushing the loaf with a little bit of water or milk before baking. This will help the crust brown and crisp up.
(Part 8) The Joys of Baking: A Personal Reflection
That's the thing about yeast-free bread baking - it's not just about creating delicious food, it's about the journey itself. It's about the satisfaction of creating something from scratch, the joy of experimenting with different flavors, and the excitement of discovering new culinary possibilities.
I remember the first time I baked a perfect yeast-free loaf. It was a simple recipe, but it was a real moment of triumph. I felt like I had accomplished something, and it was a real sense of pride!
That's what I love most about baking - it's a way to connect with myself, to be creative, and to share something special with others.
And the best part? You get to eat the delicious results of your hard work!
(Part 9) Join the Yeast-Free Revolution!
So, there you have it - my guide to yeast-free bread baking. I hope this has inspired you to get into the kitchen and give it a go. You might be surprised at how easy and rewarding it can be.
You don't need to be a culinary genius or have years of experience. Just start with a simple recipe, have fun, and embrace the learning process. You never know, you might even discover your hidden baking talent!
And if you ever have any questions, don't hesitate to reach out. I'm always happy to share my baking knowledge and experiences. After all, baking is best enjoyed with friends!
Happy baking!
Everyone is watching

Prime Rib Roast Cooking Time Chart: Per Pound Guide
Cooking TipsPrime rib roast. Just the name conjures images of lavish dinners, crackling fires, and hearty laughter. It’s ...

How Long to Bake Potatoes in the Oven (Perfect Every Time)
Cooking TipsBaked potatoes are a staple in my kitchen. They're incredibly versatile, delicious, and surprisingly easy to m...

Perfect Rice Every Time: The Ultimate Guide to Cooking Rice
Cooking TipsAs a self-proclaimed foodie, I've always been a bit obsessed with rice. It's the foundation of countless cuisi...

The Ultimate Guide to Cooking Asparagus: Tips, Techniques, and Recipes
Cooking TipsAsparagus. The mere mention of this spring delicacy conjures up images of vibrant green spears, crisp and burs...

Ultimate Guide to Cooking the Perfect Thanksgiving Turkey
Cooking TipsThanksgiving. Just the word conjures up images of overflowing tables laden with delicious food, the scent of r...
