Ah, beef tenderloin. The mere mention of this succulent cut evokes images of decadent dinners, celebratory feasts, and the tantalising aroma of perfectly seared meat. As a seasoned home cook (and confessed food enthusiast), I've had countless encounters with this culinary gem, from casual family roasts to ambitious attempts at pan-seared perfection. There's something about beef tenderloin that keeps me coming back for more.
But let's be honest, even with experience under my belt, a hint of intimidation always lingers when it comes to tenderloin. Getting the timing just right, mastering the precise temperature, and navigating the nuances of different cooking methods can feel a bit daunting. No pressure, right?
Well, fear not, my fellow culinary adventurers! This comprehensive guide will break down every step, from selecting the perfect cut to achieving that coveted "medium-rare" finish. We'll explore various cooking techniques, discuss essential equipment, and even delve into the world of delicious side dishes that complement a beautiful beef tenderloin.
This isn’t just another guide; it's a journey we're embarking on together. Let’s dive in and unlock the secrets to tenderloin perfection!
(Part 1) Choosing Your Tenderloin: A Guide to Cuts and Grades

The first step in any culinary adventure is selecting the right ingredients, and when it comes to beef tenderloin, you've got choices to make.
It all starts with understanding the cuts. A whole tenderloin, often called a "beef tenderloin roast," is a long, cylindrical muscle that runs along the backbone. Butchers typically divide this into two sections: the "large end," which is wider and boasts more intense flavour, and the "small end," known for its tender texture but with a slightly less robust flavour.
Now, let's talk grades. In the UK, we have the “Meat Standards” grading system. While there’s no official “grading” system for beef, this classification refers to the animal's age, its fat content, and the overall quality of the meat. Here's a quick overview:
Understanding Beef Grades in the UK
Think of the grading system as a way to gauge the potential flavour and tenderness you can expect from the tenderloin.
| Grade | Description |
|---|---|
| Standard | Often from a younger animal, typically leaner with a good, straightforward flavour. |
| R | Slightly older, offering a bit more marbling for a richer and more complex flavour. |
| U | The cream of the crop, usually from older animals with exceptional marbling and intense flavour. These are the tenderloins that truly melt in your mouth. |
Don’t be swayed by labels that try to sell you “Prime” cuts. It's not an officially recognized grading system in the UK.
Here’s my personal tip: If you're seeking the most impressive flavour experience, opt for the large end of a "U" graded tenderloin. It’s an investment, but you'll be rewarded with an incredible eating experience. However, if you're on a budget or cooking for a smaller group, the small end of a “Standard” or “R” grade is perfectly fine.
Remember, the key to choosing the perfect tenderloin is to consider your budget, your preferences, and the number of people you're feeding. Now, let’s move on to the next step:
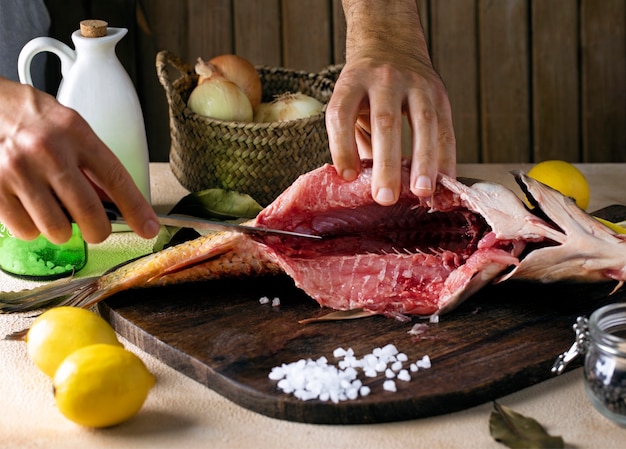
(Part 2) Preparing Your Beef Tenderloin: It's All in the Trimming
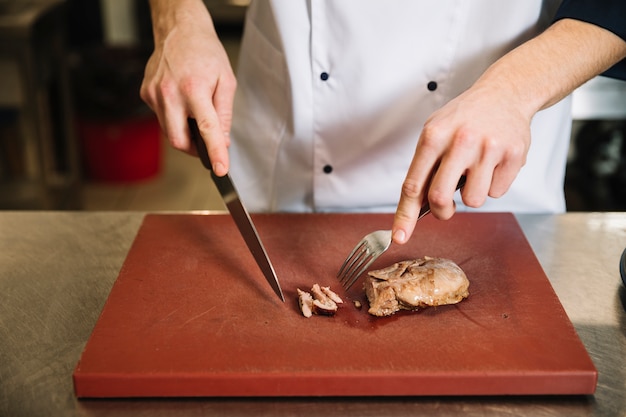
Once you've got your tenderloin in hand, it's time to give it a bit of TLC. Trimming is essential for achieving a beautifully presented and evenly cooked piece of meat.
Don't worry, this isn't a complicated process. Here's what you'll need:
- A sharp knife: This is key for clean, precise cuts.
- A cutting board: A sturdy cutting board will provide a stable surface for working with the tenderloin.
- Paper towels: Essential for patting the tenderloin dry after trimming.
Now, let’s get to it!
Trimming Your Tenderloin
- Remove the Silver Skin: This tough, white membrane that surrounds the tenderloin can make it chewy. Gently lift it with your knife and carefully peel it off. Take your time; you don't want to tear the meat underneath.
- Trim Excess Fat: Remove any excess fat that might be clinging to the tenderloin. A thin layer of fat is beneficial for flavor and moisture, but a thick layer can make it greasy.
- Even Out the Shape: If your tenderloin has any uneven parts, trim them to create a uniform shape. This will ensure that it cooks evenly. You're aiming for a smooth, symmetrical piece of meat.
Once you’ve trimmed your tenderloin, pat it dry with paper towels. This will help to ensure a beautiful sear and prevent steam from hindering the cooking process.
Now, we’re ready for the fun part – the cooking!
(Part 3) Master the Art of pan-seared beef tenderloin: A Step-by-Step Guide
For those who crave that crispy sear and juicy, flavorful core, pan-searing is the way to go. It's all about achieving a beautiful crust on the outside while keeping the inside perfectly pink.
Here's what you'll need:
- A heavy-bottomed skillet: This will distribute heat evenly, ensuring a consistent sear.
- Olive oil: The perfect oil for high-heat cooking, adding flavour and promoting a beautiful golden sear.
- Salt and pepper: Essential for bringing out the flavour of the tenderloin.
- Butter (optional): For an extra layer of richness and a beautiful sauce.
Now, let's get cooking!
Pan-Searing Perfection:
- Heat the Skillet: Place your heavy-bottomed skillet over medium-high heat. You want the skillet to be piping hot before you add the tenderloin. It should be smoking hot, almost like a well-heated cast iron pan.
- Season the Meat: Generously season the tenderloin with salt and pepper. Don't be shy with the salt! It's essential for bringing out the flavour of the meat.
- Add the Oil: Once the skillet is smoking hot, add a generous amount of olive oil. It should be shimmering and almost ready to smoke.
- Sear the Tenderloin: Carefully place the tenderloin in the hot skillet. You’ll hear a beautiful sizzle as the meat makes contact with the pan. Resist the urge to move it around. Let it sit for about 3-4 minutes per side. This will create a beautiful sear and allow the tenderloin to develop a crispy crust.
- Add Butter (Optional): If you're feeling fancy, you can add a knob of butter to the skillet in the last minute of cooking. This will add a rich, buttery flavor and create a beautiful sauce. As the butter melts, it will mix with the juices from the tenderloin, creating a delicious pan sauce.
- Rest the Meat: Once the tenderloin is seared to your liking, remove it from the skillet and let it rest for 5-10 minutes before slicing. This allows the juices to redistribute, resulting in a more tender and flavorful cut of meat. Cover the tenderloin loosely with foil to keep it warm.
Remember, the goal is to achieve a beautiful, even sear on all sides of the tenderloin. You’re aiming for a crispy crust on the outside and a perfectly cooked pink interior.
But what if you’re looking for a more tenderloin that’s cooked through?
(Part 4) oven-roasted beef tenderloin: Achieving a Consistent Cook
Oven-roasting is the perfect method if you want a consistently cooked tenderloin with a tender texture throughout. It’s a great option for large gatherings or when you want to be less hands-on in the kitchen.
Here’s what you’ll need:
- A roasting pan: This will provide a stable base for the tenderloin and allow for even heat distribution.
- Olive oil: For adding flavour and promoting browning during roasting.
- Salt and pepper: The foundation of flavour.
- Garlic (optional): A delicious addition for a hint of garlic flavour.
- Fresh herbs (optional): Enhance the flavour profile with your favourite herbs, like rosemary, thyme, or sage.
- meat thermometer: Essential for accurately checking the internal temperature of the tenderloin. You want to ensure it reaches the desired doneness.
Now, let’s get cooking!
Oven-Roasting Mastery:
- Preheat the Oven: Preheat your oven to 400°F (200°C). This will ensure that the tenderloin cooks evenly and quickly.
- Season the Meat: Season the tenderloin generously with salt and pepper. You can also add minced garlic, fresh herbs, or a drizzle of olive oil for extra flavor.
- Roast the Tenderloin: Place the tenderloin in a roasting pan and roast for 15-20 minutes per pound. The exact time will depend on the size of your tenderloin and your desired level of doneness.
- Check the Temperature: Use a meat thermometer to check the internal temperature of the tenderloin. It should reach 130°F (54°C) for medium-rare, 140°F (60°C) for medium, and 150°F (65°C) for medium-well.
- Rest the Meat: Once the tenderloin reaches your desired temperature, remove it from the oven and let it rest for 10-15 minutes before slicing. This will allow the juices to redistribute, resulting in a more tender and flavorful cut of meat. Cover the tenderloin loosely with foil to keep it warm.
For an extra-crispy crust, you can sear the tenderloin in a skillet before roasting it. Just follow the instructions from Part 3. This adds another layer of flavour and texture to your dish.
Remember, oven-roasting is about achieving consistent doneness throughout the tenderloin. It’s a great option if you’re serving a large group or if you want to minimize your time in the kitchen. It's a more forgiving method than pan-searing, allowing for a more relaxed approach to cooking.
Now, we’re going to explore some delicious ways to serve your perfectly cooked beef tenderloin.
(Part 5) Side Dishes to Compliment Your Beef Tenderloin: The Perfect Pairing
A perfectly cooked beef tenderloin deserves equally impressive accompaniments. The key is to create a balance of flavors and textures that complement the rich, savory taste of the meat.
Here are some of my favorite side dishes that I often pair with beef tenderloin:
Elevated Side Dish Ideas:
- Roasted Vegetables: A medley of roasted vegetables like asparagus, Brussels sprouts, or carrots adds a pop of color and sweetness to your plate. A drizzle of balsamic glaze or a sprinkle of herbs adds extra flavor and a touch of acidity to balance the richness of the meat.
- Creamy Polenta: The creamy, smooth texture of polenta is the perfect contrast to the tenderloin's rich flavor. It’s also a blank canvas for additional flavours, making it a great base for other ingredients like mushrooms, herbs, or cheese.
- potato gratin: A classic French dish, potato gratin features thinly sliced potatoes layered with cream, cheese, and spices. It’s a decadent and luxurious side dish that pairs beautifully with beef tenderloin.
- green beans Almondine: A simple yet elegant side dish, green beans almondine features crisp green beans sautéed with almonds and a touch of lemon juice. It provides a fresh and light contrast to the richness of the meat.
- Wild Mushroom Risotto: A rich and flavorful risotto made with wild mushrooms is a perfect match for the earthy notes of beef tenderloin. The creamy texture of the risotto also complements the tenderloin’s melt-in-your-mouth texture.
When selecting side dishes, remember to consider the overall flavor profile and texture. Don’t be afraid to experiment and find your favorite combinations. The possibilities are endless!
Let’s move on to the next step:
(Part 6) Mastering the Art of Sauce: Enhancing Your Beef Tenderloin
A good sauce can elevate a delicious dish to a culinary masterpiece. And when it comes to beef tenderloin, a rich and flavorful sauce is the perfect finishing touch.
There’s a whole world of sauce options out there, but here are some of my favorites:
Sauce Inspiration:
- Red Wine Sauce: A classic choice for beef tenderloin, red wine sauce is made with red wine, shallots, garlic, and herbs. It adds a deep, rich flavor and a touch of acidity that balances the richness of the meat. It’s also incredibly versatile and can be adjusted to your personal taste preferences.
- Mushroom Sauce: A savory and earthy sauce made with mushrooms, shallots, garlic, and white wine. It's a simple yet elegant sauce that complements the tenderloin beautifully. The earthy mushrooms perfectly complement the tenderloin's richness.
- Béarnaise Sauce: A rich and creamy sauce made with egg yolks, butter, tarragon, and white wine vinegar. It's a classic French sauce that adds a touch of luxury to any dish. The creamy texture and bright, herbaceous flavor create a stunning contrast to the tenderloin.
- Peppercorn Sauce: A spicy and flavorful sauce made with peppercorns, cream, and brandy. It adds a touch of heat and complexity to the tenderloin. The peppery kick complements the tenderloin’s savory notes.
- Bordelaise Sauce: A classic French sauce made with red wine, shallots, garlic, and bone marrow. It’s a rich and decadent sauce that’s perfect for special occasions. The rich, deep flavour of the sauce adds an extra layer of complexity to the tenderloin.
Choosing the right sauce depends on your personal preference and the overall flavor profile you’re looking to achieve. Remember, a little bit of sauce goes a long way, so don’t overdo it! The sauce should enhance the tenderloin, not overpower it.
Ready to learn some tips on how to keep your beef tenderloin at its best?
(Part 7) The Art of Serving: Keeping Your Beef Tenderloin Perfect
Now that your beef tenderloin is cooked to perfection, it's time to showcase it beautifully. The way you serve it can make all the difference in how it looks and tastes.
Here are some tips to ensure your beef tenderloin looks and tastes its best:
Serving with Style:
- Let It Rest: Always let the tenderloin rest for 10-15 minutes before slicing. This allows the juices to redistribute, resulting in a more tender and flavorful cut of meat. Cover the tenderloin loosely with foil to keep it warm during this resting period.
- Slice It Thin: Thinly slice the tenderloin against the grain. This will make it easier to chew and enhance its tenderness. Use a sharp knife for clean, even slices.
- Arrange It Beautifully: Arrange the sliced tenderloin on a platter with your chosen side dishes. Don’t overcrowd the plate. A well-presented dish is a feast for the eyes, even before the first bite.
- Add Garnishes: A sprinkle of chopped herbs, a drizzle of olive oil, or a few sprigs of fresh rosemary can elevate the presentation of your dish. Consider using fresh herbs that complement the flavour of your sauce or side dishes.
- Serve Immediately: Beef tenderloin is best served immediately after resting. This will ensure that it remains warm and juicy. The sooner you serve it, the better the texture and flavour will be.
Now, let's answer some common questions about beef tenderloin.
(Part 8) FAQs: Your Beef Tenderloin Questions Answered
I get it; there are so many questions about beef tenderloin. It’s a special cut of meat that deserves a little extra attention!
Questions You Might Ask:
- Q: How long should I cook a beef tenderloin for?
A: cooking time depends on the size of your tenderloin and your desired level of doneness. As a general rule, cook a tenderloin for 15-20 minutes per pound. Use a meat thermometer to check the internal temperature, which should be 130°F (54°C) for medium-rare, 140°F (60°C) for medium, and 150°F (65°C) for medium-well. Remember, cooking times can vary depending on your oven, so it's always best to use a meat thermometer to ensure accurate doneness. - Q: How do I know if my beef tenderloin is done?
A: The best way to determine if your beef tenderloin is cooked to your liking is to use a meat thermometer. Insert the thermometer into the thickest part of the tenderloin and check the internal temperature. You can also gauge doneness by pressing on the meat. A medium-rare tenderloin will feel springy to the touch, while a well-done tenderloin will feel firm. However, the most reliable method is using a meat thermometer. - Q: Can I freeze beef tenderloin?
A: Yes, you can freeze beef tenderloin. Wrap it tightly in plastic wrap and then aluminum foil and store it in the freezer for up to 3 months. It’s best to thaw it in the refrigerator overnight before cooking. This will ensure the tenderloin thaws evenly and doesn’t develop ice crystals that can affect the texture. - Q: What’s the best way to reheat leftover beef tenderloin?
A: The best way to reheat leftover beef tenderloin is in a preheated oven at 350°F (175°C) for about 10-15 minutes. It can also be reheated in a skillet over medium heat for a few minutes. Avoid microwaving it, as this can dry out the meat. Reheating in the oven or skillet helps retain moisture and flavour, resulting in a more delicious reheated meal. - Q: What are some tips for getting a crispy crust on my beef tenderloin?
A: To get a crispy crust, make sure your skillet is piping hot before adding the tenderloin. You should hear a sizzle as the meat hits the pan. Don't overcrowd the skillet, and let the tenderloin cook for 3-4 minutes per side without moving it. You can also sear the tenderloin in a skillet before roasting it for an extra-crispy crust. A hot skillet and a bit of patience are key to achieving that perfect crispy crust.
As you continue to experiment with different cooking techniques, sides, and sauces, you’ll find yourself creating truly unforgettable meals. Remember, cooking is an art, and there's always room for experimentation and personal touch.
So go on, give it a try! And let me know how your beef tenderloin adventure turns out!
Everyone is watching

Prime Rib Roast Cooking Time Chart: Per Pound Guide
Cooking TipsPrime rib roast. Just the name conjures images of lavish dinners, crackling fires, and hearty laughter. It’s ...
How Long to Bake Potatoes in the Oven (Perfect Every Time)
Cooking TipsBaked potatoes are a staple in my kitchen. They're incredibly versatile, delicious, and surprisingly easy to m...
Perfect Rice Every Time: The Ultimate Guide to Cooking Rice
Cooking TipsAs a self-proclaimed foodie, I've always been a bit obsessed with rice. It's the foundation of countless cuisi...
The Ultimate Guide to Cooking Asparagus: Tips, Techniques, and Recipes
Cooking TipsAsparagus. The mere mention of this spring delicacy conjures up images of vibrant green spears, crisp and burs...
Ultimate Guide to Cooking the Perfect Thanksgiving Turkey
Cooking TipsThanksgiving. Just the word conjures up images of overflowing tables laden with delicious food, the scent of r...