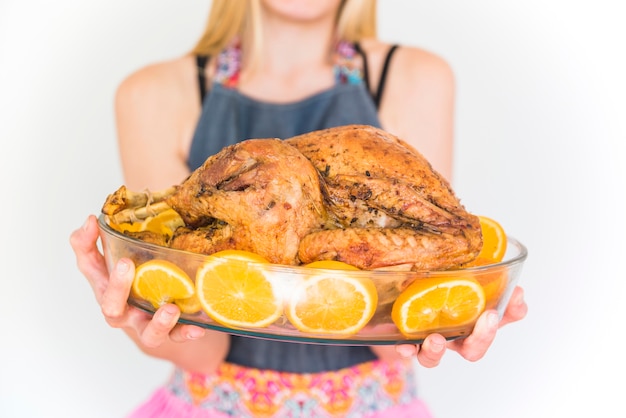
Ah, the turkey. It’s the centerpiece of many a festive meal, but it can also be a source of culinary anxiety. We’ve all been there, staring down a giant bird, wondering if we can pull off a delicious, perfectly cooked turkey. For years, I relied on the traditional oven method, but then I discovered the magic of the roaster oven. It's like having a little oven dedicated solely to your turkey! This simple appliance takes the stress out of turkey cooking, delivering consistently juicy and flavorful results.
This guide is for everyone, from the absolute beginner to the seasoned cook who's just looking for a new approach. We’ll cover everything from choosing the right turkey to crafting the perfect gravy, tackling common pitfalls, and sharing insider tips that’ll make you a turkey-roasting champion. So, grab a cuppa, settle in, and let’s get cooking!
(Part 1) Choosing Your Turkey: The Foundation of a Delicious Feast

The journey to a delectable turkey starts with selecting the right bird. It might seem like a simple task, but there are a few things to consider before you head to the butcher or the supermarket.
Size Matters: Finding the Perfect Fit
I’ve learned the hard way that choosing the right size turkey is crucial. You don't want a tiny bird for a large crowd, and you definitely don't want a colossal turkey crammed into a small roaster oven. For a standard roaster oven, a turkey between 10 and 16 pounds is usually ideal. Imagine the turkey nestled comfortably, with a bit of space to allow heat circulation. Before you buy, check the dimensions of your roaster oven and consult the manufacturer's instructions to ensure the turkey fits comfortably. There's nothing worse than realizing your turkey is too big once you get home!
Fresh or Frozen: Debating the Flavor
This is a personal preference, but I've found that fresh turkeys tend to have a more pronounced flavor. They're typically juicier and have a more delicate texture. If you're going for a fresh turkey, make sure you get it a day or two before your planned feast to allow time for it to chill properly in the fridge. If you opt for a frozen turkey, be sure to thaw it completely before you start cooking. This takes time, so plan accordingly. You can thaw it in the fridge for a couple of days, or in a cold water bath (changing the water every 30 minutes).
Turkey Types: Exploring Beyond the Basic
There are different types of turkeys out there, each with its own unique characteristics. If you’re feeling adventurous, consider a heritage breed like a Bourbon Red or a Broad Breasted Bronze. These turkeys are known for their richer flavor and a more robust texture, adding a touch of sophistication to your holiday spread. However, for a classic turkey experience, a regular white turkey will do just fine. It’s all about finding what suits your taste and the occasion.
(Part 2) Prepping the Turkey: Unveiling the Flavor

Once you’ve got your turkey, it’s time to get it prepped. This is where a little bit of care and attention goes a long way. You’re not just cooking a bird; you’re preparing it to become the star of the show!
Removing the Giblets: Unleashing the Flavor
Those little packets of giblets and neck in the turkey cavity? They're often overlooked, but they hold a treasure trove of flavor! You can use them to make a delicious broth or gravy, adding depth and richness to your meal. However, for roasting, they’re best removed. Simply snip the bag open and set the giblets aside for later use.
Pat It Dry: The Secret to crispy skin
Give your turkey a good pat dry with paper towels. This simple step makes a world of difference. It helps to achieve a crispy skin, which is a true hallmark of a perfectly roasted turkey. Drying the skin also prevents excess moisture, which can make the skin soggy. You want that beautiful, golden-brown crust, not a limp, pale one!
Seasoning the Turkey: A Symphony of Flavors
This is where you can get creative! I prefer a simple salt and pepper rub, allowing the natural flavor of the turkey to shine. However, feel free to experiment with other herbs and spices. A little bit of garlic powder, onion powder, or even a sprinkle of paprika adds a delicious depth of flavor. You can also use a blend of herbs like thyme, rosemary, and sage, creating a fragrant aroma that permeates the entire kitchen. Just be careful not to overdo it; you don’t want to overwhelm the natural flavor of the turkey. Remember, a little goes a long way!
(Part 3) The Roaster Oven Setup: Setting the Stage for a Delicious Feast

Now that your turkey is prepped, it’s time to get your roaster oven ready. This is where the real fun begins! You're about to embark on a culinary adventure, and the roaster oven is your trusted companion.
Choosing the Right Roaster Oven: A Decision for Your Kitchen
Before we go any further, let's talk roaster ovens. There are two main types: electric and stovetop. Electric roaster ovens are usually easier to use, especially if you’re not comfortable with managing heat on the stovetop. They offer a consistent heat distribution, often with a built-in thermostat, making them a great option for beginners. Stovetop roaster ovens are more traditional, requiring a little more attention to ensure the turkey cooks evenly. They offer a more rustic charm, and some cooks prefer the extra control they provide. I’ve used both and find them both quite effective. It really comes down to personal preference and your kitchen setup.
Preparing the Roaster Oven: Creating the Perfect Environment
Once you’ve chosen your roaster oven, it’s time to prepare it. Grease the bottom of the roaster oven with butter, oil, or cooking spray. This will help prevent the turkey from sticking, ensuring a smooth cooking process. You can also add a few slices of onion or celery to the bottom of the roaster oven to add flavor to the pan drippings. This little trick gives your gravy an extra layer of deliciousness!
Placing the Turkey: A Comfortable Position
Place the turkey into the roaster oven, ensuring it is positioned comfortably. Remember, you don’t want it to be crammed in! The turkey needs space to cook evenly. If you’re using a stovetop roaster oven, make sure it’s placed on a stable surface and you have enough space around it for the heat to circulate properly. Avoid placing it near the edge of the stovetop, especially if you're using a heavy roaster oven. Safety first!
(Part 4) Cooking the Turkey: The culinary journey Begins
We've reached the big day, the day you bring your turkey to life! This is where the real magic happens. The roaster oven becomes your culinary wizard, transforming a raw bird into a centerpiece worthy of celebration.
cooking time: A Guide to Perfect Doneness
Cooking time will depend on the size of your turkey. A good rule of thumb is to cook the turkey for about 15-20 minutes per pound at 325 degrees Fahrenheit (165 degrees Celsius). However, it’s always best to use a meat thermometer to check the internal temperature. You want the turkey to reach a safe internal temperature of 165 degrees Fahrenheit (74 degrees Celsius) in the thickest part of the thigh. This ensures the turkey is cooked through and safe to eat. You can find a handy guide in the table below:
| turkey weight | Cooking Time (Minutes per Pound) |
|---|---|
| 8-12 pounds | 15 |
| 12-16 pounds | 18 |
| 16-20 pounds | 20 |
Remember, these are just guidelines. Always rely on a meat thermometer for accurate results. Overcooking can lead to dry meat, so it's better to err on the side of caution.
Basting the Turkey: A Symphony of Flavors and Textures
For a beautifully golden-brown skin, I recommend basting the turkey with pan drippings or a butter-herb mixture. You can do this every 30-45 minutes. The basting helps to keep the turkey moist and adds a delicious flavor to the skin. Use a spoon or baster to collect the pan drippings and drizzle them over the turkey, ensuring every inch of the skin gets a touch of moisture.
(Part 5) Checking for Doneness: Ensuring Perfection
Doneness is everything! So how do you know when your turkey is cooked through? It’s not just about the time, it’s about the internal temperature. The meat thermometer is your trusted companion, helping you avoid the dreaded undercooked turkey.
Using a Meat Thermometer: The Ultimate Guide to Doneness
A meat thermometer is your best friend when it comes to turkey roasting. You need to insert it into the thickest part of the thigh, making sure it doesn't touch any bones. You want the temperature to reach 165 degrees Fahrenheit (74 degrees Celsius). Once you reach that magic number, you know your turkey is perfectly cooked.
The Jiggle Test: A Helpful Indicator
Another handy trick is to use the jiggle test. If the thigh feels firm and doesn’t jiggle, it’s likely cooked through. This is a quick visual check, but remember, always rely on a meat thermometer for accuracy. The jiggle test is a helpful indicator, but it shouldn't be your sole guide.
(Part 6) Resting the Turkey: A Moment of Relaxation
Once your turkey has reached the desired internal temperature, it’s time to give it a little break. Resting the turkey is crucial for achieving optimal tenderness and juiciness. It's a simple step that yields a delicious reward!
Why Resting Is Essential: Unlocking Flavor and Tenderness
Resting allows the turkey to re-absorb its juices, resulting in a juicy and flavorful meat. It also gives the juices a chance to redistribute evenly, creating a more tender and flavorful turkey overall. Imagine the juices slowly migrating back into the meat, creating a symphony of flavors and textures.
Resting Time: A Moment of Culinary Zen
I recommend resting the turkey for about 15-20 minutes before carving. You can tent it with foil to keep it warm while it rests. This will ensure the juices stay locked in and the turkey stays warm. The wait might seem like an eternity, but it's a crucial step in the turkey-roasting process.
(Part 7) Carving the Turkey: A Masterful Art
Finally, it’s time to carve the turkey. This might seem daunting, but with a few simple tips, you can do it like a pro! Carving is a culinary art form, and with practice, you can master the art of slicing and dicing with confidence.
Choosing the Right Carving Knife: A Crucial Tool
A sharp carving knife is essential for slicing the turkey neatly and efficiently. Make sure your knife is long and thin, with a serrated edge. A serrated edge cuts through the skin and meat effortlessly, leaving clean, even slices. Avoid using a dull knife, as it can shred the meat and make carving a frustrating experience.
Carving the Turkey: A Step-by-Step Guide
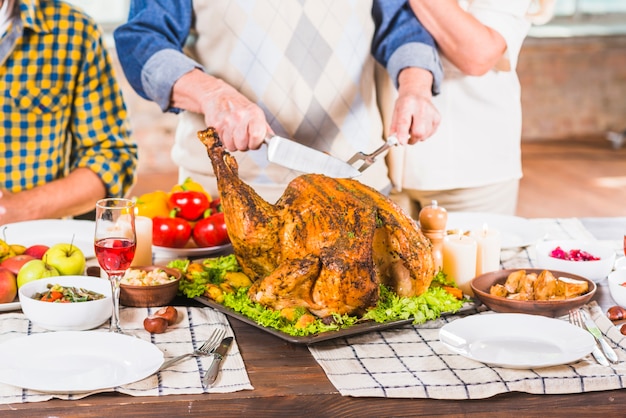
Start by carving the breast, slicing it into thin, even pieces. You can then carve the legs and thighs. If you’re feeling adventurous, you can also carve the wings. Work carefully and patiently, ensuring each slice is uniform and attractive. If you're new to carving, practice on a piece of cooked chicken first to get a feel for the technique.
(Part 8) Serving the Turkey: A Culinary Triumph
Your turkey is now cooked, rested, and carved. It’s time to enjoy it! This is the moment you've been working towards, the culmination of your culinary efforts.
Serving Suggestions: A Symphony of Flavors
I love serving my turkey with a classic stuffing, gravy, cranberry sauce, and roasted vegetables. The stuffing adds a comforting element, the gravy enriches the flavors, the cranberry sauce provides a tart counterpoint, and the roasted vegetables provide a vibrant medley of colors and textures. But feel free to get creative and add your own personal touch.
Leftover Love: Transforming Leftovers into New Delights
Don't forget about those delicious leftovers! You can use them to make turkey sandwiches, salads, soups, or even a turkey pot pie. Get creative with your leftovers and turn them into new and exciting dishes! Leftovers can be just as satisfying as the original meal, allowing you to enjoy the flavors of your turkey feast for days to come.
FAQs
- Q: Can I cook a turkey in a roaster oven if it’s too big?
- Q: Can I roast a turkey with stuffing in a roaster oven?
- Q: What if my turkey isn’t browning properly?
- Q: How do I keep my turkey moist?
- Q: Can I use a roaster oven for other dishes?
A: If your turkey is too big for your roaster oven, you can try cooking it in sections. For example, you can cook the legs and thighs separately from the breast. This will ensure that the turkey cooks evenly. Just be sure to add extra cooking time for the larger sections. It might take a little longer, but you'll end up with a perfectly cooked turkey!
A: While you can technically roast a turkey with stuffing in a roaster oven, it's not recommended. The stuffing won't cook evenly in the roaster oven, and it can lead to foodborne illness. The stuffing needs to reach a safe internal temperature, and the roaster oven environment may not be ideal for this. I recommend preparing the stuffing separately in a casserole dish or baking it alongside the turkey.
A: If your turkey isn’t browning properly, you can try increasing the heat slightly or repositioning the turkey in the roaster oven to expose more of the skin to the heat. You can also try basting it more frequently. If your turkey is in a roaster oven with a lid, you might need to leave the lid slightly ajar to allow for more browning.
A: To keep your turkey moist, I recommend basting it regularly with pan drippings or a butter-herb mixture. You can also add a little bit of broth to the bottom of the roaster oven to create a steamy environment. This will help to keep the turkey juicy and flavorful.
A: Absolutely! Roaster ovens are versatile and can be used for a variety of dishes, from roasting vegetables and poultry to making casseroles, soups, and stews. They are especially great for large family meals. Imagine creating a delicious roast chicken dinner, a hearty beef stew, or a comforting casserole all in your roaster oven. The possibilities are endless!
There you have it, my friends. That’s my ultimate guide to cooking a turkey in a roaster oven. I hope you find it helpful and inspiring. Remember, cooking a turkey in a roaster oven can be a fun and rewarding experience. So don't be afraid to experiment and try something new! Happy cooking!
Everyone is watching

Prime Rib Roast Cooking Time Chart: Per Pound Guide
Cooking TipsPrime rib roast. Just the name conjures images of lavish dinners, crackling fires, and hearty laughter. It’s ...

How Long to Bake Potatoes in the Oven (Perfect Every Time)
Cooking TipsBaked potatoes are a staple in my kitchen. They're incredibly versatile, delicious, and surprisingly easy to m...

Perfect Rice Every Time: The Ultimate Guide to Cooking Rice
Cooking TipsAs a self-proclaimed foodie, I've always been a bit obsessed with rice. It's the foundation of countless cuisi...

The Ultimate Guide to Cooking Asparagus: Tips, Techniques, and Recipes
Cooking TipsAsparagus. The mere mention of this spring delicacy conjures up images of vibrant green spears, crisp and burs...

Ultimate Guide to Cooking the Perfect Thanksgiving Turkey
Cooking TipsThanksgiving. Just the word conjures up images of overflowing tables laden with delicious food, the scent of r...
