Thanksgiving. The word conjures up images of overflowing tables laden with delicious food, a warm, cozy atmosphere, and of course, the star of the show – the turkey. We all dream of a bird that's perfectly cooked: succulent, moist, and bursting with flavour. But let's be real, sometimes those dreams turn into a dry, disappointing reality. Nobody wants a dry, flavourless turkey, especially not on Thanksgiving!
That's where the turkey in a bag method comes in. It's a total game-changer, and I'm here to share my secrets with you. I've been using this method for years, and I've never looked back. My family raves about the turkey, even my notoriously picky uncle approves! Now that's a testament to this method's success, don't you think?
So, grab a cuppa, settle in, and get ready to elevate your thanksgiving turkey to a whole new level of deliciousness. I'm going to take you step-by-step through the entire process, from prepping the bird to carving it up with all the trimmings.
Part 1: The Magic of the Bag

The Science Behind the Success
Before we jump into the details, let's unravel the science behind this brilliant technique. The magic of the bag lies in its ability to trap moisture, creating a steamy, flavour-infused environment that cooks the turkey evenly. This steamy embrace ensures every part of the bird is juicy and succulent, preventing that dreaded dry breast. It's like giving your turkey a luxurious spa treatment, but without the cucumber slices. The best part? No more basting every hour! The bag does all the work for you, leaving you free to enjoy the festive chaos. It's like magic, without the wand, and who wouldn't want that?
Gather Your Tools
You don't need a fancy kitchen gadget or a million different ingredients to make this magic happen. Just a few key items, and you're good to go:
- A large oven bag: The hero of our story. Look for one made of oven-safe plastic, big enough to comfortably accommodate your turkey. Don't skimp on this, you want a bag that's durable and leakproof. You'll thank me later.
- A turkey: The star of the show, obviously! Choose a turkey that's the right size for your crowd. A good rule of thumb is 1 pound per person, but consider adding a bit extra for those delicious leftovers (you know, for those late-night cravings).
- Your favourite turkey rub or seasoning blend: This is where you get to unleash your creativity! Use a pre-made blend or create your own masterpiece with a medley of herbs, spices, and even a touch of citrus zest. Let your taste buds be your guide.
- Butter, olive oil, or a combination: A touch of fat helps the skin achieve that beautiful golden brown colour and adds a delightful depth of flavour.
- Vegetables: Not strictly necessary, but adding some veggies like carrots, onions, or celery can enhance the flavour of the turkey and create a rich, flavorful broth for gravy later. It's a win-win!
- A roasting pan: You'll need a pan big enough to accommodate the bag and prevent any spills. It's better to be safe than sorry, trust me!
Part 2: The Prep Game: Getting Ready for Success
Thaw with Care, Rinse with Confidence
First things first, you need to thaw your turkey. It seems obvious, but it's crucial. A frozen turkey won't cook evenly, and nobody wants a case of food poisoning on Thanksgiving. The safest way to thaw is in the refrigerator, allowing at least 24 hours per 5 pounds of turkey. Once it's thawed, rinse the turkey inside and out under cold running water. Pat it dry with paper towels, and you're ready to unleash your seasoning skills.
Seasoning Symphony: Creating Flavourful Magic
This is where the fun begins! You can use a pre-made turkey rub, but I encourage you to get creative and make your own. I like to use a blend of herbs like rosemary, thyme, and sage, combined with spices like garlic powder, onion powder, paprika, and a pinch of black pepper. Don't forget a generous sprinkle of salt. Now, take your magical seasoning blend and rub it all over the turkey, inside and out. Make sure every nook and cranny is coated, and don't be shy with your seasoning.
Here's a tip for the adventurous cook: stuff the turkey cavity with herbs and citrus fruit. I love using a lemon and a few sprigs of rosemary. It adds a delightful burst of flavour to the bird.
The Butter Trick: A Touch of Richness and Golden Perfection
Now, for the finishing touch: butter. It's not just about making the skin crisp and golden, although that's a wonderful bonus. Butter helps seal in the moisture, ensuring a juicy, tender turkey. You can simply spread a thin layer of butter all over the turkey, or you can go all out and create a herb-infused butter mixture with your favourite herbs and spices. Just ensure the butter is evenly distributed, and you're ready to bag it up!
Part 3: Bagging It Up: A Safe and Secure Environment
Time to assemble your masterpiece! Grab your oven bag and lay it flat on a work surface. Carefully place the turkey in the bag, ensuring it's lying flat. You can add some vegetables to the bottom of the bag, like carrots, onions, or celery. They'll soak up all the delicious juices and add extra depth of flavour to the turkey.
If your bag has a tie, tie it securely. If it doesn't, use a twist tie or a piece of kitchen twine to close the bag. Make sure the bag is sealed tightly to prevent any leaks, we don't want a messy oven situation! Now, create a few vents in the bag to allow steam to escape, preventing the bag from bursting in the oven. You can do this by poking a few holes in the top of the bag with a fork or a skewer. Don't worry about the holes drying out the turkey. The steam will still be trapped inside, ensuring perfect cooking.
Part 4: cooking time! Bringing the Turkey to Life
Time to turn up the heat! Preheat your oven to 325 degrees Fahrenheit (163 degrees Celsius). Grab your roasting pan and place the bag inside. Make sure the bag is lying flat in the pan, and the opening of the bag is facing upwards. You're ready to cook!
The cooking time depends on the size of your turkey. A general rule of thumb is 13-15 minutes per pound of turkey. But I always recommend using a meat thermometer to ensure your turkey is cooked through.
Here's a handy table to guide your cooking time:
| Weight of Turkey (lbs) | Cooking Time (approx.) |
|---|---|
| 8-10 | 2 hours, 30 minutes - 3 hours |
| 10-12 | 3 hours, 15 minutes - 3 hours, 45 minutes |
| 12-14 | 3 hours, 45 minutes - 4 hours, 15 minutes |
| 14-16 | 4 hours, 15 minutes - 4 hours, 45 minutes |
To ensure your turkey is cooked to perfection, insert a meat thermometer into the thickest part of the thigh, avoiding the bone. The turkey is cooked through when the thermometer reads 165 degrees Fahrenheit (74 degrees Celsius). If you're using a digital thermometer, leave it in the turkey throughout the cooking process. It will alert you when the turkey reaches the desired temperature.
A meat thermometer with an alarm is also a great option if you're not constantly watching the oven. It will alert you when the turkey is cooked, giving you peace of mind and freeing you up to focus on other Thanksgiving preparations.
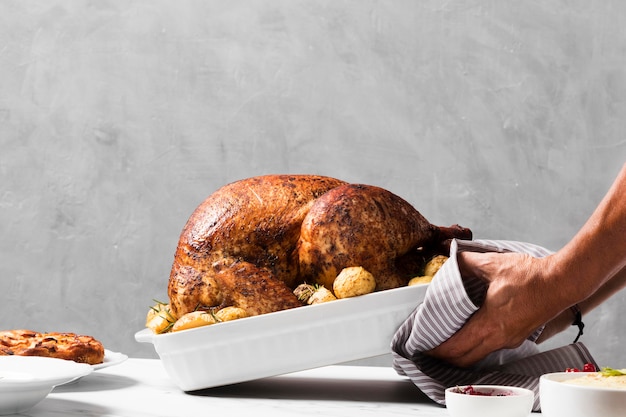
Part 5: Rest and Carve: Patience is Key to Juicy Perfection
Your turkey is cooked! But before you start carving, give it a chance to rest for at least 20 minutes. This allows the juices to redistribute evenly, ensuring a wonderfully moist turkey. While the turkey is resting, you can get started on your gravy.
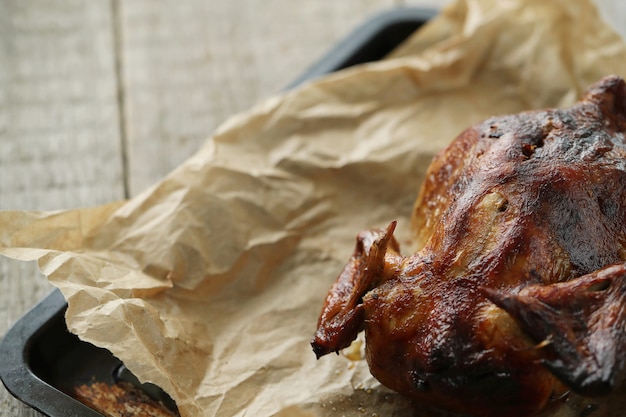
Carving the turkey is a bit of an art form, but with a little practice, you'll be a pro in no time. First, remove the turkey from the oven bag and place it on a carving board. Use a sharp carving knife to carefully remove the legs, wings, and breast. Then, slice the breast into thin slices.
Part 6: Making the Most of Your Leftovers: Turning Treasures into Deliciousness
After all the feasting, you'll probably have some leftover turkey. Don't worry, there are tons of delicious things you can do with it! Leftover turkey can be used in sandwiches, salads, soups, or even pasta dishes. Get creative and use it to make new meals for the week ahead.
My personal favourite is a turkey and cranberry salad. I combine leftover turkey, cranberry sauce, celery, walnuts, and a creamy dressing. It's a delicious and refreshing way to use up leftovers, and it's sure to be a hit with everyone.
Part 7: Beyond the Basic: Elevating the Turkey in a Bag Method
Okay, you've got the basics down pat, but let's get creative! The turkey in a bag method isn't just for Thanksgiving. You can use it to cook your turkey any time of year. And why stop at turkey? This technique is perfect for other poultry like chicken or even a whole duck. Just adjust the cooking time and temperature accordingly.
Experiment with different flavours. Try adding a bit of citrus zest, a sprig of rosemary, or a handful of fresh herbs to the bag. You can also create a flavoured butter mixture with herbs and spices, or even a touch of garlic for a bolder flavour.
You can even use this method to cook a turkey breast. It's a great option for smaller gatherings or if you don't have the space for a whole turkey.
Part 8: Troubleshooting: Addressing Common Challenges
We all have those moments in the kitchen where things don't go exactly as planned. But don't worry! The turkey in a bag method is pretty foolproof, but here are a few common problems and how to solve them:
The Bag Is Leaking
This can happen if the bag wasn't sealed properly. If this happens, try to transfer the turkey to a new bag, being careful not to spill any juices. If you don't have another bag, try patching the hole with a piece of aluminum foil. It's not ideal, but it might do the trick.
The Turkey Is Overcooked
This is usually a result of cooking the turkey for too long. If the turkey is overcooked, it's going to be dry. There's not much you can do about it, but try to salvage what you can. You can use the overcooked turkey in soups, stews, or salads.
The Skin Isn't Crispy
The bag helps to keep the turkey moist, which can result in a less crispy skin. If you want a crispy skin, remove the turkey from the bag for the last 30 minutes of cooking time. This will allow the skin to crisp up in the oven.
Part 9: FAQs: Clearing Up Common Questions
Here are some frequently asked questions about turkey in a bag:
1. Can I use a regular plastic bag instead of an oven bag?
No, absolutely not. A regular plastic bag will melt in the oven, and that's not good for anyone. Stick with an oven-safe bag made for this purpose.
2. How do I know if my turkey is cooked through?
The best way to tell if your turkey is cooked through is to use a meat thermometer. Insert the thermometer into the thickest part of the thigh, avoiding the bone. The turkey is cooked through when the thermometer reads 165 degrees Fahrenheit (74 degrees Celsius).
3. What do I do with the juices from the bag?
Don't throw them away! The juices from the bag are a great base for gravy. Strain them and then use them to make a delicious gravy. You can also add the veggies from the bag to the gravy for extra flavour.
4. Can I use this method for a frozen turkey?
No, it's best to use a thawed turkey. A frozen turkey won't cook evenly in the bag.
5. Can I use this method for a turkey breast?
Yes, absolutely! Just adjust the cooking time to suit the size of the breast. You can also add a few extra vegetables to the bag for added flavour.
There you have it, the ultimate guide to turkey in a bag. This method is foolproof, easy to follow, and will guarantee a juicy, flavorful Thanksgiving turkey that will impress your guests. Now, go forth and conquer that bird!
Everyone is watching

Prime Rib Roast Cooking Time Chart: Per Pound Guide
Cooking TipsPrime rib roast. Just the name conjures images of lavish dinners, crackling fires, and hearty laughter. It’s ...

How Long to Bake Potatoes in the Oven (Perfect Every Time)
Cooking TipsBaked potatoes are a staple in my kitchen. They're incredibly versatile, delicious, and surprisingly easy to m...

Perfect Rice Every Time: The Ultimate Guide to Cooking Rice
Cooking TipsAs a self-proclaimed foodie, I've always been a bit obsessed with rice. It's the foundation of countless cuisi...

The Ultimate Guide to Cooking Asparagus: Tips, Techniques, and Recipes
Cooking TipsAsparagus. The mere mention of this spring delicacy conjures up images of vibrant green spears, crisp and burs...

Ultimate Guide to Cooking the Perfect Thanksgiving Turkey
Cooking TipsThanksgiving. Just the word conjures up images of overflowing tables laden with delicious food, the scent of r...