Alright, folks, you've got a 22lb turkey on your hands. That's a big bird! And you're probably wondering, how on earth do I roast this thing without turning it into a dry, leathery nightmare? Trust me, I've been there – countless Christmases, Thanksgivings, and family gatherings, all with the same goal: a succulent, flavorful turkey that melts in your mouth. This guide is the culmination of my years of turkey-roasting experience, filled with tips, tricks, and even a few tales of past triumphs (and maybe a few blunders). Let's dive in!
(Part 1) The Big Bird: A First Look
Pre-Game Prep: Getting Your Turkey Ready
First, let's tackle the pre-prep. It's all about setting your turkey up for success, the kind that leads to juicy, succulent meat and that irresistible, golden-brown skin. Gather your trusty carving knife, a pair of kitchen scissors, and let's get started.
First things first, give your bird a good wash inside and out. We're talking a thorough rinse, removing any lingering feathers or giblets. Then, pat it dry with paper towels. You want that turkey nice and dry before moving on to the next step.
Now, for the fun part: seasoning. I'm a big fan of a good rub – it's like giving your turkey a flavor-packed hug. My go-to is a simple blend of salt, pepper, garlic powder, paprika, and a touch of dried herbs. You can always add your own personal twist, like a pinch of cayenne for a kick or some onion powder for extra depth. Remember, less is more! You don't want to drown out the natural turkey flavor.
The next step is stuffing. I'm a fan of stuffing, but it definitely adds complexity. You need to cook it separately to ensure it's cooked through, and it can also affect your roasting time. If you're feeling adventurous, go for it. But if you'd rather keep things simple, there's no shame in leaving out the stuffing and focusing on delicious side dishes instead.
The All-Important Brine: A Moisture Booster
Let's talk brine – a topic that often sparks debate, but one I firmly believe in. Brining is all about soaking your turkey in a salty solution, which draws moisture into the meat, resulting in incredibly tender and juicy results, especially for a large bird like yours.
You might be thinking, "Do I really need to do this? It seems like extra work." But trust me, it's worth it. You'll be rewarded with a turkey that practically falls apart, bursting with flavor and moisture.
There are two main brining methods: dry and wet.
Dry Brining: This involves rubbing the turkey with a salt mixture and letting it sit in the fridge for a few hours or overnight. It's simple, but you need to be careful not to oversalt.
Wet Brining: This is my personal favorite. You immerse the turkey in a large bucket of salt water, along with flavor-boosting ingredients like herbs, spices, and even citrus fruits.
The key is to let the turkey brine for at least 6-8 hours, ideally overnight. This gives the salt solution enough time to work its magic. A well-brined turkey is a game-changer – it's truly a revelation.
The Roasting Rack: Your Bird's Throne
Now, let's talk about the roasting rack – your turkey's throne, the platform where it'll reign supreme. It's essential for even cooking and allows hot air to circulate all around the bird. You don't want your turkey sitting in a puddle of its own juices, right? No, you want it elevated, with a good airflow for a crisp, golden-brown skin.
I find that a sturdy roasting rack, made from stainless steel or cast iron, works best. And don't forget the roasting pan! This will catch all those precious drippings, which you'll later use to make a delicious gravy.
(Part 2) The Big Day: Roasting Time!
The Temperature Tango: Finding the Perfect Heat
It's roasting day! The anticipation is building, your kitchen is starting to smell incredible, and you've prepped your turkey, rack, and pan. Now, it's time to face the heat.
The general rule of thumb is to roast your turkey at 325°F (160°C). But I've learned that there's no one-size-fits-all approach to temperature. It depends on your oven and your turkey.
For a 22lb turkey, you're looking at a roasting time of around 4-5 hours. But it's absolutely crucial to use a meat thermometer to check the internal temperature. You want it to reach 165°F (74°C) in the thickest part of the thigh.
Here's where I deviate from the norm: I like to start my roast at a slightly higher temperature, around 400°F (200°C). This gives the skin a head start in browning and getting crispy. Once the skin is golden and the turkey has reached an internal temperature of about 150°F (65°C), I reduce the heat to 325°F (160°C) to ensure it cooks evenly.
The Basting Ritual: A Moisture Boost
Basting is a crucial part of roasting, especially for a large turkey. It keeps the bird moist and adds flavor throughout the cooking process. I find that basting every 30-45 minutes with pan drippings or melted butter really makes a difference. Those drippings are a goldmine of flavor!
Some people prefer a basting brush, but I use a spoon. It allows me to carefully pour the drippings over the turkey, ensuring even coverage. Just be cautious with the hot fat!
Here's a trick I've learned: towards the end of the cooking process, when the turkey is almost done, cover it with a tent of foil. This helps prevent the skin from drying out and becoming leathery, keeping it juicy and tender.
The Resting Phase: Time to Relax
Once your turkey has reached the desired internal temperature, don't rush to carve it. Let it rest for at least 15-20 minutes. This allows the juices to redistribute throughout the meat, ensuring it's moist and flavorful when you carve it.
I usually cover the turkey with foil and let it sit on a cutting board while I prepare the rest of the meal. The resting phase is a crucial step, so don't skip it!
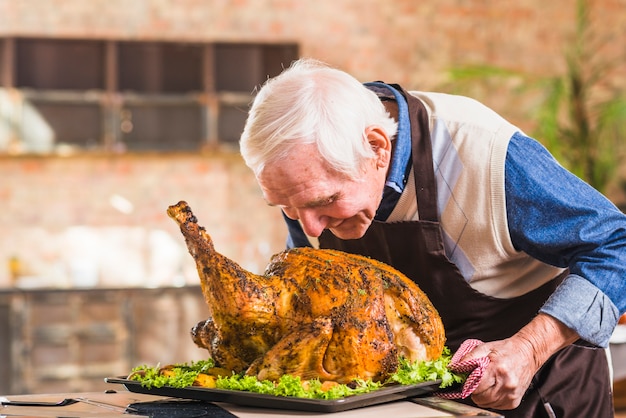
(Part 3) Time to Carve: A Masterclass in Precision
Carving the Beast: A Guide for Beginners
The moment has arrived: carving time! The anticipation is high, and the aroma is intoxicating. But before grabbing your carving knife, take a deep breath and remember that practice makes perfect.
I find it helpful to start by removing the legs. Cut along the joint between the leg and the thigh, then use your carving knife to separate them. Once the legs are removed, you can easily slice the breast meat.
Remember, sharp knives are your best friends in the kitchen. Use a good-quality carving knife, and make sure it's nice and sharp. It'll make carving much easier and less stressful.
Carving Tips: From the Trenches
Here are a few tips I've picked up over the years:
- Don't be afraid to ask for help! If you're feeling overwhelmed, enlist the help of a family member or friend. They can hold the turkey steady while you carve, and they might even have a few tips of their own.
- Carve against the grain. This will help to keep the meat from shredding.
- If you're struggling to cut through the bone, try using poultry shears.
- Don't over-carve. You want to keep the slices of meat nice and thick.
- Be patient! Carving can take a little time, so don't rush it.
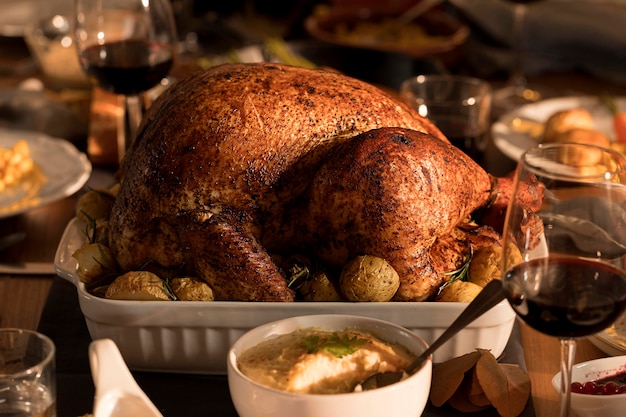
Gravy: The Finishing Touch
And speaking of delicious, let's talk gravy! The gravy is the final touch, elevating a simple meal into something truly extraordinary.
I'm a huge fan of homemade gravy, but I understand it's not everyone's cup of tea. There are many great store-bought options available. But if you're feeling adventurous, here's my recipe for a basic gravy:
- Strain the drippings from the roasting pan into a saucepan, removing any large pieces of fat.
- Whisk in a few tablespoons of flour and cook for a few minutes, stirring constantly.
- Slowly whisk in the broth, a little at a time, until the gravy reaches your desired consistency. Be careful not to let it boil.
- Season with salt and pepper to taste.
- Serve immediately over your turkey, mashed potatoes, or roasted vegetables.
(Part 4) Troubleshooting: Fixing Turkey Mishaps
The Dry Turkey Dilemma: Saving the Day
You've done everything right, but your turkey has come out a little dry. Don't panic! It happens to the best of us. Here are a few tricks to salvage the situation:
The first thing you can do is try to re-moisten the turkey. You can do this by adding some gravy or broth to the carving board or by simply spooning some pan drippings over the meat.
You can also try to reheat the turkey in a slow cooker or by placing it on a baking sheet in a preheated oven. Just make sure to cover it with foil to prevent it from drying out further.
And remember, a delicious gravy can really make all the difference!
The Undercooked Horror: When Things Go Wrong
Okay, this is a situation you want to avoid at all costs. Undercooked turkey is a serious food safety risk. You absolutely need to make sure your turkey is cooked through, reaching an internal temperature of 165°F (74°C).
If you've cut into the turkey and it's not yet cooked, you have two options:
- Return it to the oven and cook it for a little longer. Make sure to check the internal temperature regularly.
- If you're short on time, you can try to salvage the situation by carving the turkey into smaller pieces and cooking it in a skillet with some broth or gravy.
Remember, food safety is paramount. If you're unsure, it's always best to err on the side of caution and cook the turkey for a little longer.
(Part 5) Beyond the Basics: Creative Carving and Presentation
turkey carving: A Feast for the Eyes
We've covered the basic carving techniques, but there's a whole world of turkey presentation out there. It's not just about slicing the meat, it's about creating a visually appealing masterpiece.
Here are a few ideas to elevate your carving game:
- Arrange the turkey slices on a platter in a fan shape.
- Use a carving knife to cut the turkey into individual pieces, then arrange them on a platter with a bed of roasted vegetables or salad greens.
- Get fancy with your presentation by using a carving board with a moat for gravy or a platter with a built-in carving station.
The Art of Garnishing: Enhancing Your Bird
The final touch? Garnishing! It's all about adding visual appeal to your turkey, making it look even more delicious.
Here are a few ideas for garnishing:
- Fresh herbs: sprigs of rosemary, thyme, or parsley add a touch of color and fragrance.
- Citrus slices: lemon or orange slices add a touch of brightness and freshness.
- Cranberries: a handful of cranberries scattered around the platter add a pop of color and sweetness.
- Roasted vegetables: arrange a few roasted vegetables around the platter for a beautiful and tasty addition.
- Chopped nuts: a sprinkle of chopped walnuts or pecans adds a bit of crunch and texture.
(Part 6) Leftovers: Don't Waste a Bite
Turning Leftovers into Culinary Gold
You've tackled the turkey, carved it, and feasted. Now, you're left with delicious leftovers. Don't despair! Leftovers are a culinary treasure, waiting to be transformed into new and exciting dishes.
The possibilities are endless: from turkey sandwiches to turkey soup, from turkey enchiladas to turkey pot pie, the options are boundless!
My go-to turkey leftover recipe is a simple turkey salad. I combine shredded turkey with celery, onion, and mayonnaise, then serve it on bread, crackers, or even lettuce wraps. It's a classic for a reason!
Leftover Tips: Keeping It Fresh
Here are a few tips for storing your leftovers:
- Store the cooked turkey in the refrigerator in an airtight container within 2 hours of cooking.
- Don't leave turkey out at room temperature for more than 2 hours.
- Leftover turkey can be stored in the refrigerator for up to 3-4 days.
- You can also freeze leftover turkey for up to 2-3 months.
(Part 7) The Turkey Cookbook: Recipes for Every Palate
Turkey Soup: A Comforting Classic
Let's start with a classic: turkey soup. It's the ultimate comfort food, perfect for a chilly evening. Here's my go-to recipe:
- Sauté some diced onions, carrots, and celery in a large pot with olive oil.
- Add shredded turkey, chicken broth, and your favorite herbs and spices. I love adding a bay leaf, thyme, and a pinch of salt and pepper.
- Simmer for 30 minutes, or until the vegetables are tender.
- Serve hot, topped with a dollop of sour cream or a sprinkle of fresh herbs.
Turkey Salad: A Light and Refreshing Delight
Now, for something lighter and more refreshing: turkey salad. Here's my take on this classic:
- Combine shredded turkey with chopped celery, onion, and grapes.
- Add a touch of mayonnaise, Dijon mustard, and a pinch of salt and pepper.
- Serve on bread, crackers, or lettuce wraps.
Turkey Pot Pie: A Hearty and Savory Treat
Finally, for a hearty and savory treat: turkey pot pie. Here's my version:
- Sauté some diced onions, carrots, and celery in a large pot with olive oil.
- Add shredded turkey, chicken broth, and your favorite herbs and spices. I love adding a bay leaf, thyme, and a pinch of salt and pepper.
- Simmer for 30 minutes, or until the vegetables are tender.
- Pour the mixture into a pie crust and bake for 30-40 minutes, or until the crust is golden brown and the filling is bubbly.
- Serve hot, topped with a dollop of whipped cream or a sprinkle of fresh herbs.
(Part 8) FAQs: Answering Your Turkey Questions
1. How do I know if my turkey is cooked through?
The best way to tell if your turkey is cooked through is to use a meat thermometer. Insert the thermometer into the thickest part of the thigh, making sure it doesn't touch bone. The internal temperature should reach 165°F (74°C).
2. What if my turkey is overcooked?
Overcooked turkey can be dry, but it's still safe to eat. To salvage the situation, try to re-moisten the turkey by adding some gravy or broth to the carving board or by simply spooning some pan drippings over the meat.
3. How do I store leftover turkey?
Store the cooked turkey in the refrigerator in an airtight container within 2 hours of cooking. It can be stored for up to 3-4 days. You can also freeze leftover turkey for up to 2-3 months.
4. Can I brine a turkey for too long?
Yes, you can brine a turkey for too long. If you brine it for too long, the meat can become too salty. It's best to stick to the recommended brining time, which is usually 6-8 hours, or overnight.
5. What are some tips for preventing a dry turkey?
To prevent a dry turkey, make sure to roast it at a low temperature, around 325°F (160°C), and baste it regularly with pan drippings or melted butter. You can also cover the turkey with foil towards the end of the cooking process to help prevent the skin from drying out.
And there you have it! Your comprehensive guide to roasting a 22lb turkey. It's a lot of work, but it's worth it. Remember, practice makes perfect, so don't be afraid to experiment and try new things. You'll be a turkey roasting pro in no time! Happy roasting!
Everyone is watching

Prime Rib Roast Cooking Time Chart: Per Pound Guide
Cooking TipsPrime rib roast. Just the name conjures images of lavish dinners, crackling fires, and hearty laughter. It’s ...

How Long to Bake Potatoes in the Oven (Perfect Every Time)
Cooking TipsBaked potatoes are a staple in my kitchen. They're incredibly versatile, delicious, and surprisingly easy to m...

Perfect Rice Every Time: The Ultimate Guide to Cooking Rice
Cooking TipsAs a self-proclaimed foodie, I've always been a bit obsessed with rice. It's the foundation of countless cuisi...

The Ultimate Guide to Cooking Asparagus: Tips, Techniques, and Recipes
Cooking TipsAsparagus. The mere mention of this spring delicacy conjures up images of vibrant green spears, crisp and burs...

Ultimate Guide to Cooking the Perfect Thanksgiving Turkey
Cooking TipsThanksgiving. Just the word conjures up images of overflowing tables laden with delicious food, the scent of r...