Ah, the turkey. The centerpiece of countless holiday feasts, the source of endless family debates about stuffing, and, most importantly, the culinary challenge that can either make or break your entire meal. And let's face it, nobody wants a dry, overcooked bird, right? That's why I'm here to help you navigate the world of turkey roasting at 325 degrees Fahrenheit (160 degrees Celsius), a temperature that consistently delivers a juicy, flavorful bird.
Over the years, I’ve learned a thing or two about roasting turkeys, from the joys of brining to the crucial importance of resting the bird. Whether you're a seasoned cook or a newbie in the kitchen, this guide will equip you with the knowledge and confidence to roast a turkey that will leave your guests (and you) absolutely delighted.
(Part 1) The Importance of Temperature and Time: A Perfect HarmonyA Matter of Degrees: Finding the Sweet Spot
Let's start with the basics: 325 degrees Fahrenheit (160 degrees Celsius) is the magic number for turkey roasting. It's not too hot, preventing the outside from burning before the inside is cooked through, and not too low, which would result in a lengthy cooking time. This temperature allows for even cooking, ensuring that both the white meat and the dark meat get cooked to perfection. It’s the sweet spot where juiciness and flavor reach their peak.
The Time Factor: A Balancing Act
Now, here's where things get a bit more nuanced. The cooking time depends on the size of your turkey. I’ve learned this the hard way, once ending up with a bird that was barely cooked through because I underestimated the time. A smaller bird will cook faster than a larger one, so it's essential to calculate your time based on the weight.
Estimating Cooking Time: A Rough Guide
Here’s a general guideline for turkey roasting at 325 degrees F. It’s a great starting point, but remember, it’s always best to use a meat thermometer to confirm doneness.
| turkey weight | Estimated Cooking Time |
|---|---|
| 8-12 pounds | 2-3 hours |
| 12-16 pounds | 3-4 hours |
| 16-20 pounds | 4-5 hours |
| Over 20 pounds | 5 hours or more |
Keep in mind that these are just estimates. The actual cooking time can vary depending on the thickness of the turkey, its internal temperature, and even the type of oven you're using. Don't be afraid to adjust the time based on your own experience and what your thermometer tells you.
(Part 2) Preparation is Key: Setting the Stage for SuccessBrining: The Ultimate Moisture Booster
If you're aiming for a truly moist and flavorful turkey, brining is a game changer. It's a simple technique that involves soaking the turkey in a salt-water solution for several hours. The salt draws moisture out of the meat, then draws it back in, creating a remarkably juicy and flavorful bird. This is one of my favorite tricks, and I swear by it!
How to Brine: A Simple Guide
To brine your turkey, you'll need a large container, like a stockpot or a cooler, and a simple brine solution. Here's what you need:
- 1 gallon of cold water
- 1 cup of kosher salt
- 1/2 cup of brown sugar
- 1 tablespoon of black peppercorns
- 1 bay leaf
- 1 sprig of rosemary (optional)
Combine all the ingredients in the container and stir until the salt and sugar dissolve. Place the turkey in the brine, making sure it's completely submerged, and refrigerate for at least 4 hours, or up to 12 hours.
After brining, pat the turkey dry with paper towels before roasting. This helps ensure a crispy skin and allows for even browning.
Stuffing: A Matter of Choice and Safety
Stuffing is a bit of a hot topic in the culinary world. Some people swear by stuffing the turkey, while others insist it's safer and more hygienic to cook it separately. I personally prefer to cook stuffing separately. It allows for more even cooking and minimizes the risk of foodborne illness. However, if you choose to stuff your turkey, make sure the stuffing is cooked to an internal temperature of 165 degrees F (74 degrees C) to ensure safety.
Pat It Dry: A Simple Yet Crucial Step
After brining or prepping your turkey, give it a good pat down with paper towels. This removes excess moisture, which can hinder browning and make your skin soggy. A crispy, golden-brown skin is an essential part of a delicious roasted turkey, so don’t skip this step.
(Part 3) Roasting the Turkey: Bringing the Bird to LifePreheating: The Foundation of Success
Always preheat your oven to 325 degrees F (160 degrees C) before putting the turkey in. This is a crucial step that ensures consistent cooking temperature and prevents the turkey from losing temperature when it goes in.
The Roasting Rack: A Must-Have for Even Cooking
Place your turkey on a roasting rack inside a large roasting pan. This allows hot air to circulate around the bird, ensuring even cooking. I always make sure to position the rack high enough in the pan to prevent the turkey from sitting in its own juices, which can make the bottom soggy.
Basting: A Touch of Flavor
While not absolutely necessary, basting can add a touch of moisture and flavor to your roasted turkey, creating a beautiful, golden-brown skin. I tend to baste only once or twice during cooking. Use melted butter, chicken broth, or a mixture of both. Be careful not to baste too often, as this can hinder browning.
(Part 4) Checking for Doneness: The Thermometer Tells AllThe Importance of the Thermometer: No Guesswork Allowed
The best way to know if your turkey is cooked through is to use a meat thermometer. Don't rely on the pop-up timer in the bird – it's not always reliable. The turkey is cooked when the internal temperature reaches 165 degrees F (74 degrees C) in the thickest part of the thigh.
The "Pop-Up" Timer: Use with Caution
The pop-up timer in your turkey is a convenient little tool, but don't rely on it solely. It's designed to pop up when the turkey reaches a temperature of around 155 degrees F, which is not enough to ensure it's cooked through. I always recommend using a thermometer to be certain.
(Part 5) Resting the Turkey: A Crucial Step for Maximum JuicinessWhy Resting is Important: Let the Juices Redistribute
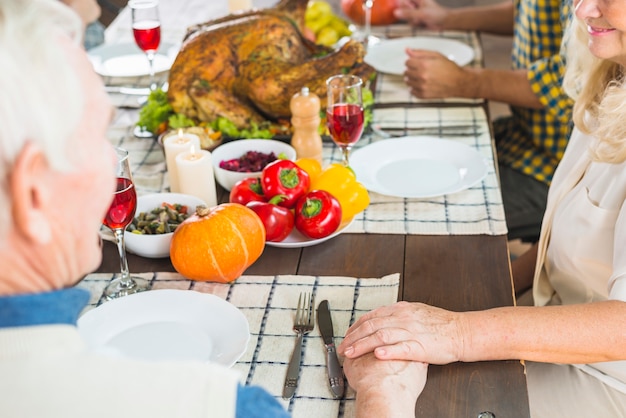
After taking your turkey out of the oven, it's essential to let it rest for 15-20 minutes before carving. This allows the juices to redistribute throughout the meat, resulting in a juicier, more flavorful bird. It’s a small step that makes a big difference.
Resting Time: A Little Patience Pays Off
I understand that you’re eager to dig in, but resist the urge to carve your turkey immediately. Allow it to rest on a cutting board, covered loosely with foil, while you prepare the rest of the meal. This short wait makes a big difference in the final result. The juices will settle, and the meat will become more tender and succulent.
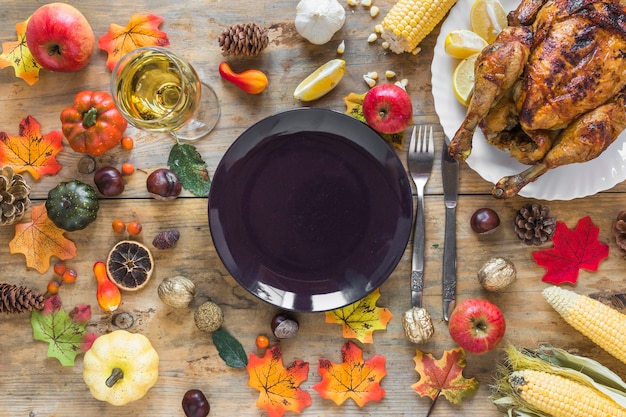
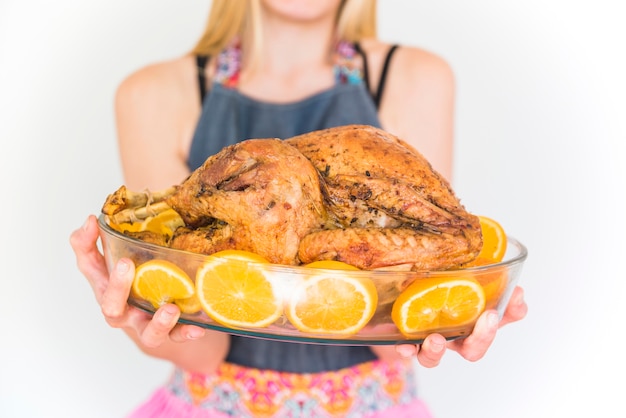
(Part 6) Carving the Turkey: A Culinary ArtThe Art of Carving: Mastering the Technique
carving a turkey can seem daunting, but with a little practice, it's a skill anyone can master. It's a satisfying part of the process, revealing the beautiful golden-brown skin and tender meat inside.
The Tools You Need: The Right Equipment Makes All the Difference
You'll need a sharp carving knife and a carving fork to carve your turkey. Use the fork to hold the turkey steady while you carve. A cutting board is also essential, but I prefer to use a large platter to make carving and serving easier. You'll also want a nice platter for presentation, and some serving spoons for scooping up those delicious juices.
The Carving Technique: Step-by-Step Guide
Here's a simple guide for carving your turkey:
- Start with the breast: Carve the breast meat, removing it in slices. Work from the top of the breast down, slicing against the grain of the meat.
- Carve the legs and thighs: Separate the legs and thighs from the carcass by cutting through the joints. Then, carve the leg and thigh meat into smaller pieces. You can remove the bone from the leg and thigh if you wish, but it’s not necessary.
- Carve the wings: Cut the wings at the joint and remove the wing tips. You can serve the wings whole or carve the meat off the bone.
- Carve the remaining pieces: If there are any remaining pieces of meat on the carcass, carefully carve them off.
Arrange the carved turkey on a platter, and you're ready to serve.
(Part 7) Leftovers: A Culinary TreasureThe Magic of turkey leftovers: Beyond the Traditional
Don't let your turkey leftovers go to waste! They're a culinary treasure, waiting to be transformed into delicious meals. From sandwiches and salads to soups and casseroles, the possibilities are endless.
turkey salad: A Classic for a Reason
My personal favourite use for leftover turkey is turkey salad. It’s a classic for a reason! Simply chop up the leftover turkey, combine it with mayonnaise, celery, onion, and your favourite spices, and you've got a delicious sandwich filling. You can add a bit of Dijon mustard for a tangy twist or a handful of chopped walnuts for added texture.
turkey soup: A Comforting Treat
When the weather gets chilly, nothing beats a warm bowl of turkey soup. Add your leftover turkey to a pot of chicken broth with vegetables and noodles, and you’ve got a hearty, comforting meal. You can even add a dollop of sour cream or a sprinkle of fresh herbs for extra flavor.
Turkey Chili: A Hearty and Flavorful Option
For a more robust and flavorful dish, try making turkey chili. Combine your leftover turkey with beans, tomatoes, onions, and your favourite chili spices. It's a satisfying and comforting meal that's perfect for a cold night.
Turkey Shepherd's Pie: A Classic comfort food with a Twist
For a hearty and comforting meal, try making turkey Shepherd's Pie. Layer your leftover turkey with mashed potatoes and a flavorful gravy. It's a classic comfort food with a satisfyingly savory twist.
(Part 8) FAQs: Your Turkey Questions AnsweredFAQs
Q1: How long should I cook a 14-pound turkey at 325 degrees F?
A 14-pound turkey will take approximately 3-4 hours at 325 degrees F. However, remember to use a meat thermometer to check for doneness, as cooking times can vary depending on factors like the thickness of the turkey and the type of oven.
Q2: Can I stuff the turkey before roasting?
While stuffing the turkey is traditional, it's generally considered safer to cook the stuffing separately. This ensures that the stuffing cooks through evenly and reduces the risk of foodborne illness. If you do choose to stuff the turkey, make sure the stuffing is cooked to an internal temperature of 165 degrees F (74 degrees C) to ensure safety.
Q3: How do I know if my turkey is cooked through?
The best way to ensure your turkey is cooked through is to use a meat thermometer. Insert the thermometer into the thickest part of the thigh, and make sure it reaches 165 degrees F (74 degrees C).
Q4: How long should I let the turkey rest before carving?
It's crucial to let the turkey rest for 15-20 minutes before carving. This allows the juices to redistribute throughout the meat, resulting in a juicier, more flavorful bird.
Q5: What can I do with leftover turkey?
There are endless possibilities for leftover turkey! You can make turkey salad sandwiches, turkey soup, turkey casseroles, or even turkey tacos. Get creative and enjoy the deliciousness of leftover turkey!
I hope this guide has equipped you with all the knowledge you need to roast the perfect turkey at 325 degrees. Now go forth and impress your guests with a delicious, juicy bird that will be the star of your holiday table!
Everyone is watching

Perfect Rice Every Time: The Ultimate Guide to Cooking Rice
Cooking TipsAs a self-proclaimed foodie, I've always been a bit obsessed with rice. It's the foundation of countless cuisi...

Ultimate Guide to Cooking the Perfect Thanksgiving Turkey
Cooking TipsThanksgiving. Just the word conjures up images of overflowing tables laden with delicious food, the scent of r...

The Ultimate Guide to Cooking Asparagus: Tips, Techniques, and Recipes
Cooking TipsAsparagus. The mere mention of this spring delicacy conjures up images of vibrant green spears, crisp and burs...

Can You Cook Spaghetti with Gasoline? (The Shocking Truth)
Cooking TipsWe've all seen those crazy internet trends. You know, the ones that make you wonder, "Did someone actually try...

Chorizo and Eggs Recipe: The Ultimate Guide
Cooking TipsRight, let’s talk about chorizo and eggs. You know, that classic Spanish dish that's always a winner. It's th...