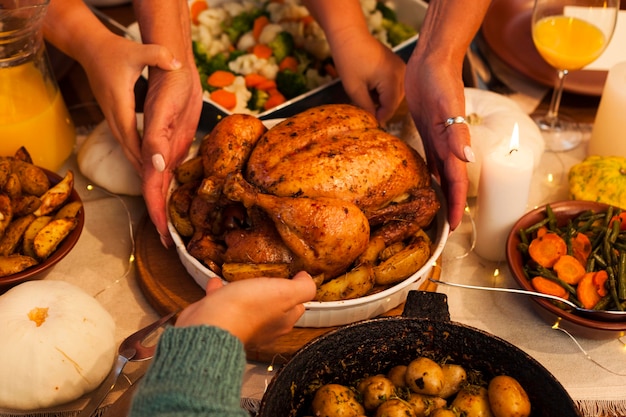
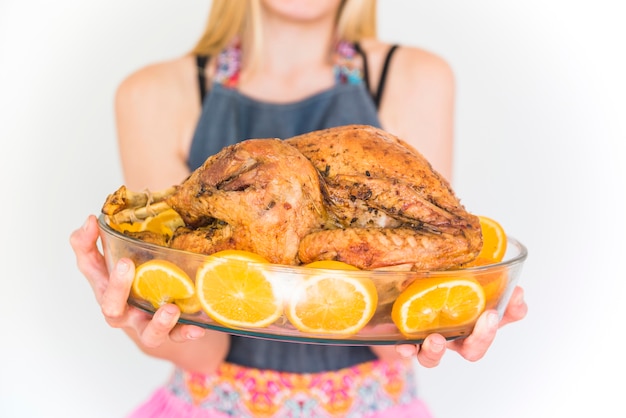
Let’s talk turkey! As a seasoned chef and self-proclaimed turkey aficionado, I’ve spent years perfecting the art of roasting this magnificent bird. And let me tell you, there's nothing quite like the aroma of a perfectly roasted turkey wafting through your home, promising a delicious feast for family and friends.
But let’s be honest, cooking a turkey can seem daunting, especially for those new to the game. You've got the whole size, weight, temperature thing going on, not to mention the timing – it can be enough to make you want to order a takeaway instead. But fear not, my friends! I’m here to guide you through the process, making sure you’re well-equipped to create a show-stopping turkey that'll leave everyone saying, "That was absolutely divine!"
(Part 1) The Turkey: Choosing Your Bird

Size Matters
The first step in any good turkey adventure is choosing the right bird. Now, this isn’t as simple as grabbing the first one you see. You need to consider how many people you’re feeding. As a general rule of thumb, allow about 1 lb of turkey per person. Don’t forget, we’re talking cooked weight here, so you'll want to factor in some shrinkage.
If you're cooking for a smaller group, a 10-12 lb bird should do the trick. For a larger crowd, you might need to go for a whopper – a 16-20 lb behemoth!
Fresh or Frozen?
Now, let’s talk about fresh versus frozen turkeys. Fresh turkeys are a great choice if you can find them, but they do need a bit more planning. You’ll need to get them a day or two ahead of time to allow them to thaw properly in the fridge. Frozen turkeys, on the other hand, are a bit more convenient, as you can buy them ahead and thaw them at your leisure.
I usually opt for fresh turkeys if I can get my hands on one, but frozen turkeys work just as well – the key is to give them plenty of time to defrost!
Thawing Frozen Turkey
If you're working with a frozen turkey, thawing it properly is crucial. The safest and most recommended method is thawing in the refrigerator. This takes time, about 24 hours for every 5 pounds of turkey.
Never thaw a turkey at room temperature, as this can create a breeding ground for bacteria. If you need to thaw a turkey quickly, you can submerge it in cold water, changing the water every 30 minutes. Just make sure the turkey is completely submerged and sealed in a leak-proof bag.
Getting Your Turkey Ready
Once you've got your chosen bird home and thawed (if necessary), it's time to prepare it for the big roast. I like to give my turkey a good rinse, pat it dry, and then stuff the cavity with some herbs and aromatics – like rosemary, thyme, and bay leaves. This gives the turkey a lovely flavour throughout.
Now, if you're thinking of stuffing the turkey itself, well, I’m going to be honest, that’s something I wouldn’t recommend. It's best to cook the stuffing separately. This ensures it’s cooked through properly and avoids the risk of any nasty surprises.
(Part 2) roasting time

Cooking Time
Right, onto the big question – how long does a turkey take to roast?
Here’s the deal, my friends: the cooking time depends on the size of your turkey and the method you’re using – whether that’s in a conventional oven, a fan oven, or a slow cooker.
A general rule of thumb is to allow about 15-20 minutes per pound for an unstuffed turkey, and 20-25 minutes per pound for a stuffed turkey. But, like I said, it all depends on your setup and your bird!
turkey roasting Times: A Handy Guide
Let’s break this down a bit further with a table:
| turkey weight | Cooking Time (Unstuffed) | Cooking Time (Stuffed) |
|---|---|---|
| 8-12 lb | 2 hours - 3 hours | 2.5 hours - 4 hours |
| 12-16 lb | 3 hours - 4 hours | 4 hours - 5 hours |
| 16-20 lb | 4 hours - 5 hours | 5 hours - 6 hours |
Remember, these are just estimations. The best way to know if your turkey is cooked through is to use a meat thermometer.
turkey thermometer: Your Secret Weapon
Speaking of thermometers, let me tell you, this is your secret weapon in the battle for perfect turkey. It takes the guesswork out of roasting and ensures your bird is cooked to juicy perfection.
Stick the thermometer into the thickest part of the thigh, making sure it doesn’t touch any bone. Your turkey is done when the thermometer reads 165°F (74°C).
The Art of Resting
Now, don’t get ahead of yourself and carve that bird right away! It’s crucial to let it rest for at least 15-20 minutes before you carve it. This allows the juices to redistribute, resulting in a moist and flavorful turkey.
(Part 3) The Roasting Process

Preheating the Oven: A Vital Step
Before you pop your turkey in the oven, make sure it’s preheated to the right temperature. For a conventional oven, you’ll want to preheat it to 325°F (165°C). For a fan oven, aim for 300°F (150°C).
Basting: Adding Moisture and Flavor
I’m a big fan of basting my turkey – it adds extra moisture and flavour. Simply use a spoon or a baster to pour the juices that collect at the bottom of the roasting pan over the turkey every 30-45 minutes. This helps keep the turkey moist and creates a beautiful golden-brown skin.
Covering the Turkey: A Wise Move
For the first part of the roasting process, you can cover the turkey with a piece of foil. This helps prevent the skin from getting too brown too quickly and keeps the turkey moist. You can remove the foil for the last 30-45 minutes of cooking to allow the skin to crisp up.
Uncovering the Turkey: Achieving a Golden Crust
Towards the end of the cooking time, remove the foil to let the skin get nice and crispy. About 30 minutes before the turkey is done, you can give it a final basting and increase the oven temperature slightly to crisp up the skin.
The Final Touch: Gravy Time
Now, let’s talk about the gravy – the perfect accompaniment to your roasted turkey. While the turkey rests, you can make your gravy using the juices that have collected in the roasting pan.
You can use the pan drippings and some stock – chicken or turkey stock works best – to create a rich and delicious gravy. Simply strain the drippings to remove any bits of fat or debris, and then whisk in the stock. You can also add a tablespoon of flour to thicken the gravy, whisking it in slowly until it reaches your desired consistency.
(Part 4) Turkey Trouble-Shooting
Dry Turkey: A Common Issue
One of the most common complaints about roasted turkeys is dryness. To prevent this, make sure you don’t overcook the turkey. A meat thermometer is your best friend here! And, like I mentioned earlier, resting the turkey after cooking is essential to keep it juicy.
Burnt Skin: Another Common Issue
Another problem you might encounter is burnt skin. This often happens if you don’t cover the turkey for part of the cooking process. If you’re worried about the skin burning, you can use a piece of foil to cover the turkey for the first part of the roasting time. Alternatively, you can try roasting the turkey breast down for the first half of the cooking time to help protect the skin.
Overcooked Turkey: A Sad Sight
If you’ve accidentally overcooked your turkey, don’t despair! There are a few things you can do to salvage it.
Firstly, try to cut the overcooked part away from the rest of the turkey. You can then use this for other dishes, like turkey soup or sandwiches.
Secondly, try to moisten the turkey by adding some broth or gravy to the pan and letting it simmer for a few minutes.
Finally, you can try to mask the dryness with a delicious gravy or cranberry sauce.
(Part 5) Turkey Feast: Serving and Storing Leftovers
Serving with Pride
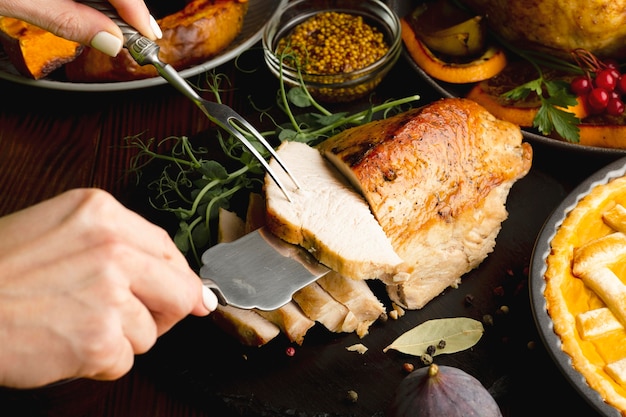
Now, you’ve got your perfectly roasted turkey, it’s time to show it off. Serve it with pride! I like to carve it at the table, giving everyone a chance to admire its golden-brown beauty.
Storing Leftovers Wisely
If you’ve got leftovers, store them in the fridge within two hours. I usually store them in airtight containers and they should last for about 3-4 days.
Leftover Turkey: Endless Possibilities
Don’t let those leftovers go to waste! There are endless possibilities for using them. You can make turkey sandwiches, turkey salad, turkey soup, or even turkey pizza. Get creative and experiment with different recipes!
(Part 6) cooking turkey: My Personal Experience
My First Turkey Disaster: A Tale of Burnt Skin
Remember my first attempt at roasting a turkey? It was a disaster! I didn’t cover the turkey for long enough, resulting in burnt skin and dry meat. It was a lesson learned, my friends! Always cover the turkey for at least part of the cooking time.
My Perfect Turkey Moment: A Triumph of Flavor
But after that initial mishap, I’ve had some truly glorious turkey moments. One year, I roasted a beautiful 16-pound turkey with a rosemary and garlic stuffing. It was so juicy and flavorful, everyone went back for seconds!
The Power of Sharing: A Thanksgiving Tradition
For me, turkey cooking is about more than just food. It’s about bringing people together and creating lasting memories. I love sharing my turkey with loved ones, and it’s become a cherished Thanksgiving tradition in our family. It’s a time for laughter, good conversation, and of course, delicious food.
(Part 7) Turkey Trivia: Fun Facts and Tips
The Origin of the Name: A Bird of Many Names
Did you know that the word "turkey" doesn’t actually come from Turkey? The word likely originated from the Ottoman Empire, where the bird was originally domesticated. Turkeys were brought to Europe by explorers in the 16th century and were initially called "Turkish hens" because they were believed to have originated in Turkey. The name eventually shortened to "turkey," and the bird became a staple in European cuisine.
The Evolution of the Turkey: A Long History
The turkey we know and love today is a domesticated descendant of the wild turkey, which is native to North America. The bird was brought to Europe by explorers in the 16th century and quickly became a popular food item. The wild turkey was a source of food for Native Americans for centuries, and its domestication played a significant role in the development of agriculture and food systems in North America.
The Importance of Brining: A Tip for juicy turkey
Brining is a popular technique for creating juicy and flavorful turkey. Simply soak the turkey in a salt-water solution for several hours or overnight. This helps retain moisture and add flavor to the meat. To make a simple brine, dissolve 1 cup of salt in 1 gallon of cold water. You can also add other aromatics, like herbs, spices, or citrus fruits, to enhance the flavor of the brine.
(Part 8) FAQs: Your Turkey Questions Answered
1. How Do I Tell If My Turkey Is Done?
The best way to determine if your turkey is done is to use a meat thermometer. Insert the thermometer into the thickest part of the thigh, making sure it doesn’t touch any bone. Your turkey is done when the thermometer reads 165°F (74°C). You can also check the temperature in the breast, which should be at least 165°F (74°C).
2. What If My Turkey Is Overcooked?
If you’ve accidentally overcooked your turkey, try to cut the overcooked part away from the rest of the turkey. You can then use this for other dishes, like turkey soup or sandwiches. You can also try to moisten the turkey by adding some broth or gravy to the pan and letting it simmer for a few minutes. Finally, you can try to mask the dryness with a delicious gravy or cranberry sauce.
3. How Long Should I Rest My Turkey After Cooking?
It’s essential to let your turkey rest for at least 15-20 minutes after cooking. This allows the juices to redistribute, resulting in a moist and flavorful turkey.
4. Can I Stuff My Turkey?
It’s generally not recommended to stuff your turkey. It’s best to cook the stuffing separately to ensure it’s cooked through properly. This is because the stuffing can act as a barrier, preventing the turkey from cooking evenly.
5. What Should I Serve with My Roasted Turkey?
Roasted turkey goes well with a variety of sides, including mashed potatoes, gravy, stuffing, cranberry sauce, and vegetables. Get creative and experiment with different combinations! Some classic pairings include:
Mashed Potatoes: Creamy and comforting, mashed potatoes are a perfect accompaniment to roasted turkey.
Gravy: A rich and flavorful sauce that adds moisture and depth to the turkey.
Stuffing: A savory bread-based dish that can be made with a variety of herbs and vegetables.
Cranberry Sauce: A tart and tangy condiment that cuts through the richness of the turkey.
Roasted Vegetables: Roasted vegetables, such as Brussels sprouts, carrots, or asparagus, add a touch of sweetness and brightness to the meal.
So there you have it, my friends! My ultimate guide to perfectly roasted turkey. Don’t be afraid to experiment and find what works best for you. And remember, the most important ingredient of all is the love and care you put into cooking your bird. Happy roasting!
Everyone is watching

Prime Rib Roast Cooking Time Chart: Per Pound Guide
Cooking TipsPrime rib roast. Just the name conjures images of lavish dinners, crackling fires, and hearty laughter. It’s ...

How Long to Bake Potatoes in the Oven (Perfect Every Time)
Cooking TipsBaked potatoes are a staple in my kitchen. They're incredibly versatile, delicious, and surprisingly easy to m...

Perfect Rice Every Time: The Ultimate Guide to Cooking Rice
Cooking TipsAs a self-proclaimed foodie, I've always been a bit obsessed with rice. It's the foundation of countless cuisi...

The Ultimate Guide to Cooking Asparagus: Tips, Techniques, and Recipes
Cooking TipsAsparagus. The mere mention of this spring delicacy conjures up images of vibrant green spears, crisp and burs...

Ultimate Guide to Cooking the Perfect Thanksgiving Turkey
Cooking TipsThanksgiving. Just the word conjures up images of overflowing tables laden with delicious food, the scent of r...
